St. Patrick’s Day Recipe Bundle

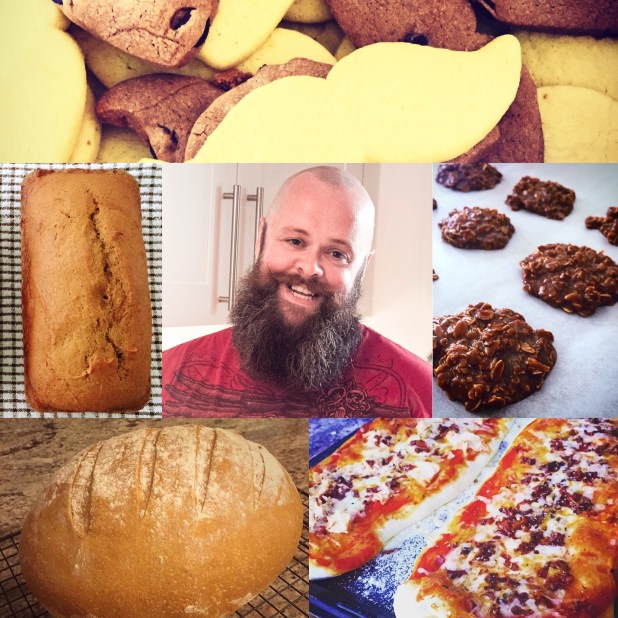
This bunch of recipes started as an idea where I wanted to do something drawing inspiration from my childhood in Ireland to my current life here in Toronto. It also helped that St. Patrick’s Day was impending so that provided a nice motivational kick. I’ve included three (or should it be four?) recipes here as frankly I couldn’t decide which to include for a single recipe post. However, I do think it works quite nicely to chart the influences on my passion for baking. I shall try to keep the background blurb short as I have to admit not being a fan of rambling anecdotes myself on recipe posts (“Seriously Janice- get to the recipe already! No one actually cares about your traumatic experience with bangs and how it rekindled your childhood love of popovers…)

In the meantime have a great St. Patrick’s Day. Eat (plenty); Drink (responsibly) and Be merry (it goes without saying).

Lá fhéile Pádraig sona dhaoibhe!

img_3571

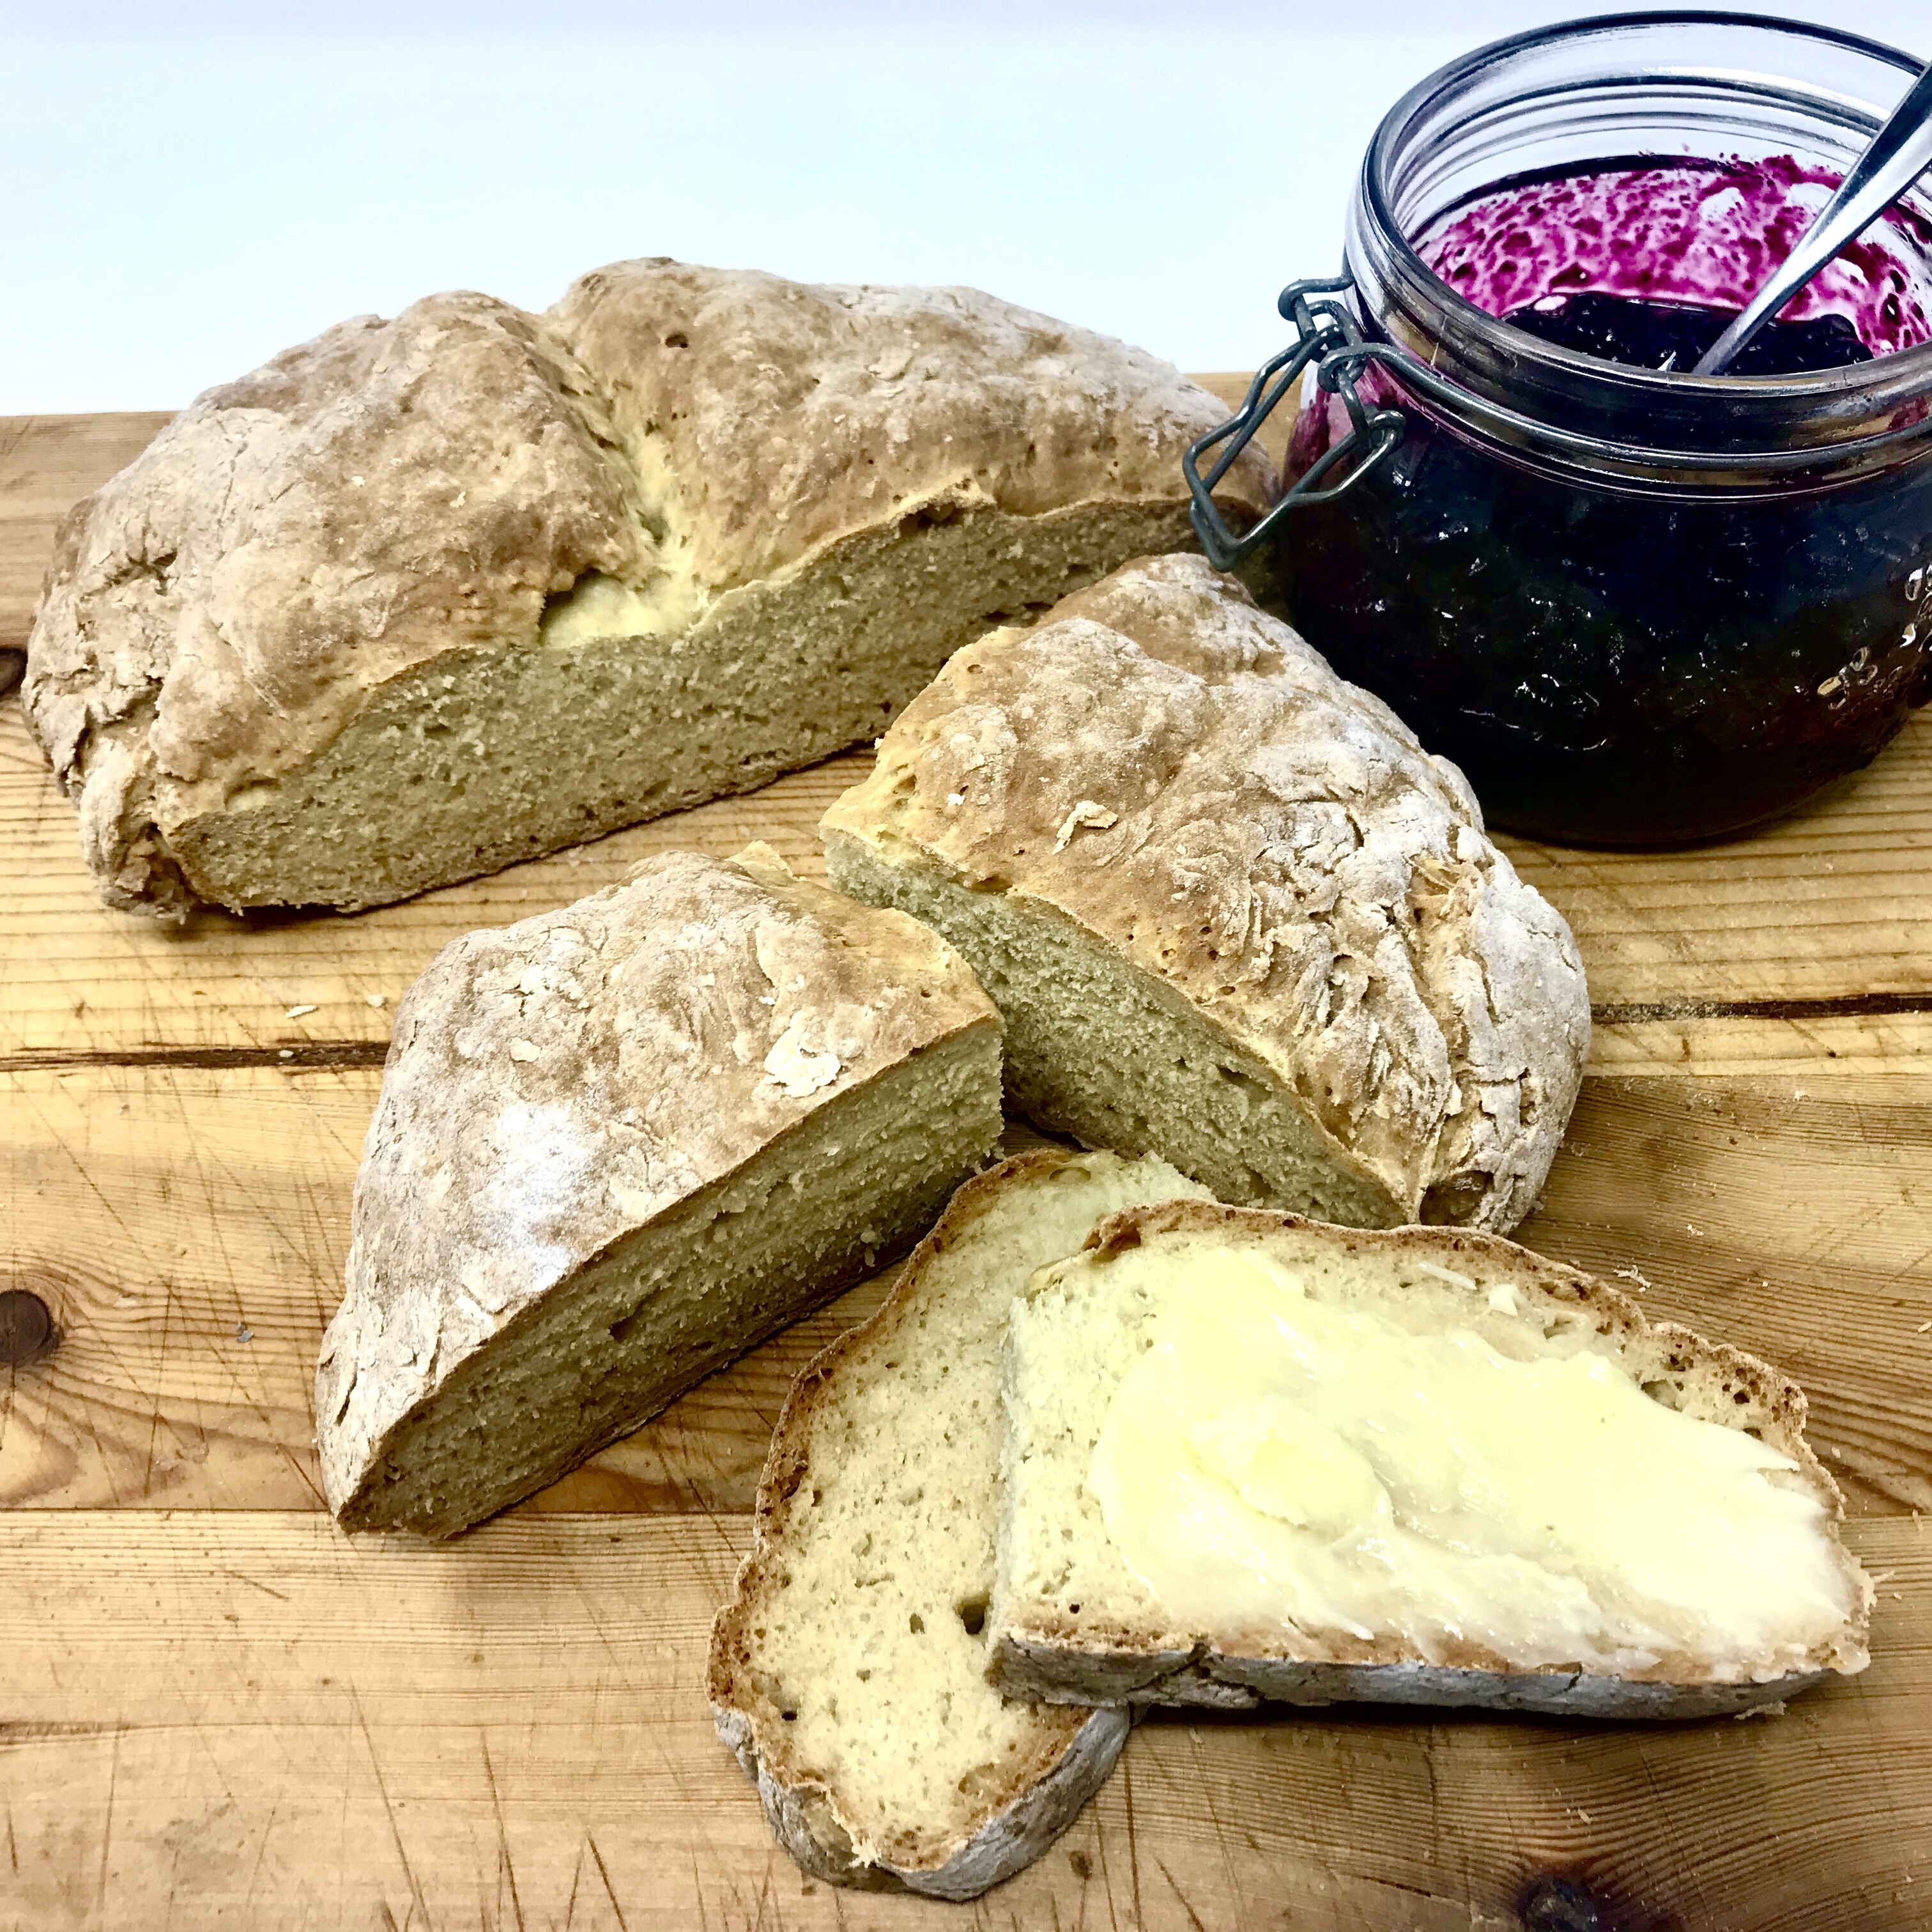
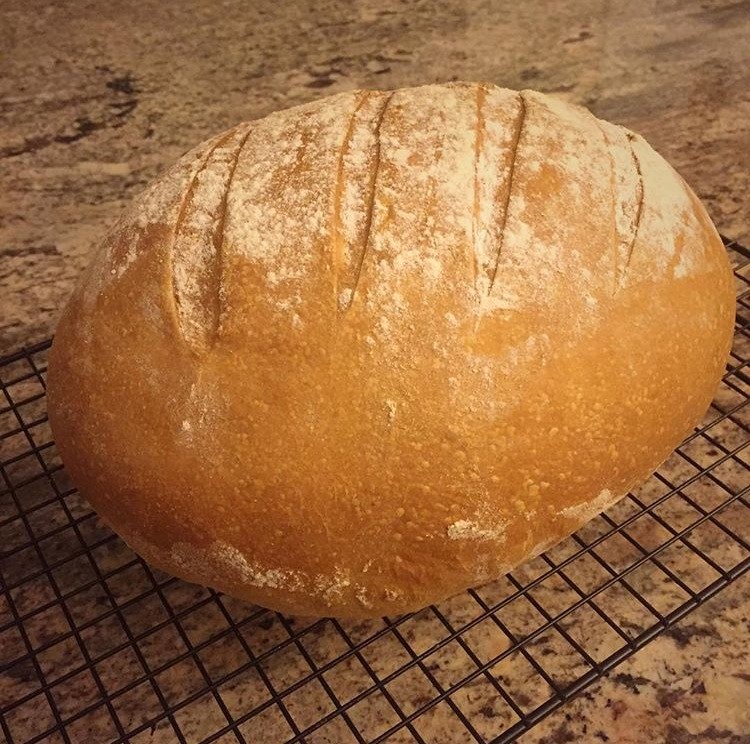
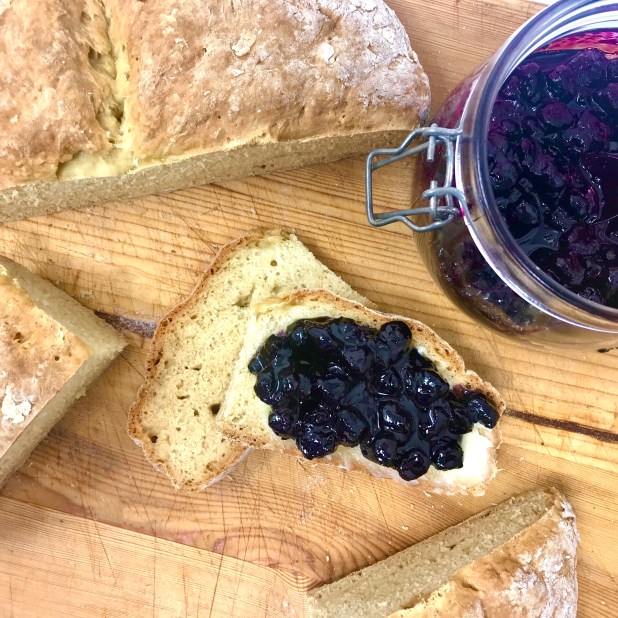
Traditional Plain Soda Bread w/ Blueberry, Rosemary & Juniper berry conserve

This is where I began. Well, I mean my love of baking. Soda bread was the first recipe that my mom showed me how to make in the kitchen. The bread is simplicity itself with  little or no baking skill required. The conserve recipe is my substitute for the sticky jam jars of childhood. If you asked me to sum up childhood memories of baking it would be of freshly cut warm plain soda bread, slathered in butter and jam. And now I pass it on to you to make your own memories.

Plain soda bread

Ingredients

  • 3 1/2 cups All purpose flour
  • 1 teaspoon bicarbonate of soda
  • 1 teaspoon kosher salt
  • 1 1/2 cups buttermilk*

img_3568-2

Method

  1. Preheat oven to 450°F
  2. Line a tray with baking parchment and dust lightly with flour. Set aside until needed
  3. In a large bowl combine the flour, bicarbonate of soda and salt. Whisk to combine and break down lumps. Make a well in the centre
  4. Pour in most of the buttermilk
  5. Using one hand stir the flour into the liquid from the outside of the bowl, turning the bowl as you do. Continue until the mixture comes together in a soft dough that is not too wet or sticky (you may need the remainder of the buttermilk here)
  6. Turn the dough out into a lightly floured surface and knead lightly for a few seconds. Don’t overknead here- you just want to do it enough so that it holds it shape. Don’t do it to the extent that you would with standard bread dough!
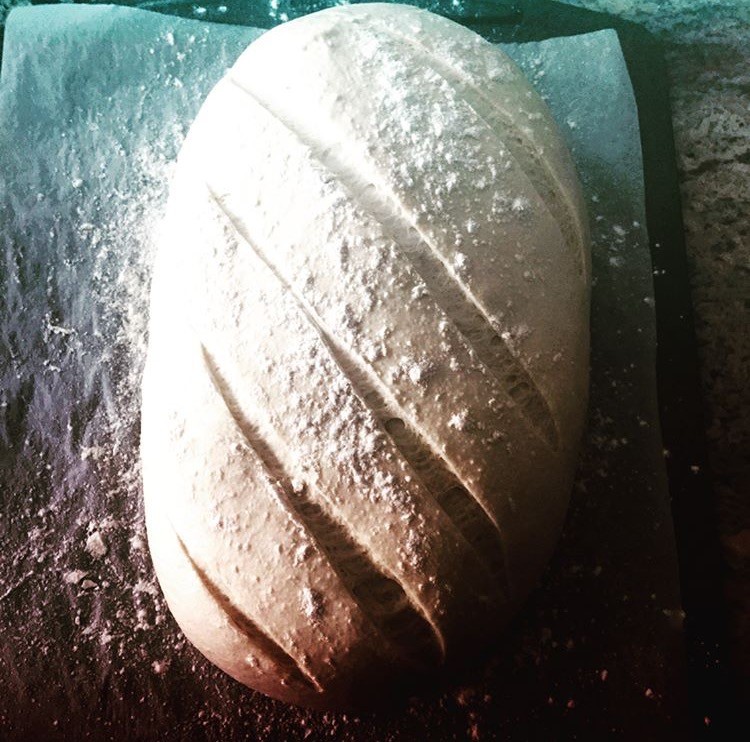
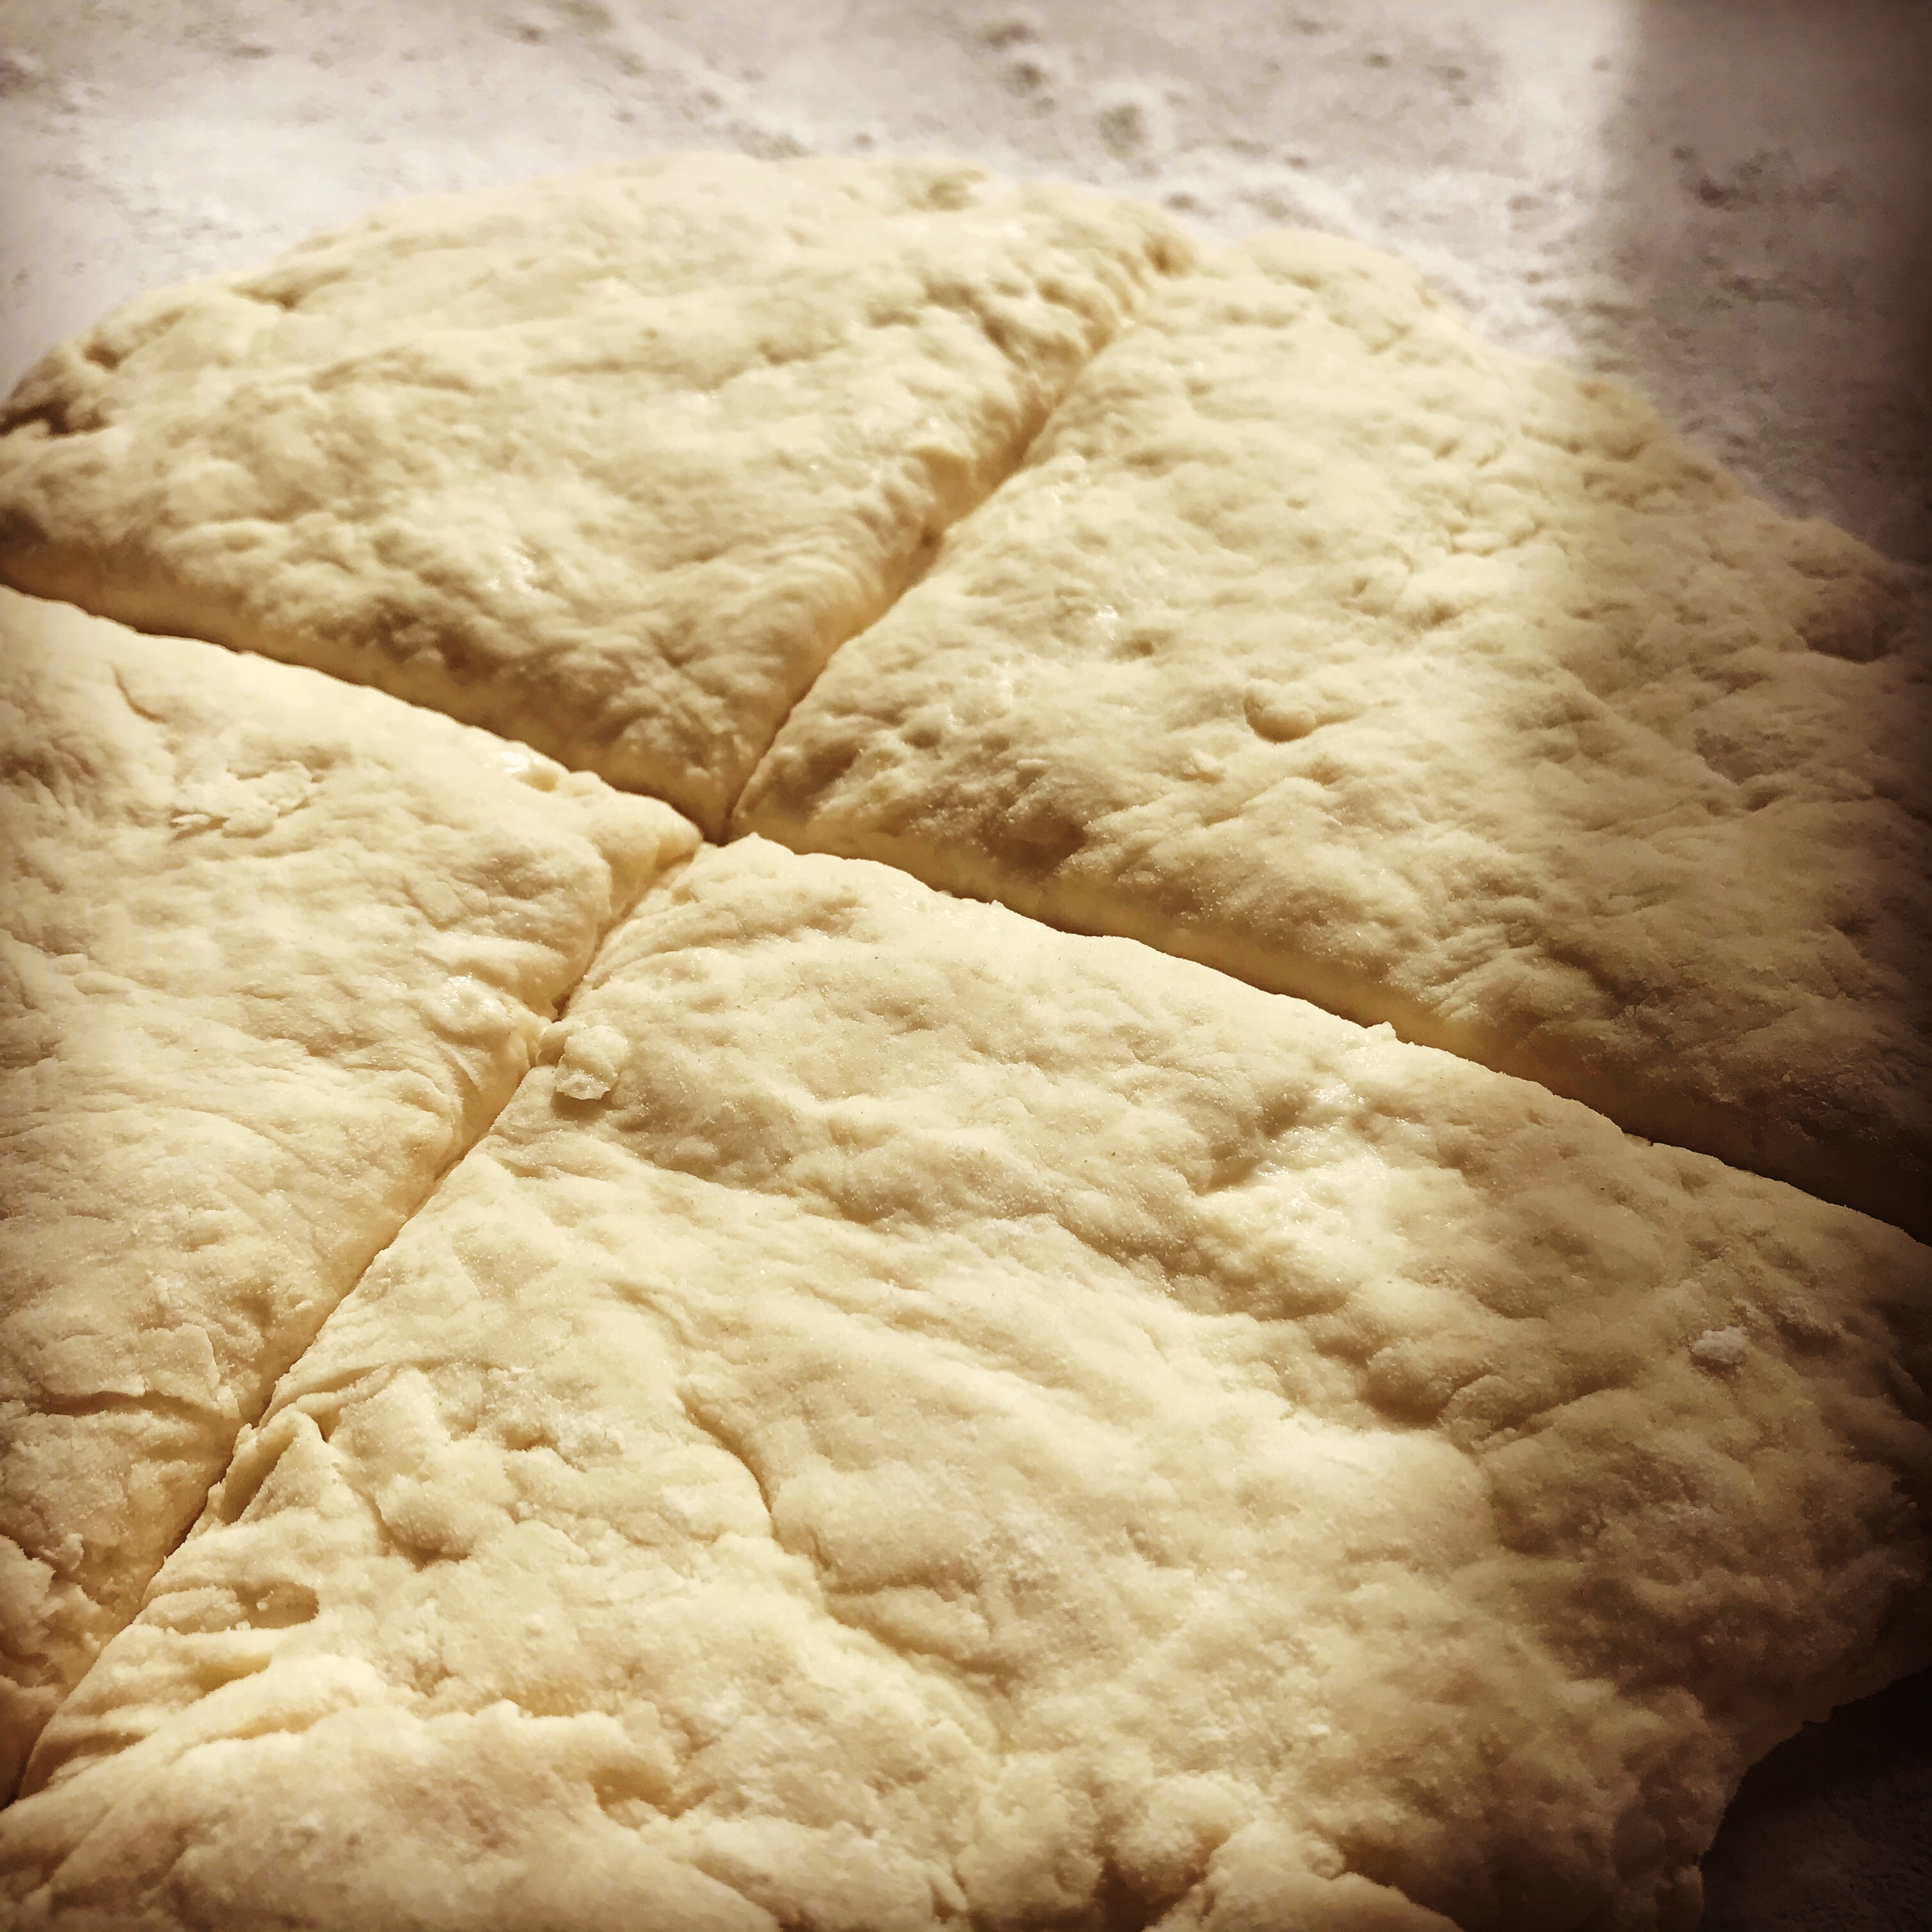
  7. Using your hands, lightly floured, pat the dough into a round shape about 2 inches thick. Transfer to the floured baking sheet
  8. With a knife (I use a bench scraper) score a cross into the top of the loaf, so that it goes almost all the way through the thickness and over the sides of the loaf
  9. Bake in the preheated oven for 15mins then reduce the heat to 400°F and continue baking for an additional 20mins until cooked. The baked loaf will be deep golden in color and sound hollow when the bottom of it is tapped
  10. Remove and cool on a wire rack
  11. This type of loaf will cool with a hard, crispy crust. If a softer crust is desired wrap a clean kitchen towel around the hot loaf and allow it to cool

1fca8a6b-ca38-454d-b386-3dc329599970

*If you don’t have buttermilk to hand you can make your own by combining 1 cup milk with 1 tablespoon squeezed lemon juice or distilled white vinegar in a jug. Stir to combine and leave to sit for 15 mins. After 15 mins the liquid will have thickened slightly and small curds can be seen. Use in the recipe as required. Any remaining milk can be stored in the fridge.

img_3578-1

Blueberry, rosemary & juniper berry conserve

Ingredients

  • 4 cups blueberries, fresh or frozen
  • 1 cup sugar
  • 2 tablespoons lemon juice
  • 1 tablespoons dried juniper berries, lightly crushed
  • 2 tablespoons water
  • Sprig of fresh rosemary (6 inch length apx)

Method

  1. In large pot combine the blueberries, juniper berries, sugar, lemon juice and water
  2. Stir over a medium heat until the mixture becomes loose and the berries start releasing liquid
  3. When the berries have soften and you see more liquid add in the spring of rosemary, ensuring it is submerged in the liquid
  4. Continue over a medium, stirring occasionally, for 30mins until the fruit has broken down and slightly thickened
  5. Remove from heat, transfer the mixture to a bowl and allow to cool to room temperature and infuse
  6. When cool place in a sterilised jar. Serve with traditional soda bread

img_3579-1


img_3498

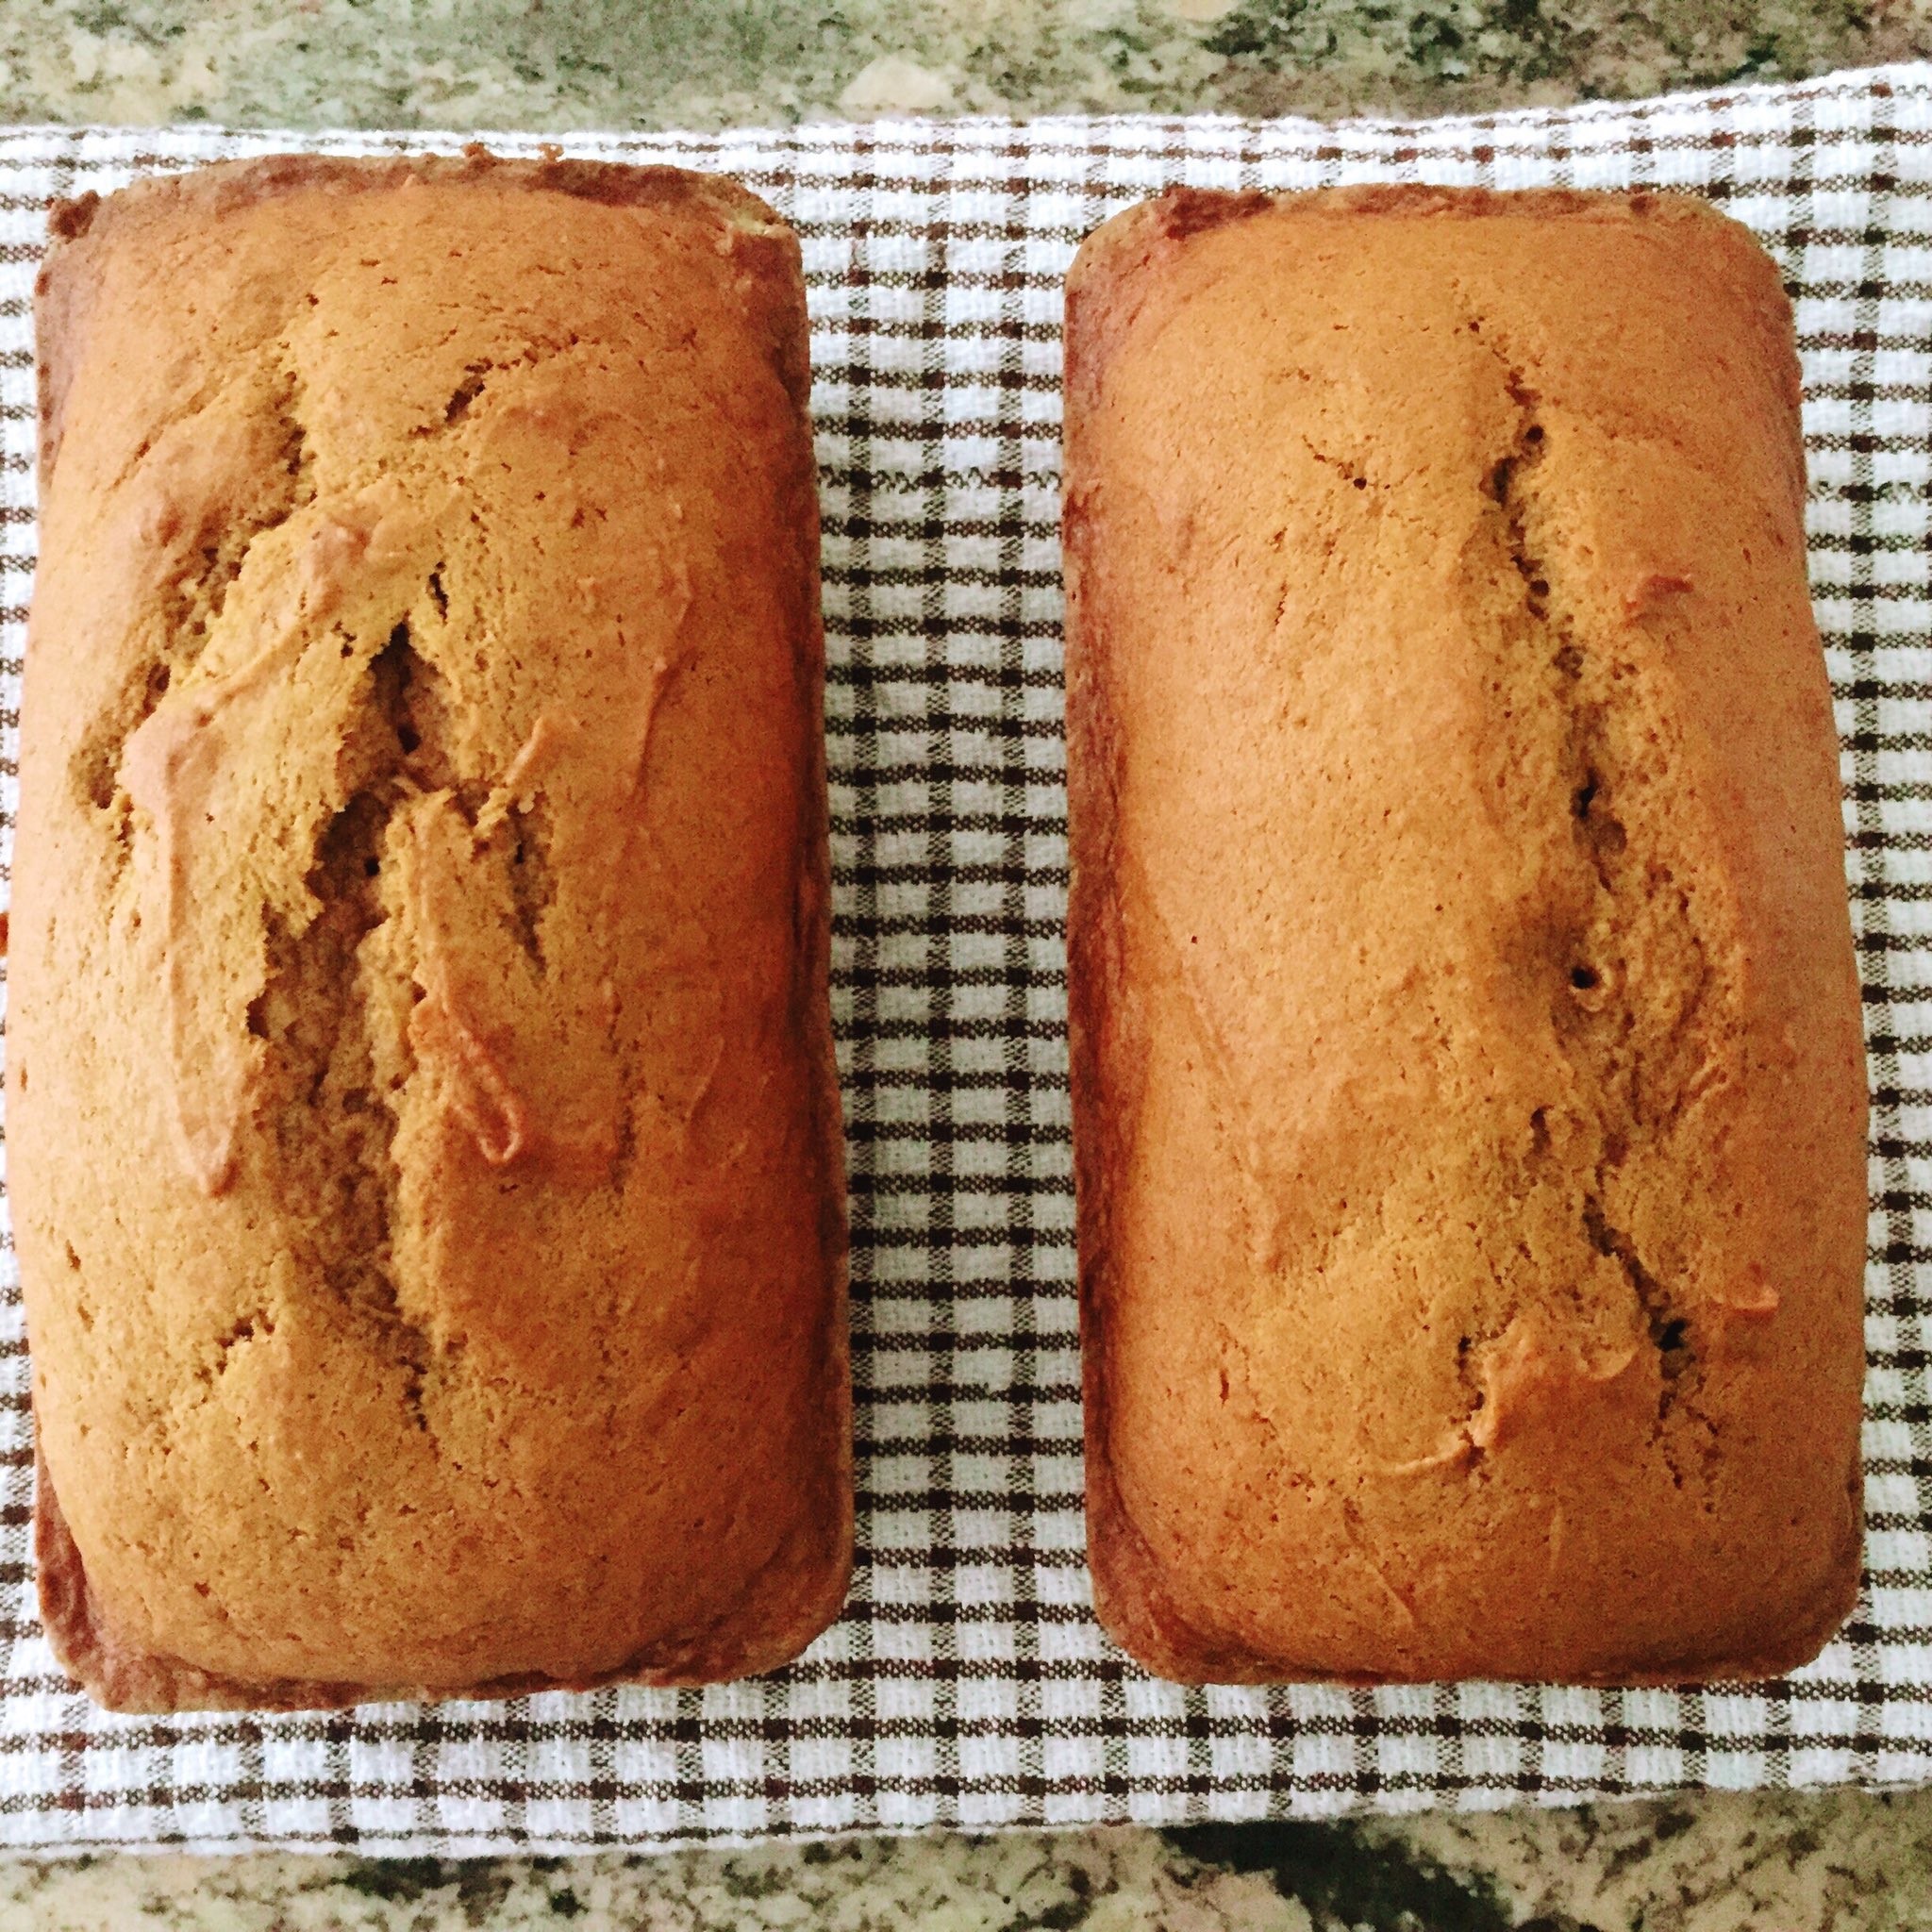
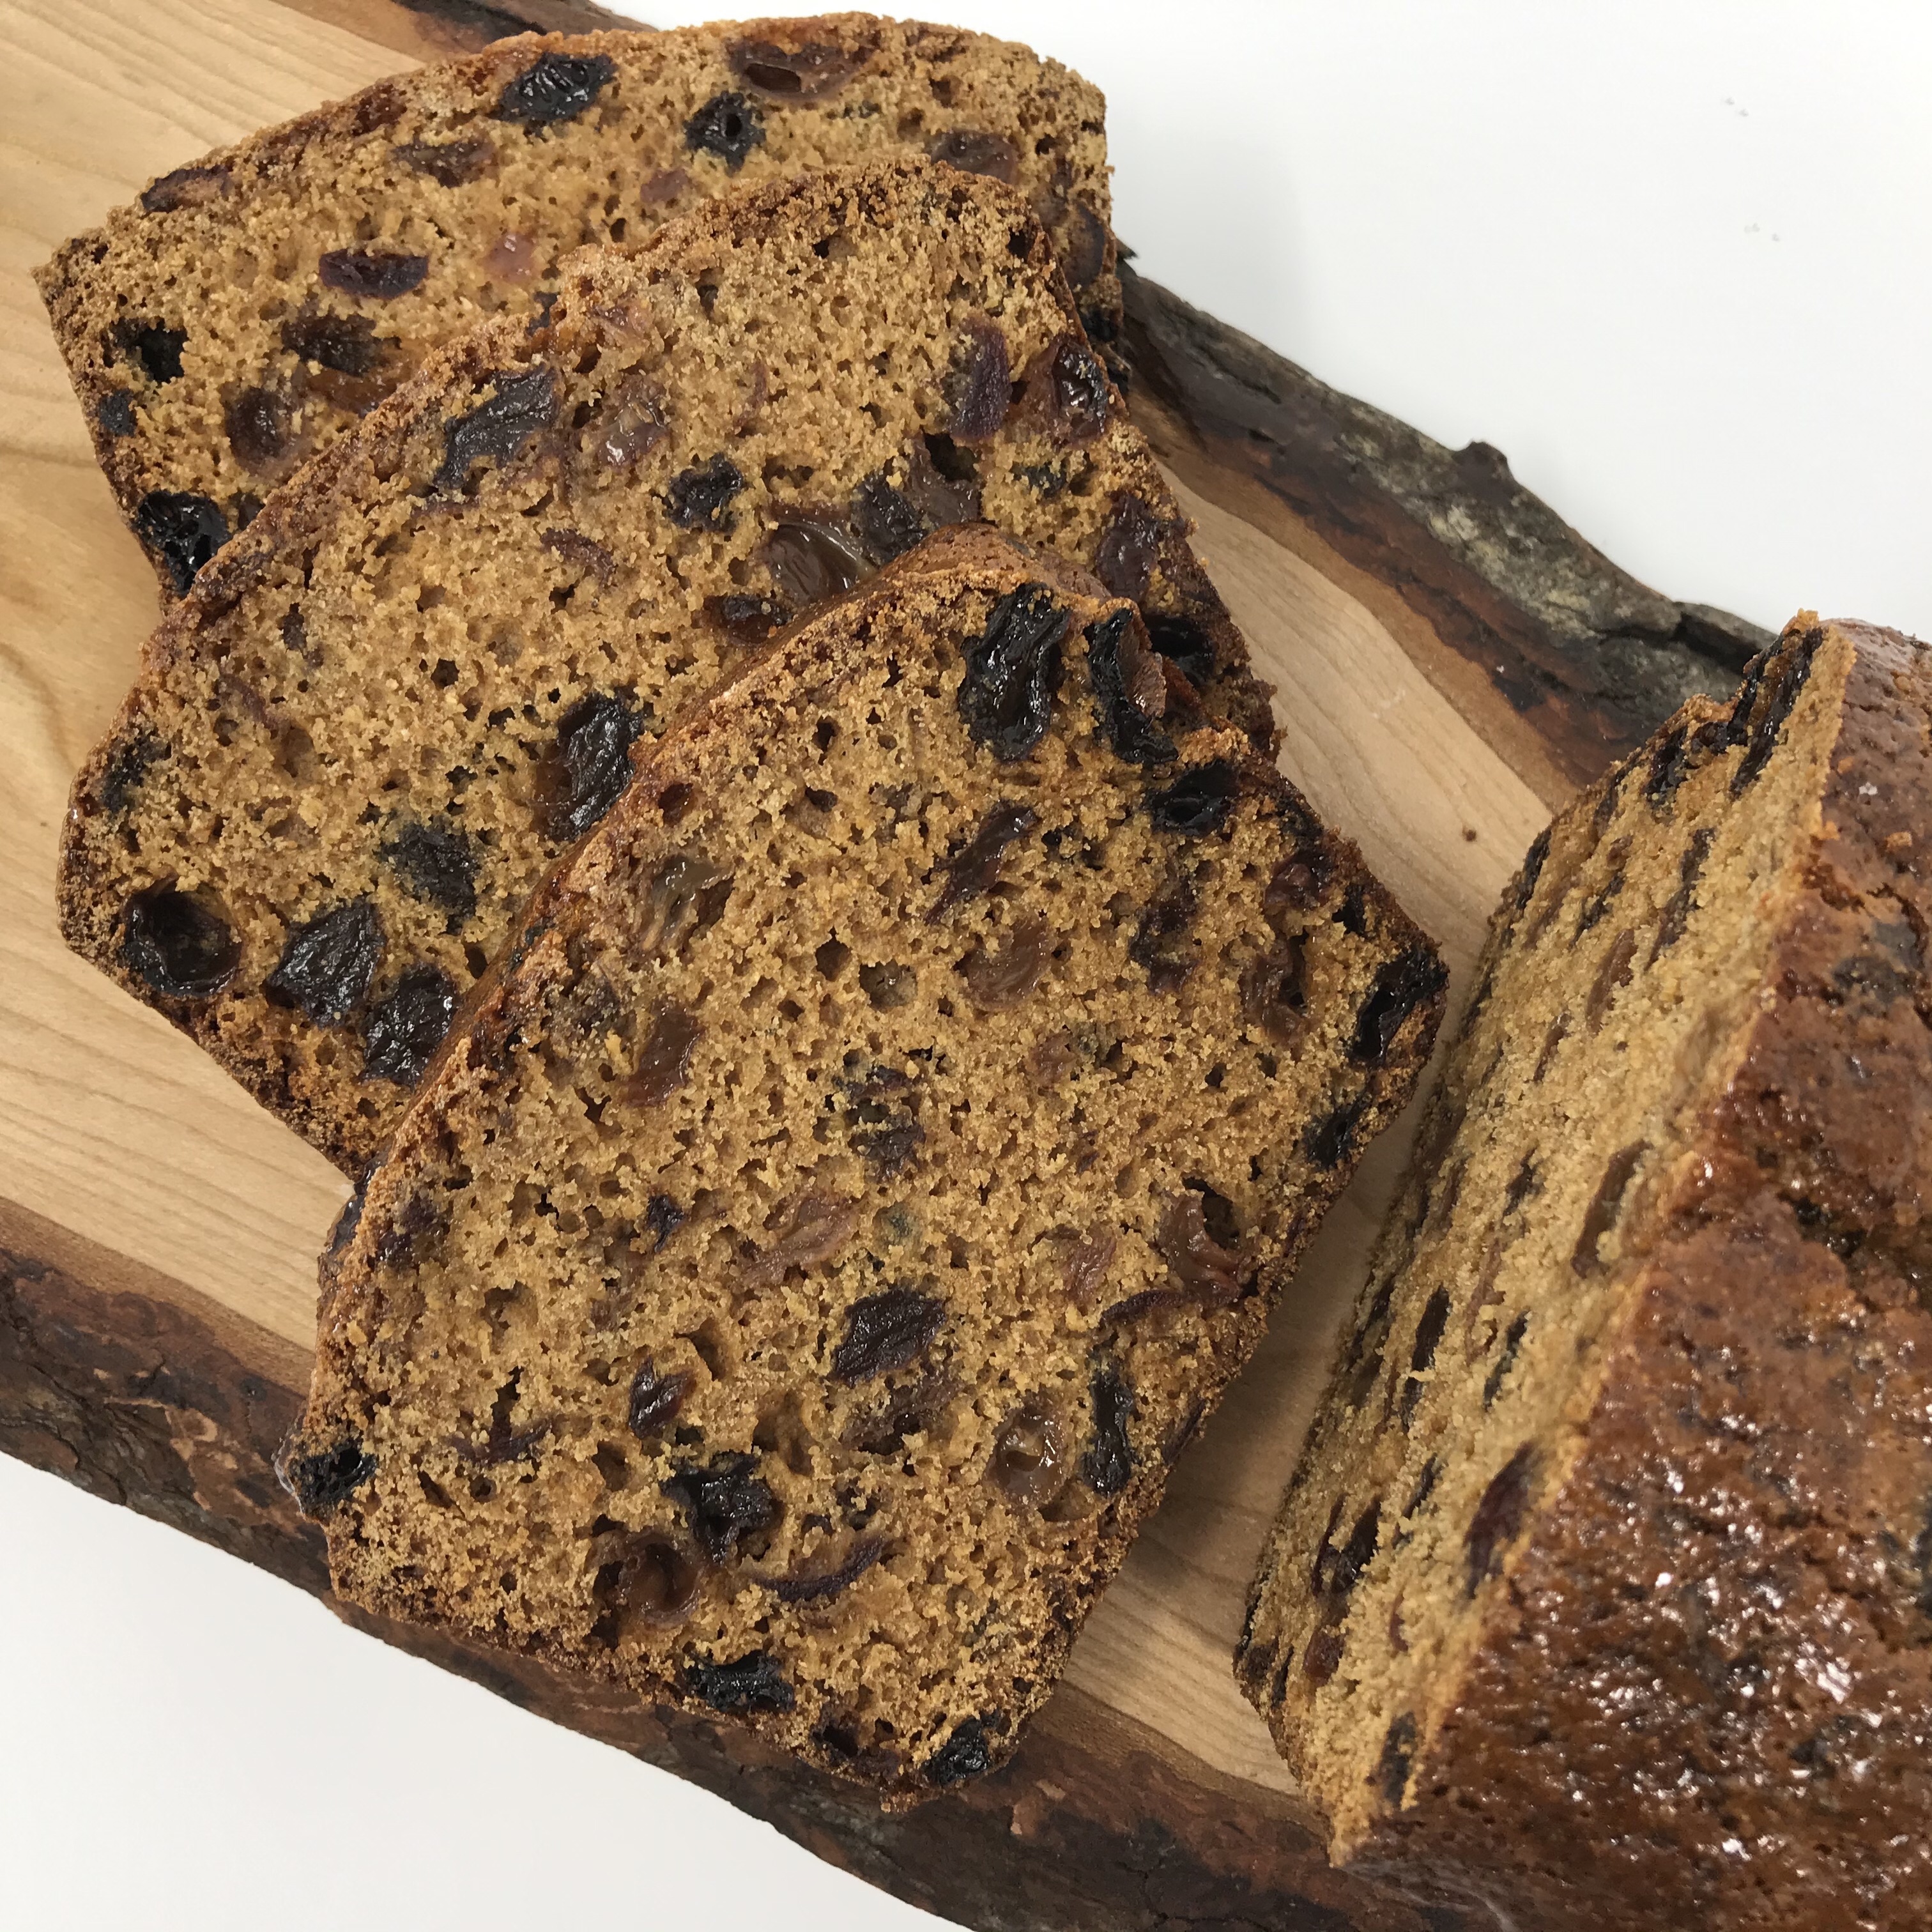
Báirín Breac (Irish Barmbrack)

As a kid I hated dried fruit. Hated it with that primal fervour only a child can manifest when presented with something they don’t like. Not only was barmbrack out- also Christmas cake, fruit cookies and anything else harbouring any sign of a shrivelled morsel. Interesting then that as an adult I can have a hankering out of the blue for something with dried fruit. Perhaps making up for lost time? Whilst more traditional to see it at Halloween, barmbrack for me is synonymous with my roots in Motherland Hibernia. Here I’ve made some additions and substitutions- mead in addition to the traditional tea steeping fluid to give a little extra indulgence; Red Fife flour to add an extra layer of nuttiness to the loaf; and cranberries as, even after all these years, candied peel still abhors me. 

Makes 1 loaf

Ingredients

  • 1 cup raisins
  • 1 cup sultanas
  • 1 cup cranberries
  • 1 1/2 cup black tea, freshly made
  • 1/4 cup mead
  • 3/4 cup dark muscovado sugar
  • 1 cup All Purpose flour
  • 2/3 cup Red Fife flour (or substitute wholewheat)
  • 2 teaspoon baking powder
  • 1 teaspoon mixed spice
  • 1/2 teaspoon ground nutmeg
  • 1 teaspoon vanilla extract
  • 1/4 teaspoon kosher salt
  • 1 egg, beaten

To finish

  • 2 tablespoons sugar
  • 2 tablespoons water

img_3480

Method

  1. Put the raisins, sultanas and cranberries in a large heatproof bowl, pour over the tea and mead. Stir to combine ensuring all the fruit is wet. Leave to soak overnight, or minimum 6 hours, stirring occasionally 
  2. Heat the oven to 350°F and grease 4.5″ x 8.5″ loaf tin pan and line with baking parchment
  3. In a second bowl, whisk together the sugar, flour, baking powder, spices and salt, making sure you break up any lumps in the sugar, then stir in the fruit mixture (including liquid), beaten egg and vanilla extract. Mix well to combine
  4. Tip the loaf mix into the tin, smooth the top and bake for 80 minutes, until a skewer comes out clean. (If the top looks to be going too dark or burning on top towards the end, cover loosely with foil)
  5. Take out of the oven, leave to cool in the tin for 15 minutes, then turn out on to a baking rack
  6. Whilst the loaf is cooling make the sugar syrup.
  7. In a small saucepan combine the sugar and water. Heat the sugar and water over a high heat until the sugar has been dissolved. Bring to a boil and continue stirring over a high heat for 1 minute
  8. Remove from the heat and allow to cool slightly before applying to the loaf
  9. When the loaf has been turned out on to the rack, liberally brush the top and sides with the cooled syrup
  10. Allow to cool fully to room temperature before slicing and serving
  11. Serve slathered in fresh butter and with a hot cup of tea for the quintessential Irish experience.
  12. Store the baked loaf wrapped in wax paper, or baking parchment, in an airtight container. The taste and texture of the remaining loaf will improve over time becoming more “fudge” like.img_3501


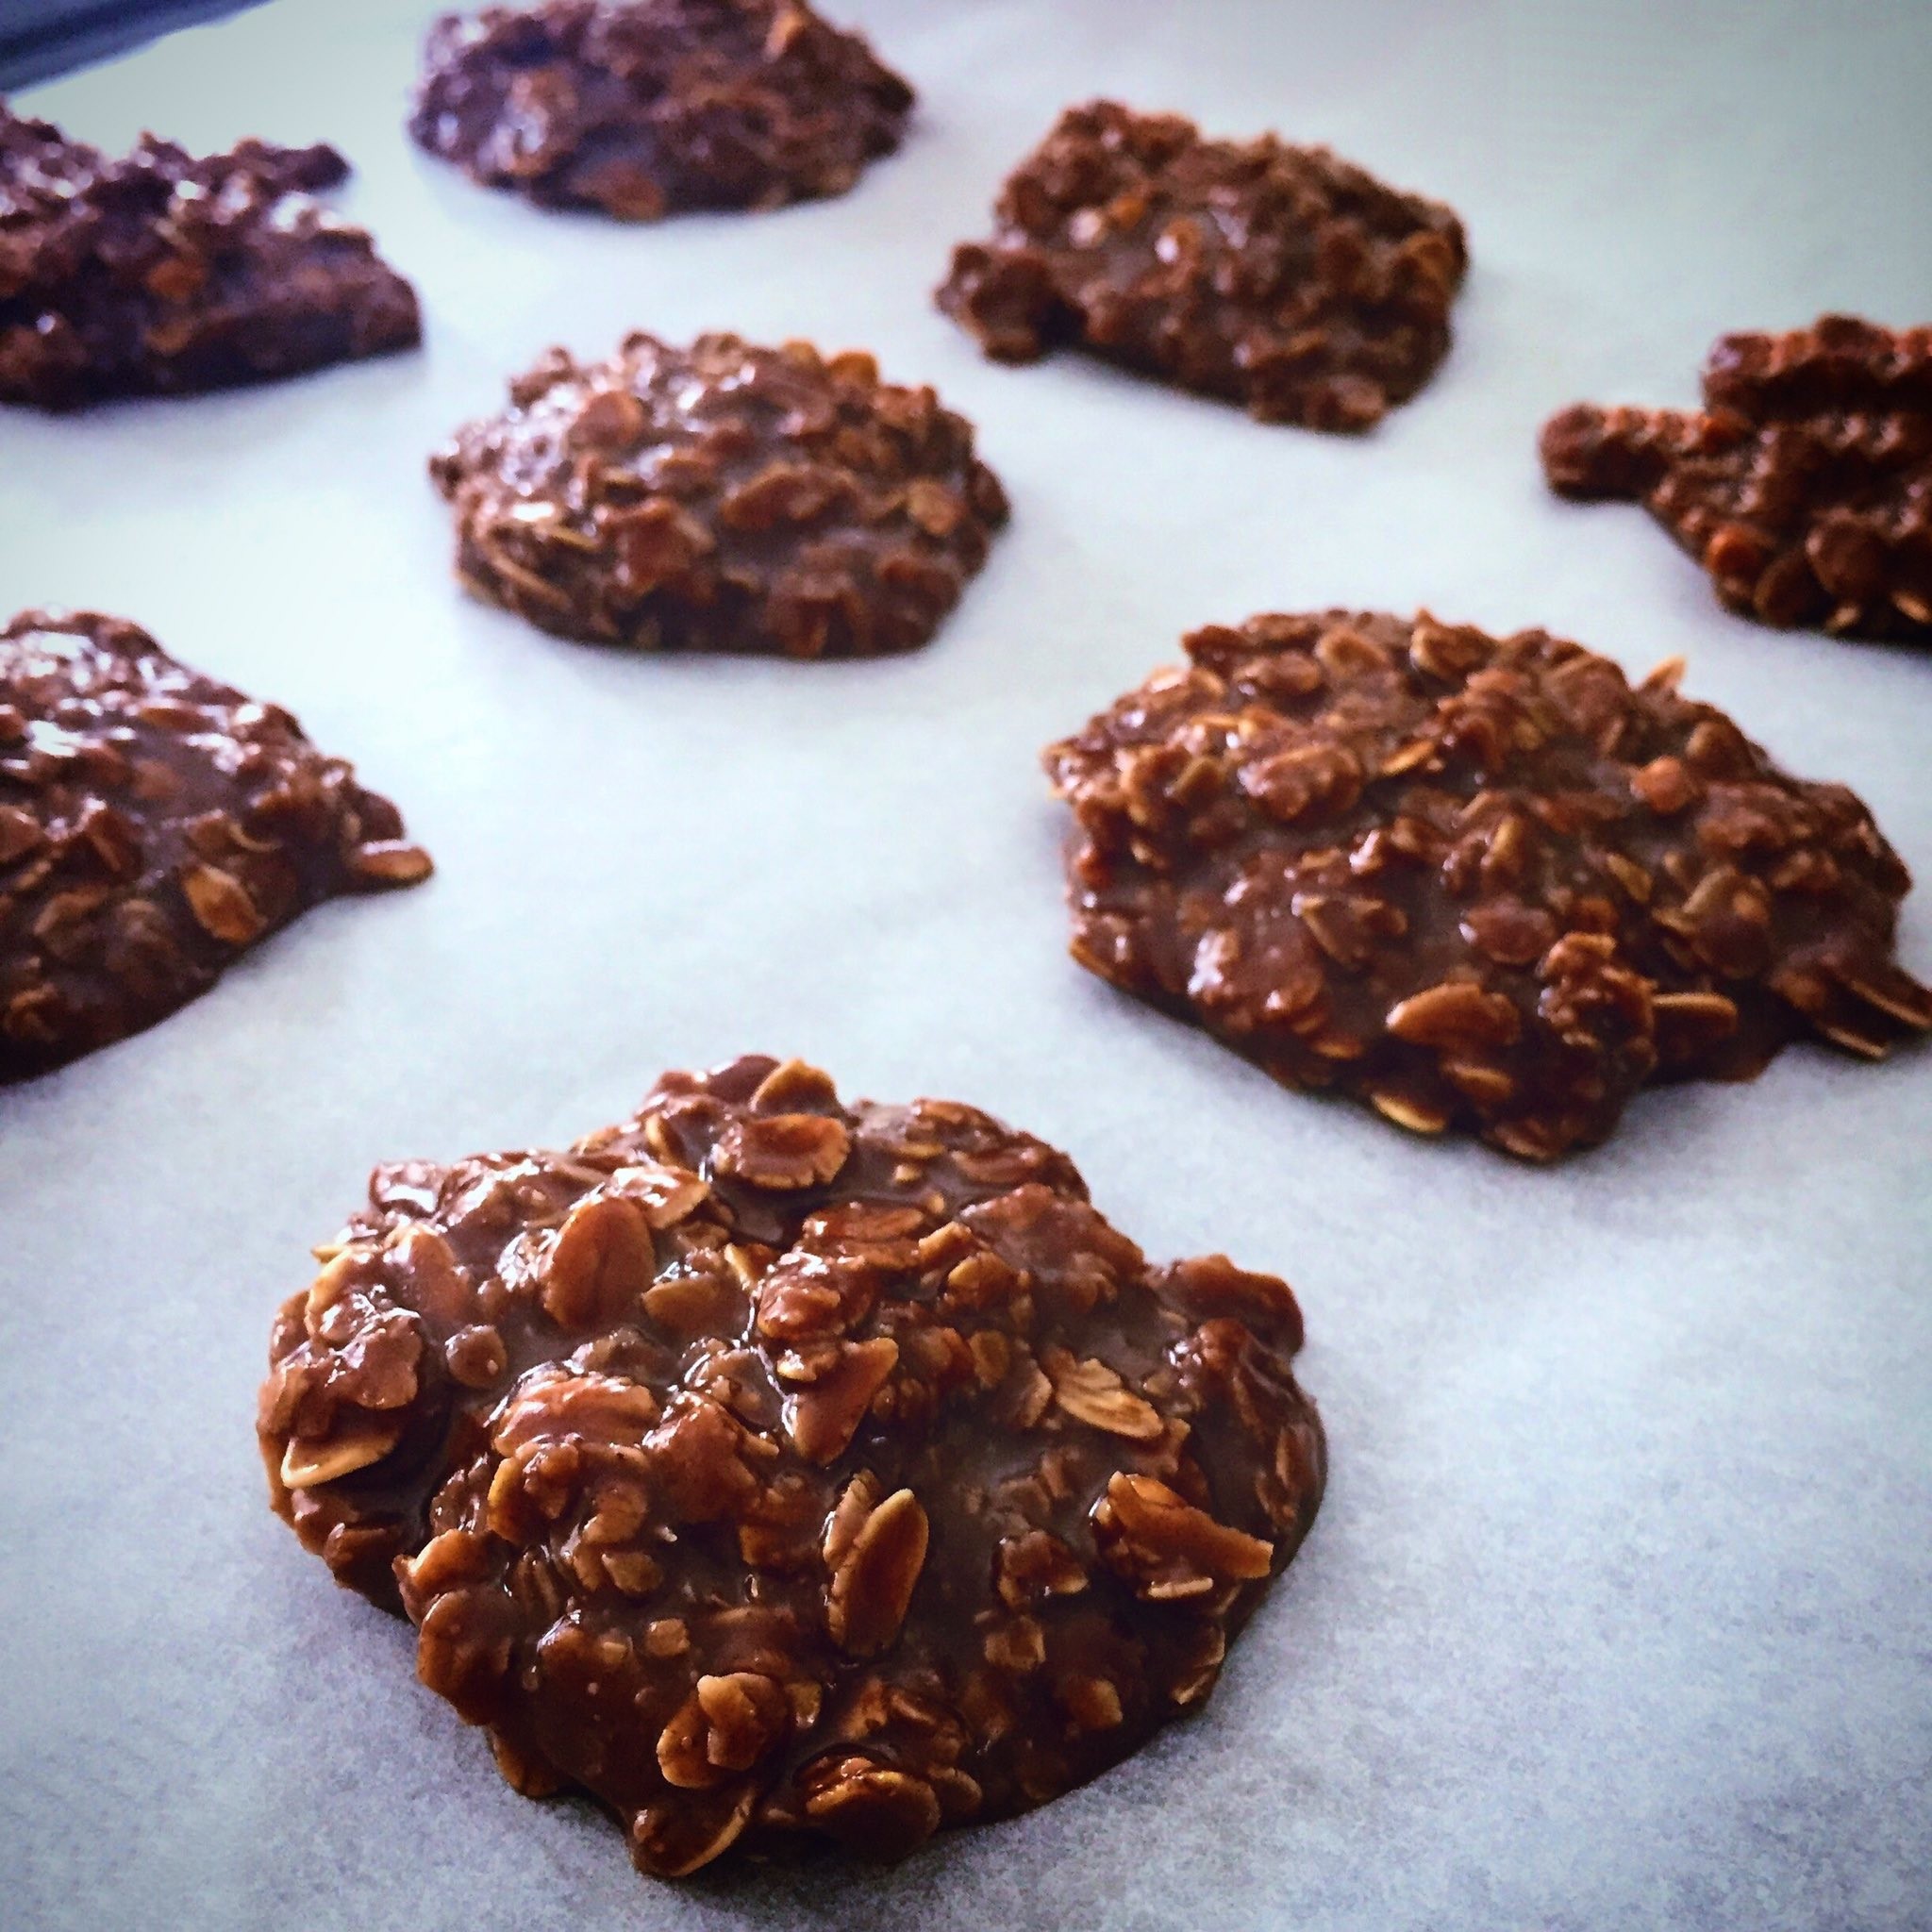
Irish Cream Nanaimo Bars

While the previous recipes had their roots firmly planted in childhood memories and influences, this is a blatant (and heady) nod to the influences of my current home. Numerous Canadian baked goods have won me over – butter tarts; beaver tails; Pouding Chomeur but the Nanaimo bar truly hits my sweet Achilles heel. And how do you make something that perfect better? Why by adding booze of course! More specifically Irish Cream. Take your pick of the ones available out there but my preference is for the stalwart that is Baileys. Not that I’ve made trays of liqueur riddled sweet bars in order to research. Of course not!

Makes 24

Ingredients

Bottom Layer

  • 1/2 cup of salted butter, melted
  • 1/3 cup of unsweetened cocoa
  • 1/4 cup of granulated sugar
  • 1 large egg, beaten
  • 1 1/4 cups of graham cracker crumbs
  • 1/2 cup of sweetened shredded coconut
  • 1/3 cup semi-sweet chocolate, chopped finely
  • 1/2 cup walnut pieces, chopped and toasted

Middle Layer

  • 2 cups of icing sugar
  • 1/2 cup of butter, softened
  • 2 -3 tablespoons of Irish Cream liqueur, I use Baileys
  • 2 tablespoons of cornstarch

Top Layer

  • 3/4 cup of semi-sweet chocolate chips
  • 1/2 cup white chocolate chips
  • 2 separate tablespoons of butter

Method

  1. Preheat oven to 350°F. Line a 9x9inch baking pan with parchment paper
  2. For the bottom layer, in a medium bowl, combined the sugar and melted butter. Stir until the sugar is nearly dissolved. Add in the graham crumbs, shredded coconut, cocoa, chopped chocolate and walnut pieces. Combine well. Add in the beaten egg and again mix well to combine
  3. Press the mixture into the lined baking pan. Bake in the preheated oven for 10 minutes, remove and set aside to cool (I usually cool mine in the fridge as i make the middle layer)
  4. Whilst the bottom layer is cooling prepare the middle layer
  5. In the bowl of a stand mixer (paddle attachment fitted) combine the icing sugar, softened butter, cornstarch and liqueur. Beat on slow until all ingredients are combined and then increase the speed to high for a few minutes until the mixture is whipped and fluffy. Spread the whipped mixture evenly over the cooled bottom layer. Place in the fridge to cool while you make the top layer
  6. Combine the semi-sweet chocolate chips and 1 tablespoon of butter in one heatproof bowl and the white chocolate chips and the other tablespoon of butter in another heatproof bowl. Melt both bowls of chocolate, one at a time, set over a pan of hot water. Spoon dollops of each melted chocolate over the cooled middle layer and using a knife spatula or spoon swirl together to evenly coat the top of the mixture
  7. Place in the fridge and chill for minimum 2 hours before slicing (4x 6) and serving.
  8. Keep the bars refrigerated for up to 3 days in a closed container, or frozen for up to 3 months

Semlor Buns

Pancake Tuesday, Fat Tuesday, Shrove Tuesday. Call it what you will- it’s an annual day with it’s roots in guilt-free indulgence before the long Lenten period of abstinence prior to the Easter celebration of faith. Having grown up in Ireland it usually meant pancakes. Stacks of pan-fried, chewy batter usually soaked in cheek-puckering amounts of Jif lemon juice and liberally sprinkled with caster sugar.

Times change and I guess so do tastes. Piles of pancakes no longer ignite childhood delight. So this year I decided to try something different and was not disappointed! Hailing from Nordic regions the “Semla bun” (Semlor pl) is a spiced bread bun, predominantly filled with an unctuous almond paste, topped with whipped cream, and dusted with a snowy layer of icing sugar (because you can never have too much decadence on Fat Tuesday!)

As with the etymology of  so many pastries and breads there are numerous versions and methods out there depending on how deep you dig. I went with the classic, and probably best known, Swedish version with some slight tweaks. The dough I use is my “go-to” enriched dough with the addition of the required ground cardamom. The inclusion of this spice not only gives the dough a depth to it’s sweet taste, but also a heady fragrance which whafts of indulgence.

The finished and filled buns are exceptional when eaten fresh and on the day. Should the need arise they can be kept in the fridge for a couple of days. But some words of caution here – the longer they are kept in the fridge the drier and tougher the buns will become. If you do this they’re best removed from the fridge about an hour before eating so they are allowed to come to their ideal serving at room temperature. Guess this means all the more reason to eat them all in one go?

Makes 12

Ingredients

Buns

  • 1 cup milk
  • 3/4 stick butter
  • 1 teaspoon vanilla extract
  • 2 1/4 teaspoons active yeast
  • 1 teaspoon sugar
  • 1/4 cup tepid water
  • 4 cups strong bread flour
  • 1/4 cup sugar
  • 2 teaspoons ground cardamom
  • 1/2 teaspoon cinnamon
  • 1 1/2 teaspoon salt
  • 1 egg
  • 1 egg, beaten for bun wash

Filling

  • Crumbs from bun centres
  • 3 1/2oz marzipan, cooled to fridge temperature
  • 2 tablespoons milk
  • 1 tablespoon heavy cream

Finish

  • 2 cups whipping cream
  • 1 teaspoon vanilla extract
  • Icing sugar to dust

Method

  1. Heat the butter and milk together in a pan until until butter is melted. Remove from heat add vanilla extract and leave to cool, stirring occasionally
  2. Combine yeast and 1 teaspoon sugar in a jug. Add tepid water, mix and leave to active for 10mins until frothy
  3. In a bowl of stand mixer combine flour, salt, cardamom, cinnamon and whisk together to combine
  4. To the flour mixture addd cooled milk mixture, yeast mixture and egg
  5. Set on low to combine the ingredients. Once combined continue to form a dough and knead in mixer for 6 mins on low, or knead  by hand for 10 mins
  6. Remove from stand mixer bowl and place in an oiled bowl to proof for 45-1hr until doubled in size
  7. Remove from bowl and on an oiled surface punch down and knock air back. Divide dough batch into 12 equal pieces and roll into balls
  8. Set equally and well spaced on a lined baking sheet and allow to second proof for 30-45mins
  9. Preheat oven to 400
  10. Brush the proofed buns with egg wash and bake in oven for 10-12mins until golden
  11. Remove from oven and allow to cool on a rack
  12. When buns have completely cooled, use a sharp serrated knife and cut the tops from them (about 1/2 inch from top). Set aside for later
  13. Remove the insides from the buns whilst leaving the outer shell intact and place crumb filling into a bowl
  14. Grate in cooled marzipan and add milk and cream. Mash/ stir until a paste is formed. Depending on the amount of crumb filling used from the buns, you may need slightly more liquid- what you want is a thick, spoonable paste
  15. Divide and spoon the marzipan crumb paste into each of the buns
  16. Set aside when each of the buns has been filled
  17. In a bowl add the vanilla extract to the whipping cream and whip until stiff peak stage
  18. Fit a piping bag with a star tip nozzle, fill with the whipped cream and pipe in a circular motion to cover over the filled bun holes
  19. Top with the saved bun lids from earlier
  20. Dust with icing sugar and enjoy!

Brazilian bakes & candies

Think of Brazil and no doubt the usual plethora of images will spring to mind- sundrenched beaches, feather-bedecked soca dancers and copious churrascaria. What doesn’t come to mind is a wealth, and often unexplored world, of baking. From breads to cakes to sweet treats there’s no shortage of tasty culinary treats to try.

So you may be asking yourself how does a Irish native, now resident in Canada, come to be waxing lyrical on all bakes Brazilian? I recently made the acquaintance of a native Brazilian via the wonders of a social media. A mutual bond over adoption matters, cultural appreciation (makes a change to hear those two words together huh?) and adventures in food was formed, and here we are! Insight from someone who grew up in a culture always trumps even the best research you can do. There is something satisfying about knowing that this is how “it” actually is, in everyday life, rather than some interpretation of “it” from the vaults of some Lonely Planet-esque archives.

The recipes here are essentially in two parts- bakes and sweets. The Pao de Queijo (Brazilian Cheesebread) is definitely worth trying out. Served warm from the oven they are an ideal breakfast morsel, or even snack through the day. Freezer-friendly and gluten-free they are also a handy reserve should any gluten intolerant friends swing by. The Pudim de Queijo and Bolo de Fuba Cremoso share a common theme in that they are both prepared making use of a tall blender. Apparently this is a common feature in Brazilian baking as stand mixers are not that common. For the Pudim de Queijo think creme caramel and Catalan flan. To be honest though to hold it in comparison is to do the Pudim injustice. The addition of the cheese to the flan mixture rescues it from the overpowering (and somewhat cloying) sweetness to which it’s European counterparts often fall prey. Cheese also a feature in the recipe for Bolo de Fuba Cremoso. When baked the combination of cheese, cornmeal and coconut result in veritable kitchen alchemy that allows for a crispy topping, smooth interlayer and deliciously crumbly base. Believe me, once you try a slice of this alongside a strong coffee, breakfast will never be the same again!

The Dochinos de Leite Moca here are all variations on a theme of Brazilian candies. Made using boiled sweetened condensed milk they are sure to prove popular not only with the little ones in your life but all the grown-ups. The final sweets will usually keep for a week in a container in the refrigerator. These dainty mouthfuls of scrumptuous sweetness look  (and taste) like they required hours of kitchen toil instead of the mere minutes needed in reality. The longest part is the cooling time! I cannot emphasis how much these candies are worth the minimal effort.


Pao de Queijo (8)

Pao de queijo

Makes approximately 40

Ingredients

  • 500g cassava starch
  • 1/2 cup water
  • 1/4 cup vegetable oil
  • 1/4 cup olive oil
  • 4 large eggs
  • 400g grated cheese (150g Gruyère; 150g mozzarella; 100g sharp red cheddar such as Red Leicester)
  • 1 teaspoon salt

Method

  1. Preheat oven to 400F and line 2 cookie baking trays with baking parchment
  2. In a bowl mix the Gruyère and mozzarella cheeses, Set aside until needed
  3. Combine the water & oil in a pan and bring to boil over heat
  4. Place cassava starch in a bowl of a stand mixer
  5. With the mixer running, carefully pour over boiling liquid in stages and mix to combine
  6. Leave to cool, until you can touch the side of the bowl
  7. With the mixer running, add in eggs one at a time
  8. Add in the Gruyère/ mozzarella cheese mix in thirds and mix until combine.
  9. Remove the dough from the bowl and fold/lightly knead in the sharp cheddar.
  10. Roll dough into 3cm wide sausage shape
  11. Cut into smaller 1 inch pieces and roll into balls using wet hands
  12. Place the dough balls on lined baking trays, spacing about 2 inches between
  13. Bake at 400F for 20mins until puffed and lightly golden

– The baked rolls/ puffs are best eaten straight away, after cooling slightly.

*Once the dough had been shaped into balls, they can be frozen in a bag or under cling wrap and baked from frozen. Bake in a 400F preheated oven for 30 mins until puffed and lightly golden

Pao de Queijo (1)


Pudim de Queijo (3)

Pudim de queijo

Makes 1, serves 12

Ingredients

Caramel

  • 1 cup fine sugar
  • 1 cup of water

Pudding

  • 4 eggs
  • 1 can (300ml) sweetened condensed milk
  • 1 can whole  milk (use the same can as sweetened condensed milk to measure)
  • 50g Parmesan cheese, grated

Method

  1. Preheat oven to 350F
  2. In a pan over a medium heat combine the water and fine sugar.
  3. Increase heat and bring to the boil, without stirring, for about 10mins. The liquid should thicken and turn a deep amber color
  4. When the liquid has turned deep amber, remove from heat and pour into an 8inch circular baking pan
  5. In a blender mix the condescended milk and milk for 2 mins
  6. Add in eggs and mix to blend again for 2 mins
  7. Add the Parmesan cheese and mix for a further 2 mins
  8. Pour into prepared caramel pan and place the filled baking pan in deep roasting tray large enough to take the pan
  9. Cover the filled pan with aluminium foil, and fill the roasting tray with water to at least 3/4 level with the pan
  10. Transfer to the preheated oven and bake for 50 mins
  11. After the aluminium foil from the pan and continue to bake for a further 10 mins
  12. Remove the baked pudding from the oven and the roasting tray. Leave to completely
  13. Turn the cooked pudding out by placing a large plate on top of the pudding and quickly inverting. It may requirement a gentle shake for it to come out
  14. Keep the turned out pudding refrigerated until serving

Pudim de Queijo (6)


Bolo de Fuma Cremoso (3)

Bolo de fubá cremoso

Makes 1 , serves 12

Ingredients

  • 3 eggs
  • 2 tablespoons unsalted butter, melted
  • 3 cups whole milk
  • 2 cups fine sugar
  • 1 cup of cornmeal
  • 3 tablespoons all-purpose flour
  • 1 cup unsweetened shredded coconut
  • 50g Parmesan cheese, grated
  • 1 tablespoon baking powder


Method

  1. Preheat the oven to 350F
  2. In a large bowl add the fine sugar, cornmeal, flour, shredded coconut and mix to combine
  3. In a large blender combine the eggs, milk, melted butter, and baking powder, Parmesan cheese and mix until well combined
  4. Pour the liquid mixture in to the bowl of dry ingredients and stir/whisk gently to combine well
  5. Pour to cake batter (which will be quite running into a 9inch spring-form cake pan
  6. Place in the preheated oven and bake for 35-40 mins until the top of the cake is golden brown and the sides pull away from the pan
  7. Remove from oven and leave to cool completely in the pan before removing the pan collar
  8. This cake goes particularly well with a strong, early morning coffee

Bolo de Fuma Cremoso (1)


Dochinos (2)

Dochinos de Leite Moca

Each recipe makes between 15-20

This little sweet bites were traditionally served at children’s parties, are astoundingly easy to make and even better to eat!

Brigadeiro

Ingredients

  • 300ml sweetened condensed milk
  • 4 tablespoons cocoa powder
  • 1 egg yolk

To finish

  • A selection of chocolate sprinkles, rainbow sprinkles to finish

Method

  1. Combine all ingredients in a heavy bottomed saucepan and cook over medium-low heat, stirring constantly with a wooden spoon, until the mixture thickens and loosens from the pan. (It will take between 8-10 mins)
  2. Pour the hot mixture into a heat-proof bowl and leave to cool to room temperature
  3. When the mixture has cooled , grease your hands with oil and shape a teaspoon of the mixture into a round ball shape in your hands
  4. Roll the ball of mixture in sprinkles of your choice to coat and place on a lined baking sheet
  5. When all the brigadeiro have been rolled transfer the baking sheet to the fridge and allow the to chill and firm for at least 2 hours


Beijinho

Ingredients

  • 300ml sweetened condensed milk
  • 1egg yolk

To finish

  • 100g unsweetened shredded coconut
  • Whole cloves (optional)

Method

  1. Combine the milk and egg yolk in a heavy bottomed saucepan and cook over medium-low heat, stirring constantly with a wooden spoon, until the mixture thickens and loosens from the pan. (It will take between 8-10 mins)
  2. Pour the hot mixture into a heat-proof bowl and leave to cool to room temperature
  3. When the mixture has cooled , grease your hands with oil and shape a teaspoon of the mixture into a round ball shape in your hands
  4. Roll the ball of mixture in the shredded coconut to coat and place on a lined baking sheet. Stud each beijinho with a whole clove
  5. When all the beijinho have been rolled, transfer the baking sheet to the fridge and allow the to chill and firm for at least 2 hours


Cajuzinho

Ingredients

  • 300ml sweetened condensed milk
  • 5 tablespoons smooth peanut butter
  • 1 tablespoon cocoa powder
  • 30g unsweetened shredded coconut

To finish

  • Fine sugar
  • Roasted peanut halves

Method

  1. Combine all ingredients in a heavy bottomed saucepan and cook over medium-low heat, stirring constantly with a wooden spoon, until the mixture thickens and loosens from the pan. (It will take between 8-10 mins)
  2. Pour the hot mixture into a heat-proof bowl and leave to cool to room temperature
  3. When the mixture has cooled , grease your hands with oil and shape a teaspoon of the mixture into a “horn” shape in your hands
  4. Roll the cajuzinho in fine sugar  to coat, stud the larger end with a peanut half and place on a lined baking sheet
  5. When all the cajuzinho have been rolled,  transfer the baking sheet to the fridge and allow the to chill and firm for at least 2 hours

Dochinos (5)


#Recipe Baking with kids…not literally!

Montage

We’ve now been resident here in Toronto for 5 months and things have pretty much settled. My husband has found his pace with his job, our kids have made a smooth transition to a new school, heck we even seemed to have navigated the whole “Daylight saving hours” thing without too much trouble. The only fly in the ointment is me trying to start Mr. Mom’s from scratch again. Whilst a brand new audience awaits from my take on baked goods, it also means a whole bunch of people who no NOTHING about you. And that’s an uphill climb! (If you do happen to work in the foodie sector and would like a food writer, or baker to work with  please do check out my Collaborations page here.)

Anyhoo I digress! As I mentioned above, our kids have (surprisingly) takenthe move to a new country in their stride with little or no tears and tantrums. This week had them on their “March Break” from school- seems to be the equivalent to a UK mid-term break. As well as taking them to the obligatory art galleries and museums (I don’t know who enjoyed it more!) I decided to introduce them to the world of baking. Now I’m not talking anything major- they’re not quiet ready for the cook’s torch or bain maire yet! However you’d be amazed how some simple stirring, cutting, and participation can ignite eagerness.

Here are some of the recipes that took place in Mr. Mom’s kitchen this week. Whilst they range from the sweet to the savory, they are all big on fun, flavour and involvement from little flour-caked hands. I’ve  also included some tips on getting kids involved in the kitchen. Don’t get me wrong- I’m not including this because I consider myself some kind of childcare expert and these are rules by which you should abide. They’re simply meant from the point of my being a dad who wanted to get his children involved in baking and these ways worked for me. I’ve left where to get your kids involved to your discretion as you know them best after all.

Some tips/tricks:

  • Put on some music. Not loud enough that you have to shout over it but loud enough for background. It helps to have something to pass lengthy tasks like kneading or blending. Also think sing-along or random exclamations of “Knead to the beat!”
  • Get the children to find and fetch the ingredients. Framed as a “Baking Treasure Hunt” I’ve seen it help reading skills and memory.
  • Weighing is a surprisingly enticing activity which always draws willing volunteers.  If they overshoot the mark when pouring, it’s no biggie (despite their possible panic!)

So now on to the fun stuff- the recipes! These are a selection of what ended up on the cooling rack…

No Bake Chocolate Cookies

Pumpkin Bread

Sugar Cookies

Simple White Loaf ( and how this can be used to make Pizza)


Mud Puddles (aka No Bake Chocolate Cookies)

pic 4


Ingredients

200g caster sugar

125ml semi-skimmed milk

115g salted butter

4 tablespoons cocoa, unsweetened

1 tablespoon good quality vanilla extract

1 pinch salt

120g gram crunchy peanut butter

225g Jumbo Oats

225g Quick Oats

Method
  • Line baking sheets with baking parchment
  • Bring the sugar, milk, butter and cocoa to a boil in a large saucepan over medium heat, stirring occasionally, then keep on a rolling boil for 1 minute
  • Remove from the heat. Add the oats, peanut butter, vanilla and salt, and stir to combine
  • Drop spaced tablespoonfuls of the mixture onto the prepared baking sheet
  • Leave to cool at room temperature for min 1 hour. After this they’ve set enough tp pick up and eat. I find they usually taste better and are easier to handle the next day
  • These can be kept in an airtight container in the fridge for up to 3 days


Pumpkin Bread

pic 3

Ingredients

250g all-purpose flour

1/2 teaspoon salt

1/2 teaspoon baking powder

1 teaspoon baking soda

1 teaspoon ground nutmeg

1 teaspoon ground cloves

1 teaspoon ground cinnamon

400g caster sugar

170g unsalted butter, softened

2 eggs

1 can (425g)  pumpkin (make sure it’s 100% pumpkin puree)

pic 2

Method
  • Preheat your oven to 160c or 325F.
  • Prepare two 1lb loaf tines with cake release or grease with butter
  • In a bowl sift together the flour, salt, baking powder, baking soda and spices
  • In a stand mixer combine the sugar, butter and eggs and mix for at least 10 mins
  • Add in the pumpkin puree and mix on slow until just combined
  • Reduce the mixer speed to low and add in the flour mixture by heaped tablespoon at a time. Keep  the mixer going until just combined – make sure there are no white flour pockets
  • Remove the bowl, pour the mixture equally between the prepared tins and level the top
  • Bake in the oven for 60-70mins until a skewer comes out clean
  • Remove from the oven, remove from tins and leave to cool on a wire rack. When cool wrap in clingfilm until needed.
  • These loaves get better over time. After a couple of days wrapped they develop a fudgy, sticky texture which goes really with the warming spicy flavor (similar to McVities Jamaican Ginger Cake for those of you who know it?)


Sugar Cookies

pic 5

Ingredients

350g unsalted butter, softened

400g caster sugar

4 eggs

1 teaspoon good quality vanilla extract

620g all-purpose flour

2 teaspoons baking powder

1 teaspoon salt

Icing sugar for dusting and rolling


Method
  • Preheat oven to 200C or 400F
  • Line cookie sheets with baking parchment
  • Sift the flour, baking powder and salt together in a bowl
  • In a stand mixer, cream together butter and sugar until smooth (mix for at least 10 mins)
  • Beat in eggs, one at a time,and vanilla
  • With the mixer on a slow speed, stir in the flour mixture one heaped tablespoon at a time until well combined and a dough formed
  • Tip the dough onto clingfilm and wrap tightly
  • Cover, and chill dough for at least one hour (or overnight)
  • Dust a surface with icing sugar, sprinkle the dough with icing sugar and roll out the dough to a thickness of apx 5mm (*use icing sugar to prevent sticking to surface and rolling-pin)
  • Cut out shapes using cookie cutters and transfer to prepared baking sheets
  • Bake in preheated oven for 8-10 mins
  • Remove and use a wide spatula or palette knife to transfer the soft cookies to wire rack to cool. They’ll firm up upon further cooling.

* I made 50/50 blend of vanilla and chocolate sugar cookie by removing half the dough when refrigerating it and leaving half in the bowl. To this I added 50g unsweetened cocoa powder and 100g unsweetened chocolate chips. Mix until well combined then refrigerate and make as per the rest of the recipe.


Simple White Loaf

pic 12

Ingredients

500g Bread flour

12g fast action yeast

10g salt

40ml light olive oil

320ml warm water

pic 10

Method
  • In a bowl combine the flour, yeast (to one side) and salt (to opposite side)
  • In bowl combine olive oil and water
  • Pour the water/oil mixture into the flour bowl in a steady stream
  • With your hand in a “Claw” shape mix from outside of the bowl towards to centre. Continue until all the mixture comes together into a dough ball and the bowl sides are clean
  • Lightly oil a surface with olive oil and tip out the dough onto it
  • Knead the dough for 10 mins until it becomes smooth and elastic
  • Transfer the kneaded dough to a lightly oiled bowl and cover with some lightly oiled cling film. Leave to rise until doubled in size
  • Line a baking sheet with baking parchment and dust with bread flour
  • Again lightly oil a surface and tip out the risen dough
  • Punch and knead the dough, for about 5 mins, until all the air has been expelled from it (called “Knocking Back”)
  • Shape with your hands into a long oval shape and transfer to the prepared baking sheet
  • Cover loosely with some damp kitchen paper or oiled cling film and leave for 40-60 mins until risen
  • Preheat your oven to 225c or 435F
  • Once the dough has risen, lightly spray with water, slash the top of the loaf, dust with all-purpose flour and place it in the preheated oven. After doing this place a dish filled with 1 pint of water in the bottom of the oven (this creates a crust)
  • Bake for 25mins, at which point reduce the temperature to 200c or 390F and continue to bake for a further 15-20mins
  • Remove the loaf from the oven (careful of the steam!) and leave to cool

Pizza adaptation

I’ve also used this recipe to make pizzas which the kids absolutely go crazy for. I’m not sure that it’s as much for the taste of it as it is for the whole “I’ve made this!” boost to their confidence. To use this for pizza making follow the steps until the “Knocking Back” stage.

pic 9

  • After knocking back the dough divide into equal pieces (I usually get 4-5 good size pizzas from this quantity of dough).
  • Preheat your oven to 250C or 475F (with baking sheets or pizza stones in)
  • Sprinkle a surface with a 50/50 combination of all-purpose flour and semolina
  • Dust the dough with some of the flour/semolina mixture. Flatten and stretch the dough until thin into which ever shape works best for you- circle, oval or rectangular. It just depends on what fits with your oven
  • Dress to your (and your kids!) taste with toppings. All of the following are good- tomato passata (as sauce); cheese shreds; bacon; tuna; pepperoni; chicken; fresh herbs; fresh mozzarella; thinly sliced figs…thre list can go on!
  • Carefully remove and dust your baking sheets or pizza stone with flour/ semolina mixture
  • Transfer your pizza(s) to baking sheets or pizza stone and bake for 10-12 mins until ready
  • Remove from oven, brush the exposed sides with extra virgin olive oil and servepic 8

So there’s a brief selection of some o the tasty goods from my kitchen. I hope you enjoy baking them, getting your kids to pitch in and tasting them as much as we have.


#Recipe- Egyptian Flatbreads

Egyptian Flatbreads 4

This started life as yet another “Popcorn” recipe which was consigned to the “Not Right Now” folder on my desktop. With the weather taking a turn for the better I’ve decided to dust it off and let it see the light of day. The flatbreads are really easy and they’re fantastic for picnic or BBQ weather. The popcorn feature ingredient can easily be omitted and the breads will be just as good- maybe not as much of a talking point though?

I love these with smeared with fresh, homemade hummus and sprinkled with some pomegranate seeds. They’re also ideal halved and stacked with slivers of BBQ’d meat, fresh juicy tomatoes and drizzled with olive oil. A definite taste for the summer!

Makes 4

Flatbreads

500g strong, white bread flour

10g salt

10g fast (easy) yeast

375ml warm water

40ml olive oil

2 tablespoons honey


Dukkah paste

100g chopped hazelnuts

50g sesame seeds

50g coriander seed

10g cumin seed

1 teaspoon sea salt

½ teaspoon black pepper

50g nigella seeds

2 teaspoons sweet paprika

14g Lemon & Fennel popcorn, crushed

Olive oil

Egyptian Flatbreads 1

  • Place the flour in a bowl, add the yeast to one side, and the salt to the other.
  • Create a well in the middle and add 275ml water, the olive oil and the honey and mix with your fingers until combined. Continue to add the rest of the water a little at a time until all the flour in the bowl has been incorporated. You may not need all the water- you want a dough that is well combined and soft, but not sticky or soggy. By the end your dough should be smooth and elastic.
  • Lightly oil a clean bowl and transfer the dough. Cover loosely with oiled cling film and leave to rise until doubled in size.
  • Whilst the dough is rising, prepare the dukkah.
  • In a pan add the chopped hazelnuts; sesame seeds; coriander seeds; cumin seed; nigella seeds; and paprika. Toast over a medium heat until fragrant.
  • Add the salt and pepper and grind until rough.
  • Add in the crushed popcorn and mix to combine.
  • Drizzle in enough olive oil to create a rough paste.
  • Once the dough has doubled in size, tip out onto a lightly oiled surface and knock back to remove the air (knead for about 5 minutes).
  • Cut the dough into 4 (roughly) equal pieces, and flatten with your fingers in a rough circle shape. With a lightly oiled rolling pin, roll into a larger circular shape, approximately 10-12cms diameter.
  • Transfer to 2 baking trays lined with baking parchment (2 dough discs on each).
  • Smear each of the dough circles liberally with the dukkah paste, covering the entire surface. Leave to rest for 20 minutes.
  • Whilst the dough is resting, preheat your oven to 225 degrees.
  • When the dough is rested, place the baking sheets in the oven- one on top third of oven, one in lower third of oven. After 6 mins, swap the positions of the trays, also turning them 180 degrees (front to back). Continue to bake for another 6 mins.
  • Remove from oven and allow to cool on their baking trays for a further 5 minutes. After this time transfer from the baking trays to wire racks.
  • The flatbreads can be served warm, or cool.