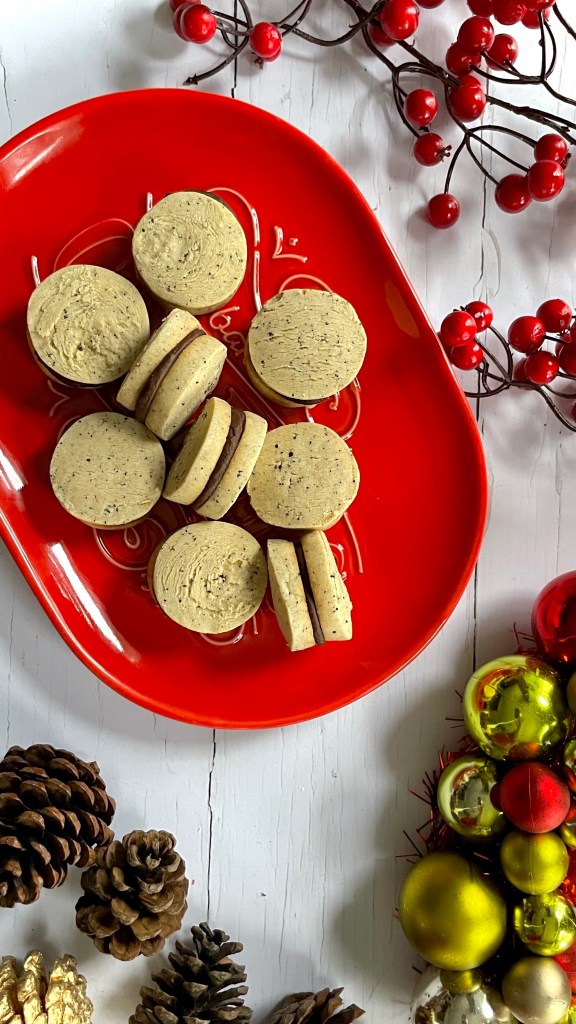
In the bowl of a stand mixer fitted with the paddle attachment, beat softened butter until creamy. Add confectioners’ sugar and beat until well combined and smooth
Add egg yolks, vanilla extract and beat just until fully combined
Add flour, ground coffee, salt, and beat at low speed just until flour is incorporated but before dough forms a ball
Turn out dough onto a floured surface and use your hands to bring dough together. Divide dough in half and roll into 1½-inch-wide logs. Wrap logs in cling wrap, and refrigerate until firm, 1 to 2 hours
Preheat oven to 350°F. Line baking sheets with parchment paper, or silicone making mats
Unwrap logs and cut into ¼-inch-thick rounds. Place rounds 1 inch apart on prepared pans
Bake until just lightly browned around the edges, 10 to 12 minutes. Let cool on pans for 5 minutes. Remove from pans and let cool completely on wire racks
Place chocolate in a large heatproof bowl. In a small saucepan, bring cream and butter to a simmer over medium heat. Pour hot cream mixture over chocolate. Let stand for 1 minute; stir until a smooth, silky ganache forms. Let stand until thickened, 30 minutes to 1 hour
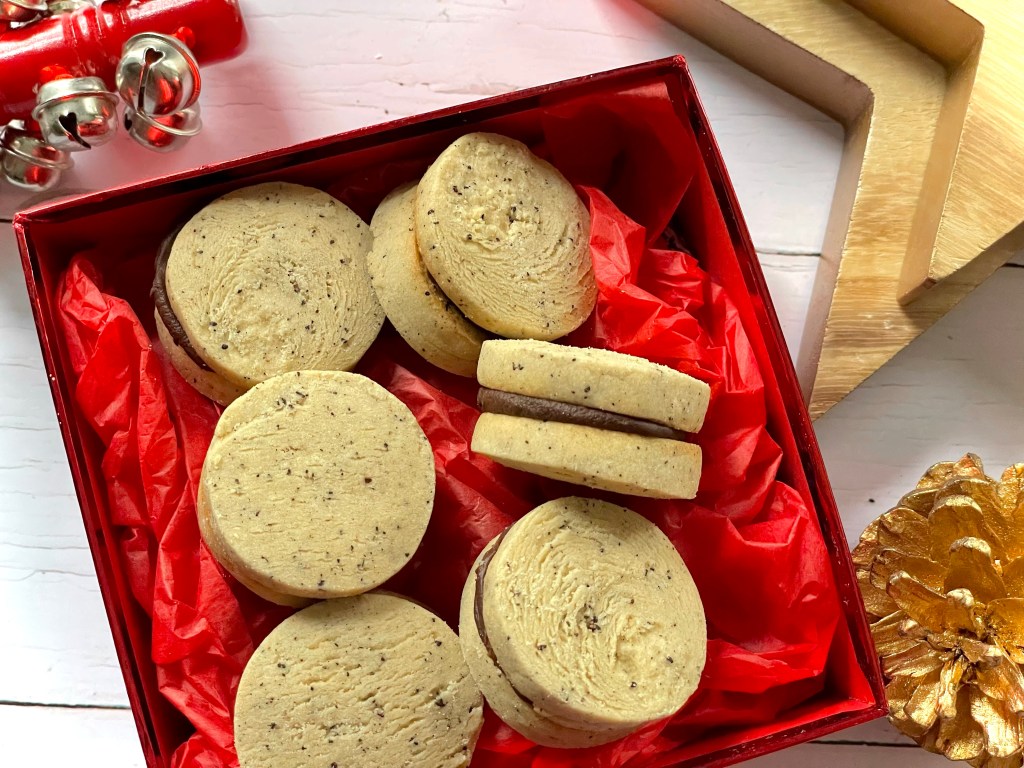
Using a piping bag fitted with a small round piping tip, pipe a round of ganache onto flat side of half of cookies. Place remaining cookies, flat side down, on top of ganache. Let stand until ganache is set, 1 to 2 hours
Unfilled cookies will keep for 2 to 3 days. Once they are filled with ganache, the cookies are best served within a day
6 tablespoons (3/4 stick) unsalted butter, room temperature
6oz milk chocolate
6oz semi-sweet chocolate
¼ cup strong brewed coffee, cold
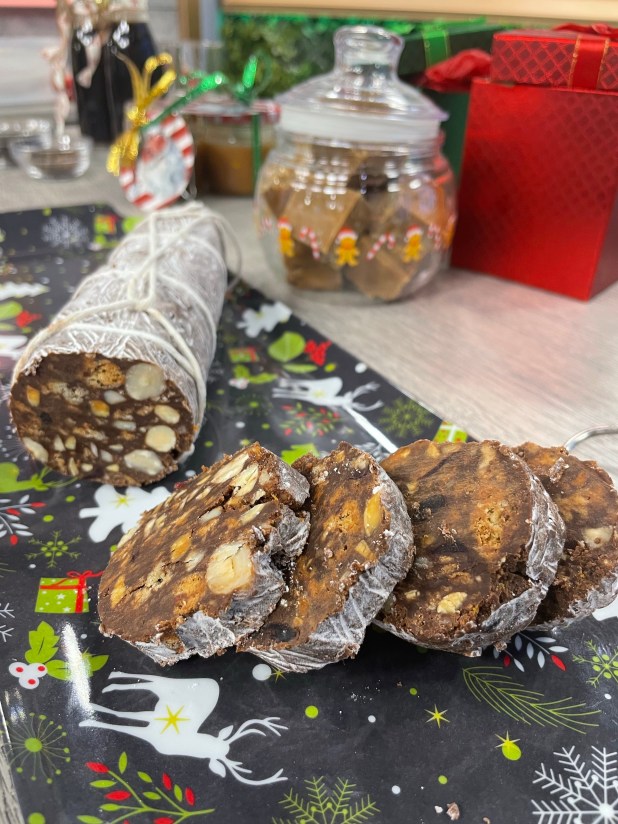
9oz crunchy amaretti biscuits, roughly crushed
½ cup dried cranberries
1 teaspoon freshly grated orange zest
¼ cup powdered sugar
*as an extra treat for the grown-ups you can add a splash of booze! At the end of step 3, add in some a tablespoon or two of liqueur to your liking. I find Amaretto, or rum particularly delicious!
Method
Preheat oven to 350F. and line a baking sheet with baking parchment
Spread the almonds and hazelnuts in a single layer on a baking sheet. Bake until the nuts are lightly toasted, 6 to 8 minutes. Set aside and allow to cool completely
Put the butter and chocolates in a heatproof medium bowl and place the bowl over a pan of barely simmering water. Stir until the chocolate has melted and the mixture is smooth. Stir in the coffee until smooth*
Add the cooled, toasted nuts, crushed amaretti biscuit pieces, cranberries, orange zest, and stir until well combined. Cover the bowl and refrigerate until firm but mouldable, about 1 ½ hours
Remove from refrigerator and divide the chocolate mixture in half. Place half of the mixture in the centre of an 18-inch-long piece of cling wrap. Using a spatula, form the mixture into a log, about 7 inches long and 2 inches in diameter. Roll up the log in the plastic and twist the ends to seal. Roll back and forth on a work surface a few times to make the log evenly round. Repeat with the remaining chocolate mixture. Refrigerate both logs until firm, preferably overnight
After chilling, remove the logs from your refrigerator and over a large piece or baking parchment liberally all over rub with the powdered sugar. Brush off an excess sugar with a pastry brush
Store the finished salami in your refrigerator and to serve let the log(s) sit at room temperature for 15 minutes. Using a sharp serrated knife, cut the logs into 1/2-inch-thick slices and serve. Perfect with a strong coffee
12 tablespoons (1½ sticks) unsalted butter, room temperature
½ cup whole milk, room temperature
2 teaspoons red food coloring gel*
1 teaspoon apple cider vinegar
“Coal” Candy
3 tablespoons unflavoured popping candy
½ tablespoon coconut oil
1 tablespoon black cocoa
*Measurement dependant on strength of color. Please note that if using liquid coloring a larger quantity may be required, which in turn may affect the consistency of what you’re coloring. Color to personal preference
Method
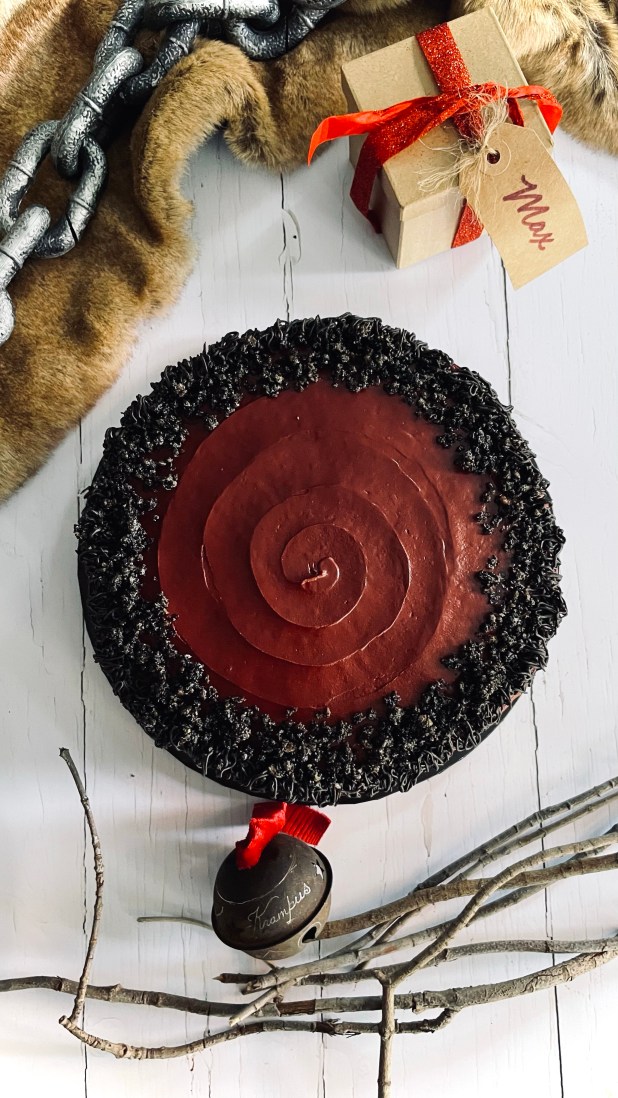
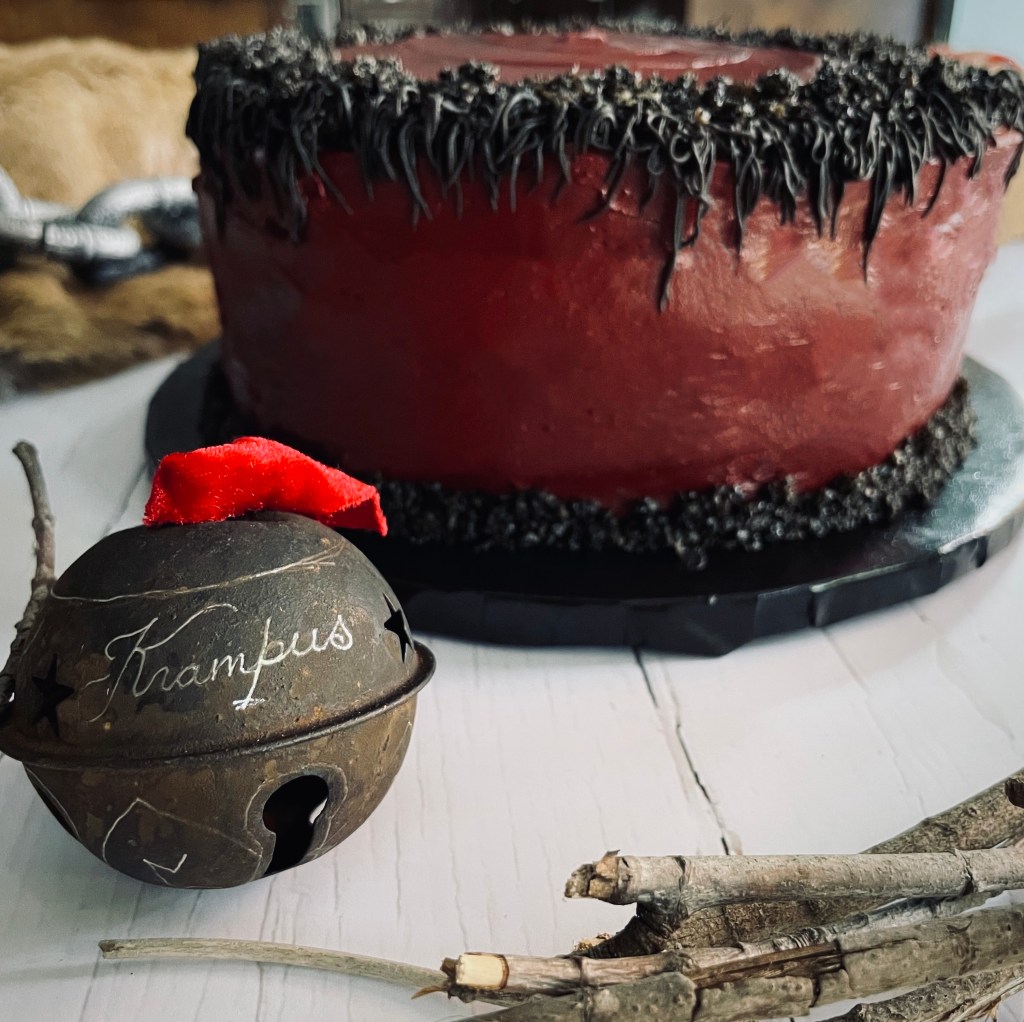
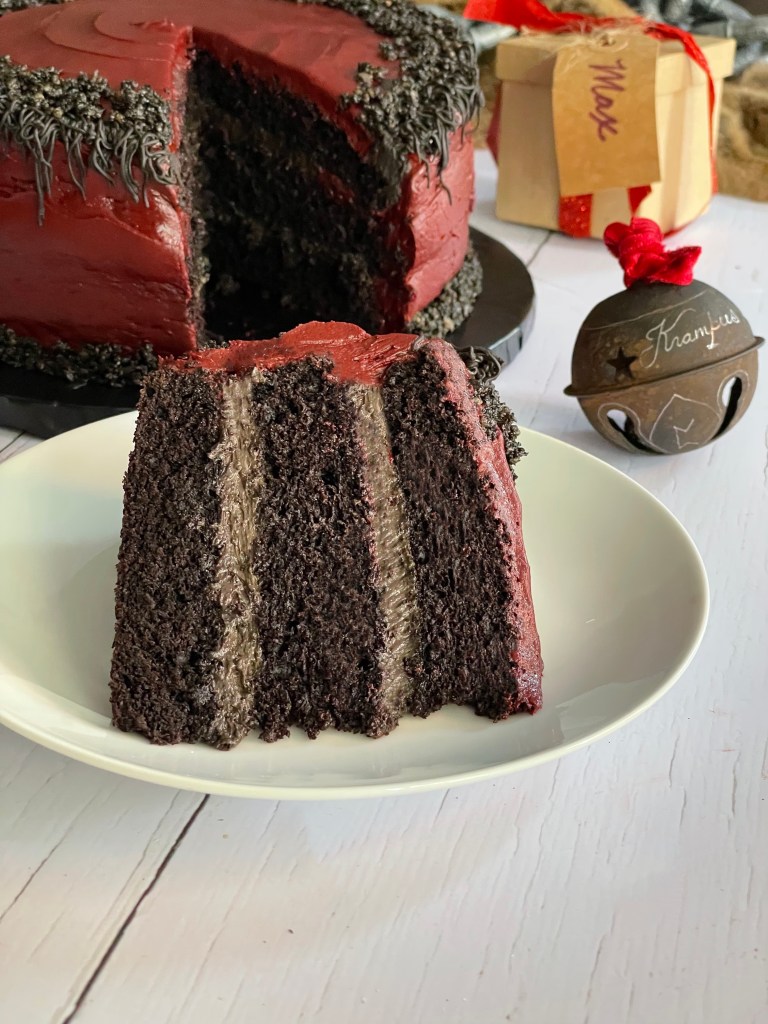
Midnight Chocolate Cake
Preheat your oven to 350F
Prepare 3 no. 8” diameter baking pans by greasing/spraying and lining with baking parchment
In a large bowl combine all the cake ingredients- the flour, sugar, cocoa powder, black cocoa, espresso powder, baking soda, salt, water, canola oil, vanilla extract, and vinegar
Whisk slowly until fully combined, making sure to scrape the bottom of the bowl to avoid any dry ingredient residue. Continue mixing until fully blended and smooth
Divide and pour into your prepared pans. If needed gently tilt the pans to allow the cake batter to flow into an even layer
Bake in your preheated oven for between 20-25minutesm or until a cake tester, or skewer, comes out clean when inserted into the centre of the cake. Remove the cake from the oven allow to cool in tin for 5 minutes in a rack
After allowing to cool for 5 minutes, remove from the pans and allow the cakes to cool fully before decorating
Ganache Filling and Decoration
For the ganache, place the chocolate pieces in a medium heatproof bowl
Heat the heavy cream/ whipping cream, in a small pan over a medium heat until just below boiling (look for small bubbles at the edge of the cream in the pan)
Remove the cream from the heat and gently pour the warmed cream over the chocolate pieces in the bowl. Leave to rest for 5 minutes
After 5 minutes, gently stir the chocolate/ cream mixture with a whisk to emulsify it. It will appear mottled and speckled at first but continue gently stirring until it thickens and is uniform in color
Once fully smooth and uniform in color, set aside and leave to fully cool for 1 hour before dividing the mixture into two separate bowls. After 30 mins, using an electric whisk, beat one of the bowls of mixture to a fluffy, whipped consistency (this will be your filling ganache). Set both aside for about another hour until the they to a spreadable consistency. (The cooling/thickening process can be speeded up by placing the bowls of mixture in your refrigerator)
Buttercream Frosting
In a bowl, sift together the powdered sugar and cocoa powder. Set aside
In the bowl of a stand mixer fitted with a paddle attachment, beat the butter beat on medium speed for 2 minutes. Scrape down the sides and bottom of the bowl
Reduce the speed to low and the add in sugar/cocoa mixture a cup at a time. Combine on low speed until all the sugar/ cocoa mixture has been added
With mixer on low speed, add in milk, red food coloring and vinegar
Increase speed medium and mix for 2 minutes until smooth. After this time, increase the speed to medium/ high and whip for a further 2 minutes
“Coal” Candy
Put the coconut oil into a heat proof bowl and heat in a microwave for 20 seconds until the coconut oil is melted
Add in the popping candy and stir to fully coat it in the melted oil
Add the black cocoa and stir until an even color and it looks like “coal dust”
To assemble and decorate
Level off the cake layer to flat
Frost each layer with a ring of frosting. Pipe or spread an even layer of the whipped chocolate ganache inside the ring of buttercream frosting. Stack the next layer on top and repeat the process.
Using the buttercream frosting apply a light crumb coating on the outside of the cake and let the cake chill in the refrigerator for 20 minutes.
Frost the cake the remaining frosting, and chilli again for a further 20 minutes
Use the remaining (unwhipped) ganache to decorate the cake. You can either apply a final top layer by smoothing the ganache on top, or as I’ve done, using a Wilton #233 tip apply a “fur trim” to the edge.
Preheat oven to 350 degrees F. Line a 13×9 inch baking pan with parchment paper
In bowl of a stand mixer, combine the melted butter, brown sugar and beat with the paddle attachment at medium speed for between 5- 6 minutes
In a separate bowl whisk together the orange zest, ground ginger, ground cinnamon, baking powder, salt, and flour until combined. Set aside until needed
To your sugar/ butter mixture add in eggs, orange extract, and vanilla extract and beat until mixed well. Add in the flour/ dried ingredients mixture, beating until just blended
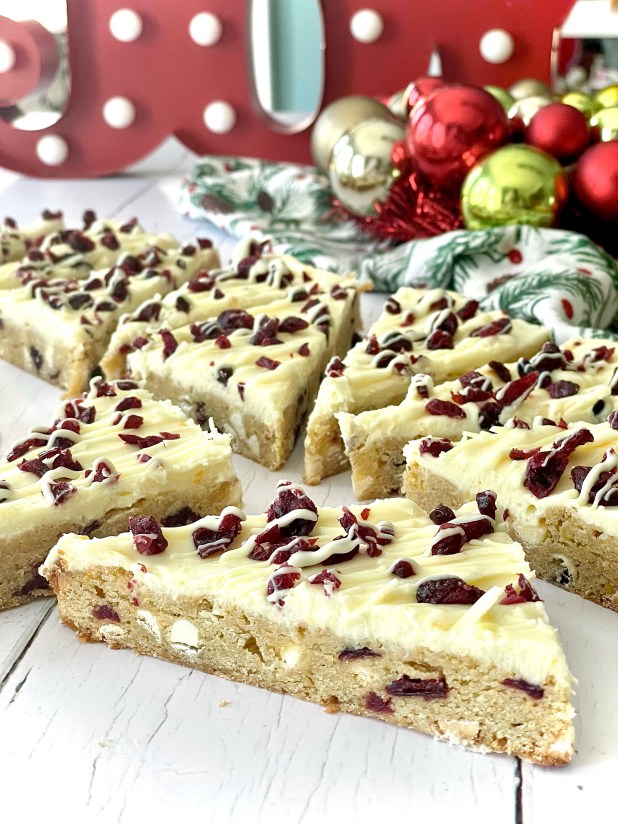
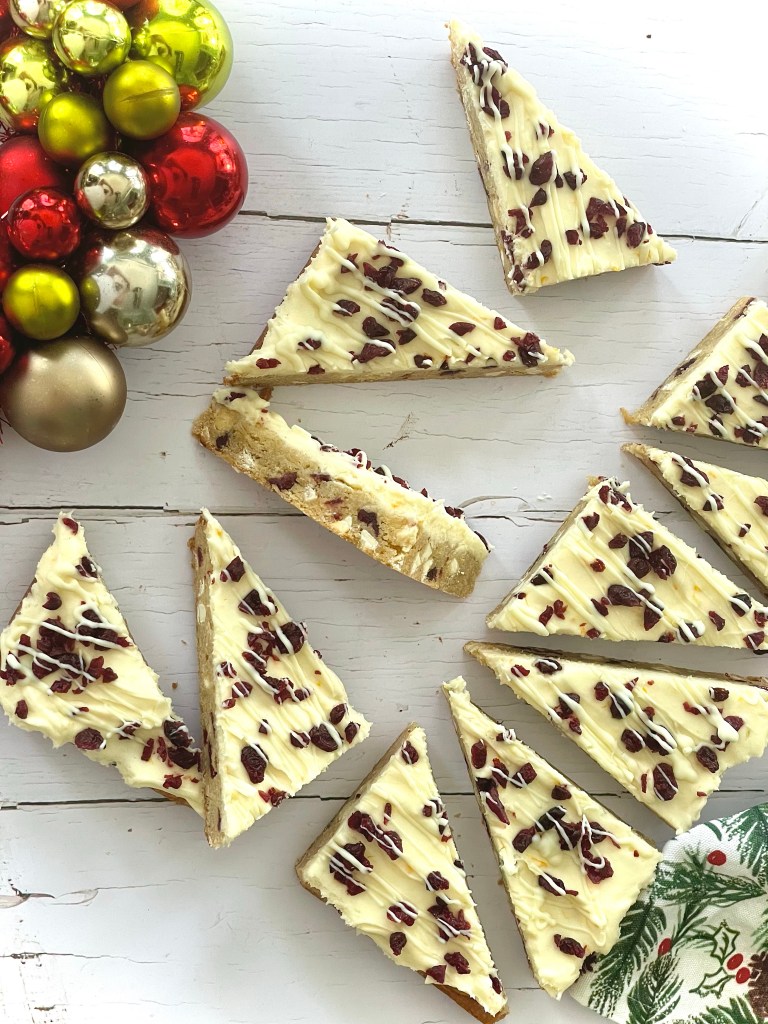
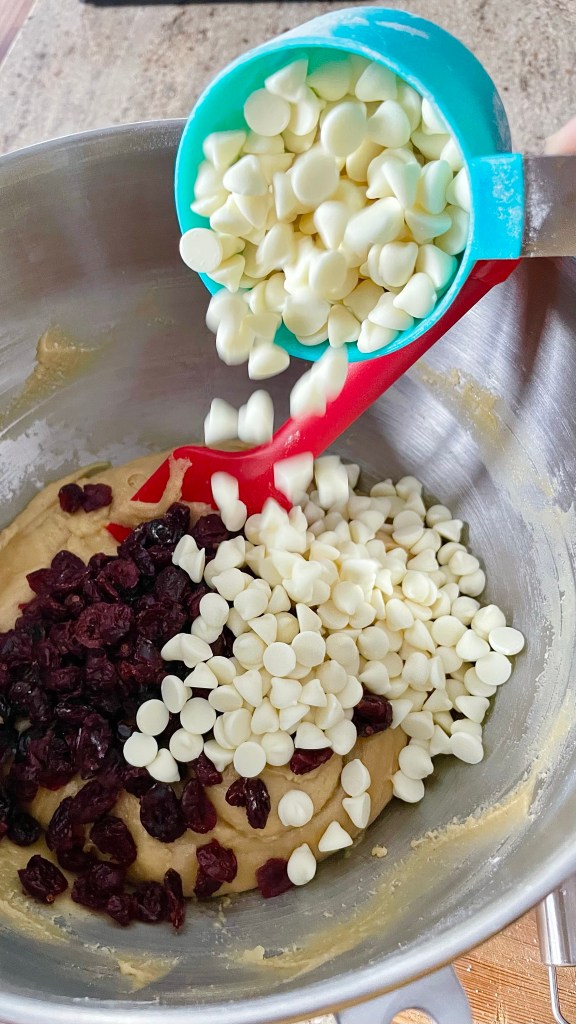
Fold in white chocolate chips and dried cranberries using a spatula. Spread evenly into the bottom of prepared pan
Bake in preheated oven for 18-20 minutes until set and golden brown at the edges. Remove from oven and place pan on a wire rack to cool. Allow bars to cool completely before topping with frosting and decorating
To make the frosting and finish
With an electric whisk, beat together the cream cheese, butter and powdered sugar until smooth and creamy.
Add orange juice, vanilla extract, orange zest beat again until well combined and smooth
Using a spatula top the cooled bars with frosting. Sprinkle over the chopped dried cranberries and drizzle white chocolate over the top with either a piping bag
Place the bars in the refrigerator for about an hour to help them set up before cutting. Cut baked sheet into half lengthwise, then into 4 so you end up with 8 pieces. Cut each piece in half diagonally so you end up with two triangles so you end up with 16 triangles in total
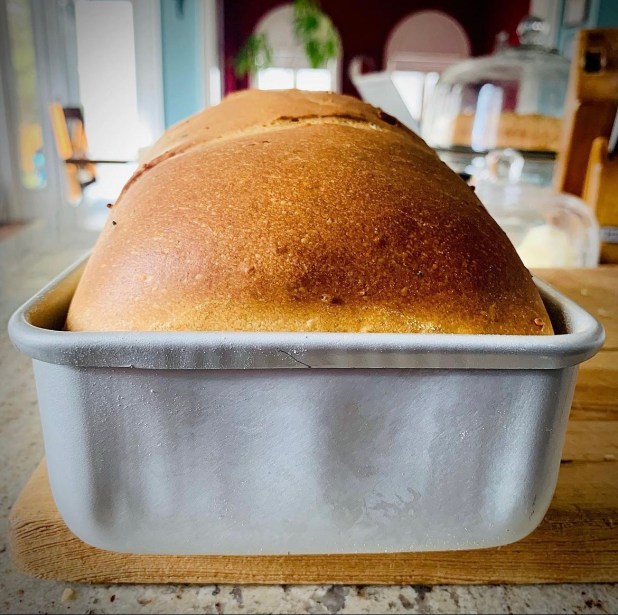
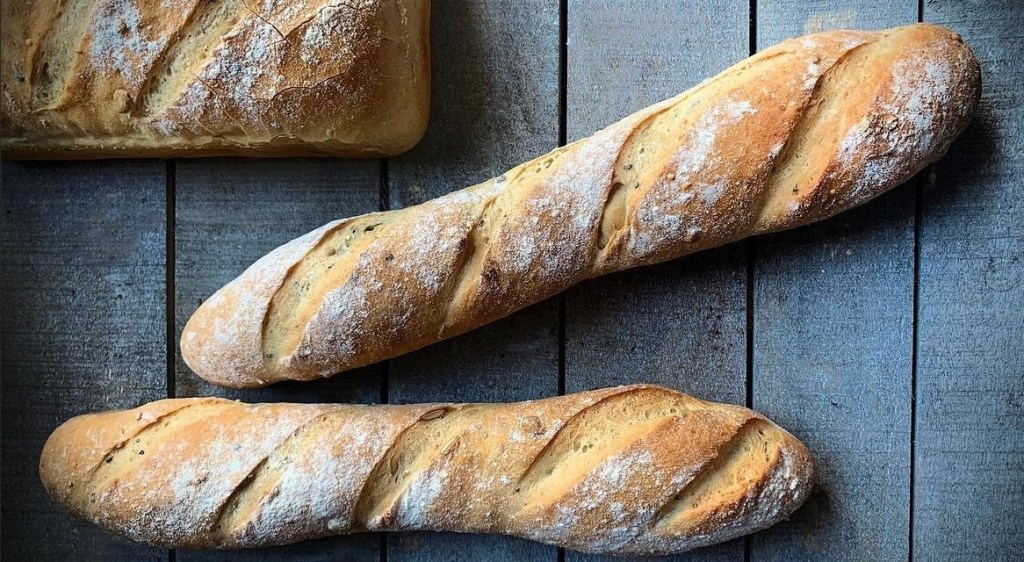
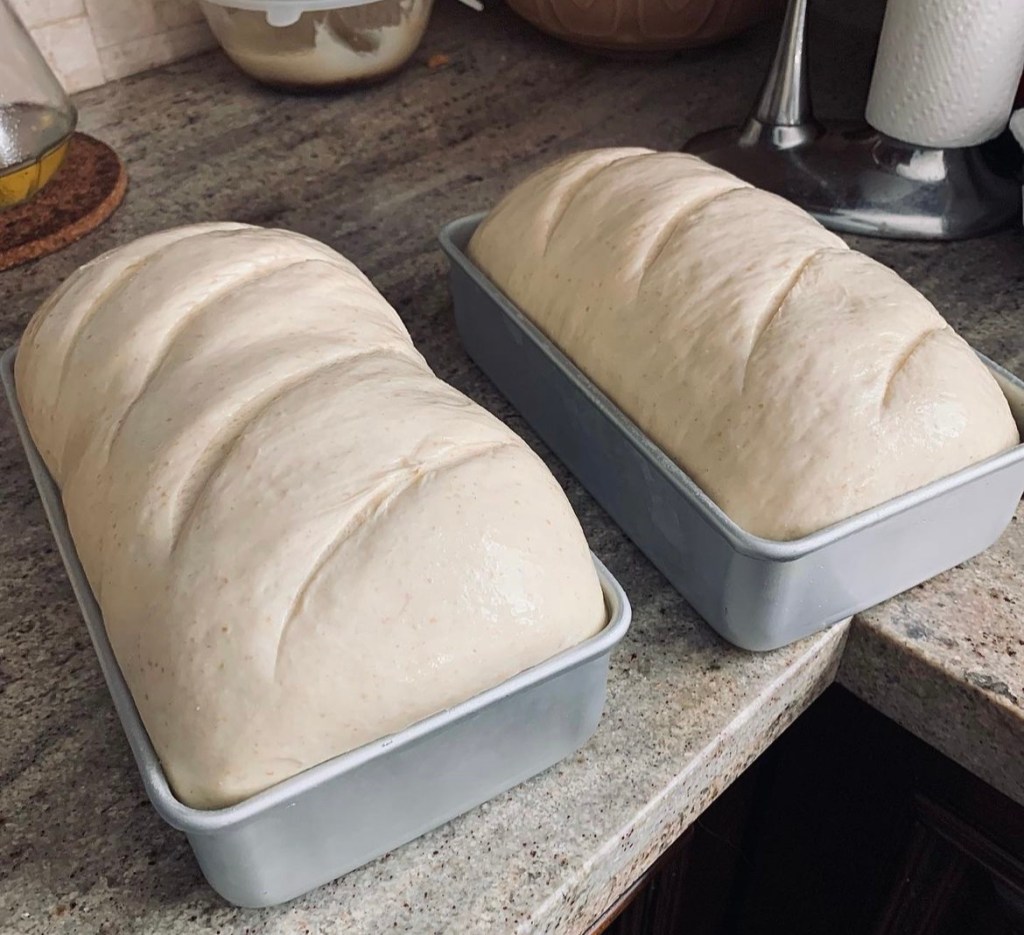
November 17th is National Homemade Bread Making day so I thought to share some tips, tricks and insights into bread making as I’ve learned over the years. Don’t get me wrong- I am by no means saying the I am the fountain of all things bread based- in the beginning I baked some loaves that were frankly crimes against humanity! But one of the lesser known ingredients in a good loaf is…perseverance. Mistakes will be made- try to see them not a signs of failure but rather as chances to learn. Making even a simple loaf of bread can be immensely rewarding, not to mention therapeutic in these hectic times. Its a skill that’s easily learned and long lasting. If you;ve never made a loaf of bread before, congratulations- you have a delicious new word to explore in front of you.
Here are my top tips when it comes to bread making (those that require more information I’ll expand on later in the post)-
Check your yeast expiry date. It may sound obvious but it a mistake often made. Yeast is a living thing and as such can die over time. Using an expired yeast in your bread making is a non-starter from which there is no return.
The water that you use should be warm, just above body temperature. If you use water that is too hot, you’ll probably kill your yeast (remember- it’s a living thing); if you use water that’s too cold you won’t activate the yeast and it’ll remain sleepy.
Try using Autolyse method. More on that later.
When adding yeast to your dough, add it to one side of the bowl. To the other side add your salt and sugar. Adding salt and sugar directly on top of the yeast can cause a reaction and have them kill your yeast.
In your dry ingredients try using a dough enhancer (dough conditioner). This is a dry ingredient which can help boost the properties of your dough mixture. Again more on that later.
Don’t let your dough proof too long. Optimum time is between 60-90 minutes. If you leave it any longer you run the risk of the dough collapsing back on itself. However if you’re proofing it in the refrigerator, you can increase this so it can be done overnight with no ill effects.
When baking your loaf, try adding a baking pan with a couple of inches of water to the bottom of your oven. This creates a steam environment which gives your finished loaf a wonderful, toothsome crust.
Try adding in a pinch of Vitamin C powder, or a splash of leom/ orange juice. This creates a more acidic environment which aids the gluten bonds giving a better structure to your loaf. You don’t need to do this is you’re already using a dough enhancer/ conditioner.
Let your baked loaf cool completely before slicing. The structure of a warm loaf hasn’t set, or fixed, yet and as such if you were to slice it you will squash and unduly tear the slices.
While bread is ideal for freezing for enjoyment at a later date, please don’t keep your bread in the fridge. This does anything BUT keep it fresh for longer. It will in fact dry it out quicker resulting in a less tasty slice at a quicker rate.
The Autolyse Method
This is simply adding your water to your flour, mixing it and letting it rest before adding any remaining ingredients. Once completely mixed, ensuring that there are no pockets of dry flour, the flour/ water mixture is set aside for between 20 to 60 minutes. During this time a number of reactions take place that benefit your bread making.
The flour gets properly soaked and hydrated which aids the development of gluten strands. This gluten strand development helps cut down the kneading time required later on
Fermentation takes place at a slower pace allowing for a more enhanced flavor and better keeping time to yout baked loaf
The carotenoids present remain intact and this helps the final desired color, flavour and aroma of the baked loaf
The dough’s elasticity is massively improved allowing better workability, a better rise and a more pleasing, open crumb to your loaf when sliced
*When using the Autolyse method you add instant yeast after the autolyse is complete, dissolve them in a small amount of warm water (1 ounce) reserved from the autolyse
About Dough Enhancer (Dough Conditioner)
This is a dry ingredient added to your dough mix, made up of a number of ingredients which boost your doughs basic properties. Think of it as a “food supplement” to your dough. Typically a dough enchancer/ conditioner will be made up of
Gluten- Additional gluten to that already present in your bread flour helps gives your dough some extra muscle. It will amke your dough more elastic and easy to work
Acidic Element- Typically Viamain C or Asorbic Acid this acts to strengthen the gluten bonds that from around the bubbles caused from the yeast reaction in the mix. It also acts to boost the effectiveness of your yeast, as well as improving the longevity of the finished loaf.
Lecithin- This helps gives your finished load a lighter, softer texture akin to a store bought loaf but within the mass production nasties. Better rising is also a side-effect of this addition. It also helps increase the keeping quality of your bread, giving you some extra time to enjoy.