Kohakutou (Japanese Amber Candy)

Makes A lot! (dependent on cutting size)

Ingredients

  • 4 teaspoons agar agar
  • 1 3/4 cups water
  • 3 cups sugar, white
  • 1/2 teaspoon candy flavouring oil
  • 1/2 teaspoon citric acid
  • Gel food coloring, to personal preference

Method

  1. Prepare an 8-x 8-inch square pan with smooth sides by spraying lightly with cooking spray
  2. In a medium pan, stir to combine the agar agar and water. Let sit for 5 minutes
  3. Bring the agar agar mixture to a boil over a medium heat, stirring constantly, until it has completely dissolved and the mixture thickens. This should take between 2 to 3 minutes
  4. Add the sugar and cook, stirring constantly, until it has completely dissolved and the mixture is thick and syrupy, about 3 minutes
  5. Remove the pan from the heat. Add the candy flavoring, citric acid and stir to combine
  6. Pour the mixture into the prepared pan. Add a few drops of food coloring to your personal preference and swirl throughout the mixture using a skewer or chopstick. Refrigerate for 1 hour
  7. After this time your agar agar mixture should be quite firm and set. If it isn’t refrigerate for another 15 minutes. Run a thin knife or offset spatula around the edges of the pan. Flip the pan over onto a parchment-lined baking sheet, or counter-top. then tap to dislodge the jelly. If the jelly is stubborn, cut it into chunks and remove those from the pan instead
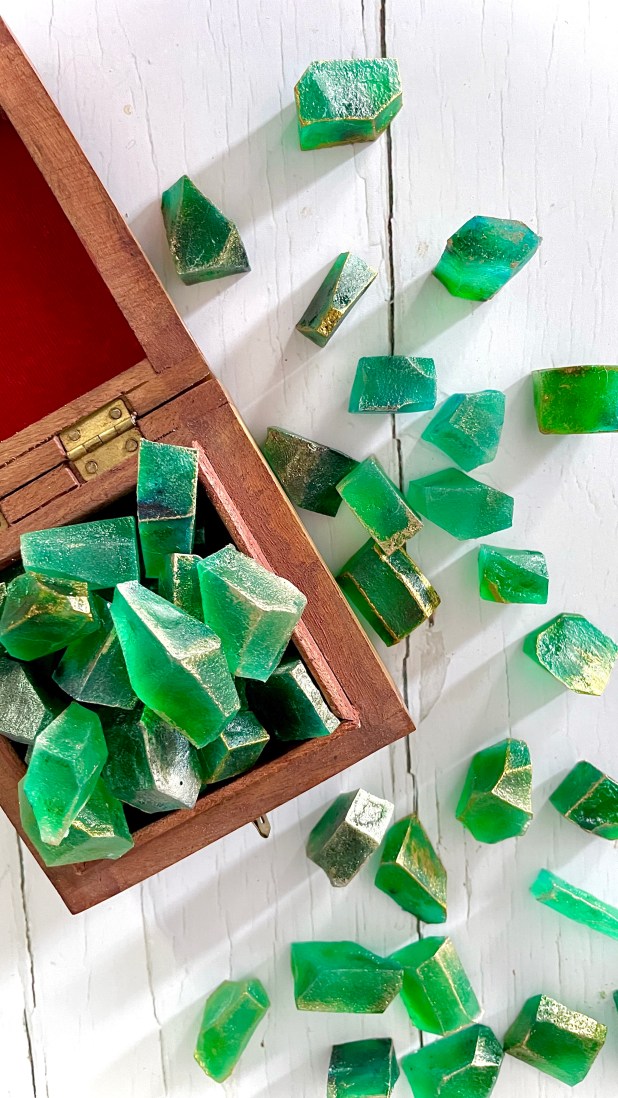
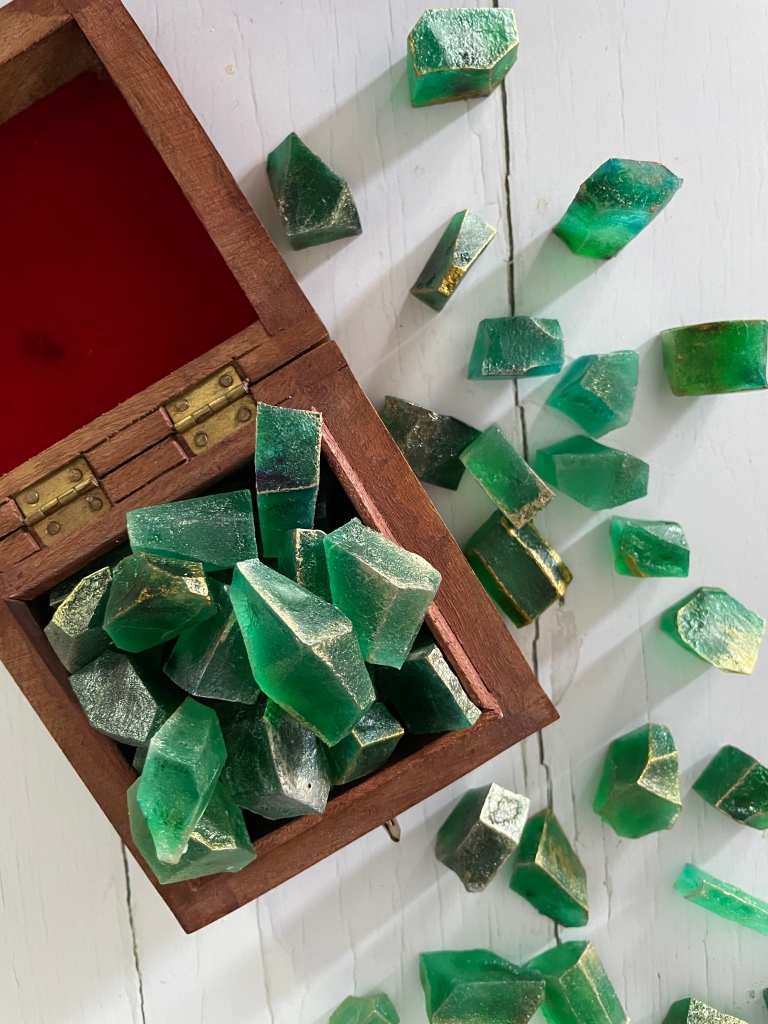
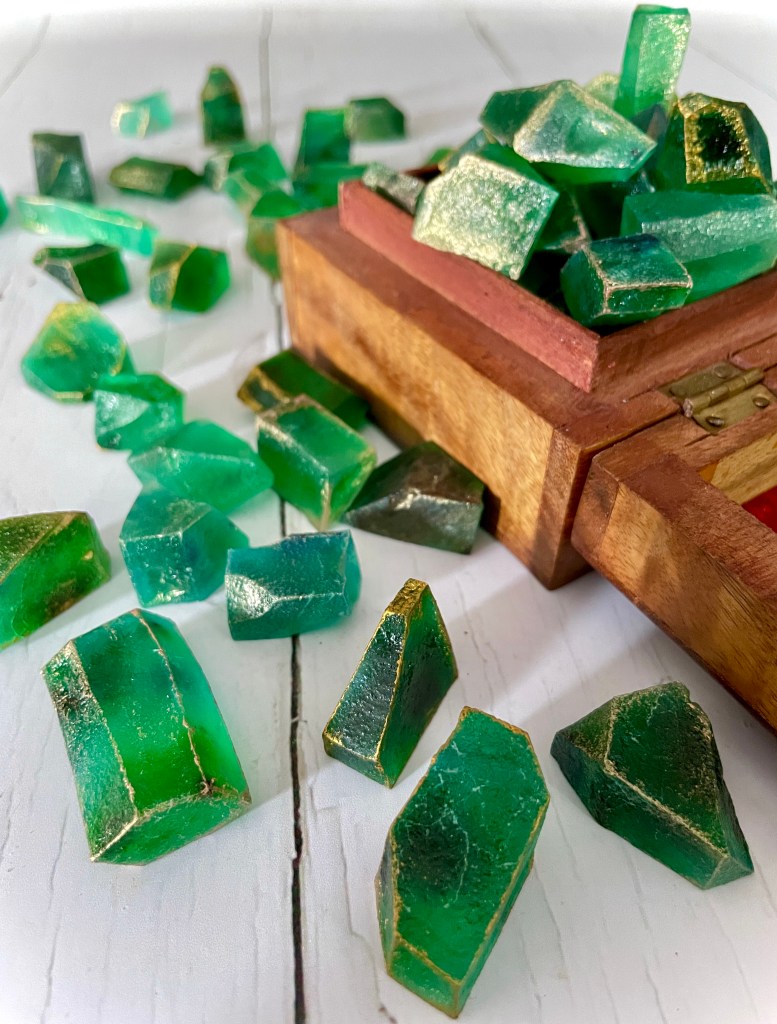
  8. Use a sharp paring knife to cut the jelly into crystal shapes, trimming as desired. The jelly will be firm but sticky. You can also tear the jelly to form jagged edges
  9. Now here comes the hard part! Set the shaped jelly shapes on to clean parchment paper and leave in a cool area, free from or with low humidity. Leave the jellies for about 7 days, rotating morning and evening to ensure even drying. Over this time you’ll notice the candy pieces will form a hard out crust.
  10. After this time you can eat the candy crystals as is, or you can decorate them with edible glitter or paint, to enhance their “geode crystal” look.
  11. The candies can be kept in an air-tight container for up to a further two weeks to enjoy them at their best

Mini Chilled Cheesecakes

Makes 24

Ingredients

Crust

  • 2 cups graham cracker crumbs (about 16 full sheet graham crackers)
  • 1/3 cup packed light or dark brown sugar
  • ½ cup unsalted butter, melted

Filling

  • 1 cup cold heavy cream or heavy whipping cream
  • 16 oz full-fat cream cheese, softened to room temperature
  • 1/3 cup granulated sugar
  • 2 Tablespoons sour cream or plain yogurt, at room temperature
  • 1 teaspoon fresh lemon juice
  • ½ teaspoon pure vanilla extract

Method

Crust

  1. Preheat your oven to 350°F
  2. Line two standard 12-count muffin pans with cupcake liners. Make sure you have room in your refrigerator for both pans
  3. If your graham crackers aren’t crumbs yet, use a food processor to pulse them into fine crumbs. Pour crumbs into a medium bowl and stir in the brown sugar and melted butter until combined. Mixture will have the consistency of wet sand. Spoon 1 and ½ Tablespoons of the crust mixture into each cupcake liner and use the back of the spoon (or shot glass) to pack it down tightly
  4. Bake the crusts in your preheated oven for 5 mins. Remove and let the warm crusts cool while you make the filling

Filling

  1. Using a hand mixer or a stand mixer fitted with a whisk attachment, whip the cold heavy cream into stiff peaks on medium-high speed, about 3 minutes. Set aside.
  2. Using a hand mixer or a stand mixer fitted with a whisk or paddle attachment, beat the cream cheese and granulated sugar together on medium speed until smooth and creamy. Scrape down the sides and up the bottom of the bowl with a rubber spatula as needed
  3. Add the sour cream, lemon juice, and vanilla extract. Beat on medium-high speed until smooth and combined, about 1 minute. Make sure there are no large lumps of cream cheese. If there are lumps, keep beating until smooth.
  4. Using a rubber spatula, fold the whipped cream into the cheesecake filling until combined. Combine slowly as you don’t want to deflate the mixture
  5. Using a spoon or piping bag to transfer the filling on top of the crusts. Use the back of a spoon to smooth the tops so they are flat
  6. Refrigerate the mini cheesecakes in the pans for at least 3 hours and up to 2 days
  7. Keep refrigerated until ready to serve. Serve topped with whipped cream; fresh fruit or fruit sauce
  8. Cover and store leftover mini cheesecakes in the refrigerator for up to 5 days

Zenzero Cookies

Makes 24

Ingredients

  • 2 1/3 cups All Purpose flour
  • 1 Tablespoon ground Allspice
  • 1 teaspoon bicarbonate of soda
  • ½ teaspoon salt
  • ¾ cup + 2 Tablespoons light golden sugar
  • ½ cup cold butter, chopped
  • 12 pieces of Fabbri Zenzero candied ginger, roughly chopped
  • 1 large egg
  • 2 Tablespoons golden corn syrup
  • 3 Tablespoons Fabbri Zenzerro candied ginger surup
  • 7oz dark chocolate, chopped

To decorate

  • Fabbri Zenzero candied ginger, thinly sliced (optional)

Method

  1. Mix the flour, ground ginger, bicarbonate of soda, salt and sugar in a bowl, then rub in the butter to make crumbs. Stir in the chopped stem ginger pieces
  2. Beat together the egg and both syrups, pour into the dry ingredients and stir, then knead with your hands to make a dough. Cut the dough in half and shape each piece into a log shape about 10cm in length. Wrap in cling film and chill for 20 mins
  3. Heat oven to 350°F and line 2 baking sheets with baking parchment. Thickly slice each log into 12 and put the slices on the baking sheets, spacing them well apart and reshaping any, if necessary, to make rounds. Bake for 14 mins, then leave to cool for a few mins to harden before transferring to a wire rack to cool completely
  4. Once the cookies have fully cooled melt the chocolate in a bowl over a pan of gently simmering water, making sure that the water isn’t touching the bottom of the bowl. Dip one side of each cookie into the chocolate (it may help to wear gloves here!). Allow to set for a few minutes the decorate with a slice of ginger, if you like, and leave to set fully.
  5. *Will keep for 1 week in an airtight container

Pistachio & Raisin Bran Muffins

Makes 12

Ingredients

  • 1 cup wheat bran
  • 1 ½ cups whole wheat flour
  • ½ cup raisins, soaked in orange juice
  • ½ cup pistachios, chopped
  • 1 teaspoon baking powder
  • 1 teaspoon baking soda
  • 1 cup milk, room temperature
  • ¾ cup Monkfruit sweetener
  • 2 Tablespoons Canola oil
  • 1 egg, beaten

Method

  1. Preheat your oven to 400°F
  2. Grease, or line, a muffing tin(s)
  3. Whisk together the bran, flour, baking soda and baking powder
  4. Drain then stir in the raisins and pistachios, mix to combine then set aside
  5. Blend milk, Monkfruit sweetner, oil and egg. Add to dry ingredients and stir just combined
  6. Using large cookie scoop, transfer to your prepared muffin tin(s)and bake in preheated oven for 15 minutes or until muffins pull away from sides of cups
  7. Remove from oven, leave to cool and enjoy

Self-saucing Chocolate Pudding

Ingredients

Topping

  • 1 cup brown sugar , loosely packed
  • ¼ cup cocoa powder
  • 1 ¼ cups boiling water

Pudding

  • 1 cup All Purpose flour
  • 2 ½ teaspoons baking powder
  • 1/3 cup fine (caster) sugar
  • ¼ cup cocoa powder
  • Pinch of salt
  • ½ cup milk, room temperature
  • 4 Tablespoons butte , melted
  • 1 egg
  • 1 teaspoon vanilla extract

Method

  1. Preheat oven to 335°F
  2. Grease 8x 8x 2.5” baking dish
  3. Whisk brown sugar and cocoa in a bowl to make the topping mix. Set aside
  4. Whisk flour, baking powder, fine sugar, cocoa powder and salt in a bowl
  5. In a separate bowl, whisk together the butter and milk, then whisk in the egg and vanilla. Don’t worry if some lumps form from the butter- carry on whisking together
  6. Pour the egg mixture into the flour mixture. Mix until combined – it will be a thick batter
  7. Spread into baking dish. Sprinkle with topping mixture. Shake gently to spread out thinly
  8. Carefully pour the hot water all over the top of the pudding, trying to avoid any pooling
  9. Transfer to oven and bake for 30 minutes, or until the top of the cake springs back when poked lightly. The top will be a bit crusty, like the top of brownies
  10. Remove from oven, stand for just a few minute, then serve immediately