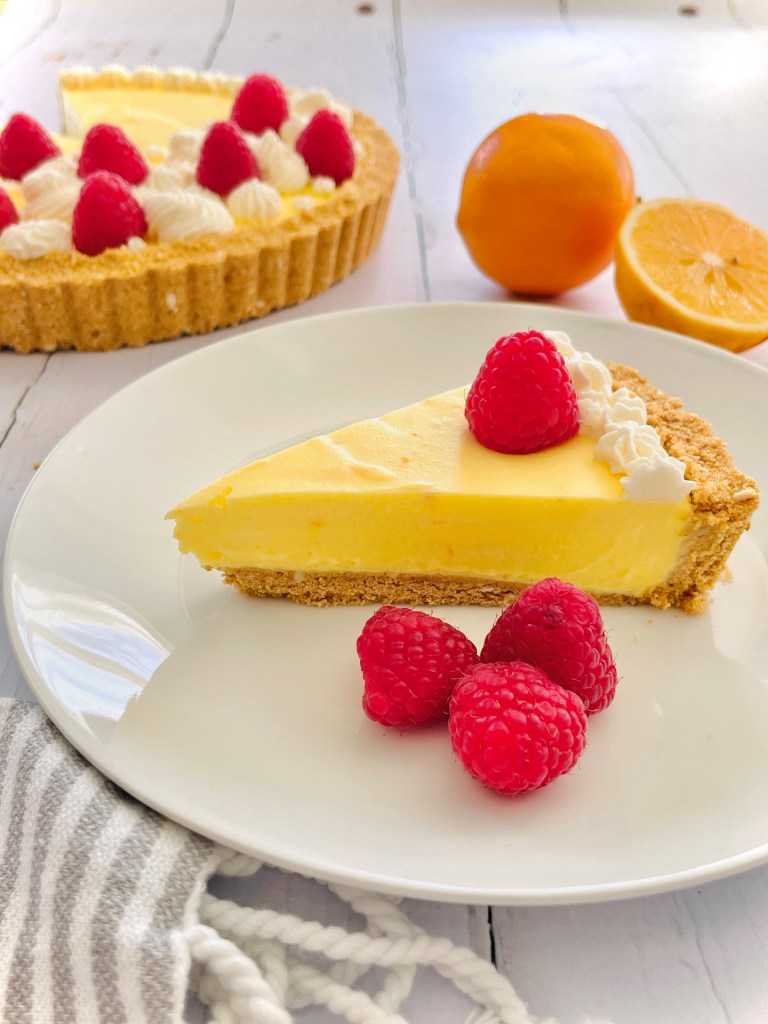
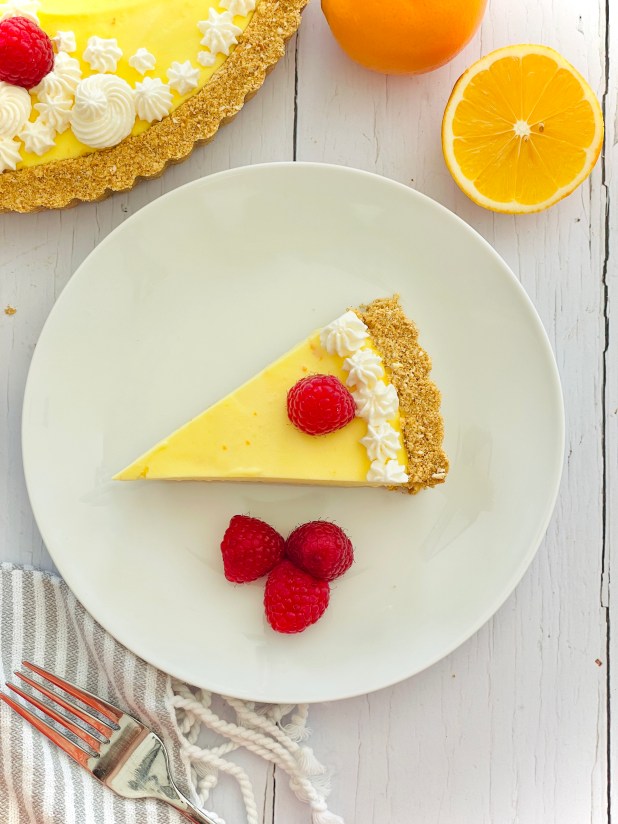
Spring Grasshopper Pie

Makes 1x 9″ pie

Ingredients

Crust

  • 2 cups graham cracker crumbs
  • 1/2 cup mini-pretzels
  • 2 oz white chocolate
  • 6 Tbsp soft unsalted butter

Filling

  • 3 cups mini marshmallows
  • 1/2 cup whole milk
  • 1/4 cup St. Germain elderflower liqeur
  • 1/4 cup Meyer lemon juice
  • zest 1 Meyer lemon
  • 1 1/2 cups heavy cream
  • Yellow food coloring, optional

To finish/ decorate

  • 1 tsp powdered gelatin
  • 2 Tbsp water
  • 1cup whipping cream
  • 1/4 cup powdered sugar
  • 2 tsp vanilla extract
  • Fresh raspberries

Method

  1. Process the crumbs, mini-pretzels, chocolate in a food processor until they form a crumb mixture. Add the butter and process until the mixture starts to clump together
  2. Press the mixture into a high-sided fluted tart pan, making a smooth base and sides with your hands or the back of a spoon. Put it into the refrigerator to chill and harden
  3. Melt the marshmallows in a saucepan over low gentle heat along with the milk. Once the milk starts to foam (not boil), take off the heat and keep stirring until the marshmallows blend into the milk to make a smooth mixture
  4. Transfer the mixture into a heatproof bowl, then whisk in the elderflower liqeur, lemon juice and zest. Leave to cool to room temperature
  5. In a separate medium bowl, whisk the cream until it starts to hold soft peaks then, still whisking on slow, add the cooled marshmallow mixture. This filling will be soft and thick, so that it will eventually drop easily out of the bowl into the chilled pie crust
  6. When the marshmallow mixture and cream are combined, whisk in a few drops of food coloring, if using
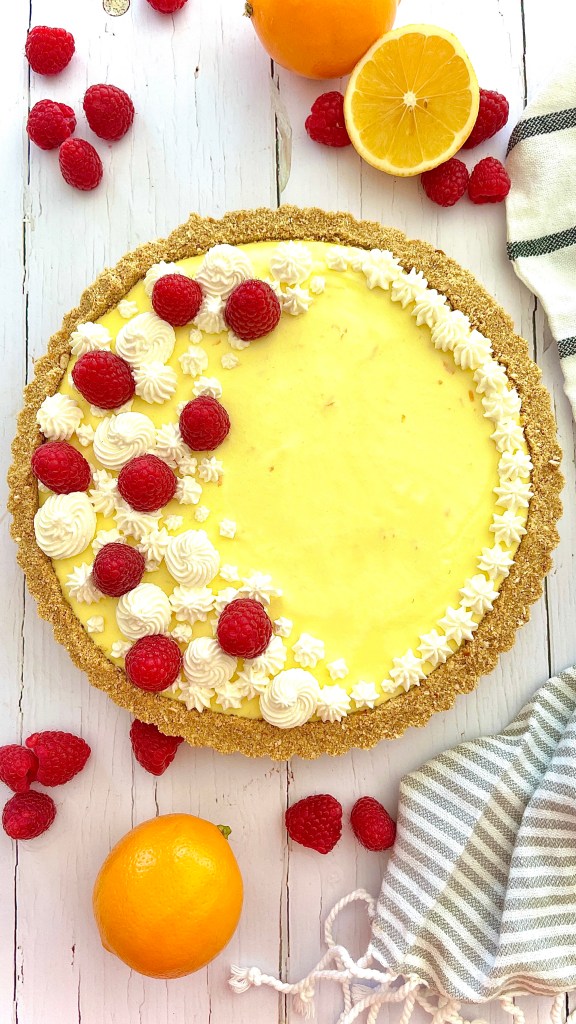
  7. Spread the filling into the chilled base, swirling it about with a spatula to fill evenly. Put the pie in the refrigerator, uncovered, to chill overnight or for a minimum of 4 hours until firm
  8. In a small bowl combine the powdered gelatin and water. Leave to rest until absorbed. Heat in microwave for 10-15 seconds, until the gelatin is disolved. Set aside to cool while you prepare the whipped cream
  9. In a separate medium bowl combine the whipping cream, powdered sugar and vanilla extract. Whip to soft peaks
  10. With you whisk running on low, gently add in the gelatin solution and continue whisking. Once all the gelatin has been added, increase speed and whip to firm peak stage.
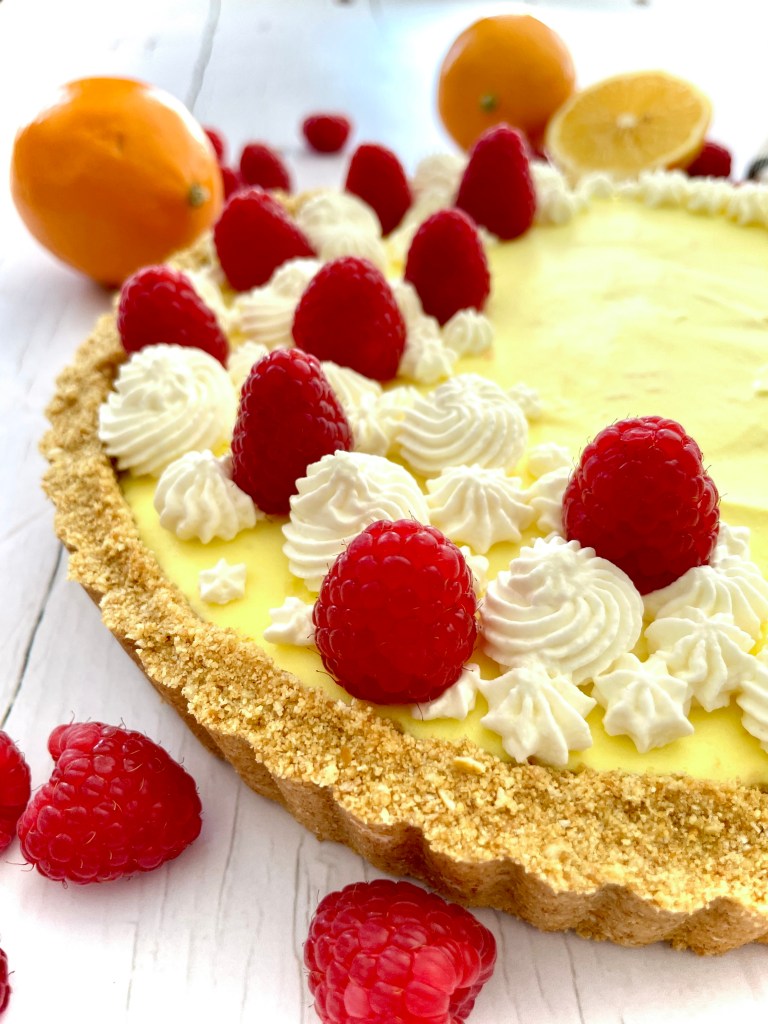
  11. Pipe/ decorate the top of the set pie to your preference and finish with fresh raspberries

Saskatoon Berry Pie

Makes 1x 9inch double crust pie

Ingredients

Pie Crust

  • 2 ½ cup all-purpose flour
  • 4 teaspoon granulated sugar
  • 1 teaspoon salt
  • 1 cup cold unsalted butter, diced
  • 1/2 cup ice water

Filling

  • 4 cups fresh, or frozen, Saskatoon berries (if using frozen berries, thaw and drain)
  • ½ cup granulated sugar
  • 3 ½ tablespoon corn-starch
  • 1 teaspoon almond extract
  • ½ teaspoon ground nutmeg
  • 1 tsp. fresh lemon juice
  • 2 tablespoons chilled butter, cut in small pieces

Filling

  1. Add all sauce ingredients to a medium bowl and stir well to ensure the berries are well coated. Set aside until needed. See note * in step 6 below

Pie Crust

  1. Combine the flour, sugar and salt in a large mixing bowl or a food processor.  Whisk or pulse briefly until combined
  2. Sprinkle the diced butter evenly over the dry ingredient mixture until the butter is evenly dispersed into pea-sized (or smaller) bits.  If using a food processor, briefly pulse the butter and dry ingredients together 5 to 7 times until the butter is evenly dispersed into pea-sized (or smaller) bits, then transfer the mixture to a large mixing bowl
  3. Sprinkle the dough evenly with the ice water. Use a spatula to quickly mix the water into the dough until it is evenly combined, and the dough begins to form moist clumps.  (If the dough is not sticking together, you can add 1 or 2 more tablespoons of water to help it clump.)
  4. Using your hands, quickly pack the dough into a ball. Divide into 2, then flatten the dough balls into 3/4-inchthick disks
  5. Wrap the dough disks tightly in plastic wrap, then refrigerate for at least 1 hour, or up to 3 days, until ready to roll out and use
  6. When ready to bake the pie, preheat your oven to 425 F, remove one disk from the refrigerator and let rest for 10-15 minutes. (*I usually prepare the filling at this point)
  7. Roll on a lightly floured counter until least 12 inches in diameter and about 1/8 inch thick
  8. Gently fold the rolled-out dough into quarters and carefully transfer dough to the pie dish, and gently press the dough into the sides of the plate without stretching it
  9. Using a knife to trim off any excess pastry, leaving about a 1-inch border of crust around the top of the pie plate. Carefully lift and fold the outer 1/2-inch edges of the crust back under itself, pinching the crust gently to sculpt an upstanding ridge
  10. Chill this pie crust in the refrigerator while you make the lid using the second disk of dough
  11. When ready, fill your pastry lined pie dish with the filling and dab the chilled butter pieces on top
  12. Cover with the second (top) pastry disk and pinch the edges together to seal. Use a small knife of scissors to make slits/ vents in the top crust
  13. Transfer your pie to the preheated oven and bake for 15 minutes, then reduce temperature to 350 F and bake for a further 45-50 minutes, until the filling is bubbling through the slits and the top is golden brown. (If the edges start to brown too quickly, cover with foil)
  14. Once baked remove the pie from the oven and leave to cool on a wire rack before serving

#Recipe Peanut Butter Cream Pie

If you’ve read my previous post on Toronto you may remember me mentioning a favourite restaurant there – The Gabardine. (If you haven’t you can read it here). One of the desserts I had the pleasure of trying was a Peanut Butter Cream Pie. I had never had it before and had no idea what it was but it sure sounded good. And boy, I was not disappointed! I can only describe it as a lighter version of a cheesecake with moreish peanut buttery goodness abound. Ever since then I haven’t been able to get it out of my mind and so set about trying to receate it. Not to detract from chef Graham Pratt’s original of course- the best form of flattery is, afterall, imitation.

For me this is one of those dishes that is truly evocative of a time in my life. One bite and I’m instantly back in the bright buttermilk interior of The Gabrdine, smelling herby puff pastry and smoked ham, cheeks gently puckering from a chilled Sauvignon, all the while watching the Torontonian business clique milling back to their desks. Typing this oddly stirs subtle pangs almost of homesickness. I hope to get back there some day- and hopfully try another slice of pie!

So with it being Peanut Butter Lovers Day today (seriously who decides these things?) it’s the perfect time for posting the recipe for my version of it.

Peanutbutter Cream Pie- Recipe Image

For the Pie

250g Digestive biscuits
5 tablespoons Melted butter
50g Demerara sugar
75g Salted peanuts
160g Icing suga
280g Cream cheese
230g Smooth peanut butter
230ml Double cream, lighlty whipped

To finish

150ml Double cream, whipped

You’ll also need a 9″ x 1″ or 1.5″ deep circular pie dish

  • In a food processor blend the digestive biscuits, Demerara sugar and salted peanuts.
  • Whilst blitzing drizzle in the melted butter. Blitz to rough breadcrumbs stage.
  • Pour into a pie dish and press into the base and sides using a metal spoon.
  • Place the crumb lined pie dish into the refrigerator to set at least 3 hours, preferably overnight.
  • In a stand mixer blend the icing sugar and cream cream until smooth.
  • Add in the smooth peanut butter and mix again to combine.
  • Gently fold in the whipped cream. Don’t stir too much as this will whip the cream even more and make the filling “heavy”.
  • When the whipped cream is fully folded in, pour/ spoon the filling into the set crumb base, and smooth the top.Refrigerate for 2-3 hours.
  • When ready to serve remove from the fridge and top with the remaining whipped cream.
  • Slice, and serve (with additional whipped cream if you really want to treat yoursefl!)