2oz semi-sweet chocolate (I use bars with 1/4 oz square so I can put 2 in each dish)
Sauce
1 cup maple syrup
1 cup packed light brown sugar
½ cup water
¼ cup unsalted butter
1 tsp vanilla extract
Method
Cake
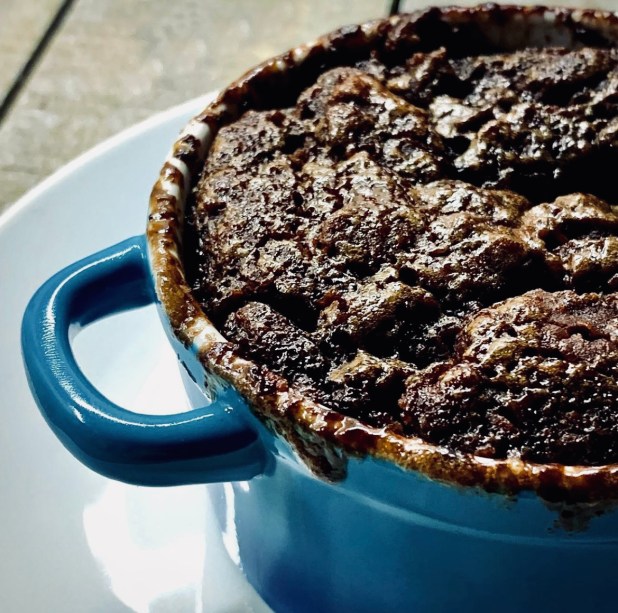
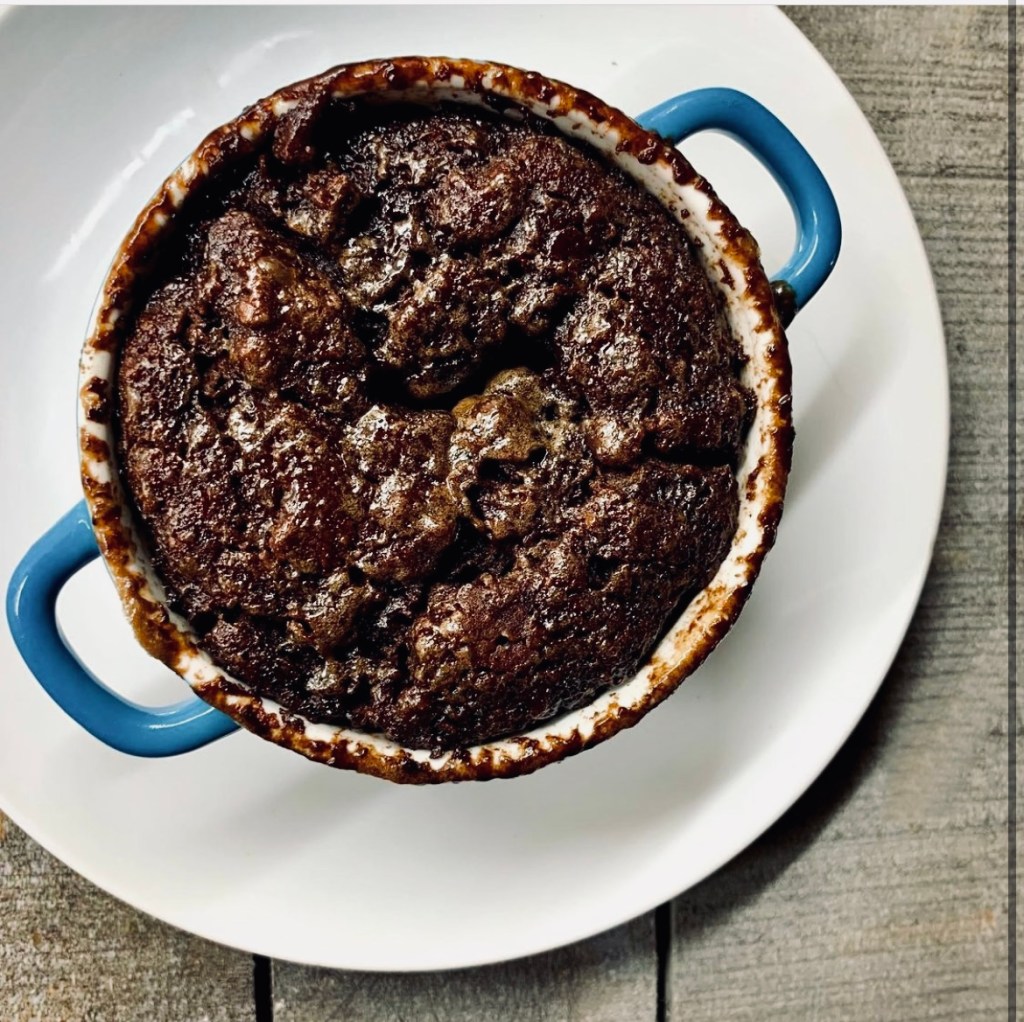
Preheat the oven to 350ºF (180ºC). Lightly grease 4 individual (0.25L) mini-cocottes, ramekins or other ovenproof dishes and place them onto a baking tray
Sift the flour, cocoa powder, sugar, baking powder and salt into a large mixing bowl. Add the butter and use a pastry cutter or your fingertips to work the butter into the flour until a rough, crumbly mixture – similar to thick breadcrumbs or damp sand is achieved
Add the milk, chocolate milk and stir just until the mixture comes together
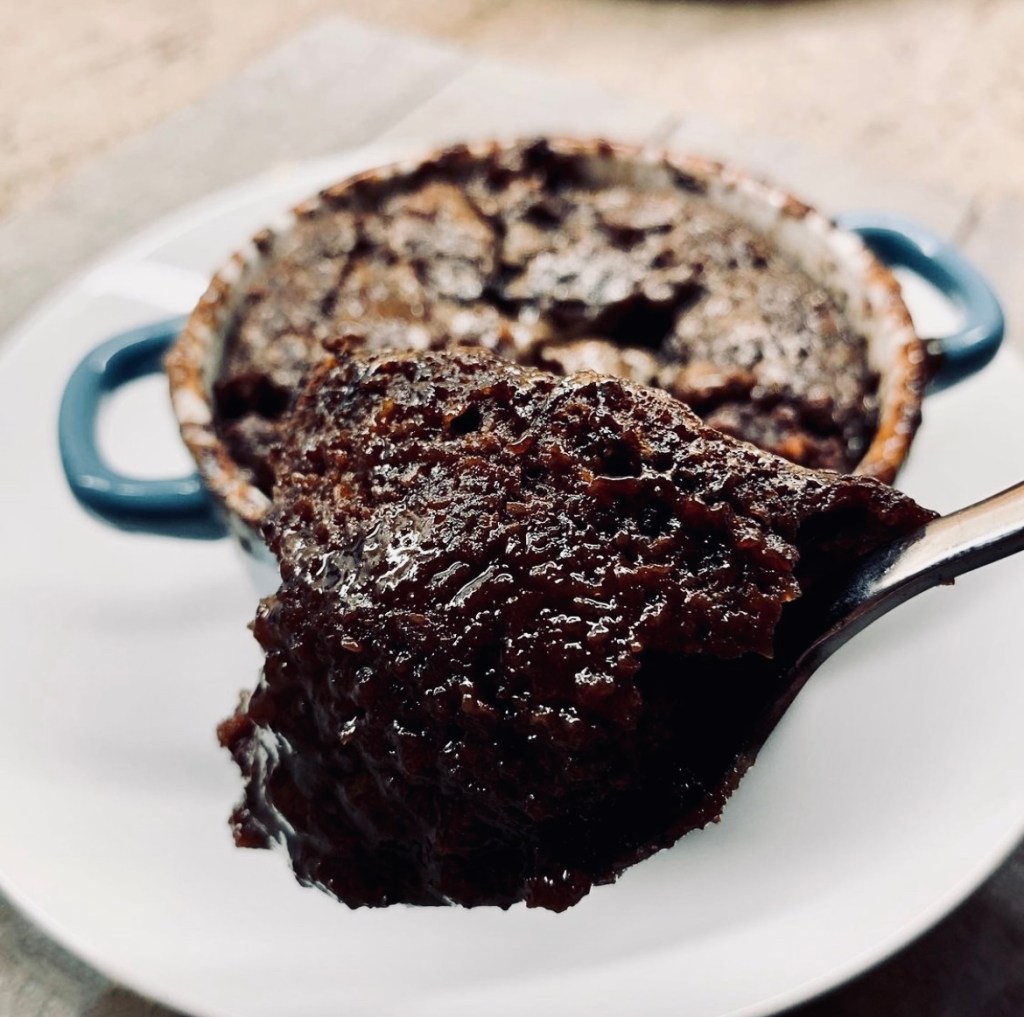
Spoon this into the prepared smaller baking dishes. Push 2 x 1/4 oz square of chocolate into the middle of each pudding. Set aside while you prepare the sauce
Sauce
Combine the maple syrup, brown sugar, water, butter and vanilla in a pan and bring to a boil over high heat, stirring occasionally.
Once it reaches a rolling boil, remove it from the heat and ladle this over the cake in the ramekins.
Bake the puddings for about 30 minutes, until a tester inserted into the centre of a pudding comes out clean.
Remove from the oven and let the puddings cool for about 15 minutes before serving (be careful syrup is hot!)
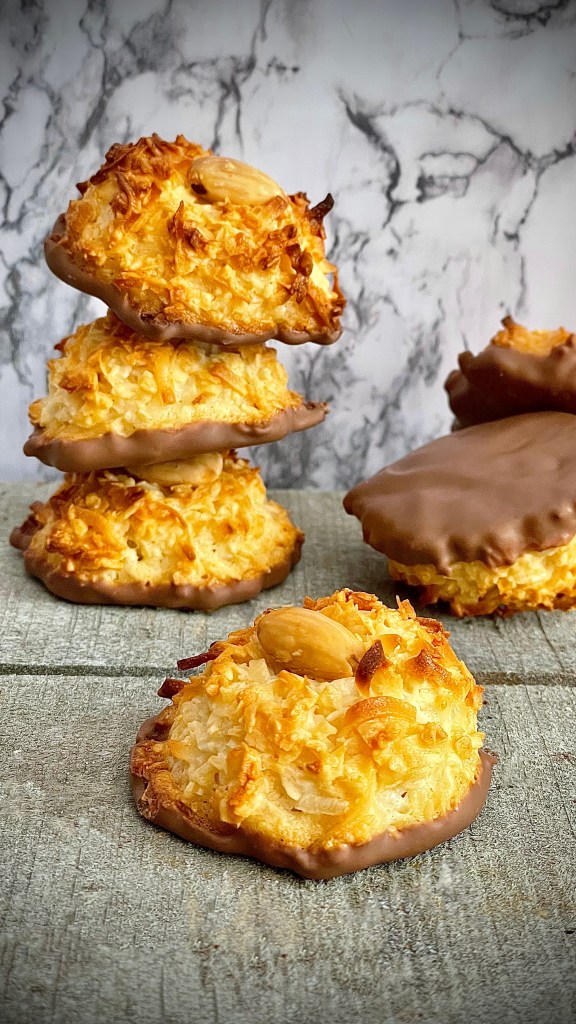
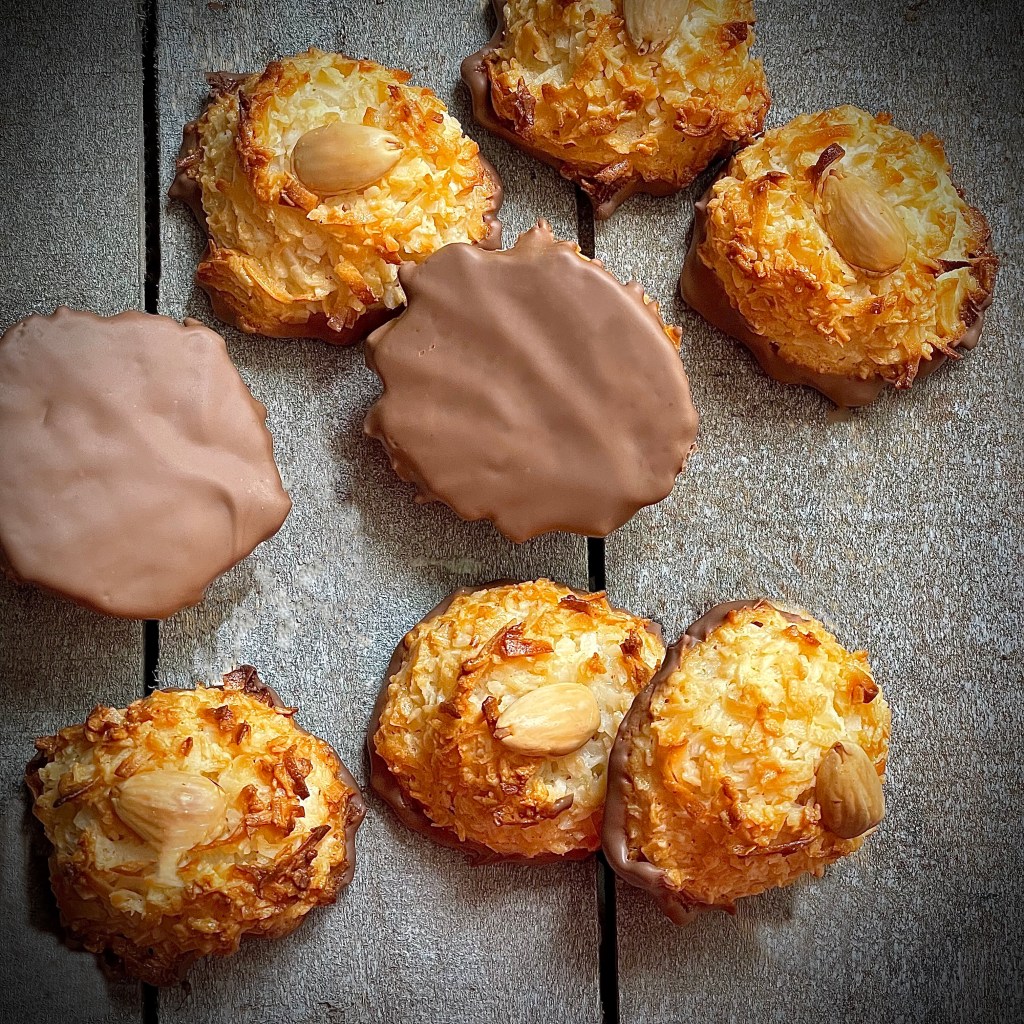
It’s National Macaroon Day! So let’s celebrate these li’l nuggets of sweet coconutty goodness in all their chewy, toasty glory! These are fantastic treats which can have a universal appeal since they are in effect gluten-free. Any leavening required is done via the addition of whipped egg whites.
Speaking of additions in this recipe I’ve included a gentle tipple of almond liqueur in a reference to the cookies almond based begins. I also find that the combination of coconut and almond works really well. Think of these as a pimped up version of the fondly loved Almond Joy or Bounty bars for the grown-ups!
Don’t get me wrong – these also taste great without the addition of the alcohol. The added benefit being you can get the kids involved in the making of and then reward them for their efforts. It’s smiles all round!
Combine the coconut, condensed milk, vanilla and almond liqueur a large bowl. Mix well
Whip the egg whites and cream of tartar on high speed in the bowl of an electric mixer fitted with the whisk attachment until they make medium-firm peaks
Carefully fold the egg whites into the coconut mixture
Drop the batter onto sheet pans lined with parchment paper using either a 1 3/4-inch cookie scoop, or 2 teaspoons
Press an almond into the top of each macaroon mound
Bake for 25, until golden brown. Remove from the oven and leave to cool on tray for 5 minutes before peeling to remove. Place on a rack and leave to cool fully
When fully cooled dip the base of each macaroon into the melted chocolate. Leave to set, upside down (chocolate side up) on a cooling rack
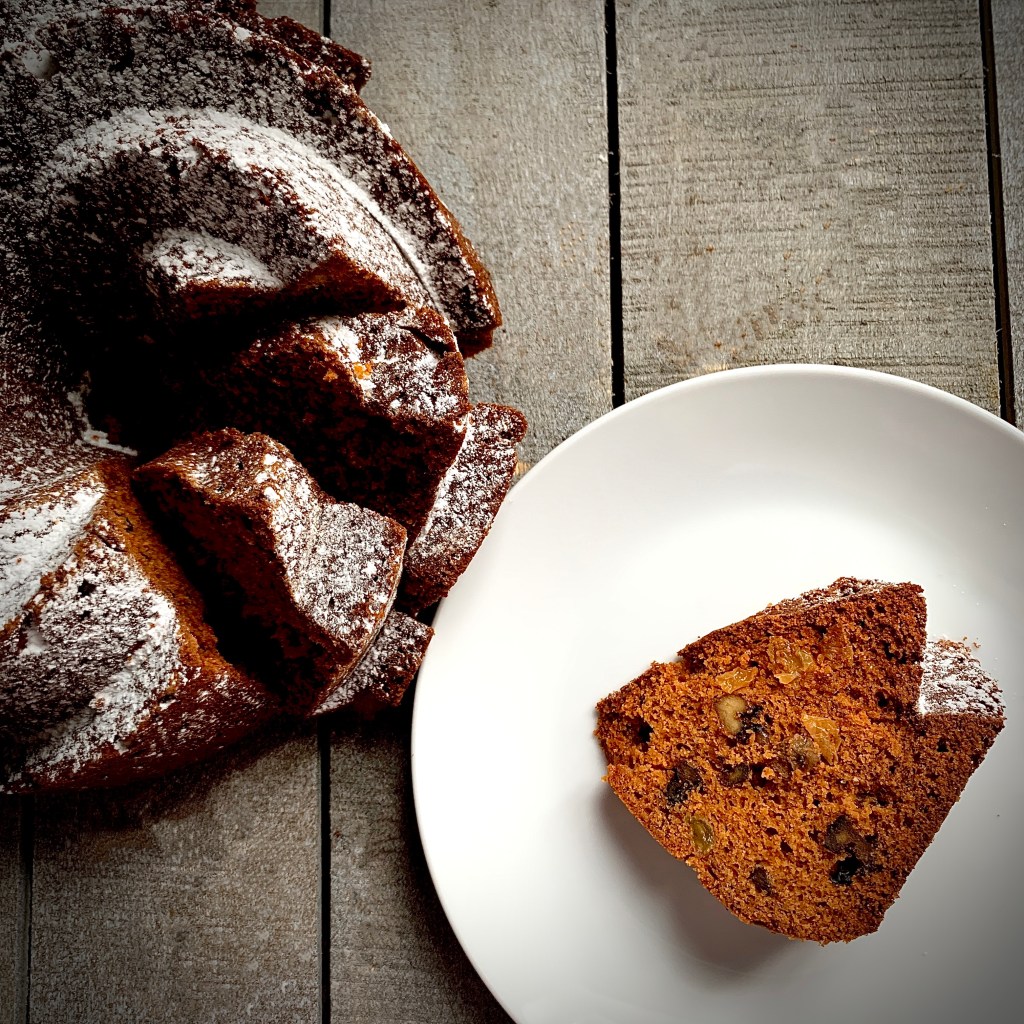
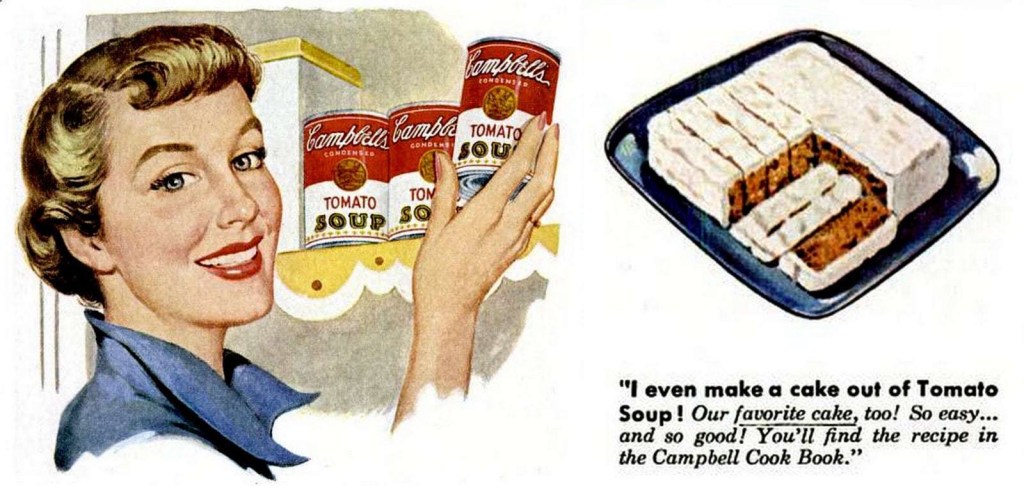
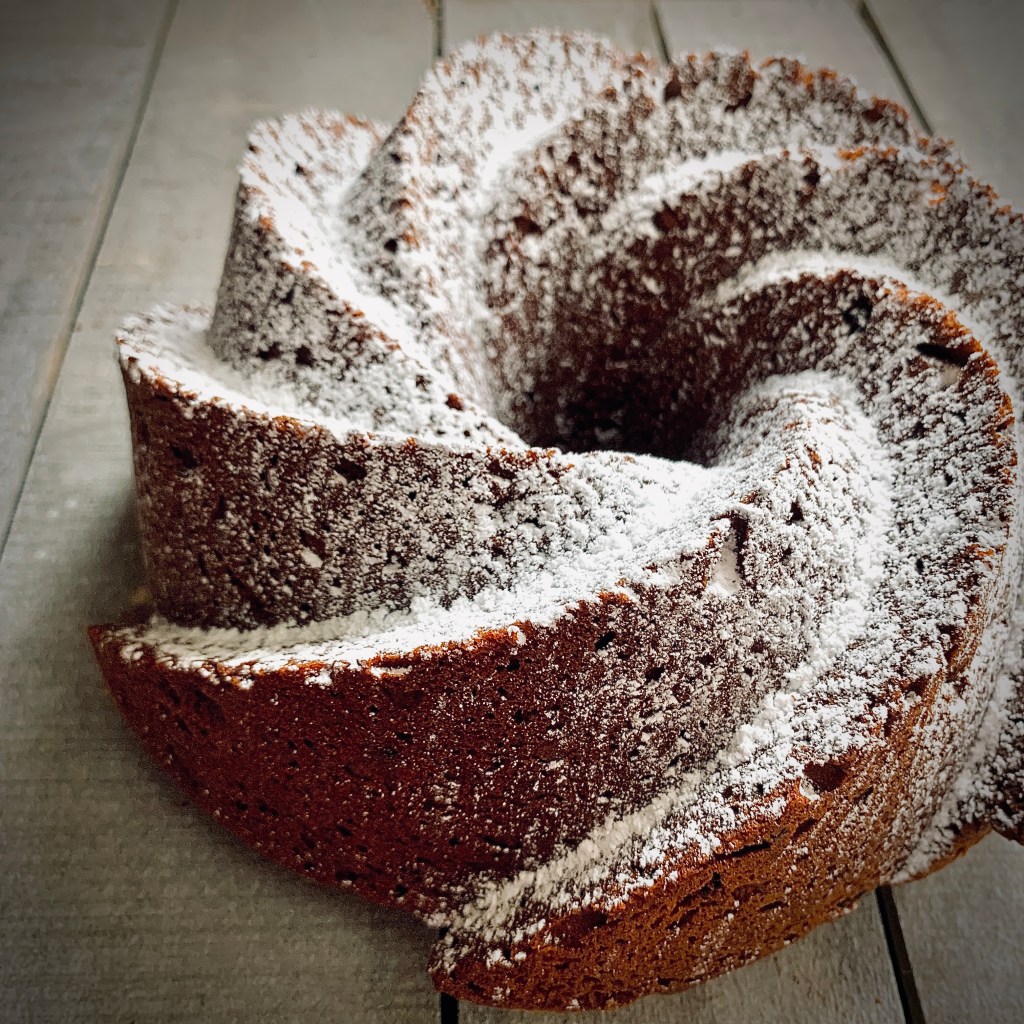
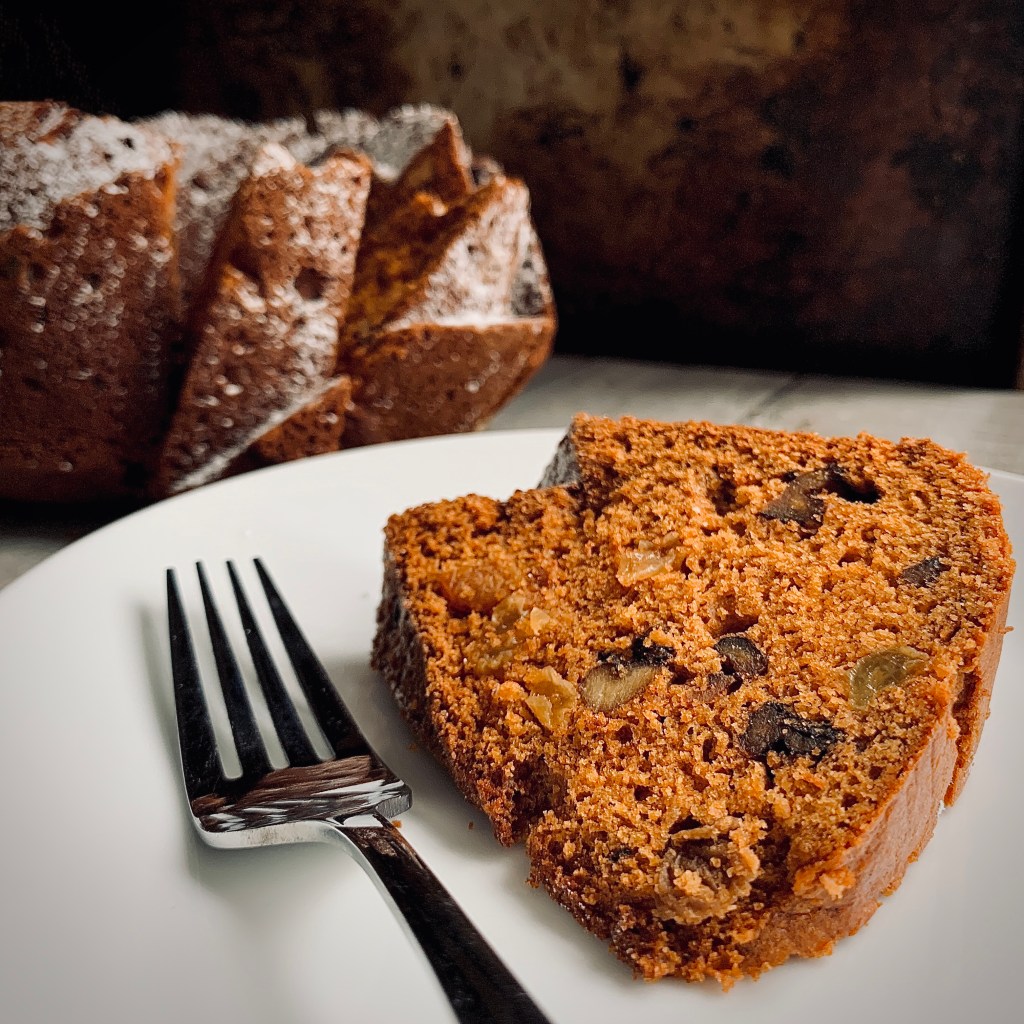
Let’s just file this under “Oddly Delicious” shall we? Harking from the same recipe-pivoting era as Chocolate Vinegar Cake this wonderfully moist spiced cake was originally the gimmick of the well known convenience food giant Campbells. Appealing to thrifty housewives who had to pivot due to ever increasing rationing restrictions on ingredients this is a left of center approach to the seminal favorite carrot cake. The use of tomato soup is really based much more in texture and color as opposed taste, being barely perceptible on the palette. The bright red of the original soup altering to a pleasing dark amber, evocative of Autumnal evenings. In fact the whole package of this deliciously warm spiced cake could easily replace any demand for pumpkin laced bakes in my books.
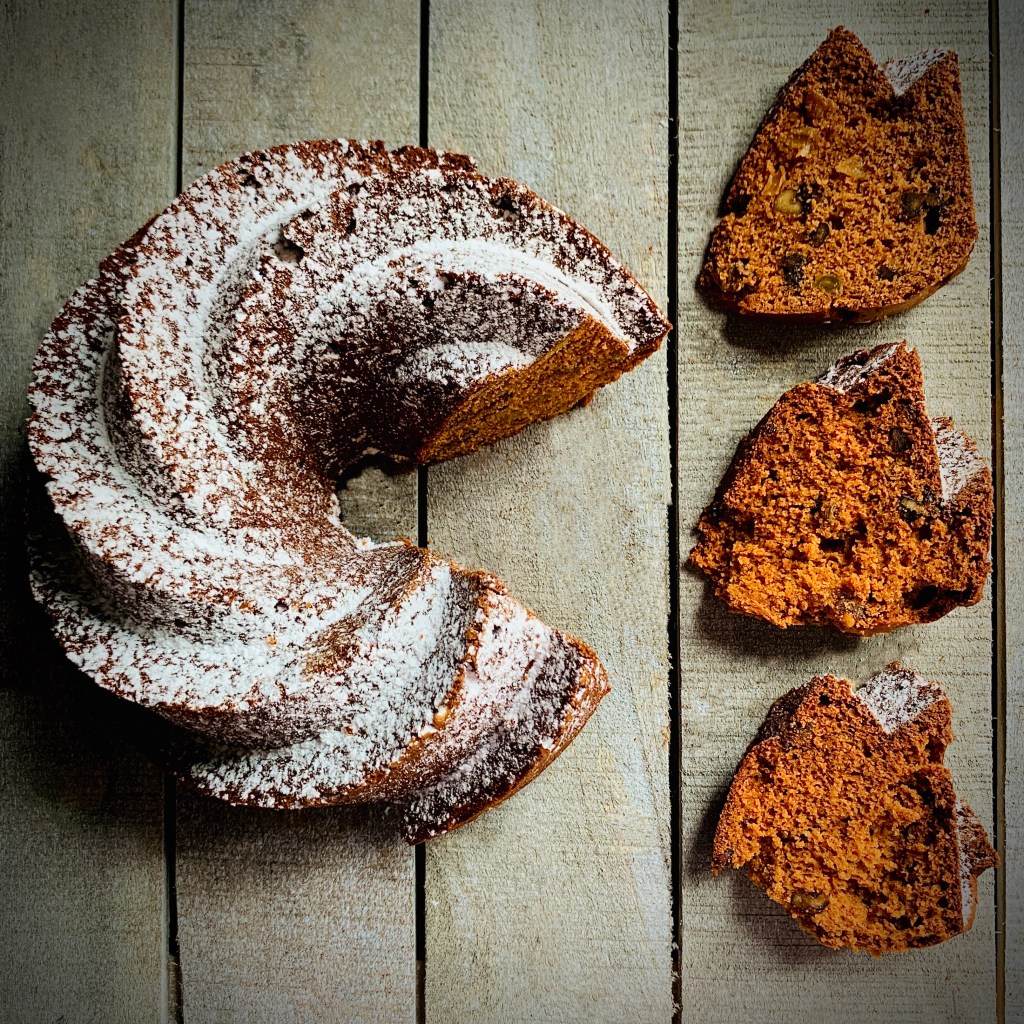
The original recipe for this proved popular throughout the ages, from it’s origins in the ’20s right through to the ’70s, reaching it’s peak in the 1950s with the recipe regular featuring on the reverse of soup cans. The prominence of convenience foods in the 50s and 60s called for the use of boxed spice cake mix as the main ingredient coupled with the tomato soup. Here I’ve tweaked the original recipe using traditional cake ingredients (sans box mix!) and added in some plump, soaked golden raisins and toasted walnuts for a bit more bite.
Research on this cake will lead you to it in it’s various forms. Vintage published recipes show a loaf-type cake with chocolate frosting, later appearing as a round layer cake with cream cheese frosting. I’ve settled on letting the uniqueness of the cake itself shine through as a Bundt, finished with a simple but ample dusting of powdered sugar. All in all this cake provides a delicious bite of retro-tastiness which is a worthy replacement for any run-of-the-mill coffee cake.
Combine the golden raisins and tea in a small bowl and steep for 15 mins
Prepare an 8-cup bundt pan with baking spray
Preheat the oven to 350°F. Lightly grease
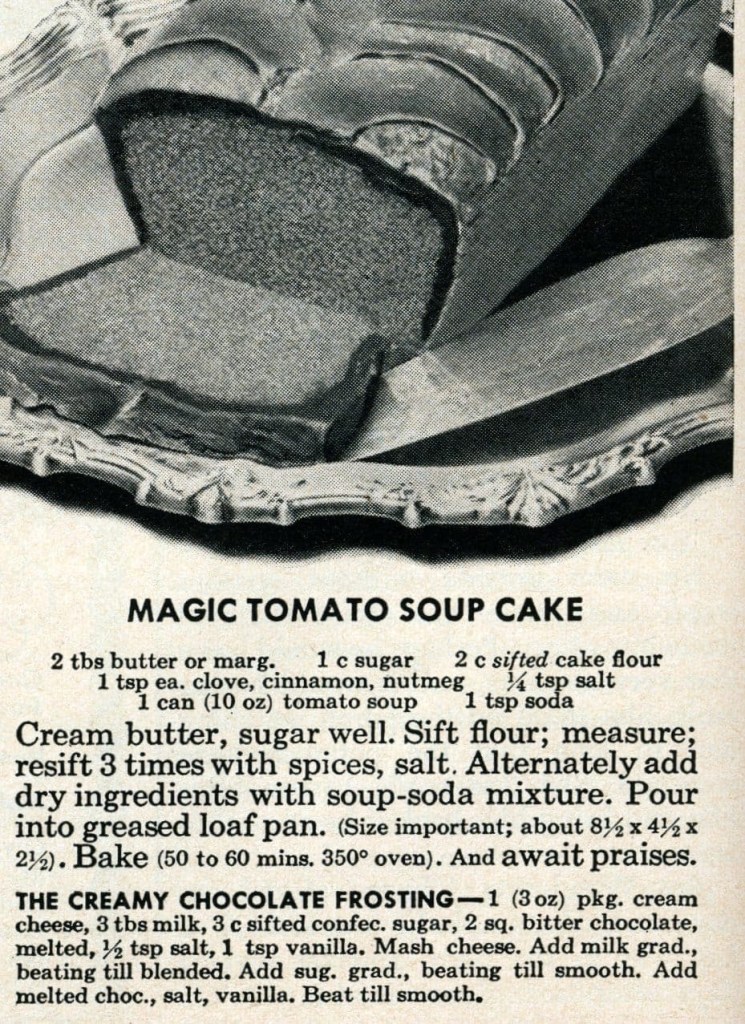
Add the condensed tomato soup (DON’T add water) to a bowl and stir in the baking soda (it will puff up a bit). Set aside while preparing the rest of the ingredients
Add the sugar and butter to a mixer bowl and beat with paddle attachment until light and fluffy.
Add n the vanilla extract, and then beat in the eggs, one at a time until just mixed
Mix in the tomato soup. (Note: it might ‘split’ slightly but don’t worry, it will come together with the flour)
Sift in the flour, baking powder and spices, then add the golden raisins (drained) and toasted walnuts. Gently fold to combine with a wooden spoon, or spatula. Don’t overmix, but ensure no streaks of flour remain
Pour the mixture into the prepared pan and bake for in preheated oven for 35 minutes, after this time reduce the heat to 325°F and bake for a further 10-15 minutes or until an inserted toothpick comes out clean
Allow to cool in the pan for 10 minutes, then turn out onto a wire cooling rack to cool completely
Once fully cool, dust liberally with powdered sugar
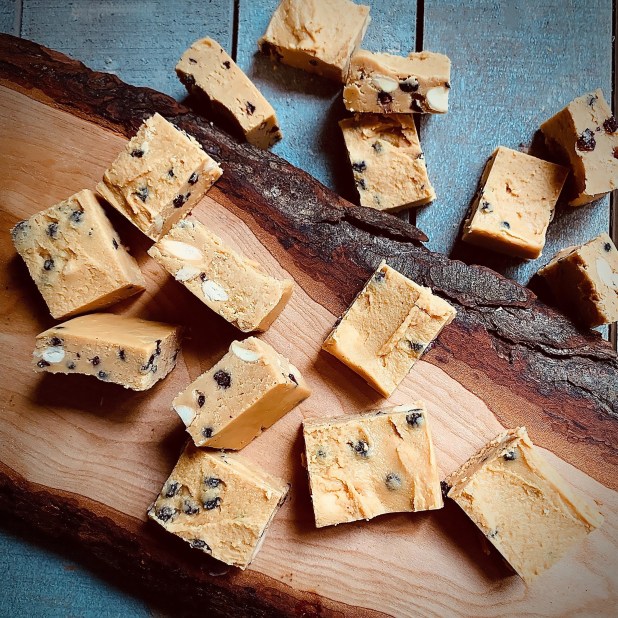
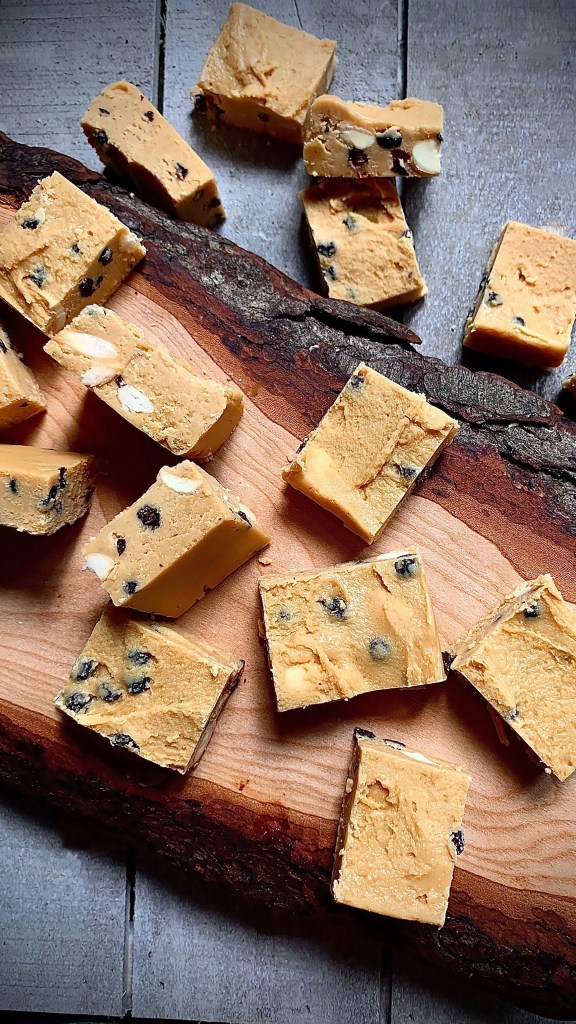
Think of this as a pimped up Fruit & Nut bar. For me the recipe brings to mind a stroll through the woods and spying all the wild bounty. In fact, if I were anyone else, a foraging trip. Crunchy toasted almonds give a wonderful textural contrast to the smooth, creamy fudge studded with blueberry flavor. Being dried their flavor is that little bit more concentrated and works really well to provide pops of berry to counter the fudge becoming too cloying. As for the maple syrup? Well, IMO everything tastes better with maple syrup!
By the way- a date for your diary? May 12th is Nutty Fudge Day. There you have it- a perfect reason to try this recipe!
Line the bottom and sides of a 8″x 8″ x (at least) 2″ deep pan with baking parchment, leaving about 2” overhang on both the long sides
In a large, heavy saucepan bring the maple syrup to a boil over medium heat; simmer for 5 minutes, making sure to keep a very close watch as the syrup can rise quite a lot as it boils. If it starts to rise, lift the pan off the heat for a few seconds to allow the syrup to drop
After 5 minutes, pour in the evaporated milk and without stirring (but you can swirl the pan) bring the mixture back to the boil, be careful in case it bubbles and rises again, and let it simmer until it reaches 236°F (Soft Ball stage) on a candy thermometer. This usually takes about 20 minutes. It may be tempting to walk away but DON’T!
As soon as the mixture reaches that temperature, carefully remove the pan from the heat. Add the butter pieces to the pot but do not stir it in. Let the mixture cool for about 6 minutes
Carefully transfer the mixture a stand mixture bowl, scraping using heat-proof spatula and using the paddle attachment beat for about 6-7 minutes on high speed, until the sugar mixture gets thicker and lighter in color. It may look like it has crystalized, or separated, but beat on nonetheless
After the mixing time has passed fold in the dried blueberries and almonds
Transfer the fudge to the prepared pan, spreading to the edges. You may need to work quickly here as the fudge will start to the firm up
Transfer to the fridge until completely set, about 2 to 3 hours
Lift the fudge from the pan and cut into squares with a sharp knife. Dipping the knife into hot water and wiping dry between cuts helps to get smooth, clean cuts. The number of pieces will depend on the size of your cuts. I usually get 21-24 pieces
Store in a cool dry place in an airtight container for up to two weeks. Best served at room temperature
Choux pastry was one of the first things that my Mom taught me how to make. When I say “taught me” I mean showed me how to do it, gave me some tips and then said, “Now go yourself and do it, the books are over there’. A pretty laissez fair approach I’m sure you’ll agree? Nonetheless these first tentative explorations of patisserie (sounds far more glamourous than I actually remember!) have given me a solid base from which to build and no doubt resulted in the lack of fear of trying choux pastry.
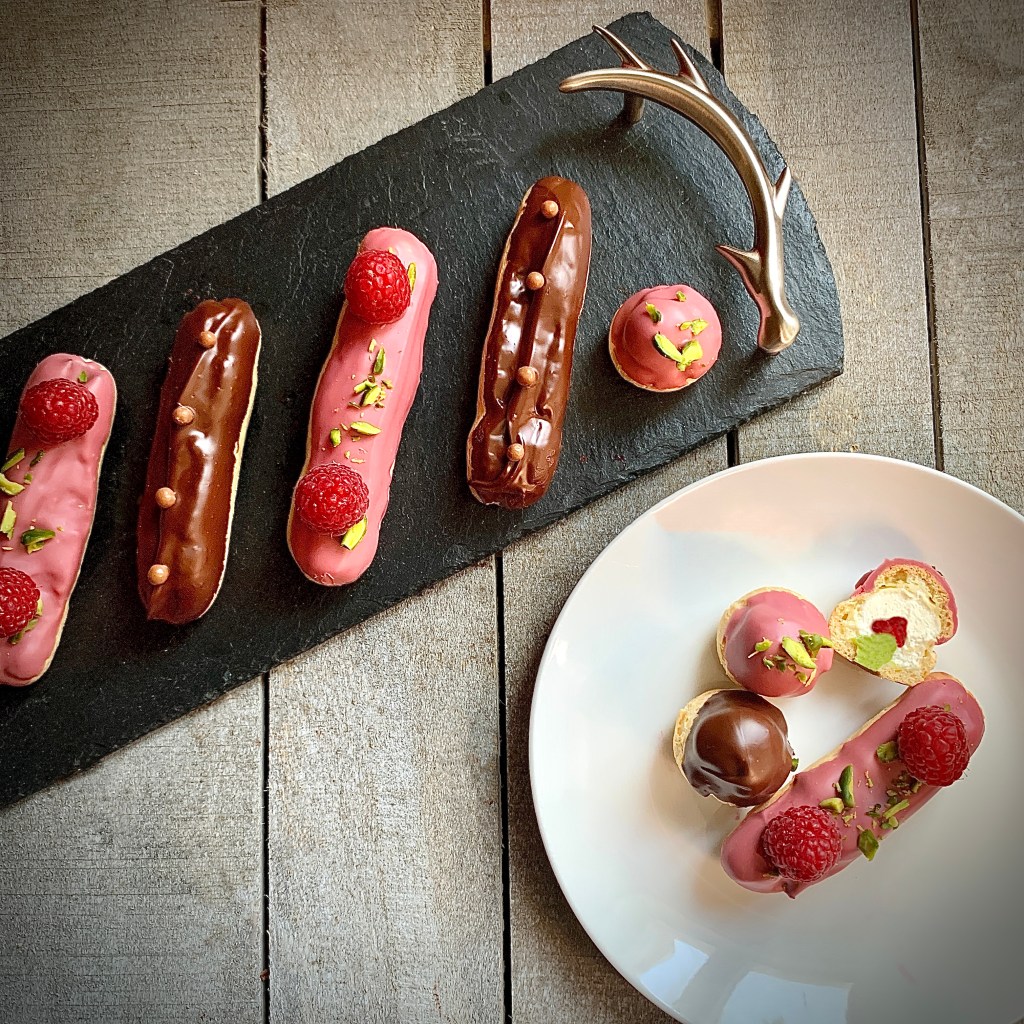
Eclairs have always been synonymous with “being a treat” for me. They were always in that separate part of the bakery shop display cabinet, away from jam doughnuts, vanilla slices and chester bread, basking in their own halo of the fluorescent bulb. Let me tell you this though- the eclairs I grew up on were a far cry from those gourmet, high-end ones seen today. I’m talking a childhood indulgence filled with sweetened cream and chocolate “flavoured” glaze. Sounds delish, huh? Well, back then it was.
So here is my take and what better way to pay homage to the memory of my mom (ala upcoming Mother’s Day) than take one of her first lessons to me and combine it with my knack for unexpected, “haute” flavours. I want you to enjoy creating these so, as I mention later, if the filling them in the way I describe sounds a bit daunting, or laborious, please feel free to fill them with just the cream and serve the coulis and pistachio butter alongside. They make wonderful dipping sauces!
I find the floral flavour of elderflower works so well with raspberry. The zing tart hit of the berry contrasting wonderfully with the regal, fresh floral note. Adding in the pistachio gives another depth of flavour with earthy, sweetness that seems to almost bridge to two flavours. If all of this sounds like a load of ol’ foodie jargon then let me just say this – these are damn good!
The use of SOMA Pistachio Butter here is in no way paid for or compensated by the manufacturer. I simply mention using it as I am a huge fan and have yet to find something fit for substitution.
Line 2 baking trays with either Silpat mats, or non-stick baking parchment. Set aside until needed
Preheat your oven to 425 degrees F
Combine water, butter, shortening and salt together in a pot. Heat over a high hear until butter and shortening have melted, and the mixture is at a rolling boil
Carefully add the bread flour in one go, and stir vigorously for at least 5 minutes until the mixture comes together in a ball, and cleans the sides of the pan
Transfer cooked dough mixture in to the bowl of a stand mixer, fitted with paddle attachment, and mix on medium speed until bowl is cool to the touch and there is no more steam rising from the mixture
Gradually add eggs, roughly one at a time, scraping down the bowl between each addition. The mixture may separate after each addition but keep whisking until it comes together again before adding more egg. Ensure the dough is not too runny. You may not need the last amount of egg*
Transfer the choux dough to a medium piping bag fitted with a French star nozzle
Pipe the choux dough onto your prepared baking trays in lengths 5-6 inches, ensure they are all the same size/length
Transfer to you preheated oven and bake for 25mins, until risen, crisp and golden brown. DO NOT open the door before this time
After the 25 minute mark turn the heat off, remove one tray from the oven leaving the other one in. Working quickly using a skewer, or chopstick narrow end, prick each eclair, place back on the tray and return them all to the oven. Repeat with the second tray
When all eclairs have been pricked, leave in the oven cooling for another 15 minutes. Remove from oven and leave in a draught-free area to cool fully.
To make Elderflower cream
Combine all ingredients in a bowl
Whisk until cream is thickened and semi-firm peaks are achieved
Keep cool in the fridge until needed for filling
To make the Raspberry coulis
In a small pan combine all the ingredients
Heat on high heat until the berries start to break down and the mixture has started to boil
Reduce heat and continue to simmer for 10 minutes, stirring occasionally
After this time remove from heat, transfer to bowl and leave to cool fully
Once fully cool, transfer to a piping bag, seal and set aside until needed
To prepare the pistachio butter
Stir to ensure an even mixture
Transfer to a small piping bag, seal and set aside until needed
To fill the choux eclairs**
Once all your components have fully cooled, you cab set about filling
Using the narrow point of a chopstick, or thick skewer, make a hole in the underside of each eclair, roughly midway along it’s length
Fit a piping bag with a narrow filling nozzle (“Bismarck” style) and transfer the elderflower cream to this bag
Insert the nozzle into the hole you made in the eclair and gently squeeze to pipe some filling in. Be careful not to fill completely as you will not be able to get any of the other fillings. (You may have to sacrifice one or two to gauge the correct amount of squeezing and filling. Tasty cast-offs nonetheless!)
After filling all with the cream, snip the end of the piping bag with raspberry coulis so it’s narrow enough to fit in the hole in the eclair. Gently pipe some coulis in. You’ll find you won’t need to pipe it for as long
Once all have been filled with the coulis, snip the end of the bag fitted with pistachio butter (again so it can fit into the hole) and gently pipe a little pistachio butter into each eclair
When all the eclairs have been filled, place on a baking tray and transfer to the fridge while you prepare the chocolate glazing
To prepare chocolate glaze
In a medium bowl (wide enough to be able to place your ecliars in), combine the ruby chocolate callets and butter
Heat in a microwave for 10 seconds. Remove and stir for a minute
Repeat, heating again for 10 seconds. Stir until mixture melts down further and is fully combined
If any small pieces of chocolate remain, heat again for 5 SECONDS. Remove and stir until fully melted
To finish
Have a cooling rack handy to place you finished eclairs on
Remove the eclairs from the fridge and, gently but firmly holding, dip one by one into the melted chocolate so that the top half gets covered. As second dipping might be necessary.
Gently shake to remove and excess chocolate, and place chocolate side up on the cooling rack to finish setting
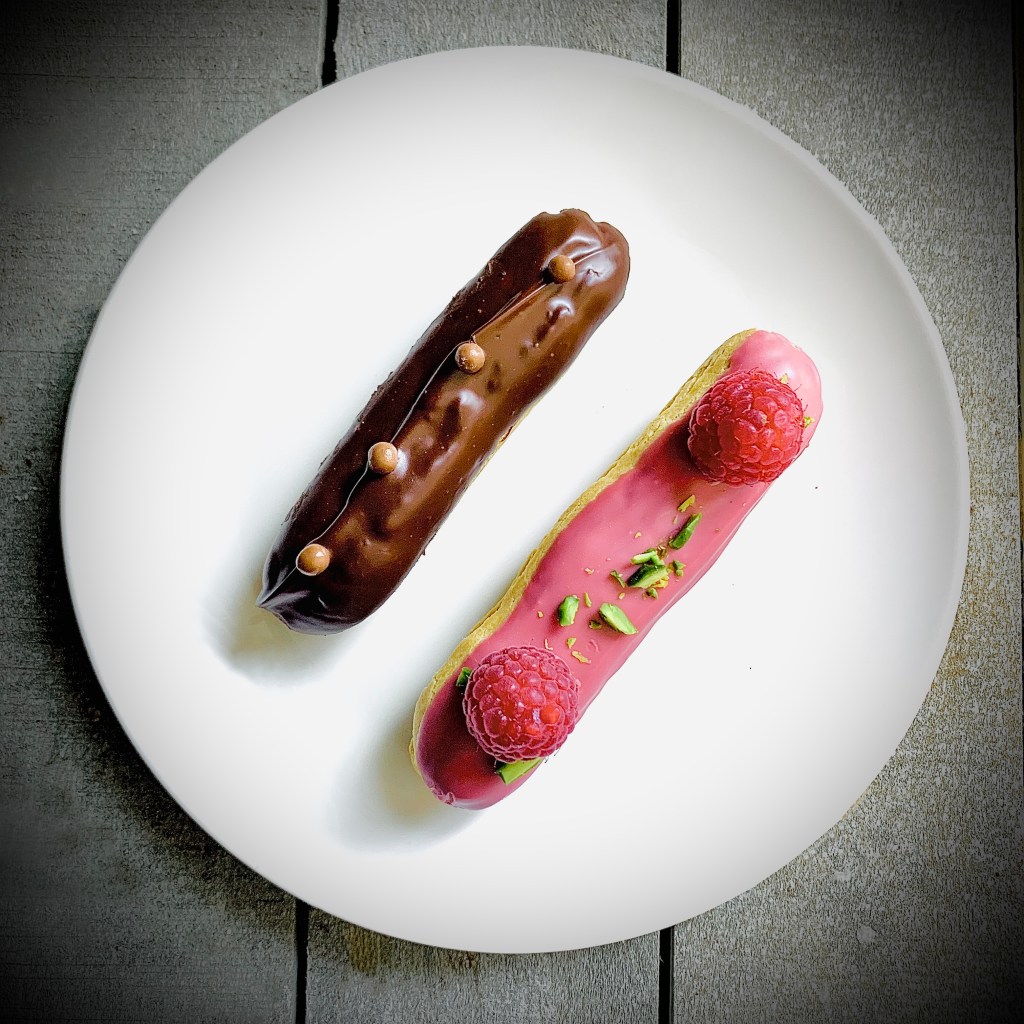
If your decorating them as suggested here, sprinkle with the pistachio slivers and pop some raspberries on the chocolate to your liking. I’d suggest decorating as you go along, or have someone helping you decorate, as the chocolate glaze can set by time you’ve dipped them all- making it harder for the finishing touches to stick
Serve and enjoy!
*When adding you eggs to make the choux dough you may not need all of the eggs. To check you want a consistency of dough that will fall from your spatula leaving a V-shape hanging, or using your (clean) finger, run it lightly through the top of the mixture. It should leave a groove that doesn’t collapse into itself.
** I completely understand that doing the full filling process is fiddly and can require a bit of practice. If you prefer shortcut to take is just to fill the eclairs with the elderflower cream and finish them with the ruby chocolate glaze as above. These can them be served with some of the raspberry coulis and pistachio butter alongside. That way you get to experience of all the wonderful flavors without it being so fussy to fill!