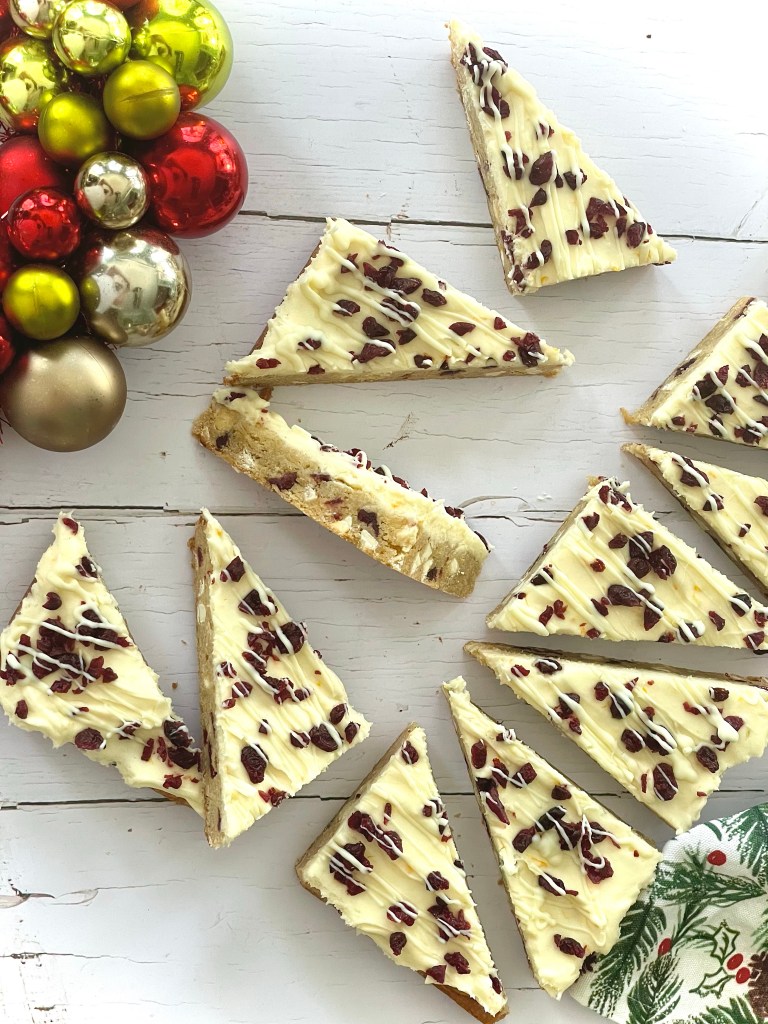
3-Ingredient Sugar Cookies

Makes 24

Ingredients

  • 1 cup butter, room temperature
  • 2/3 cup granulated sugar
  • 2 cups All-purpose flour

Optional

  • 1 ½ teaspoon Vanilla extract
  • Festive Sprinkles

Method

  1. Preheat oven to 350°F. Line a baking sheet with barking parchment or a silicone baking mat
  2. Add your butter with sugar into a large bowl and beat with an electric whisk for a few minutes until combines and fluffy. (If you’re using vanilla extract add at this point)
  3. Add in your flour and beat again until combined. The dough will be crumblier that typical cookie dough
  4. Break off/ scoop walnut sizes pieces and roll in your hands*
  5. Place the cookies balls onto the prepared tray and using a flat-bottomed glass press down to flatten to ¼ to ½ inch thickness. You can press some sprinkle into the tops at this point
  6. Bake in your preheated oven for between 12-14 minutes, until the edges are just turning golden-brown
  7. Cool on the baking sheet for about 5 minutes, then move to a rack to cook completely

*You can roll them in some additional granulated sugar at this point if you like

Chocolate Espresso Sables

Makes 25 sandwich cookies

Ingredients

Cookies

  • 2/3 cup butter, room temperature
  • 1 cup powdered sugar
  • 2 large egg yolks
  • 1 teaspoon vanilla extract
  • ½ Tonka bean, grated (optional)
  • 2 cups All-purpose flour
  • 2 Tablespoons freshly ground coffee
  • ½ teaspoon Kosher salt

Filling

  • 4 oz semi-sweet chocolate, chopped
  • 1/3 cup heavy, or whipping, cream
  • 1 Tablespoon butter

Method

  1. In the bowl of a stand mixer fitted with the paddle attachment, beat softened butter until creamy. Add confectioners’ sugar and beat until well combined and smooth
  2. Add egg yolks, vanilla extract and beat just until fully combined
  3. Add flour, ground coffee, salt, and beat at low speed just until flour is incorporated but before dough forms a ball
  4. Turn out dough onto a floured surface and use your hands to bring dough together. Divide dough in half and roll into 1½-inch-wide logs. Wrap logs in cling wrap, and refrigerate until firm, 1 to 2 hours
  5. Preheat oven to 350°F. Line baking sheets with parchment paper, or silicone making mats
  6. Unwrap logs and cut into ¼-inch-thick rounds. Place rounds 1 inch apart on prepared pans
  7. Bake until just lightly browned around the edges, 10 to 12 minutes. Let cool on pans for 5 minutes. Remove from pans and let cool completely on wire racks
  8. Place chocolate in a large heatproof bowl. In a small saucepan, bring cream and butter to a simmer over medium heat. Pour hot cream mixture over chocolate. Let stand for 1 minute; stir until a smooth, silky ganache forms. Let stand until thickened, 30 minutes to 1 hour
  9. Using a piping bag fitted with a small round piping tip, pipe a round of ganache onto flat side of half of cookies. Place remaining cookies, flat side down, on top of ganache. Let stand until ganache is set, 1 to 2 hours
  10. Unfilled cookies will keep for 2 to 3 days. Once they are filled with ganache, the cookies are best served within a day

Krampus Cake

Makes 1 no. 8” layer cake

Ingredients

Midnight Chocolate Cake

  • 2 cups All Purpose Flour
  • 1 ½ cups granulated sugar
  • ½ cup unsweetened cocoa powder
  • ¼ cup black cocoa powder
  • 1 ½ teaspoons baking soda
  • 1 ½ teaspoons espresso powder
  • ¾ teaspoon salt
  • 1 ½ cups water
  • ¾ cup canola oil
  • 1 ½ teaspoons vanilla extract
  • 1 ½ teaspoons white vinegar

Ganache Filling and Decoration

  • 8oz semi-sweet chocolate, chopped into chunks
  • 1 cup heavy/whipping cream
  • ½ teaspoon black food coloring gel*

Buttercream Frosting

  • 4½ cups powdered sugar
  • 1 cup cocoa powder
  • 12 tablespoons (1½ sticks) unsalted butter, room temperature
  • ½ cup whole milk, room temperature
  • 2 teaspoons red food coloring gel*
  • 1 teaspoon apple cider vinegar

“Coal” Candy

  • 3 tablespoons unflavoured popping candy
  • ½ tablespoon coconut oil
  • 1 tablespoon black cocoa

*Measurement dependant on strength of color. Please note that if using liquid coloring a larger quantity may be required, which in turn may affect the consistency of what you’re coloring. Color to personal preference

Method

Midnight Chocolate Cake

  1. Preheat your oven to 350F
  2. Prepare 3 no. 8” diameter baking pans by greasing/spraying and lining with baking parchment
  3. In a large bowl combine all the cake ingredients- the flour, sugar, cocoa powder, black cocoa, espresso powder, baking soda, salt, water, canola oil, vanilla extract, and vinegar
  4. Whisk slowly until fully combined, making sure to scrape the bottom of the bowl to avoid any dry ingredient residue. Continue mixing until fully blended and smooth
  5. Divide and pour into your prepared pans. If needed gently tilt the pans to allow the cake batter to flow into an even layer
  6. Bake in your preheated oven for between 20-25minutesm or until a cake tester, or skewer, comes out clean when inserted into the centre of the cake. Remove the cake from the oven allow to cool in tin for 5 minutes in a rack
  7. After allowing to cool for 5 minutes, remove from the pans and allow the cakes to cool fully before decorating

Ganache Filling and Decoration

  1. For the ganache, place the chocolate pieces in a medium heatproof bowl
  2. Heat the heavy cream/ whipping cream, in a small pan over a medium heat until just below boiling (look for small bubbles at the edge of the cream in the pan)
  3. Remove the cream from the heat and gently pour the warmed cream over the chocolate pieces in the bowl. Leave to rest for 5 minutes
  4. After 5 minutes, gently stir the chocolate/ cream mixture with a whisk to emulsify it. It will appear mottled and speckled at first but continue gently stirring until it thickens and is uniform in color
  5. Once fully smooth and uniform in color, set aside and leave to fully cool for 1 hour before dividing the mixture into two separate bowls. After 30 mins, using an electric whisk, beat one of the bowls of mixture to a fluffy, whipped consistency (this will be your filling ganache). Set both aside for about another hour until the they to a spreadable consistency. (The cooling/thickening process can be speeded up by placing the bowls of mixture in your refrigerator)

Buttercream Frosting

  1. In a bowl, sift together the powdered sugar and cocoa powder. Set aside
  2. In the bowl of a stand mixer fitted with a paddle attachment, beat the butter beat on medium speed for 2 minutes. Scrape down the sides and bottom of the bowl
  3. Reduce the speed to low and the add in sugar/cocoa mixture a cup at a time. Combine on low speed until all the sugar/ cocoa mixture has been added
  4. With mixer on low speed, add in milk, red food coloring and vinegar
  5. Increase speed medium and mix for 2 minutes until smooth. After this time, increase the speed to medium/ high and whip for a further 2 minutes

“Coal” Candy

  1. Put the coconut oil into a heat proof bowl and heat in a microwave for 20 seconds until the coconut oil is melted
  2. Add in the popping candy and stir to fully coat it in the melted oil
  3. Add the black cocoa and stir until an even color and it looks like “coal dust”

To assemble and decorate

  1. Level off the cake layer to flat
  2. Frost each layer with a ring of frosting. Pipe or spread an even layer of the whipped chocolate ganache inside the ring of buttercream frosting. Stack the next layer on top and repeat the process.
  3. Using the buttercream frosting apply a light crumb coating on the outside of the cake and let the cake chill in the refrigerator for 20 minutes.
  4. Frost the cake the remaining frosting, and chilli again for a further 20 minutes
  5. Use the remaining (unwhipped) ganache to decorate the cake. You can either apply a final top layer by smoothing the ganache on top, or as I’ve done, using a Wilton #233 tip apply a “fur trim” to the edge.
  6. Decorate with the black “coal candy”

Adapted from a recipe by layercakeparade

Copycat Cranberry Bliss Bars

Makes 16

Ingredients

Bars

  • 1 cup (2 sticks) butter, melted
  • 1 1/2 cups packed brown sugar
  • 2 eggs
  • 1 teaspoon orange extract
  • 1 teaspoon vanilla extract
  • Zest 1/2 orange
  • 1 teaspoon ground ginger
  • 1/2 teaspoon ground cinnamon
  • 1 teaspoon baking powder
  • 1/2 teaspoon salt
  • 2 cups all purpose flour
  • 1 cup white chocolate chips
  • 3/4 cup dried cranberries

Frosting and Finish

  • 8 oz. cream cheese, room temperature
  • 3 Tablespoon unsalted butter, room temperature
  • 1 1/2 cups powdered sugar
  • 2 Tablespoons orange juice
  • 1/2 teaspoon vanilla extract
  • Zest 1/2 orange
  • 1/2 cup dried cranberries, roughly chopped
  • 3oz white chocolate, melted

Method

To make the bars

  1. Preheat oven to 350 degrees F. Line a 13×9 inch baking pan with parchment paper
  2. In bowl of a stand mixer, combine the melted butter, brown sugar and beat with the paddle attachment at medium speed for between 5- 6 minutes
  3. In a separate bowl whisk together the orange zest, ground ginger, ground cinnamon, baking powder, salt, and flour until combined. Set aside until needed
  4. To your sugar/ butter mixture add in eggs, orange extract, and vanilla extract and beat until mixed well. Add in the flour/ dried ingredients mixture, beating until just blended
  5. Fold in white chocolate chips and dried cranberries using a spatula. Spread evenly into the bottom of prepared pan
  6. Bake in preheated oven for 18-20 minutes until set and golden brown at the edges. Remove from oven and place pan on a wire rack to cool. Allow bars to cool completely before topping with frosting and decorating

To make the frosting and finish

  1. With an electric whisk, beat together the cream cheese, butter and powdered sugar until smooth and creamy.
  2. Add orange juice, vanilla extract, orange zest beat again until well combined and smooth
  3. Using a spatula top the cooled bars with frosting. Sprinkle over the chopped dried cranberries and drizzle white chocolate over the top with either a piping bag
  4. Place the bars in the refrigerator for about an hour to help them set up before cutting. Cut baked sheet into half lengthwise, then into 4 so you end up with 8 pieces. Cut each piece in half diagonally so you end up with two triangles so you end up with 16 triangles in total
  5. Serve and enjoy!

Edible Gingerbread Cookie Dough

Ingredients

  • 1 cup all-purpose flour, heat treated*
  • ½ cup unsalted butter, softened
  • ½ cup packed light brown sugar
  • 3 Tablespoons granulated sugar
  • ¼ teaspoon salt
  • 3 Tablespoons fancy molasses
  • 1 ½ Tablespoons milk
  • ½ tsp vanilla extract
  • ¾ teaspoon ground cinnamon
  • 1 teaspoon ground ginger
  • 1/8 teaspoon ground cloves
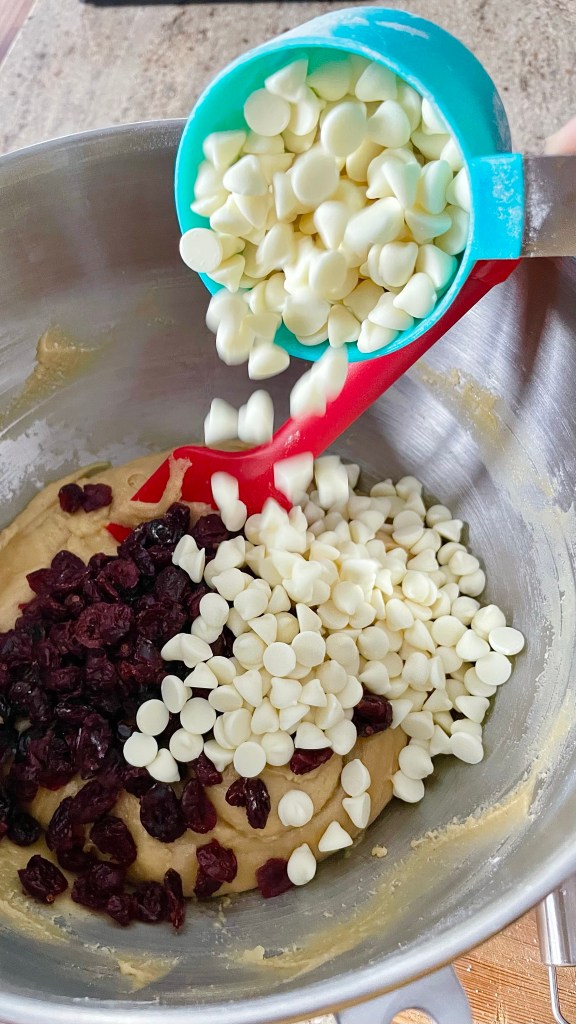
  • ½ cup white chocolate chips
  • Festive sprinkles, or nonpareils

Method

  1. In the bowl of stand mixer combine the butter, both sugars, salt, fancy molasses and whip together until pale and fluffy, about 10 minutes
  2. Mix in the milk and the vanilla extract until combined
  3. In a separate bowl, whisk together the flour, cinnamon, ginger, and cloves. Add in the flour mixture by ¼ cupful, beating between until combined, until all the flour mixture has been added
  4. Fold in the chocolate chips. Add sprinkles, or nonpareils, to your liking
  5. Scoop, or spoon, into sterilised mason, or kilner, jars and add some more sprinkles for that extra festive touch. Wrap as you like if you’re gifting to someone- I usually bow and tag the jars with festive ribbon
  6. Cookie dough is best eaten at room temperature

How To Store: Keep this Edible Gingerbread Cookie Dough in the refrigerator in an airtight container. Eat it up within 2 weeks!

* To heat treat your flour for safety, place it in a bowl and microwave it in 30-second intervals until the flour temperature reaches 165 F (74 C). Mix with a spoon between intervals. Mine usually takes around 3 bursts. Allow to cool before using. Or you can bake it for 7-8 minutes in a preheated oven at 350°F

Edible Cookie Dough Christmas Trees

If you’re not gifting this edible cookie dough (how could you not? It’s the Season of Giving!) a fantastic way of using this delicious treat are these adorable Edible Cookie Dough Christmas Trees. Fun and easy to make, you can also get some little helping hands involved too!

Ingredients

  • Additional waffle/ sugar cones 
  • White, or semi-sweet chocolate, melted
  • Festive sprinkles

Method

  1. Line a baking tray with baking parchment or foil, and set aside until needed
  2. If your edible cookie dough is still soft enough, fill a place in a piping bag and snip the end off.
  3. Pipe the cookie dough into your cones. (If the edible cookie dough is a bit too stiff to pipe, you can use a butter knife, or small spoon, to fill the cone instead)
  4. Coat the outside of your filled comes with the melted chocolate, either by dipping in a deep bowl, or coating using a spoon
  5. Place on your prepared baking tray and let the chocolate set for a minute or two (this will help the sprinkle stick better). Add festive sprinkles to finish your Christmas trees off and allow for the chocolate to fully set
  6. To serve/ eat, push a popsicle stick into the cookie dough, for ease of holding and enjoy!