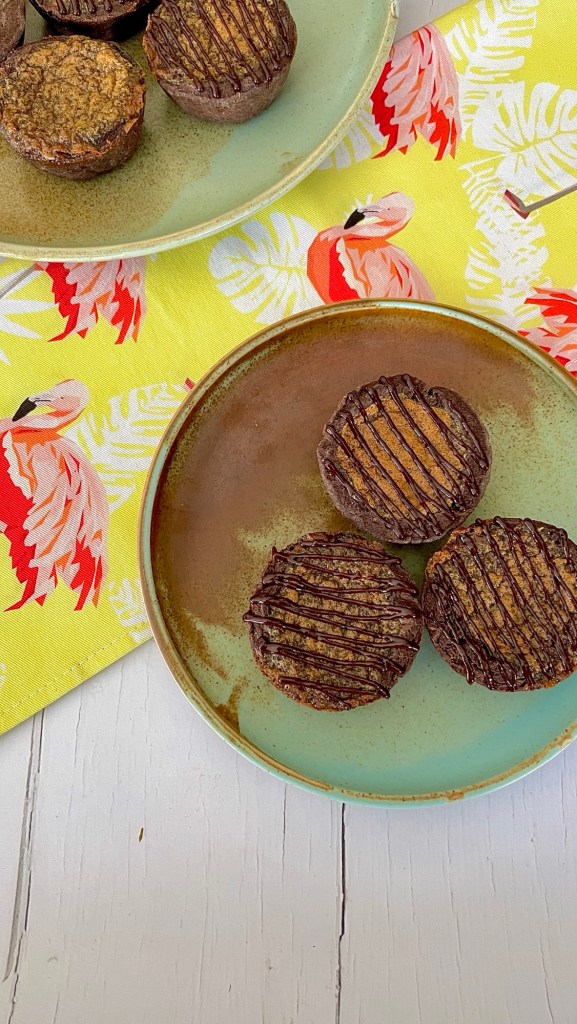
Dubai Butter Tarts

Makes 12

Ingredients 

Pastry

  • 1 1/4 cups All purpose flour
  • 1/2 cup cocoa
  • 1 Tablespoon sugar
  • 1/2 teaspoon salt
  • 1/2 cup butter, cold and cubed
  • 6-7 Tablespoons ice-cold water (dependant on humidity)

Kataifi Filling

  • 2 1/2oz Kataifi pastry, cut to 1/2inch pieces (if not already)
  • 2 Tablespoons butter
  • 200g pistachio cream
  • 3 Tablespoons tahini
  • 1/2 teaspoon salt

Butter Tart Filling

  • 1 cup brown sugar, packed
  • 2 eggs
  • 1/4 cup butter, softened
  • 1 Tablespoon apple cider vinegar
  • 3 Tablespoons light corn syrup
  • Pinch salt

Method

Pastry

  1. Whisk together the flour, cocoa, sugar and salt in a large bowl
  2. Add the chopped butter. Using a pastry blender, or two butter knives, cut in the butter until it resembles coarse crumbs (with a few pea-sized pieces)
  3. Add the water, one spoonful at a time, until the dough starts to come together in a single ball
  4. Gather dough into a ball and knead a couple of times to bring together. Flatten into a disc, wrap in cling wrap and chill for at least 30 minutes
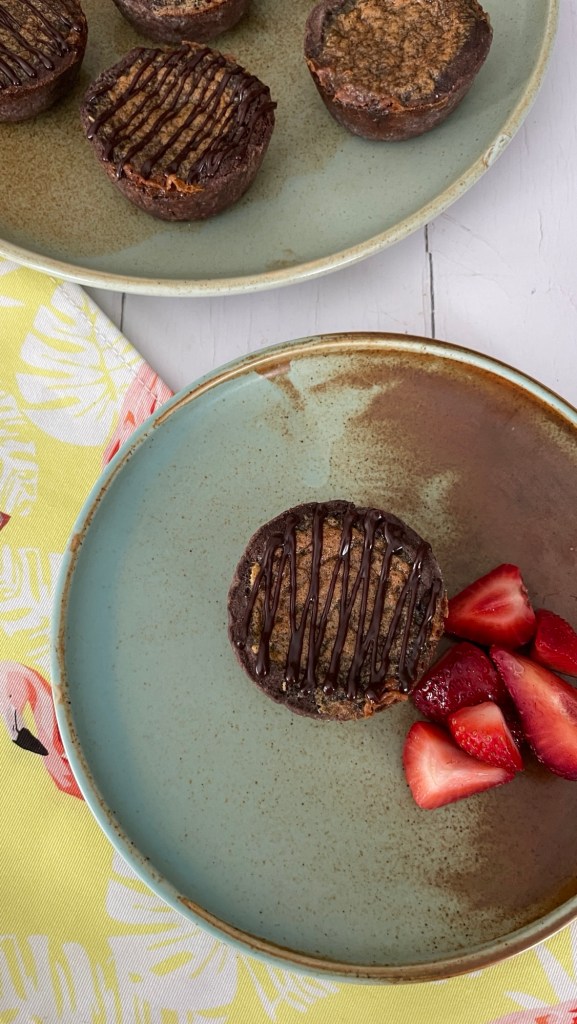
  5. On a smooth surface lightly dusted with cocoa, roll pie dough to a ¼-inch thickness. Cut 12 rounds using a 4½-inch round cookie cutter, re-rolling scraps if needed. Gently press rounds into a 12-cup muffin pan. Refrigerate while you make the fillings

Kataifi filling

  1. In a large frying pan set over a medium heat, melt the butter 
  2. Add the kataifi pastry and stir to coat in butter 
  3. Continue to stir the pastry, moving it around the pan continuously, until deep golden brown
  4. Remove from the heat and transfer to a large bowl to cool
  5. When cooled completely, add the pistachio cream, tahini and salt
  6. Stir all the ingredients together to combine well
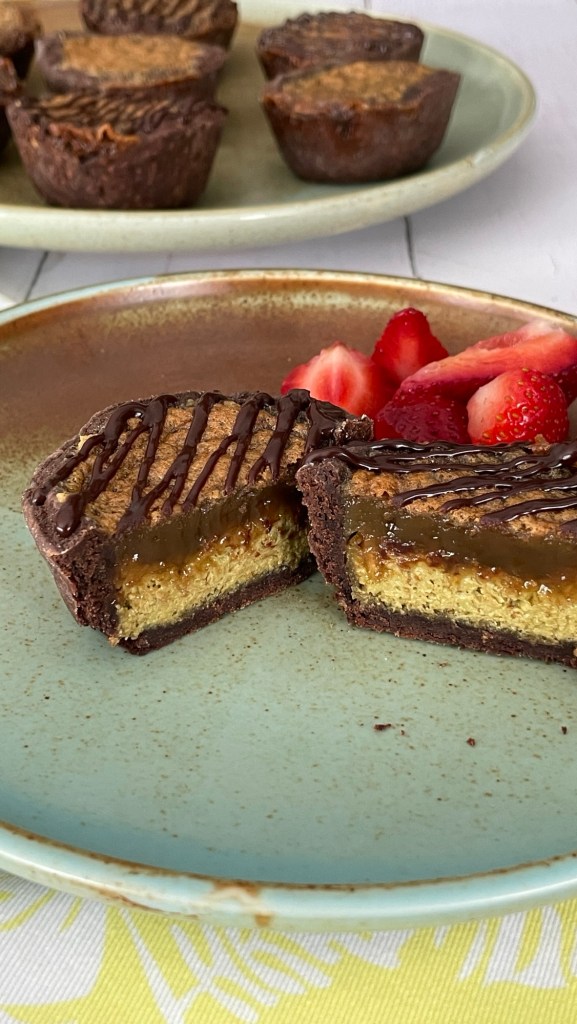
  7. Fill the bottom of each pastry tart cup with between 1 – 2 Tablespoons of kataifi filling, tamping it down loosely to 1/3 to 1/2 depth of each tart cup
  8. Return to fridge to chill while you prepare the butter tart filling

Butter Tart Filling

  1. Preheat your oven to 400°F
  2. Combine all the butter tart ingredients in a medium bowl and using electric whisk, beat until smooth and fully combined
  3. Using a jug or piping bag, pour the filling into each tart cup until just below the top
  4. Transfer to the heated oven and bake for 5 minutes at 400°F
  5. After 5 minutes, reduce heat to 375°F and continue to bake for 20 minutes until the filling turns slightly opaque and appears to dome
  6. Remove from oven and allow to cool in tin for 5 minutes then gently loosen and rotate in the tin using a knife or palette knife 
  7. Allow to cool fully in the tin, before removing
  8. Serve and enjoy  

Pumpkin Pie Milkshake

Serves 1

Ingredients

  • 1 standard serving slice leftover pumpkin pie (homemade or store-bought)
  • 1 cup vanilla ice cream
  • 3/4 cup full-fat milk

Optional to finish

  • Whipped cream
  • Additional pie crust crumbs
  • Sprinkles

Method

  1. In a blender combine the pie slice, ice cream and milk
  2. Blend at high speed until just combined. I prefer a slightly smooth shake with some pieces of pie crust left for texture. If you prefer a smoother shake texture, blend together for a longer period of time
  3. Decant into a milkshake glass and top with whipped cream and, if using, additional pie crust crumbs and sprinkles
  4. Sip and enjoy!

Pumpkin Pie Bites

Yields 10-12, depending on scoop size. This recipe has been made using 1/2 leftover 8inch pumpkin pie

Ingredients

  • Leftover pumpkin pie (homemade or store-bought)
  • 4oz milk chocolate chips*
  • 4oz semi-sweet chocolate chips*

To finish

  • Sprinkles, or chopped roasted nuts

Method

  1. Place the left over pumpkin pie into a large bowl and break/ mic together to combine. You don’t smooth a mixture as these taste better with some texture from the original leftover pumpkin pie crust. Continue until you have a semi-smooth mixture
  2. Using a cookie scoop, place balls of the mixture onto a lined tray or container that will fit in your freezer compartment.
  3. When all the mixture has been scooped onto the tray, place it in the freezer for about 30 mins
  4. Just before removing the pumpkin pie balls from the freezer, combine both the chocolate chips in a heatproof bowl set over a pan of water and melt together until smooth
  5. Remove the pumpkin pie balls from the freezer and one at at time roll in the melted chocolate. Place back onto the lined tray, add sprinkles if using and allow the chocolate to fully set
  6. Serve and enjoy!

Turtle Brownies

Yields 24

Ingredients

Brownies

  • ¾ cup unsalted butter, cubed
  • 6oz semi-sweet chocolate, broken into pieces
  • 3 eggs + 1 yolk
  • 1 cup sugar
  • ¾ cup plain flour
  • ½ cup cocoa powder
  • ½ teaspoon espresso powder
  • 1 Tablespoon milk powder
  • 1 cup pecan pieces, toasted
  • 1 cup semi-sweet chocolate chips
  • ½ cup caramel sauce (homemade or store bought)

To Finish

  • ¾ cup sugar
  • ¼ cup milk
  • ¼ cup butter
  • 4oz semi-sweet chocolate
  • ½ teaspoon expresso powder
  • ½ teaspoon salt
  • ½ cup pecan pieces, toasted
  • ½ cup semi-sweet chocolate chips
  • ¼ cup caramel sauce (homemade or store bought)
  • 1 teaspoon sea-salt flakes

Method

  1. Set your oven to 350°F and prepare a 9” x 9” baking tray with oil/baking parchment leaving an overhang each side
  2. Melt the butter and chocolate in a bowl over a saucepan of simmering water (or bain-marie), stirring occasionally. Once melted, remove from the heat, and allow to cool
  3. In the bowl of a stand mixer, beat the eggs, egg yolk and sugar until the mixture is thickened and fluffy, then, in a separate bowl, combine the flour, cocoa powder, espresso powder, milk powder and whisk to combine
  4. Add the cooled chocolate mixture into the egg/sugar mixture. Fold together until uniform in color
  5. Fold in the pecan pieces and chocolate chips
  6. Pour your mixture into the prepared tray and gently spread to level the surface. Place in the oven for 25-30 minutes, then remove from the oven when baked
  7. Leave to cool on a wire rack for 10 mins, then after this time use a chopstick, or cake dowel, to poke holes over the surface of the brownie, taking care NOT to poke the full way through the brownie layer
  8. Once the surface of the brownie has been poked with holes, pour the caramel sauce over the surface of the brownies and spread with a spatula to ensure the caramel gets to all of the holes
  9. Place in your refrigerator for between 1 hour to allow the caramel to soak the brownie layer and firm up
  10. After this time prepare the frosting. Remove the brownie pan form the fridge and set on a counter ready to be frosted – you’ll need to move quickly
  11. In a wide pan combine the sugar, butter and milk. Heat over a medium heat until melted, stirring to combine, then increase heat to bring to a boil. Continue to boil for 1 minute, stirring constantly
  12. After the minute, remove the pan from the heat, then quickly but carefully add the chocolate pieces and stir constantly. When then chocolate appears to be nearly fully combined, add in the salt and espresso powder and stir for a few seconds more until fully combined and uniform in color.
  13. Pour the frosting over the caramel surface of the brownie layer.
  14. AA If needed tilt to brownies to ensure full surface coverage
  15. Whilst the frosting is still setting, sprinkle the surface with the pecan pieces and chocolate chips, gently pressing if needed to ensure they stick. Return the brownies to the fridge for at least another hour to allow the frosting to set
  16. After this time, remove from the fridge and give one last drizzle of caramel over the surface and sprinkle with some sea salt flakes to finish
  17. These brownies are exceptionally rich and decadent so keep than in mind when slicing. I usually divide into 12, and then cut in half again to give 24 brownie “bars” in total
  18. Serve and enjoy!

Salted Caramel Chocolate Pots

Yields 6 glass jars or pots (1/2 cup capacity each)

Ingredients

  • 1 ¼ cups whipping, or heavy, cream
  • 7oz semi-sweet chocolate, chopped into small chunks
  • 12 Tablespoons caramel sauce (store bought or homemade)
  • 1-2 teaspoons sea-salt flakes
  • 6 teaspoons chopped peanuts, optional

Method

  1. Add the cream to a medium pan and heat over a medium heat
  2. While the cream heats add the chocolate chunks to a medium bowl
  3. Once the cream has gently heated- you’ll noticed small bubbles at the edge of the surface, remove it from the heat and pour over the chocolate chunks. Leave to sit for 5 minutes while you prepare the caramel pots
  4. Spoon or pipe 2 Tablespoons of caramel sauce into the bottom of each glass jar or pot
  5. Sprinkle each with sea-salt flakes to taste
  6. After the 5 minutes have past, gently stir the chocolate/ cream mixture until it is fully emulsified, smooth and uniform in color
  7. Gently pour over the prepared caramel layer, dividing equally between the pots. I find this a lot easier using a small ladle
  8. Once all the pots have been filled, sprinkle each with the chopped peanuts and refrigerate for at least 2 hours until set
  9. Keep refrigerated until serving, and enjoy