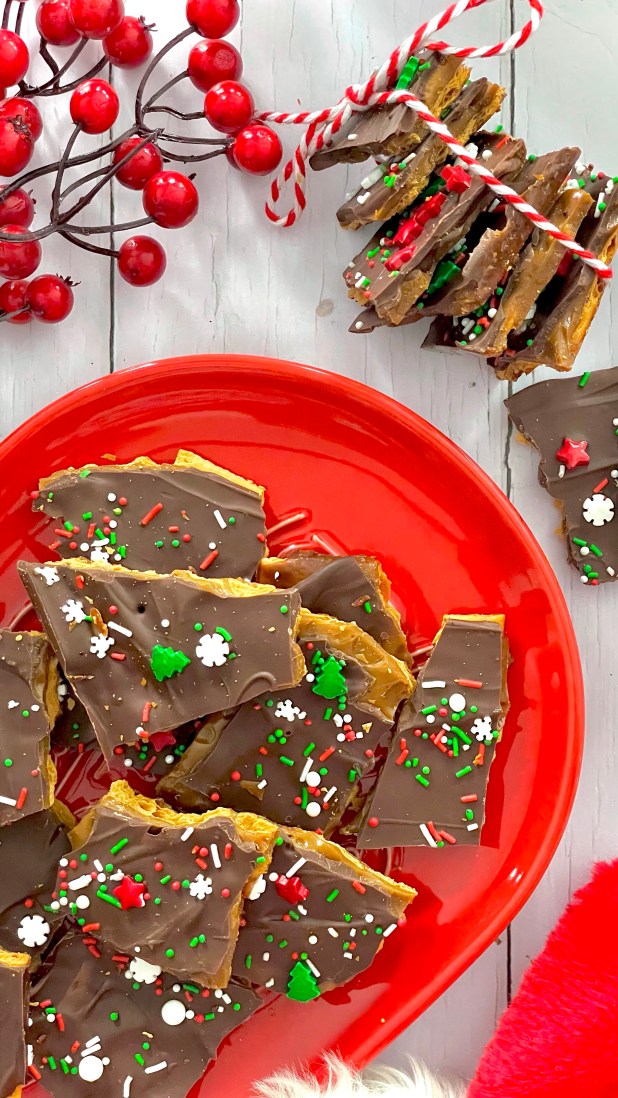
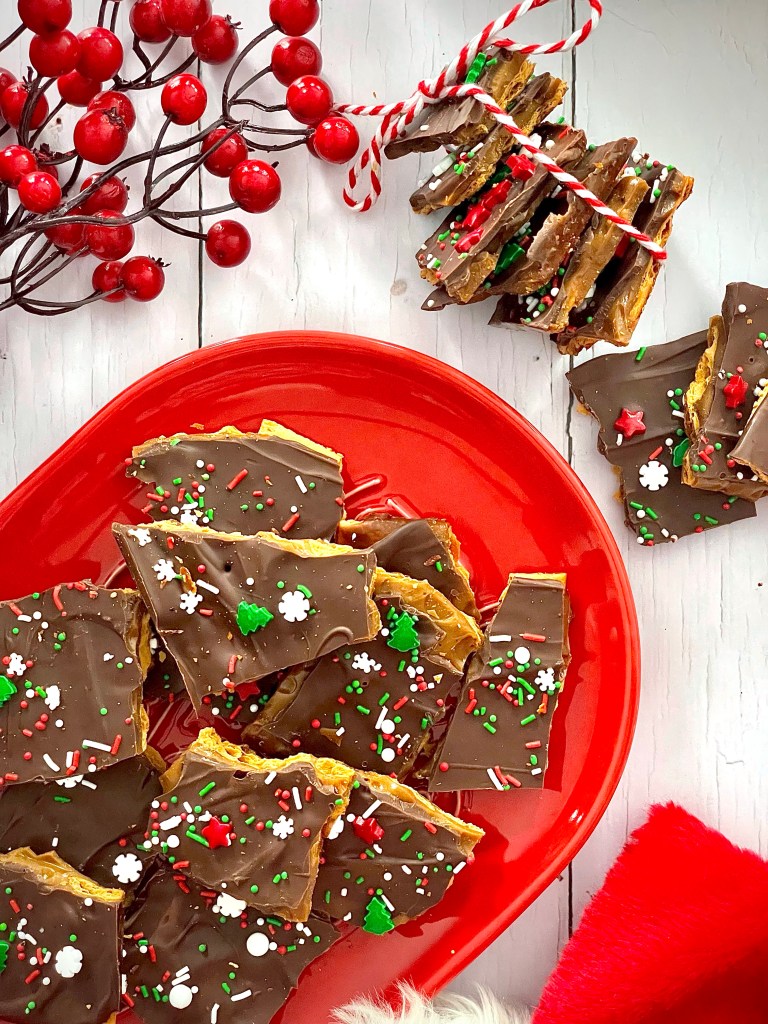
Additional toppings to your liking eg festive sprinkles, chopped nuts
Method
Preheat your oven to 350F
Line a large baking or cookie tray with heavy duty aluminum foil
Arrange you crackers to cover an area of the tray, typically I use 6 x 7 arrangement
In a large pan, combine the butter and sugar. Heat over a medium heat until the butter is melted. Increase heat to medium-high and boil for 5 minutes, stirring constantly
Remove the pan from the heat and carefully pour the caramel mixture over the crackers. Using a silicone spatula or palette knife spread the mixture to cover the surface of the crackers
Place in your prehated oven and bake for 5 minutes. The mixture should show some bubbling
Remove the cracker tray from the oven and set on a heatproof surface
Sprinkle over the two cups of chocolate chips. Allow to sit undisturbed for 5 minutes
After this time, using a clean palette knife spread the melted chocolate chips over the surface of the caramel
Once the chocolate has been spread, sprinkle over your choice of bark toppings to cover
Leave to cool fully a few hours at room temperature. You can speed this up by placing in the refrigerator for a hour or so
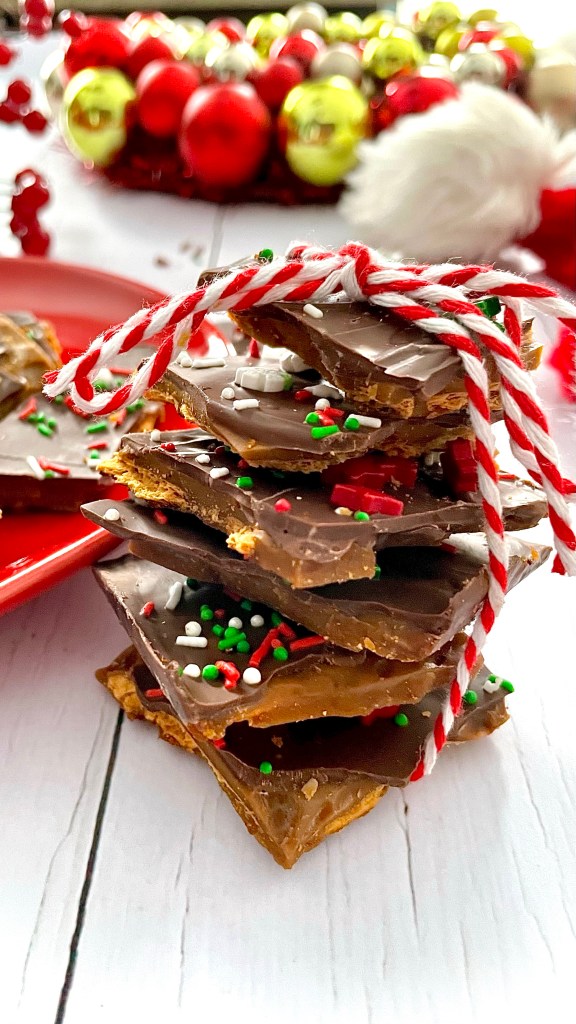
Once fully cooled, peel away the foil and break into smaller shard pieces
Leftovers can be stored in an airtight container and stored in the fridge for up to a week. You can also freeze it for up to 3 months
6 tablespoons (3/4 stick) unsalted butter, room temperature
6oz milk chocolate
6oz semi-sweet chocolate
¼ cup strong brewed coffee, cold
9oz crunchy amaretti biscuits, roughly crushed
½ cup dried cranberries
1 teaspoon freshly grated orange zest
¼ cup powdered sugar
*as an extra treat for the grown-ups you can add a splash of booze! At the end of step 3, add in some a tablespoon or two of liqueur to your liking. I find Amaretto, or rum particularly delicious!
Method
Preheat oven to 350F. and line a baking sheet with baking parchment
Spread the almonds and hazelnuts in a single layer on a baking sheet. Bake until the nuts are lightly toasted, 6 to 8 minutes. Set aside and allow to cool completely
Put the butter and chocolates in a heatproof medium bowl and place the bowl over a pan of barely simmering water. Stir until the chocolate has melted and the mixture is smooth. Stir in the coffee until smooth*
Add the cooled, toasted nuts, crushed amaretti biscuit pieces, cranberries, orange zest, and stir until well combined. Cover the bowl and refrigerate until firm but mouldable, about 1 ½ hours
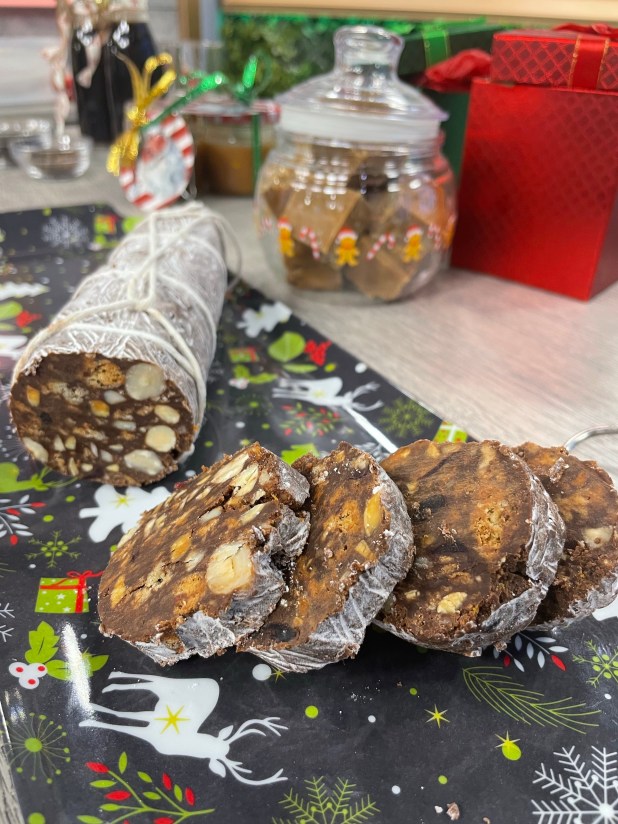
Remove from refrigerator and divide the chocolate mixture in half. Place half of the mixture in the centre of an 18-inch-long piece of cling wrap. Using a spatula, form the mixture into a log, about 7 inches long and 2 inches in diameter. Roll up the log in the plastic and twist the ends to seal. Roll back and forth on a work surface a few times to make the log evenly round. Repeat with the remaining chocolate mixture. Refrigerate both logs until firm, preferably overnight
After chilling, remove the logs from your refrigerator and over a large piece or baking parchment liberally all over rub with the powdered sugar. Brush off an excess sugar with a pastry brush
Store the finished salami in your refrigerator and to serve let the log(s) sit at room temperature for 15 minutes. Using a sharp serrated knife, cut the logs into 1/2-inch-thick slices and serve. Perfect with a strong coffee
12 tablespoons (1½ sticks) unsalted butter, room temperature
½ cup whole milk, room temperature
2 teaspoons red food coloring gel*
1 teaspoon apple cider vinegar
“Coal” Candy
3 tablespoons unflavoured popping candy
½ tablespoon coconut oil
1 tablespoon black cocoa
*Measurement dependant on strength of color. Please note that if using liquid coloring a larger quantity may be required, which in turn may affect the consistency of what you’re coloring. Color to personal preference
Method
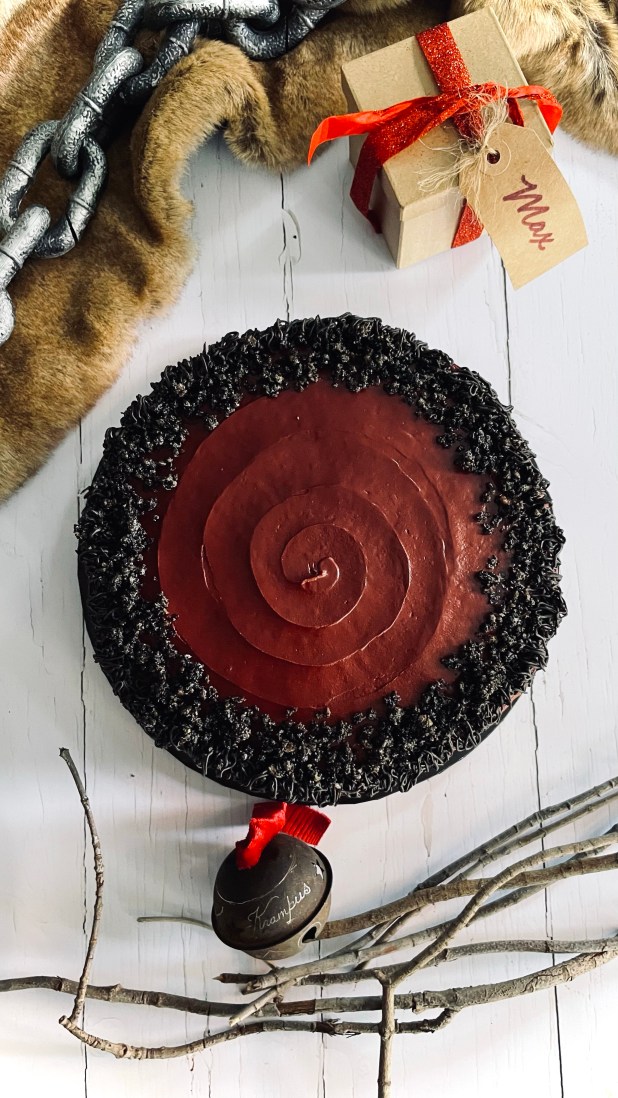
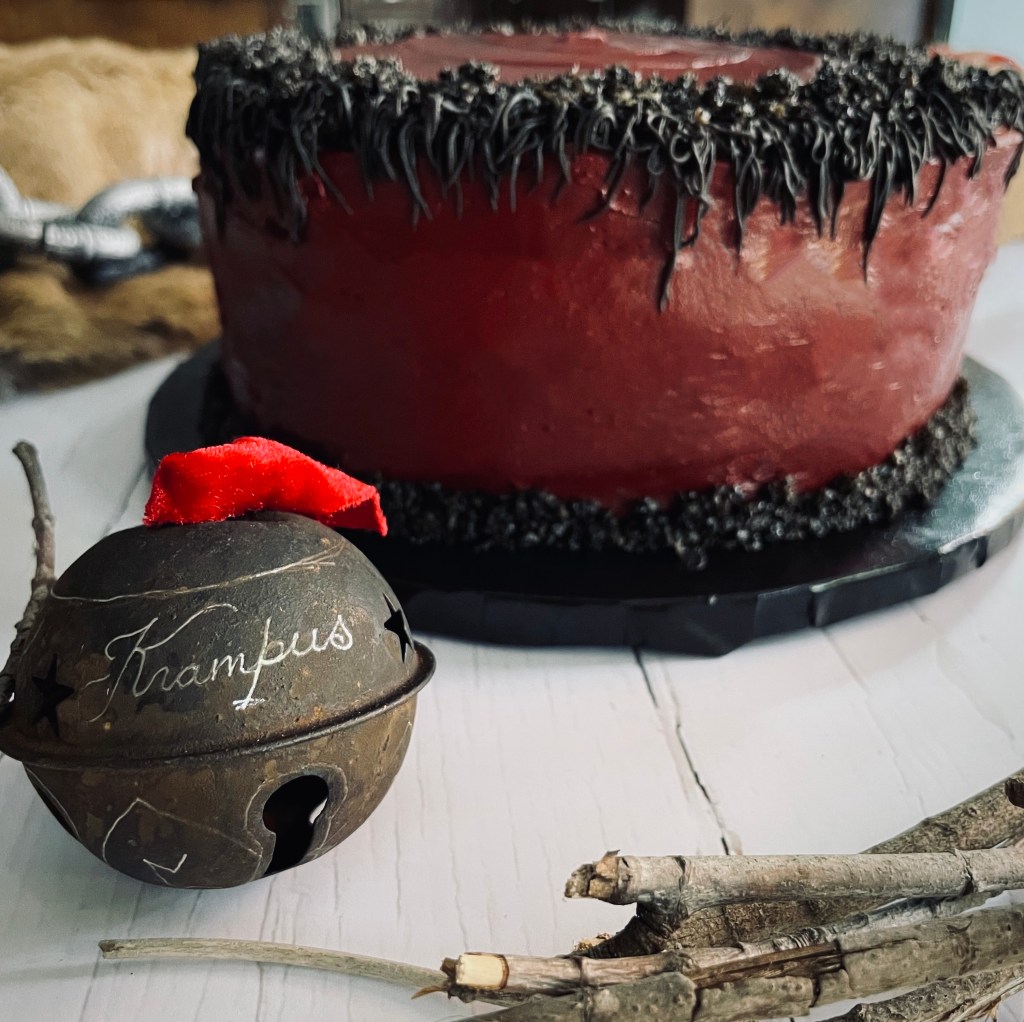
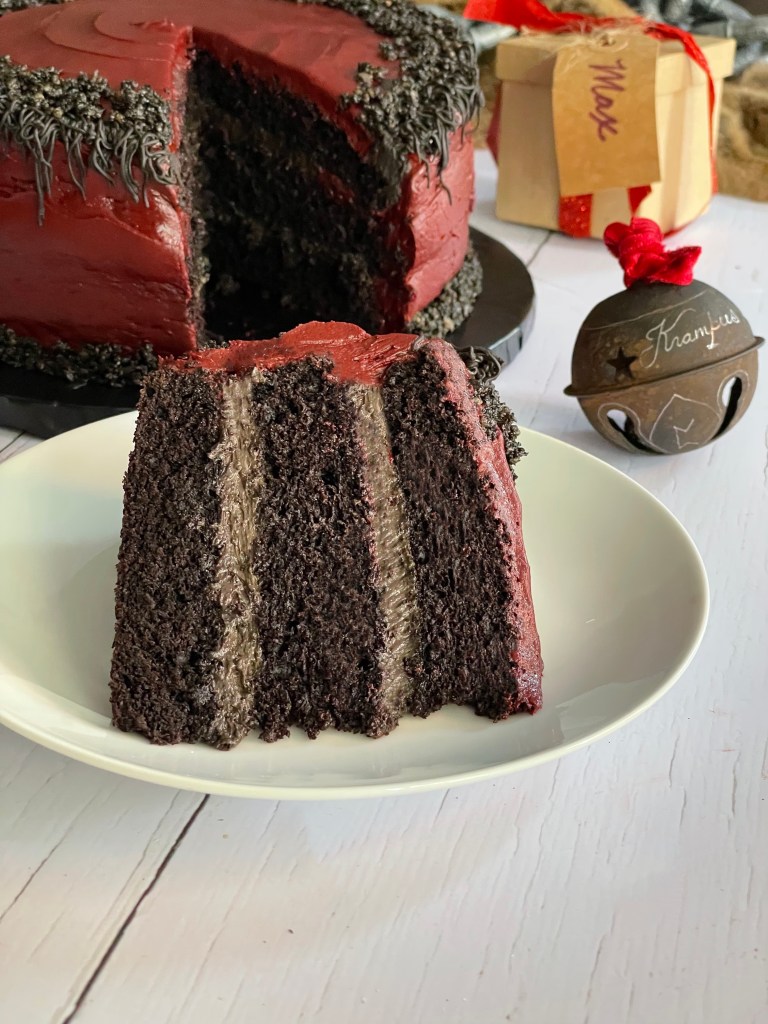
Midnight Chocolate Cake
Preheat your oven to 350F
Prepare 3 no. 8” diameter baking pans by greasing/spraying and lining with baking parchment
In a large bowl combine all the cake ingredients- the flour, sugar, cocoa powder, black cocoa, espresso powder, baking soda, salt, water, canola oil, vanilla extract, and vinegar
Whisk slowly until fully combined, making sure to scrape the bottom of the bowl to avoid any dry ingredient residue. Continue mixing until fully blended and smooth
Divide and pour into your prepared pans. If needed gently tilt the pans to allow the cake batter to flow into an even layer
Bake in your preheated oven for between 20-25minutesm or until a cake tester, or skewer, comes out clean when inserted into the centre of the cake. Remove the cake from the oven allow to cool in tin for 5 minutes in a rack
After allowing to cool for 5 minutes, remove from the pans and allow the cakes to cool fully before decorating
Ganache Filling and Decoration
For the ganache, place the chocolate pieces in a medium heatproof bowl
Heat the heavy cream/ whipping cream, in a small pan over a medium heat until just below boiling (look for small bubbles at the edge of the cream in the pan)
Remove the cream from the heat and gently pour the warmed cream over the chocolate pieces in the bowl. Leave to rest for 5 minutes
After 5 minutes, gently stir the chocolate/ cream mixture with a whisk to emulsify it. It will appear mottled and speckled at first but continue gently stirring until it thickens and is uniform in color
Once fully smooth and uniform in color, set aside and leave to fully cool for 1 hour before dividing the mixture into two separate bowls. After 30 mins, using an electric whisk, beat one of the bowls of mixture to a fluffy, whipped consistency (this will be your filling ganache). Set both aside for about another hour until the they to a spreadable consistency. (The cooling/thickening process can be speeded up by placing the bowls of mixture in your refrigerator)
Buttercream Frosting
In a bowl, sift together the powdered sugar and cocoa powder. Set aside
In the bowl of a stand mixer fitted with a paddle attachment, beat the butter beat on medium speed for 2 minutes. Scrape down the sides and bottom of the bowl
Reduce the speed to low and the add in sugar/cocoa mixture a cup at a time. Combine on low speed until all the sugar/ cocoa mixture has been added
With mixer on low speed, add in milk, red food coloring and vinegar
Increase speed medium and mix for 2 minutes until smooth. After this time, increase the speed to medium/ high and whip for a further 2 minutes
“Coal” Candy
Put the coconut oil into a heat proof bowl and heat in a microwave for 20 seconds until the coconut oil is melted
Add in the popping candy and stir to fully coat it in the melted oil
Add the black cocoa and stir until an even color and it looks like “coal dust”
To assemble and decorate
Level off the cake layer to flat
Frost each layer with a ring of frosting. Pipe or spread an even layer of the whipped chocolate ganache inside the ring of buttercream frosting. Stack the next layer on top and repeat the process.
Using the buttercream frosting apply a light crumb coating on the outside of the cake and let the cake chill in the refrigerator for 20 minutes.
Frost the cake the remaining frosting, and chilli again for a further 20 minutes
Use the remaining (unwhipped) ganache to decorate the cake. You can either apply a final top layer by smoothing the ganache on top, or as I’ve done, using a Wilton #233 tip apply a “fur trim” to the edge.
Happy World Chocolate Day! Yes the food calendar which so often celebrates obscure treats and foods has of course a day designated to everyone’s favorite sweet treat. In whatever form- be it dark, milk, white, ruby or golden, nearly everyone I know has a soft spot for the timeless treat that is chocolate. In fact so much so in my case I ended up competing on a reality baking show about it. But I won’t bore you with those details.
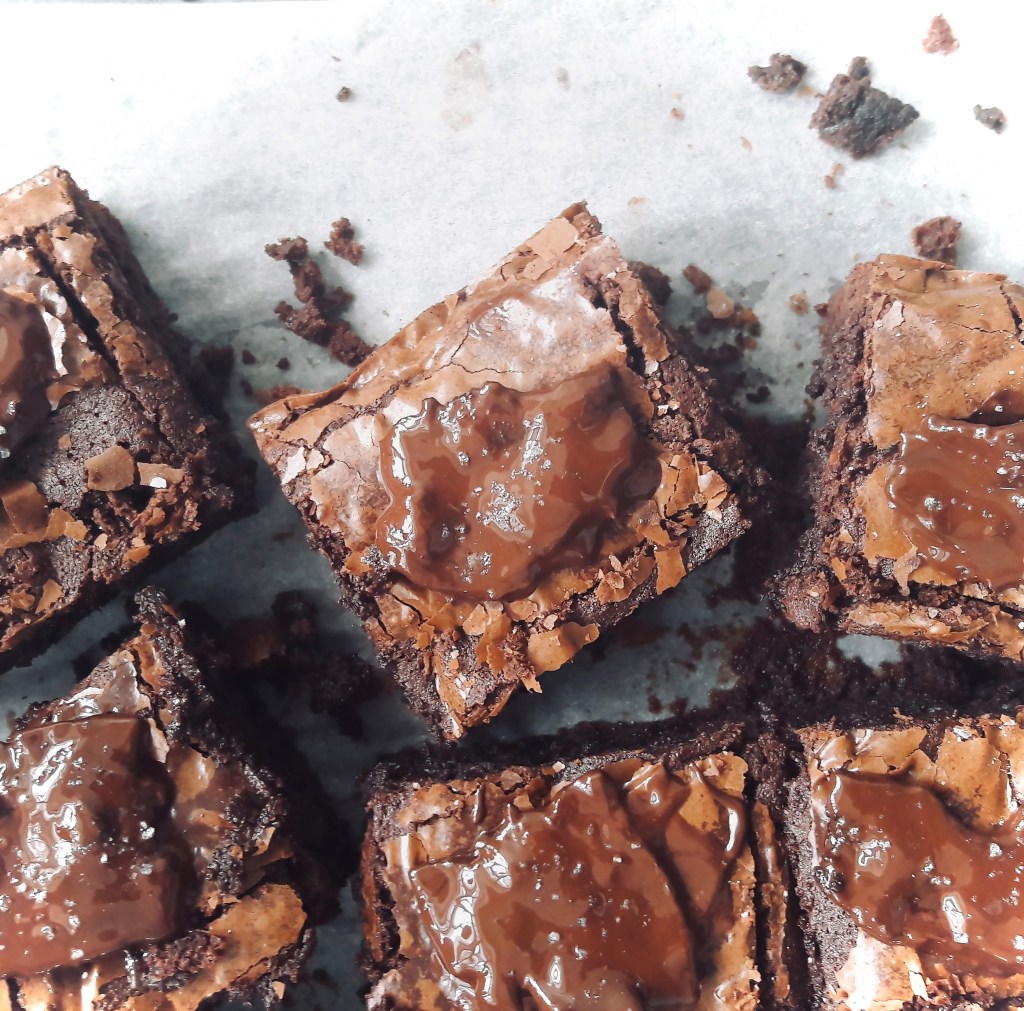
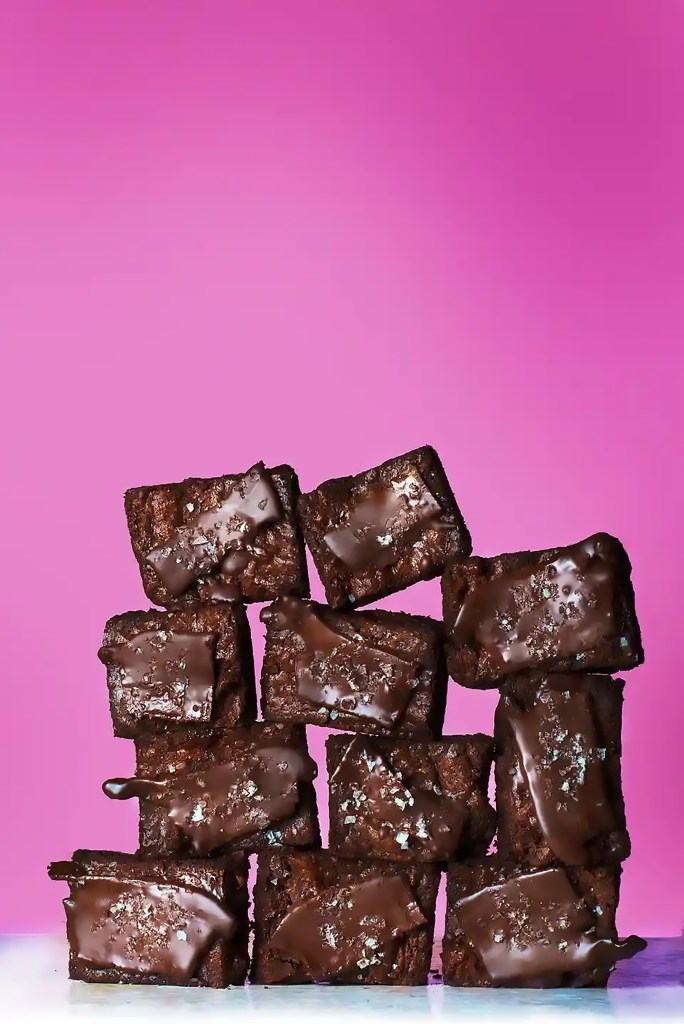
It only seemed fitting given the day that it is that I highlight one of the keystones of my baking journey thus far- my Smokin’ Pig Licker Brownies. Bear with me and see past the name- by know you know I do like to create a talking point! Originally conceived from an idea combining two stalwart (yet polar opposite) favorites in the food world – chocolate (sweet) and bacon (savory) I will forever be indebted to these tasty morsels for earning me the “award winning” in my press kit bio title.
Wanting to pair chocolate and bacon led me to research whether this combination was a historic one, steeped in the recipes of olde, or a more recent affair. It proved to be a little of both. I mean think of the “mole sauces” of Mexican cuisine- pairing sweet and savory was indeed nothing new. But how about actual bacon? It was through this that I stumbled upon “Pig Lickers” and what they involved. A treat hailing from Southern US state fairs, Pig Lickers as such are “treats made by coating cooked bacon in chocolate, and then garnishing with chunks of sea salt”. Are we feeling it yet? The name alone had me hooked let alone that fact that it combined my two holy grail ingredients.
But I wanted to push it a little further. State fairs to me always bring that cliched image of candy floss, hot dogs, and chilli dogs. Wait! Chilli dogs?…chilli? Chilli and chocolate! There you have it! My end result- these brownies would be a classic combination of chilli and chocolate, with a thumbing of the culinary nose addition of bacon- in not one but two forms! The smoky, heat of the decadent brownies would be studded with crispy, sweet bacon pieces and then topped off with the aforementioned Pig Licker- a sliver of crispy bacon enrobed in chocolate, sprinkled with shards of sea-salt. Bet you’re on board NOW?
Before I depart to smother my bacon (!) a couple of words of advice. Don’t be tempted to use thick cut, or peameal, bacon here. The fat-to-meat ration is off and doesn’t work. Instead of crispy morsels of Umami goodness playing with luxurious chocolate, you get chunks of meat which just doesn’t sit right- taste or texture wise. Also don’t stress about tempering the chocolate. I mean you can if you want to go for the whole professional “snap” (*triggered*) finish if that’s your jam but at the end of the day these are rustic, wholesome, come-as-you are treats. Which I hope you enjoy!
Makes 12
Ingredients
1 cup bacon, finely chopped
2 teaspoons maple syrup
¾ cup unsalted butter, cubed
6oz semi-sweet chocolate, broken into pieces
3 eggs
1 cup sugar
¾ cup plain flour
½ cup cocoa powder
1 teaspoon smoked paprika
½ teaspoon mild chilli powder
2oz dark chocolate chunks
To decorate
3 full pieces of bacon 3 rashers, each cut into 4
4oz semi-sweet chocolate, melted
Sea salt flakes
Method
Set your oven to 350°F and line a deep 12″x9″ baking tray with baking parchment leaving an overhang each side
Fry the bacon in a pan until just starting to crisp. Add the maple syrup and fry until a shade browner and crisper. Remove from the heat and leave to cool on a plate
Melt the butter and chocolate in a bowl over a saucepan of simmering water (or bain-marie), stirring occasionally. Once melted, remove from the heat, and allow to cool
In the bowl of a stand mixer, beat the eggs and sugar until the mixture is thickened and fluffy, then, in a separate bowl, combine the flour, cocoa powder, smoked paprika and chilli powder.
Fold the cooled chocolate mixture into the egg mixture. Sieve in the dry ingredients, and fold together until uniform in color
Fold in the chocolate chunks and bacon pieces. You may need to break up the bacon pieces as they may have stuck together while cooling
Pour your mixture into the lined tray and gently spread to level the surface. Place in the oven for 20-25 minutes, then leave to cool completely in the tin before cutting into squares
To decorate, place the larger bacon pieces in the frying pan and cook until crisp. Remove and leave to cool. Melt the remaining in a bowl over a saucepan of simmering water (or bain-marie), or in a microwave on short bursts, until fully melted
Coat the bacon pieces one at a time in the melted chocolate. Place a bacon piece on top of each brownie and sprinkle with sea salt
2oz semi-sweet chocolate (I use bars with 1/4 oz square so I can put 2 in each dish)
Sauce
1 cup maple syrup
1 cup packed light brown sugar
½ cup water
¼ cup unsalted butter
1 tsp vanilla extract
Method
Cake
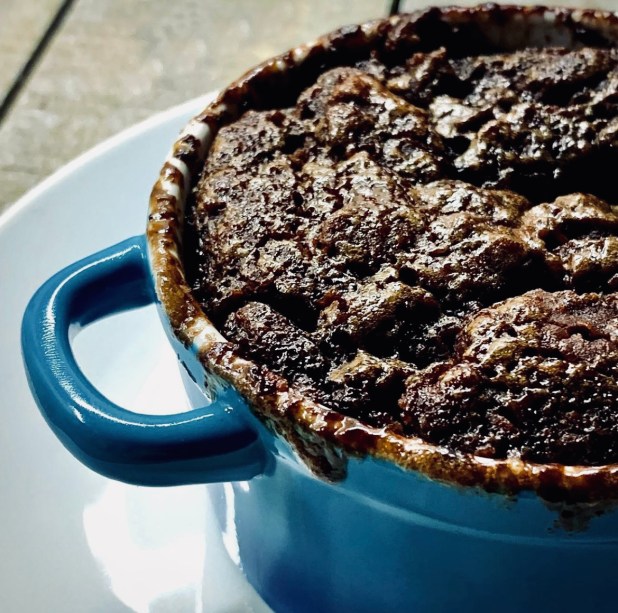
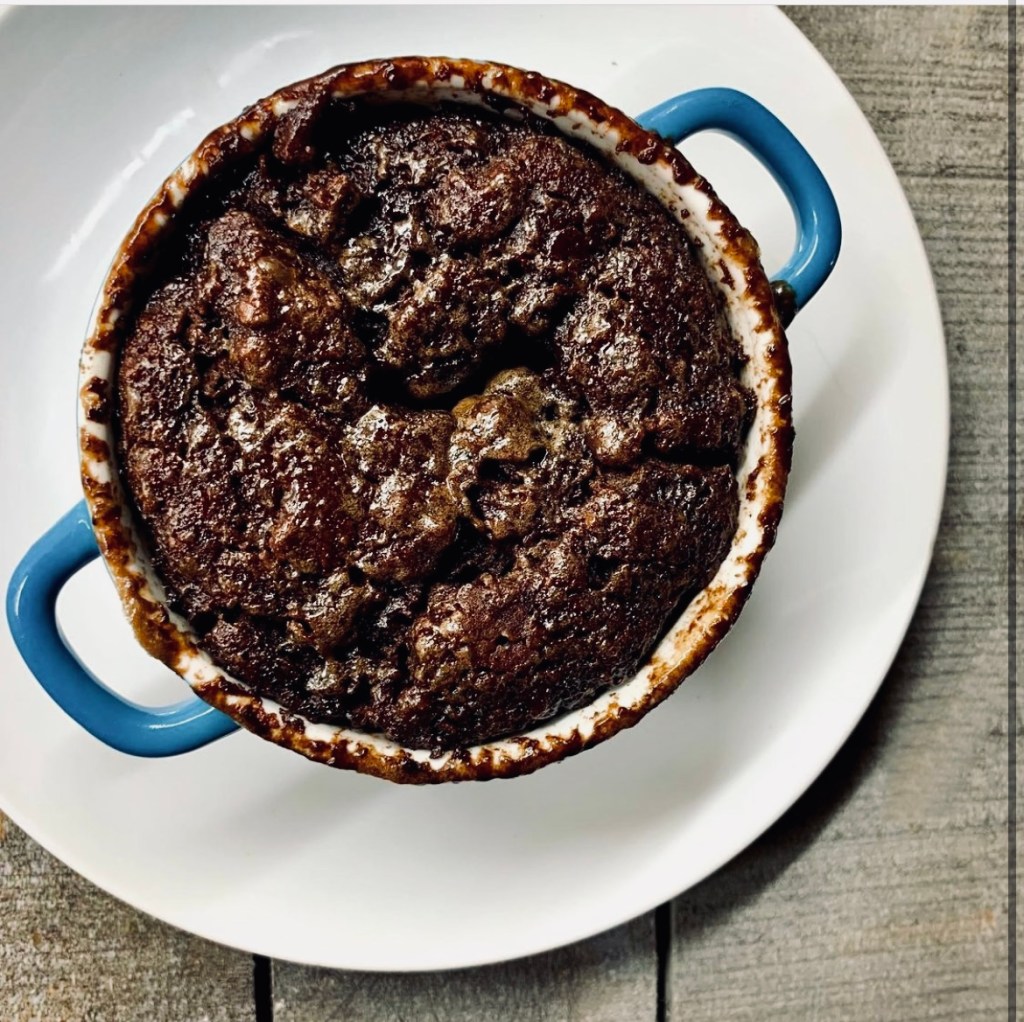
Preheat the oven to 350ºF (180ºC). Lightly grease 4 individual (0.25L) mini-cocottes, ramekins or other ovenproof dishes and place them onto a baking tray
Sift the flour, cocoa powder, sugar, baking powder and salt into a large mixing bowl. Add the butter and use a pastry cutter or your fingertips to work the butter into the flour until a rough, crumbly mixture – similar to thick breadcrumbs or damp sand is achieved
Add the milk, chocolate milk and stir just until the mixture comes together
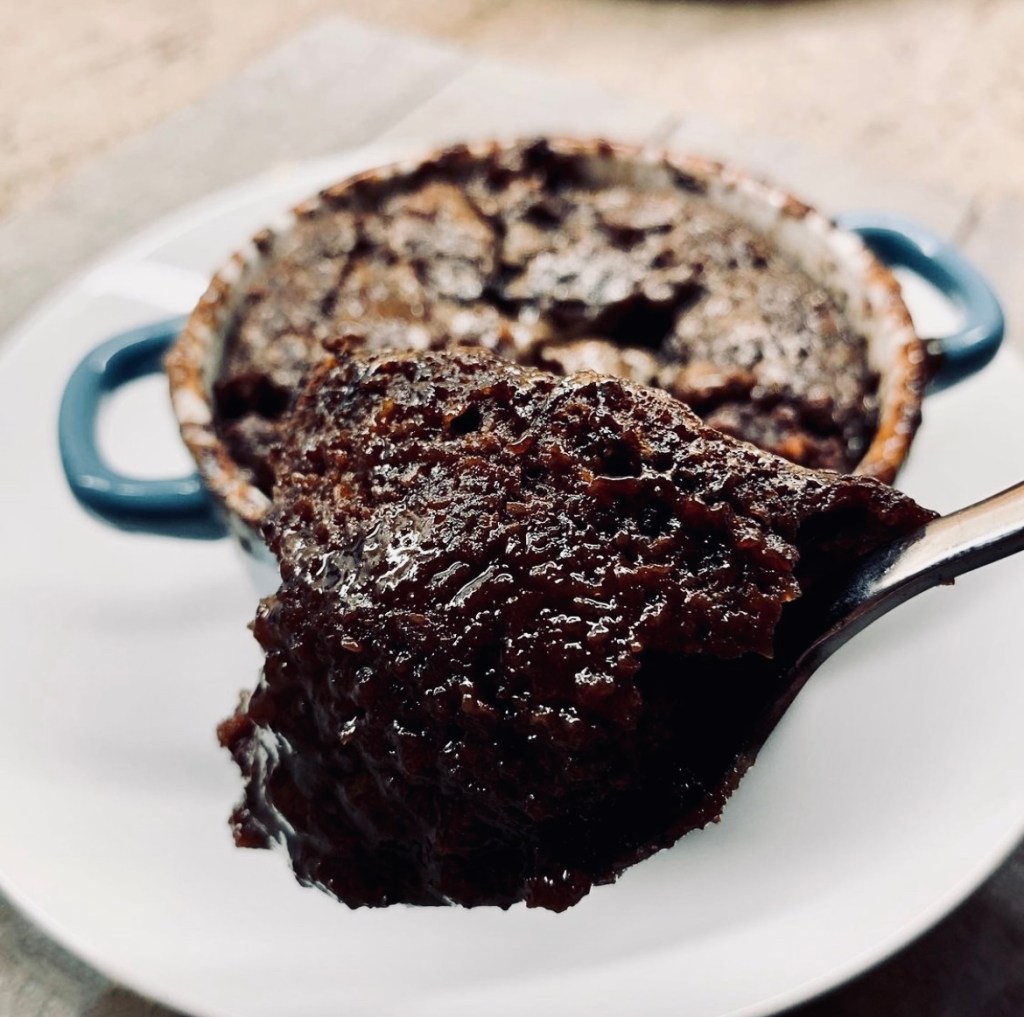
Spoon this into the prepared smaller baking dishes. Push 2 x 1/4 oz square of chocolate into the middle of each pudding. Set aside while you prepare the sauce
Sauce
Combine the maple syrup, brown sugar, water, butter and vanilla in a pan and bring to a boil over high heat, stirring occasionally.
Once it reaches a rolling boil, remove it from the heat and ladle this over the cake in the ramekins.
Bake the puddings for about 30 minutes, until a tester inserted into the centre of a pudding comes out clean.
Remove from the oven and let the puddings cool for about 15 minutes before serving (be careful syrup is hot!)