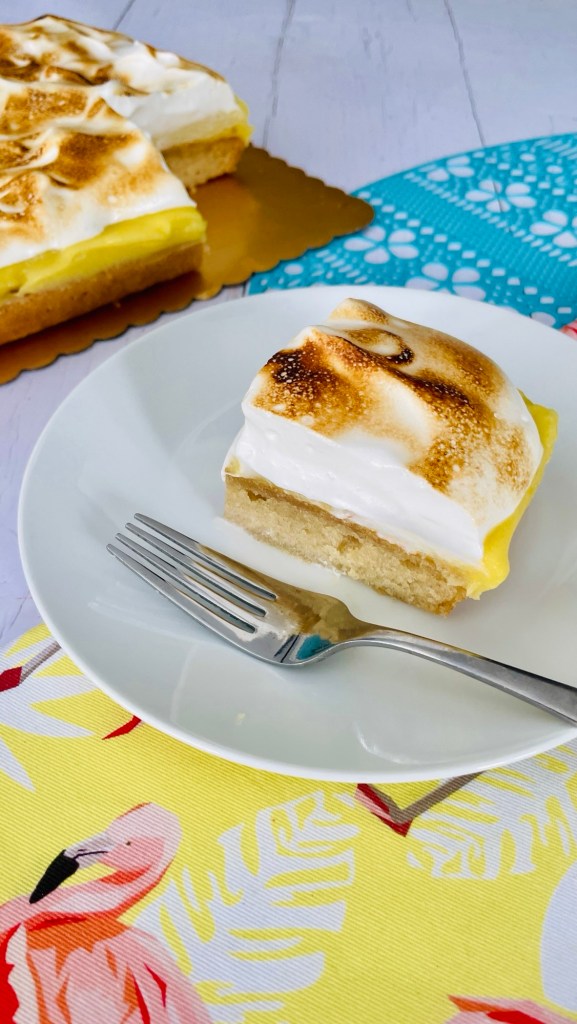
Lemon Meringue Sheet Cake

Serves 16-20

This post contains affiliate links

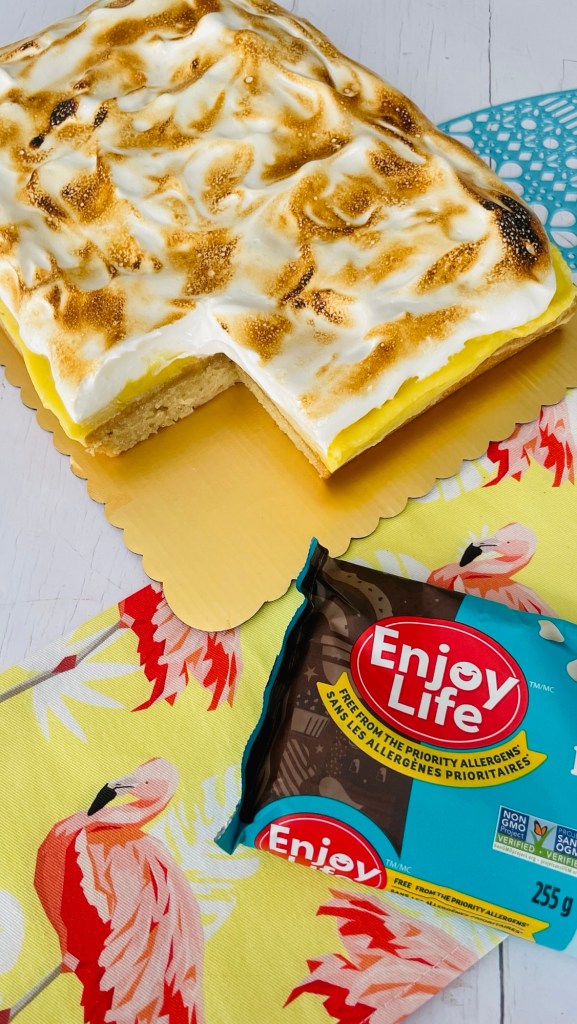
Lemon meringue pie is one of my favourite desserts and my recipe for this Lemon Meringue Sheet Cake takes the wonderfully fresh flavours of Spring, delivers them in a fun sheet cake, taking into consideration possible allergies so that everyone can have a slice of the fun!

I’ve partnered with Enjoy Life for this delicious gluten-free, egg-free, dairy-free, allergen-friendly dessert, as the brand offers a wide range of delicious baking chocolate, perfect for Spring entertaining, as well as school-friendly snacks. All of their products are free-from the top 14 common food allergens and are also certified gluten-free; School-Friendly; verified Non-GMO; and made in a dedicated nut-free and gluten-free facility. 

The standout feature of this cake is a decadent lemon white chocolate ganache layer made using Enjoy Life White Baking Mini Chips. Smooth, zesty and utterly delicious, it can be enjoyed by anyone around the table!

Ingredients

Lemon Ganache layer

  • 680g Enjoy Life white baking mini chips
  • 1 cup whipping cream alternative
  •  2 tablespoons lemon zest (2 large lemons)
  • ¼ cup fresh lemon juice (2 large lemons)
  • 1-2 drops yellow food colouring gel

Vanilla Cake layer

  • 1 ½ cups granulated sugar
  • 2 cups all-purpose gluten-free flour*
  • 1 ½ teaspoons baking soda
  • ¾ teaspoon salt
  • 1 ½ cups water
  • ¾ cup canola oil
  • 2 teaspoons vanilla extract
  • 2 teaspoons white vinegar

Meringue layer**

  • 1/2 cup aquafaba (canned chickpea liquid)
  • ⅛ teaspoon cream of tartar
  • 1 cup powdered sugar
  • 1 teaspoon vanilla extract

Method

Lemon Ganache layer

  1. Place the Enjoy Life white baking mini chips into a large bowl
  2. Microwave for 15 second bursts, stirring in between, until the chips are starting to melt. Set aside until needed
  3. In a small pan, heat your whipping cream alternative until just boiling – you’ll see small bubbles forming at the edge of the liquid. DO NOT allow the liquid to fully boil
  4. Remove from the heat and pour over the semi-melted white baking mini chips, ensuring all the chips are submerged. Allow to rest for 5 minutes
  5. After this time add in the lemon zest and lemon juice, stirring to incorporate. Continue stirring until the mixture is completely emulsified, smooth and uniform in color. Don’t worry if along the way the mixture looks like it has separated- just continue stirring and it will come back together. Using an immersion (stick) blender here really helps with the process, speeding it up
  6. Once your ganache mixture has fully emulsified, add in 1-2 drops yellow food colouring gel and stir until uniform in colour. Cover the surface of the ganache with cling wrap, and set aside for minimum 4 hours to thicken at room temperature

Vanilla Cake layer

  1. Preheat your oven to 350°F
  2. Prepare a 9” x 12” baking pan by greasing and lining with baking parchment
  3. In a large bowl combine all the cake ingredients- the sugar, flour, baking soda, salt, water, canola oil, vanilla extract, and vinegar
  4. Whisk until fully combined, making sure to scrape the bottom of the bowl to avoid any dry ingredient residue. Continue mixing until fully blended and smooth
  5. Pour into your prepared pan. If needed gently tilt the pan to allow the cake batter to flow into the corners
  6. Bake in your preheated oven for between 20-25 minutes or until a cake tester, or skewer, comes out clean when inserted into the centre of the cake. Remove the cake from the oven allow to cool in tin for 5 minutes in a rack
  7. After allowing to cool for 5 minutes, invert the cake onto a cooling rack lined with baking parchment
  8. Remove the tin and lining baking parchment paper and allow the cake to cool fully before covering with the ganache layer

Meringue layer**

  1. In a large bowl combine the chilled chickpea liquid and cream of tartar, whisk until soft peaks form using an electric whisk
  2. With the whisk still running, gradually add in the powdered sugar in stages, being sure to fully whisk in the current amount before adding more (the mixture should not feel grainy at all). Once all your sugar has been added increase the whisk speed and continue to beat until stiff peaks have formed. (If using a handheld electric whisk this part of the process will take longer than making typical egg-based meringue)
  3. Once stiff peaks have been achieved, add in the vanilla extract and whisk to incorporate

To Finish

  1. With your vanilla cake layer fully cooled, spread or pipe the ganache onto the surface. Use a spatula or palette knife to smooth it out
  2. Spoon the aquafaba meringue over the ganache layer and spread to cover the surface. Use a fork or the back of a spoon to create ruffles/ peaks
  3. Gently torch the surface of the aquafaba meringue with a hand-torch or place until the broiler for a few minutes until browned
  4. Slice, serve and enjoy! This sheet cake is best enjoyed straight away

*I use gluten-free flour that incorporates xanthan gum. If yours doesn’t add in 1 ½ teaspoons xanthan gum with your dry ingredients. Regular all-purpose flour can also be substituted 1:1, without the addition of xanthan gum.

**If chickpea aquafaba in the meringue topping isn’t an option, the cake can be enjoyed with your favourite allergen-friendly whipped topping as an alternative

Dubai Butter Tarts

Makes 12

Ingredients 

Pastry

  • 1 1/4 cups All purpose flour
  • 1/2 cup cocoa
  • 1 Tablespoon sugar
  • 1/2 teaspoon salt
  • 1/2 cup butter, cold and cubed
  • 6-7 Tablespoons ice-cold water (dependant on humidity)

Kataifi Filling

  • 2 1/2oz Kataifi pastry, cut to 1/2inch pieces (if not already)
  • 2 Tablespoons butter
  • 200g pistachio cream
  • 3 Tablespoons tahini
  • 1/2 teaspoon salt

Butter Tart Filling

  • 1 cup brown sugar, packed
  • 2 eggs
  • 1/4 cup butter, softened
  • 1 Tablespoon apple cider vinegar
  • 3 Tablespoons light corn syrup
  • Pinch salt

Method

Pastry

  1. Whisk together the flour, cocoa, sugar and salt in a large bowl
  2. Add the chopped butter. Using a pastry blender, or two butter knives, cut in the butter until it resembles coarse crumbs (with a few pea-sized pieces)
  3. Add the water, one spoonful at a time, until the dough starts to come together in a single ball
  4. Gather dough into a ball and knead a couple of times to bring together. Flatten into a disc, wrap in cling wrap and chill for at least 30 minutes
  5. On a smooth surface lightly dusted with cocoa, roll pie dough to a ¼-inch thickness. Cut 12 rounds using a 4½-inch round cookie cutter, re-rolling scraps if needed. Gently press rounds into a 12-cup muffin pan. Refrigerate while you make the fillings

Kataifi filling

  1. In a large frying pan set over a medium heat, melt the butter 
  2. Add the kataifi pastry and stir to coat in butter 
  3. Continue to stir the pastry, moving it around the pan continuously, until deep golden brown
  4. Remove from the heat and transfer to a large bowl to cool
  5. When cooled completely, add the pistachio cream, tahini and salt
  6. Stir all the ingredients together to combine well
  7. Fill the bottom of each pastry tart cup with between 1 – 2 Tablespoons of kataifi filling, tamping it down loosely to 1/3 to 1/2 depth of each tart cup
  8. Return to fridge to chill while you prepare the butter tart filling

Butter Tart Filling

  1. Preheat your oven to 400°F
  2. Combine all the butter tart ingredients in a medium bowl and using electric whisk, beat until smooth and fully combined
  3. Using a jug or piping bag, pour the filling into each tart cup until just below the top
  4. Transfer to the heated oven and bake for 5 minutes at 400°F
  5. After 5 minutes, reduce heat to 375°F and continue to bake for 20 minutes until the filling turns slightly opaque and appears to dome
  6. Remove from oven and allow to cool in tin for 5 minutes then gently loosen and rotate in the tin using a knife or palette knife 
  7. Allow to cool fully in the tin, before removing
  8. Serve and enjoy  

Pumpkin Pie Milkshake

Serves 1

Ingredients

  • 1 standard serving slice leftover pumpkin pie (homemade or store-bought)
  • 1 cup vanilla ice cream
  • 3/4 cup full-fat milk

Optional to finish

  • Whipped cream
  • Additional pie crust crumbs
  • Sprinkles

Method

  1. In a blender combine the pie slice, ice cream and milk
  2. Blend at high speed until just combined. I prefer a slightly smooth shake with some pieces of pie crust left for texture. If you prefer a smoother shake texture, blend together for a longer period of time
  3. Decant into a milkshake glass and top with whipped cream and, if using, additional pie crust crumbs and sprinkles
  4. Sip and enjoy!

Pumpkin Pie Bites

Yields 10-12, depending on scoop size. This recipe has been made using 1/2 leftover 8inch pumpkin pie

Ingredients

  • Leftover pumpkin pie (homemade or store-bought)
  • 4oz milk chocolate chips*
  • 4oz semi-sweet chocolate chips*

To finish

  • Sprinkles, or chopped roasted nuts

Method

  1. Place the left over pumpkin pie into a large bowl and break/ mic together to combine. You don’t smooth a mixture as these taste better with some texture from the original leftover pumpkin pie crust. Continue until you have a semi-smooth mixture
  2. Using a cookie scoop, place balls of the mixture onto a lined tray or container that will fit in your freezer compartment.
  3. When all the mixture has been scooped onto the tray, place it in the freezer for about 30 mins
  4. Just before removing the pumpkin pie balls from the freezer, combine both the chocolate chips in a heatproof bowl set over a pan of water and melt together until smooth
  5. Remove the pumpkin pie balls from the freezer and one at at time roll in the melted chocolate. Place back onto the lined tray, add sprinkles if using and allow the chocolate to fully set
  6. Serve and enjoy!

Pumpkin Sticky Toffee Puddings

Makes 6

Ingredients

Pumpkin Puddings

  • 1/4 cup orange juice
  • 1/2 cup boiling water
  • 1 cup pitted prunes, chopped
  • 1 teaspoon baking soda
  • 1 1/2 cups all-purpose flour
  • 1 teaspoon baking powder
  • 1 teaspoon pumpkin spice
  • 1/2 teaspoon kosher salt
  • 1/4 cup unsalted butter, at room temperature
  • 3/4 cups light brown sugar
  • 2 large eggs
  • 1 Tablespoon maple syrup
  • 1 cup natural pumpkin puree

Toffee Sauce

  • 1/2 cup heavy cream
  • 1 cup light brown sugar
  • 1/4 cup unsalted butter
  • 2 Tablespoons maple syrup
  • 1/2 medium Tonka bean, finely grated (can be substituted with 1 teaspoon vanilla extract)
  • 2 teaspoons Rum (or omit for a kiddy-friendly version)

Method

Pumpkin Puddings

  1. Preheat oven to 350°. Grease, or spray with baking spray, 6 mini-savarin or mini-Bundt tins
  2. In a small heatproof bowl, pour orange juice followed by the boiling water over the chopped prunes; stir in the baking soda. Stir together to combine and set aside to soak for about 15-20 minutes until softened
  3. In a medium bowl, whisk together the flour, baking powder, pumpkin spice and salt. Set aside until needed
  4. In the bowl of a stand mixer fitted with the paddle, beat the butter with the brown sugar at medium speed until fluffy and combined
  5. Beat in the eggs, one at a time until combined, followed by the maple syrup
  6. Reduce speed to low, beat in the flour mixture in stages until just combined, scraping down bowl between additions
  7. Add the date mixture (including liquid) followed by pumpkin purée, and beat at low speed until just combined
  8. Divide the batter into the prepared mini-pans, and bake until a toothpick inserted in the center comes out clean, about 25 minutes*
  9. Remove from oven, and continue to Finishing Steps

Toffee Sauce*

  1. With about 5 minutes left on the pumpkin pudding baking time, in a small saucepan, combine the heavy cream, butter, brown sugar, maple syrup, finely grated tonka bean and the rum (if using)
  2. Bring to a gentle boil over moderate heat, stirring to melt the butter and sugar, cooking until slightly thickened and deep golden, about 3 minutes.
  3. Keep warm on a low heat until serving

To Finish

  1. Once you remove the puddings from the oven, using a skewer or toothpick, poke holes all over the exposed surface
  2. Spoon 4-5 teaspoons of the warm toffee sauce over the puddings, and let stand until absorbed, about 10 minutes
  3. Serve warm, turned out onto plates (they may take some gentle persuasion!) with some of the remaining sauce spooned over. Perfect with a scoop of vanilla ice cream!