Fluffiest Pizza Rolls

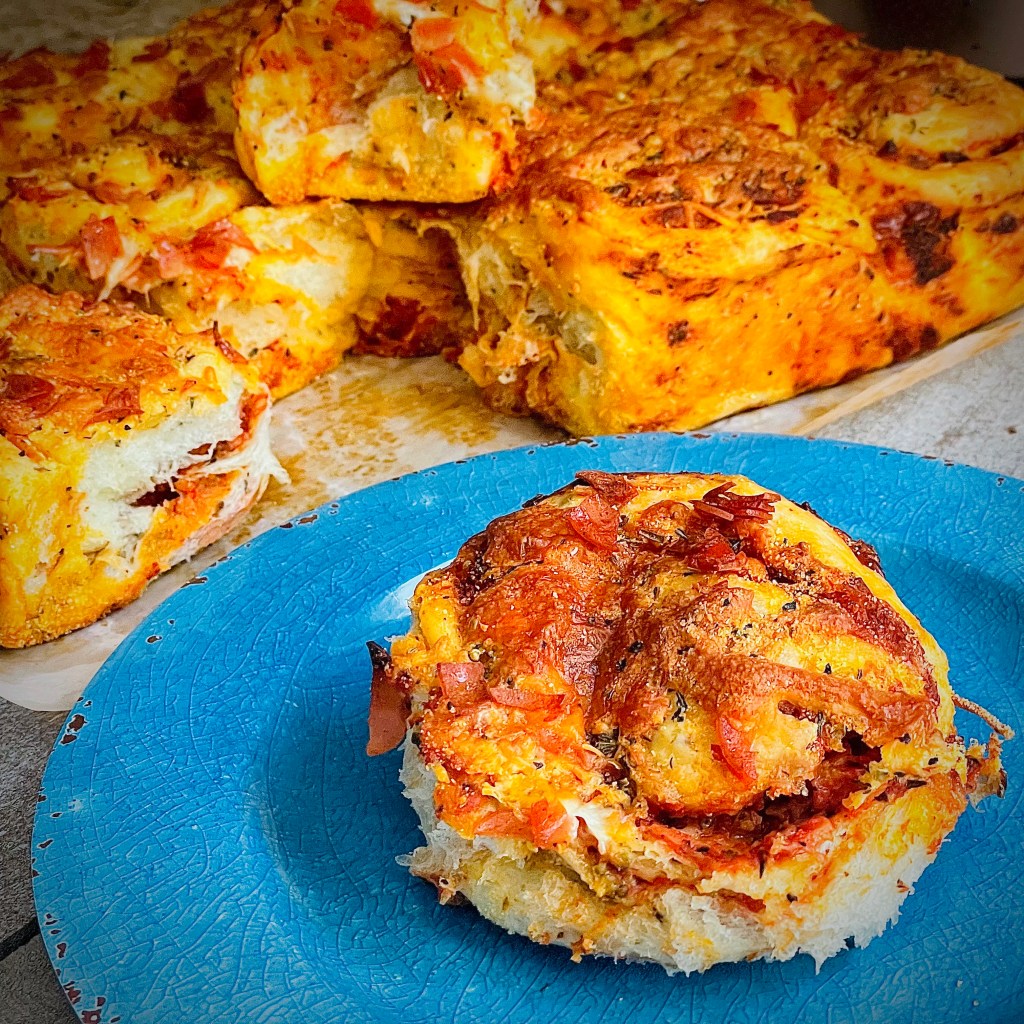
Who doesn’t love pizza? Yes- that age old question. From my experience a pretty good fan base is kids. I know my two are 100% on board with this, and with these rolls even more so. I think part of the enjoyment for them is knowing that they’ll get to sample the fruits of their labor at the end. Over the years I’ve learned that letting kids take ownership of tasks (no matter how small) can yield bountiful positive results and enjoyment all round. But…I’m here to talk pizza (rolls)!

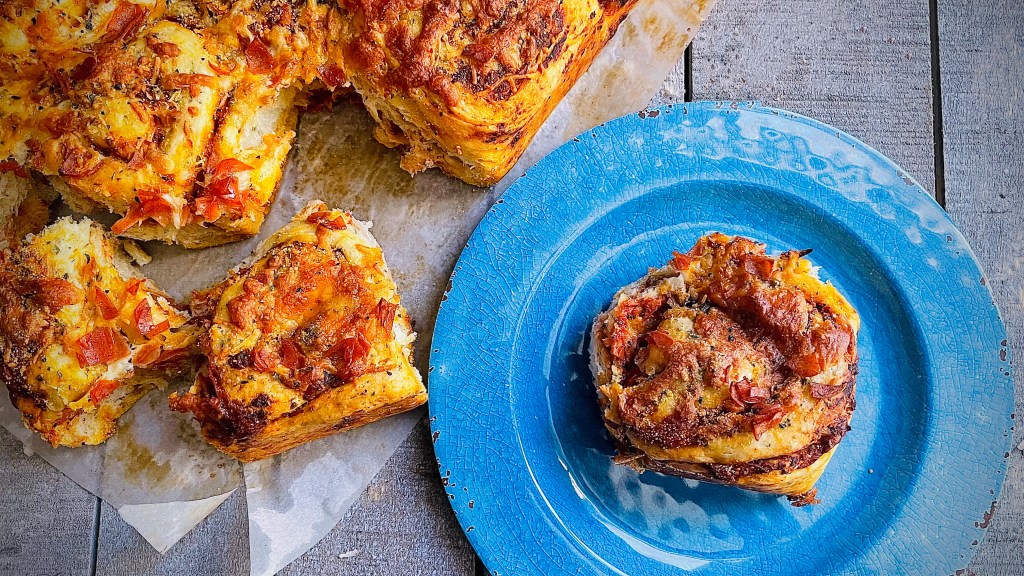
These pizza rolls are perfect on so many fronts – pizza is popular; you can rope the kids in to helping; guests can eat as much as they like; they’re easily transportable outdoor eating in the summer weather. Like I said- the perfect tear and share popular summer bite. For a snack or appetizer I use one, for a main I use two paired with a leafy, summer salad. Let’s not forget it customizable too. If pepperoni isn’t your thing, swap it in for chicken, or ham.

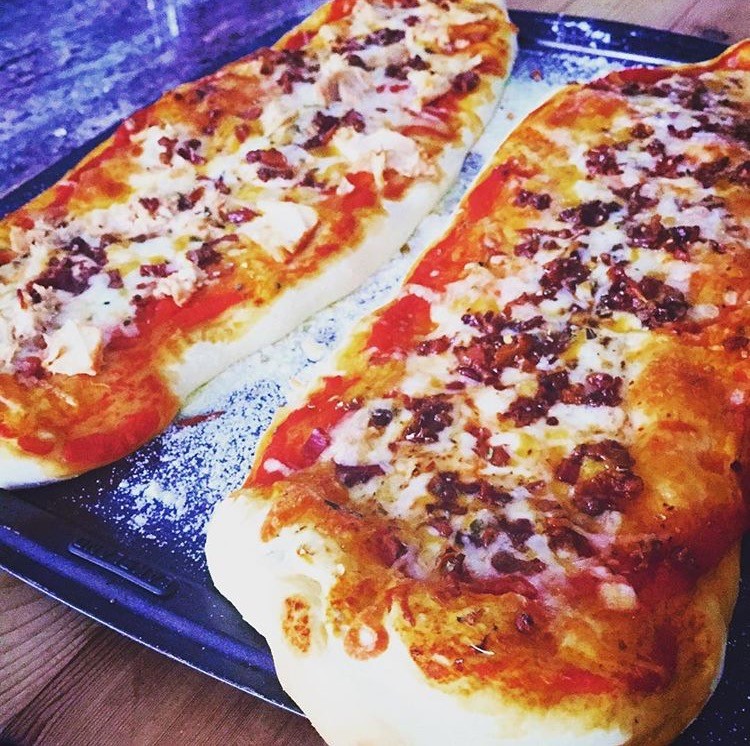
You’ll notice a couple of things with this recipe. The dough can appear wetter than usual when fully mixed, This is what makes the end baked roll so fluffy. It really is a case of “wetter is better”. You also see that I mention cornmeal in the recipe. Whilst this isn’t an ingredient in the rolls as such, dipping their bases in it and baking them results in a wonderfully toasted, crispy bottom with a delightful crunch.

One last piece of advice before I go. These pizza rolls are at their best fresh out of the oven however if there are any left they can be wrapped, stored in the fridge and reheated for enjoying later.

Makes 12

Ingredients

Pizza Sauce

  • 6oz can tomato puree
  • 1 can (15oz) tomato sauce
  • 1 Tablespoon dried oregano
  • 1 Tablespoon dried thyme
  • 2 Tablespoons Italian seasoning
  • 1 teaspoon garlic powder
  • 1/2 teaspoon garlic salt
  • 1/2 teaspoon onion powder
  • 1/2 teaspoon fresh ground black pepper
  • 1 teaspoon sugar

Pizza Rolls

  • 4 cups bread flour
  • 2 1/4 teaspoons quick yeast
  • 1 Tablespoon Kosher salt
  • 1 Tablespoon sugar
  • 1 Tablespoon Italian seasoning
  • 1 egg
  • 1 1/2 cups warm water
  • 1/4 cup oil

Filling/ Topping

  • 2 cups pizza sauce, recipe above
  • 1 cup shredded mozzarella
  • 1 cup shredded sharp cheddar
  • 1 Tablespoon Italian seasoning
  • 1 cup shredded parmesan
  • 1 cup pepperoni, diced/ shredded
  • 1/2 cup cornmeal
  • Olive oil

Method

Pizza Sauce

  1. Combine all the sauce ingredients in a bowl, stir well, cover and set aside on the counter until needed

Pizza Rolls

  1. In the bowl of a stand mixer, with dough hook attachment, combine the flour, yeast, salt, sugar, and Italian seasoning
  2. Add the egg and combine on low speed
  3. Add in 3/4 of the liquid and mix on speed 2 to to combine. The dough should come together and start “cleaning the sides of the bowl”. If you dough is still “shaggy” gradually add in some of the remaining liquid until it comes together
  4. Knead on this speed for 7 minutes, until it is uniform and spring to the touch. It will be a bit sticky!
  5. Transfer to an oiled bowl, cover and leave in a warm place to rise until doubled in size (mine usually takes between 50mins to 1 hour)
  6. Line a 9″ x 12″ baking tray with baking parchment, leaving about a 2″ overhang all the way around. This will help fish the baked pizza rolls out of the tin
  7. In medium bowl, combine the mozzarella, cheddar, parmesan and Italian seasoning. Set aside
  8. Spread the cornmeal onto a plate and set aside
  9. Once doubled in size, tip out onto a well-floured counter and knock back the air from the risen dough
  10. Form into a rough rectangular shape 20″ x 12″ with long edge facing you
  11. Spread the surface of the dough with 2 cups of the pizza sauce. Next sprinkle over 2/3 of the cheese mixture, followed by 1/2 of the pepperoni
  12. Taking the long edge, roll the dressed dough up into a long log shape. It’ll get messy- there’s no getting away from it but doing it slow and easy helps keep most of the filling inside
  13. Cut the rolled up log into 12 pieces* and dip the bottom of each piece into the cornmeal. Place the rolls into the prepared baking tray, cornmeal side down in 3 x 4 formation allowing a small gap between each
  14. Preheat your oven to 350F
  15. Cover with some oiled cling wrap and set aside to rise for approximately 35 to 40 minutes. By the end of this time you’ll notice they will have risen again and be quite snug in the baking tray
  16. Brush with some olive oil and bake in your preheated oven for 15 minutes, at which point remove from the oven, sprinkle over the remaining cheese mixture, followed by the remaining pepperoni, return to the oven and continue baking for a further 15 to 20 minutes until the crust is golden, the cheese has melted and the pepperoni is nicely crisped up
  17. Remove from the oven and leave in the pan for 5 minutes. After this time remove from the pan using the baking parchment overhang, serve and enjoy with the remaining pizza sauce for dipping

*A handy trick for cutting your individual rolls is to use some dental floss (unflavored and clean) or some fishing line (again clean!). Cut a length, wrap it it around the long dough log at where you want to cut and pull together. Slices will be clean and you don’t run the risk of squashing them. Repeat to cut more.

#Recipe Baking with kids…not literally!

Montage

We’ve now been resident here in Toronto for 5 months and things have pretty much settled. My husband has found his pace with his job, our kids have made a smooth transition to a new school, heck we even seemed to have navigated the whole “Daylight saving hours” thing without too much trouble. The only fly in the ointment is me trying to start Mr. Mom’s from scratch again. Whilst a brand new audience awaits from my take on baked goods, it also means a whole bunch of people who no NOTHING about you. And that’s an uphill climb! (If you do happen to work in the foodie sector and would like a food writer, or baker to work with  please do check out my Collaborations page here.)

Anyhoo I digress! As I mentioned above, our kids have (surprisingly) takenthe move to a new country in their stride with little or no tears and tantrums. This week had them on their “March Break” from school- seems to be the equivalent to a UK mid-term break. As well as taking them to the obligatory art galleries and museums (I don’t know who enjoyed it more!) I decided to introduce them to the world of baking. Now I’m not talking anything major- they’re not quiet ready for the cook’s torch or bain maire yet! However you’d be amazed how some simple stirring, cutting, and participation can ignite eagerness.

Here are some of the recipes that took place in Mr. Mom’s kitchen this week. Whilst they range from the sweet to the savory, they are all big on fun, flavour and involvement from little flour-caked hands. I’ve  also included some tips on getting kids involved in the kitchen. Don’t get me wrong- I’m not including this because I consider myself some kind of childcare expert and these are rules by which you should abide. They’re simply meant from the point of my being a dad who wanted to get his children involved in baking and these ways worked for me. I’ve left where to get your kids involved to your discretion as you know them best after all.

Some tips/tricks:

  • Put on some music. Not loud enough that you have to shout over it but loud enough for background. It helps to have something to pass lengthy tasks like kneading or blending. Also think sing-along or random exclamations of “Knead to the beat!”
  • Get the children to find and fetch the ingredients. Framed as a “Baking Treasure Hunt” I’ve seen it help reading skills and memory.
  • Weighing is a surprisingly enticing activity which always draws willing volunteers.  If they overshoot the mark when pouring, it’s no biggie (despite their possible panic!)

So now on to the fun stuff- the recipes! These are a selection of what ended up on the cooling rack…

No Bake Chocolate Cookies

Pumpkin Bread

Sugar Cookies

Simple White Loaf ( and how this can be used to make Pizza)


Mud Puddles (aka No Bake Chocolate Cookies)

pic 4


Ingredients

200g caster sugar

125ml semi-skimmed milk

115g salted butter

4 tablespoons cocoa, unsweetened

1 tablespoon good quality vanilla extract

1 pinch salt

120g gram crunchy peanut butter

225g Jumbo Oats

225g Quick Oats

Method
  • Line baking sheets with baking parchment
  • Bring the sugar, milk, butter and cocoa to a boil in a large saucepan over medium heat, stirring occasionally, then keep on a rolling boil for 1 minute
  • Remove from the heat. Add the oats, peanut butter, vanilla and salt, and stir to combine
  • Drop spaced tablespoonfuls of the mixture onto the prepared baking sheet
  • Leave to cool at room temperature for min 1 hour. After this they’ve set enough tp pick up and eat. I find they usually taste better and are easier to handle the next day
  • These can be kept in an airtight container in the fridge for up to 3 days


Pumpkin Bread

pic 3

Ingredients

250g all-purpose flour

1/2 teaspoon salt

1/2 teaspoon baking powder

1 teaspoon baking soda

1 teaspoon ground nutmeg

1 teaspoon ground cloves

1 teaspoon ground cinnamon

400g caster sugar

170g unsalted butter, softened

2 eggs

1 can (425g)  pumpkin (make sure it’s 100% pumpkin puree)

pic 2

Method
  • Preheat your oven to 160c or 325F.
  • Prepare two 1lb loaf tines with cake release or grease with butter
  • In a bowl sift together the flour, salt, baking powder, baking soda and spices
  • In a stand mixer combine the sugar, butter and eggs and mix for at least 10 mins
  • Add in the pumpkin puree and mix on slow until just combined
  • Reduce the mixer speed to low and add in the flour mixture by heaped tablespoon at a time. Keep  the mixer going until just combined – make sure there are no white flour pockets
  • Remove the bowl, pour the mixture equally between the prepared tins and level the top
  • Bake in the oven for 60-70mins until a skewer comes out clean
  • Remove from the oven, remove from tins and leave to cool on a wire rack. When cool wrap in clingfilm until needed.
  • These loaves get better over time. After a couple of days wrapped they develop a fudgy, sticky texture which goes really with the warming spicy flavor (similar to McVities Jamaican Ginger Cake for those of you who know it?)


Sugar Cookies

pic 5

Ingredients

350g unsalted butter, softened

400g caster sugar

4 eggs

1 teaspoon good quality vanilla extract

620g all-purpose flour

2 teaspoons baking powder

1 teaspoon salt

Icing sugar for dusting and rolling


Method
  • Preheat oven to 200C or 400F
  • Line cookie sheets with baking parchment
  • Sift the flour, baking powder and salt together in a bowl
  • In a stand mixer, cream together butter and sugar until smooth (mix for at least 10 mins)
  • Beat in eggs, one at a time,and vanilla
  • With the mixer on a slow speed, stir in the flour mixture one heaped tablespoon at a time until well combined and a dough formed
  • Tip the dough onto clingfilm and wrap tightly
  • Cover, and chill dough for at least one hour (or overnight)
  • Dust a surface with icing sugar, sprinkle the dough with icing sugar and roll out the dough to a thickness of apx 5mm (*use icing sugar to prevent sticking to surface and rolling-pin)
  • Cut out shapes using cookie cutters and transfer to prepared baking sheets
  • Bake in preheated oven for 8-10 mins
  • Remove and use a wide spatula or palette knife to transfer the soft cookies to wire rack to cool. They’ll firm up upon further cooling.

* I made 50/50 blend of vanilla and chocolate sugar cookie by removing half the dough when refrigerating it and leaving half in the bowl. To this I added 50g unsweetened cocoa powder and 100g unsweetened chocolate chips. Mix until well combined then refrigerate and make as per the rest of the recipe.


Simple White Loaf

pic 12

Ingredients

500g Bread flour

12g fast action yeast

10g salt

40ml light olive oil

320ml warm water

pic 10

Method
  • In a bowl combine the flour, yeast (to one side) and salt (to opposite side)
  • In bowl combine olive oil and water
  • Pour the water/oil mixture into the flour bowl in a steady stream
  • With your hand in a “Claw” shape mix from outside of the bowl towards to centre. Continue until all the mixture comes together into a dough ball and the bowl sides are clean
  • Lightly oil a surface with olive oil and tip out the dough onto it
  • Knead the dough for 10 mins until it becomes smooth and elastic
  • Transfer the kneaded dough to a lightly oiled bowl and cover with some lightly oiled cling film. Leave to rise until doubled in size
  • Line a baking sheet with baking parchment and dust with bread flour
  • Again lightly oil a surface and tip out the risen dough
  • Punch and knead the dough, for about 5 mins, until all the air has been expelled from it (called “Knocking Back”)
  • Shape with your hands into a long oval shape and transfer to the prepared baking sheet
  • Cover loosely with some damp kitchen paper or oiled cling film and leave for 40-60 mins until risen
  • Preheat your oven to 225c or 435F
  • Once the dough has risen, lightly spray with water, slash the top of the loaf, dust with all-purpose flour and place it in the preheated oven. After doing this place a dish filled with 1 pint of water in the bottom of the oven (this creates a crust)
  • Bake for 25mins, at which point reduce the temperature to 200c or 390F and continue to bake for a further 15-20mins
  • Remove the loaf from the oven (careful of the steam!) and leave to cool

Pizza adaptation

I’ve also used this recipe to make pizzas which the kids absolutely go crazy for. I’m not sure that it’s as much for the taste of it as it is for the whole “I’ve made this!” boost to their confidence. To use this for pizza making follow the steps until the “Knocking Back” stage.

pic 9

  • After knocking back the dough divide into equal pieces (I usually get 4-5 good size pizzas from this quantity of dough).
  • Preheat your oven to 250C or 475F (with baking sheets or pizza stones in)
  • Sprinkle a surface with a 50/50 combination of all-purpose flour and semolina
  • Dust the dough with some of the flour/semolina mixture. Flatten and stretch the dough until thin into which ever shape works best for you- circle, oval or rectangular. It just depends on what fits with your oven
  • Dress to your (and your kids!) taste with toppings. All of the following are good- tomato passata (as sauce); cheese shreds; bacon; tuna; pepperoni; chicken; fresh herbs; fresh mozzarella; thinly sliced figs…thre list can go on!
  • Carefully remove and dust your baking sheets or pizza stone with flour/ semolina mixture
  • Transfer your pizza(s) to baking sheets or pizza stone and bake for 10-12 mins until ready
  • Remove from oven, brush the exposed sides with extra virgin olive oil and servepic 8

So there’s a brief selection of some o the tasty goods from my kitchen. I hope you enjoy baking them, getting your kids to pitch in and tasting them as much as we have.