Makes 18
Ingredients
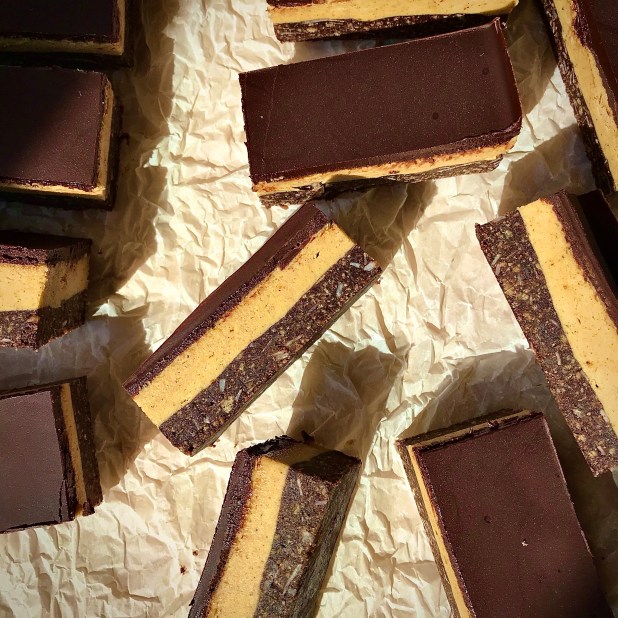
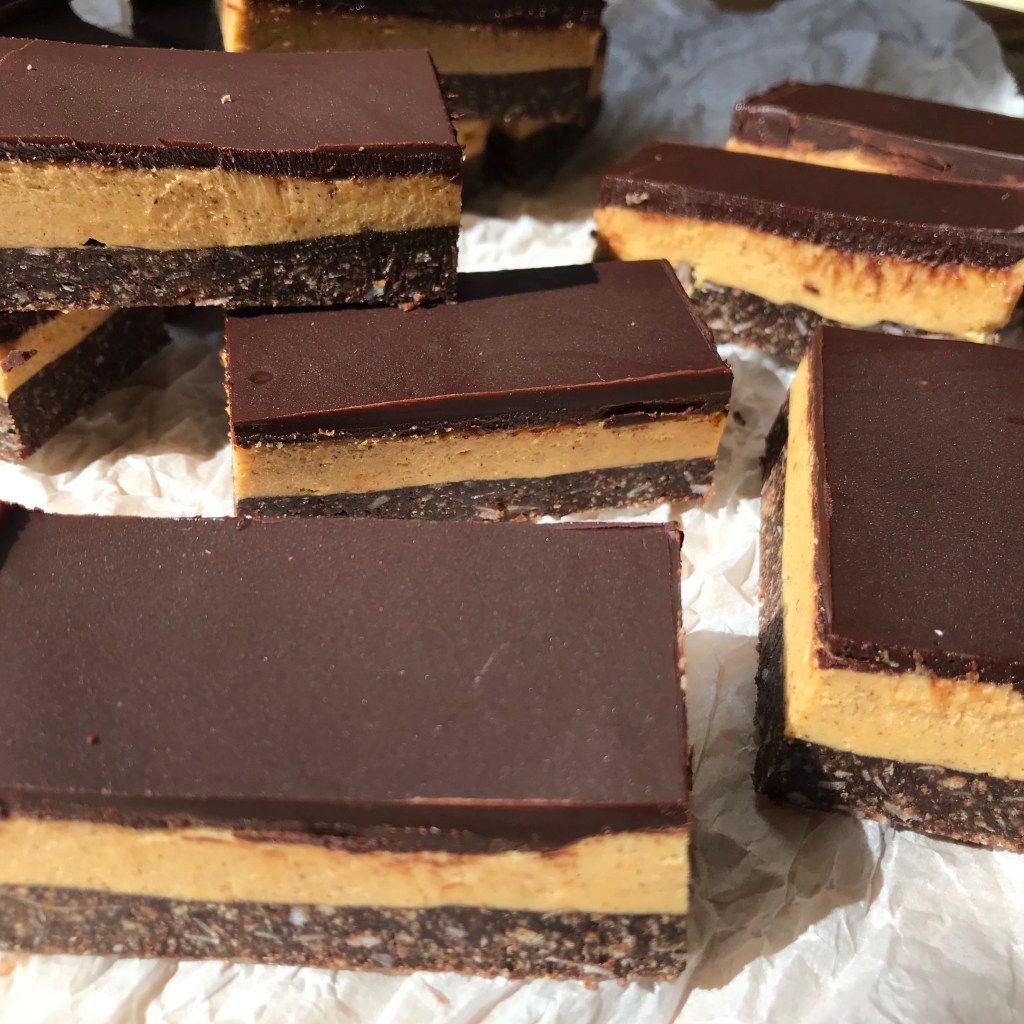
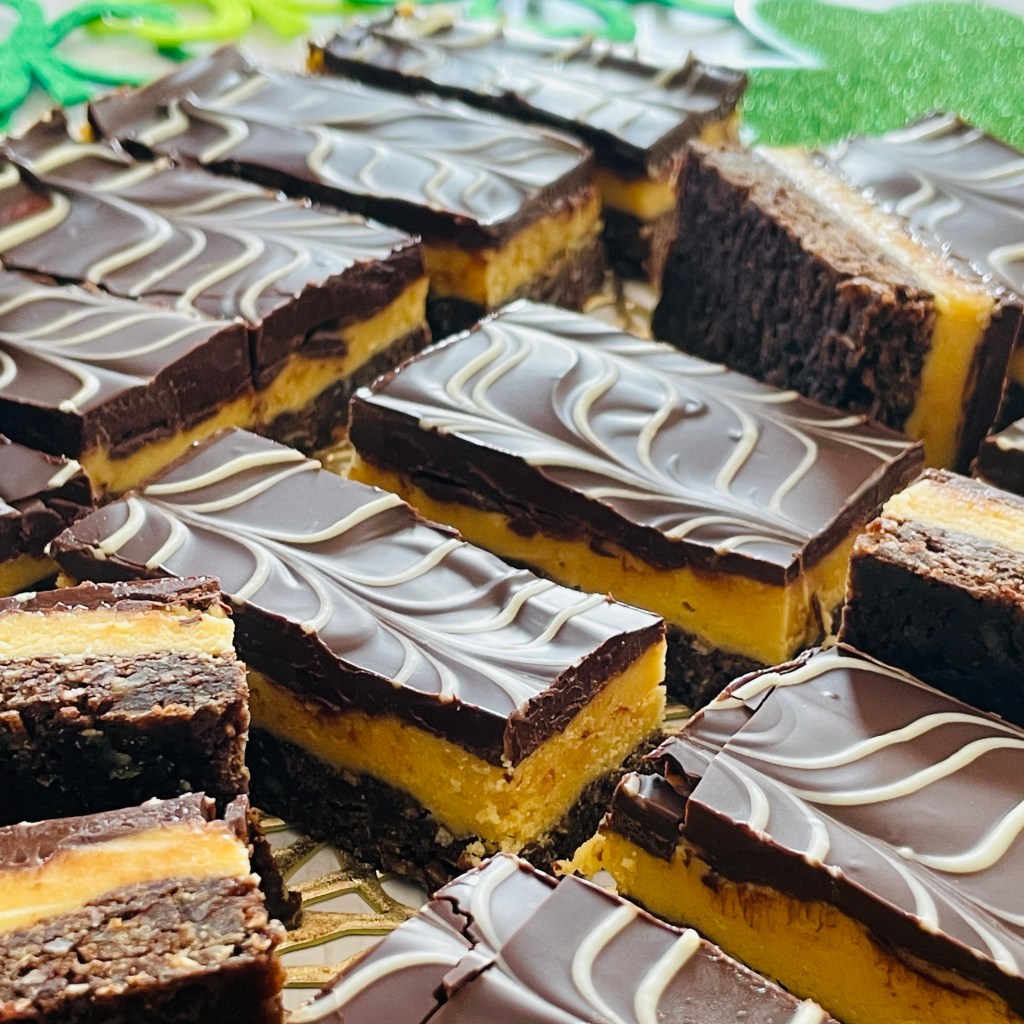
Base layer
- 1/2 cup butter
- 1/3 cup cocoa powder
- 1/4 cup fine sugar
- 1 large egg, beaten
- 1 1/2 cups graham cracker crumbs
- 1 cup brown (wholewheat) bread crumbs
- 3/4 cup sweetened shredded coconut
Middle layer
- 1 cup powdered sugar
- 1/2 cup butter, softened to room temperature
- 2 Tbsp custard powder
- Pinch salt
- 2-3 Tbsp Irish Cream (Baileys), to taste
- 1 tsp vanilla extract
Top layer
- 6 oz semi-sweet chocolate, broken/ chopped into pieces
- 2 Tbsp butter
- 2oz white chocolate, broke/ chopped in to pieces
- 1 tsp butter
Method
Base layer
- Preheat oven to 350 degrees F. Line a 9 inch square baking pan with parchment paper
- In small saucepan over medium heat, combine butter, cocoa and sugar, stirring occasionally until butter has melted and mixture is smooth. Set aside to cool
- In a separate medium bowl combine the egg, graham cracker crumbs, brown bread crumbs and shredded coconut. Add in the cooled cocoa/ butter mixture and stir to fully combine
- Transfer to your prepared pan. Press firmly and level as much as possible
- Bake for 10 mins, then remove from oven and leave to cool completely
Middle layer
- In bowl of a stand mixer with paddle attachment, cream together powdered sugar, butter, custard powder, salt, Irish cream and vanilla extract. Spread the mixture evenly over the cooled bottom layer; smooth and chill for at least an hour
Top layer
- In a bowl set over barely simmering water, melt semi-sweet chocolate, and butter together, stirring occasionally, until smooth and shiny.
- In a microwave, heat the white chocolate and butter together in a small bowl until melted. Transfer to a small piping bag.
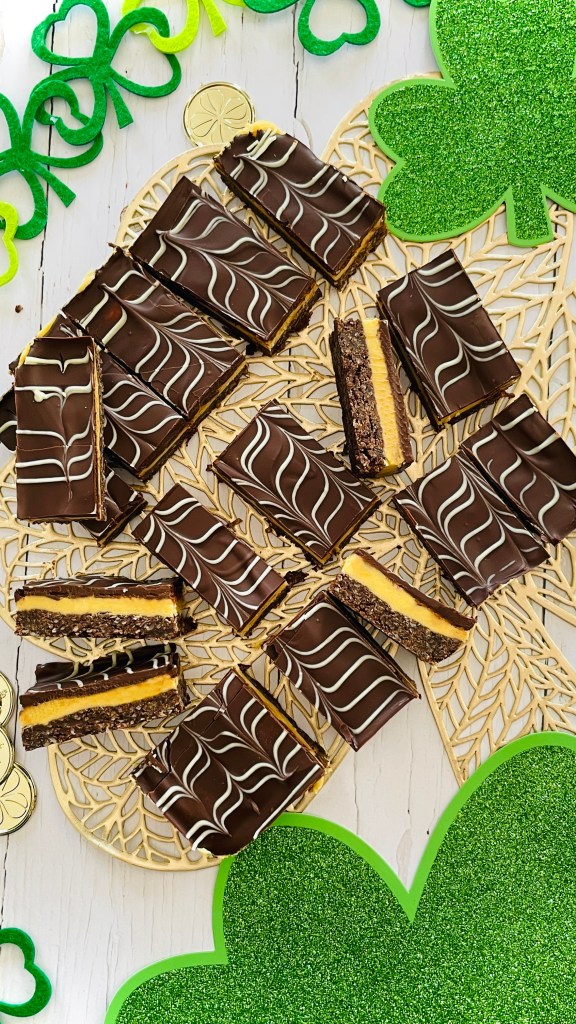
- Pour over the melted semi-sweet chocolate over the Irish cream layer and smooth. Pipe on the white chocolate and feather to a design of your liking
- Chill in the refrigerator overnight, or 2 hours minimum. Cut into bars (I usually get 18, cutting into 3 x 6)
- Keep the cut bars in a covered container either in the refrigerator (3 days) or frozen (3 months)