¼ cup unsalted butter, softened to room temperature
1 ¼ cups smooth peanut butter
1 teaspoon vanilla extract
1 cup powdered sugar
1 ½ cups crisped rice cereal
8oz semi-sweet chocolate, chopped
1 teaspoon coconut oil
Method
Prepare a baking tray by lining with parchment paper
Place the softened butter and the peanut butter in the bowl of a large mixer and beat until soft and well-combined
Add the vanilla and the powdered sugar, and mix until all of the sugar is incorporated
Using a wooden spoon or spatula, fold in the crisped rice and mix until the cereal is just incorporated into the peanut butter
Use a cookie scoop, or small teaspoon, place small balls of the mixture on to the prepared tray and chill for 1 hour
After the hour, using your hands roll the balls until smooth
Return to the prepared tray and freeze for 30 mins until firm
Just before removing the peanut butter balls from the freezer, melt the chocolate and coconut oil together in a small bowl set over hot water. Stir occasionally while melting to ensure it’s evenly mixed
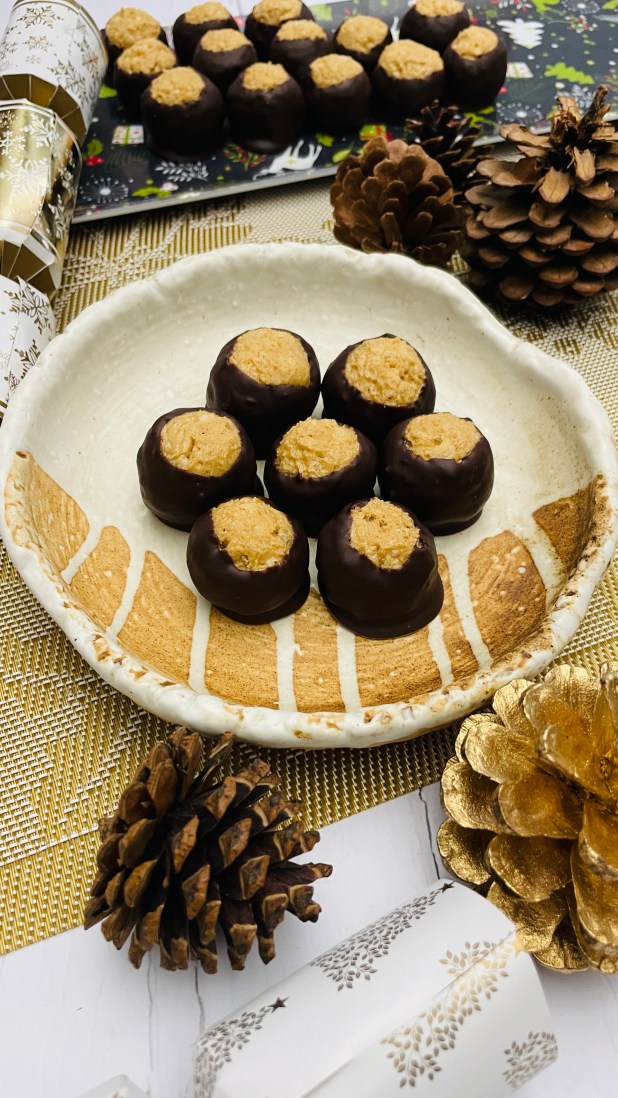
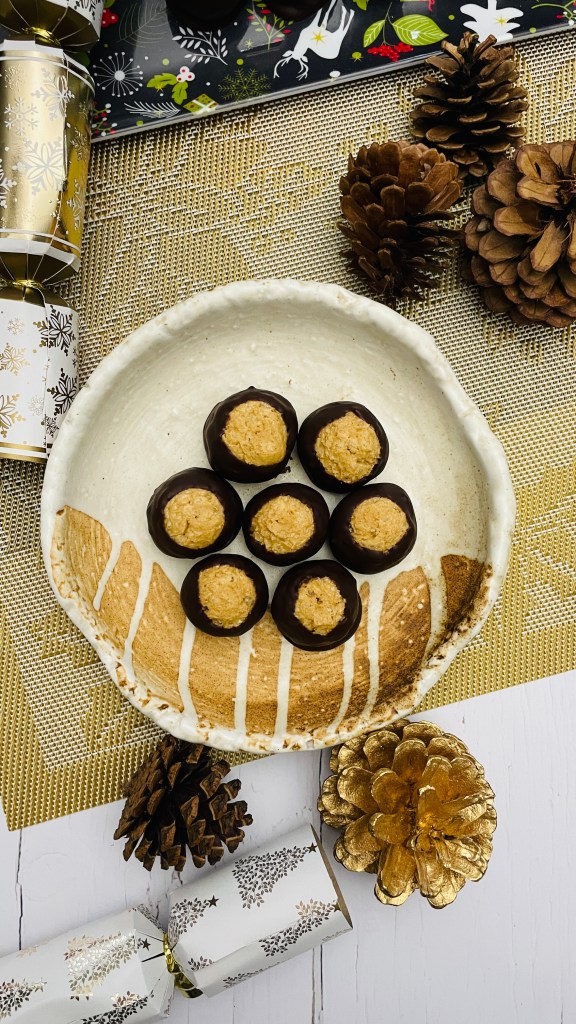
Once the chocolate is melted and completely smooth, take a cocktail stick and stick it into a frozen crunchy buckeye, ensuring the cocktail stick is well inserted and lower it into the chocolate. Be careful not to insert the buckeye all the way, keeping the top imcoated. Roate the buckeye as you tip and allow any excess to drip back into the bowl
Place the dipped candies on to your prepared baking sheet and once they are all dipped, refrigerate them to set the chocolate, for about 15 minutes
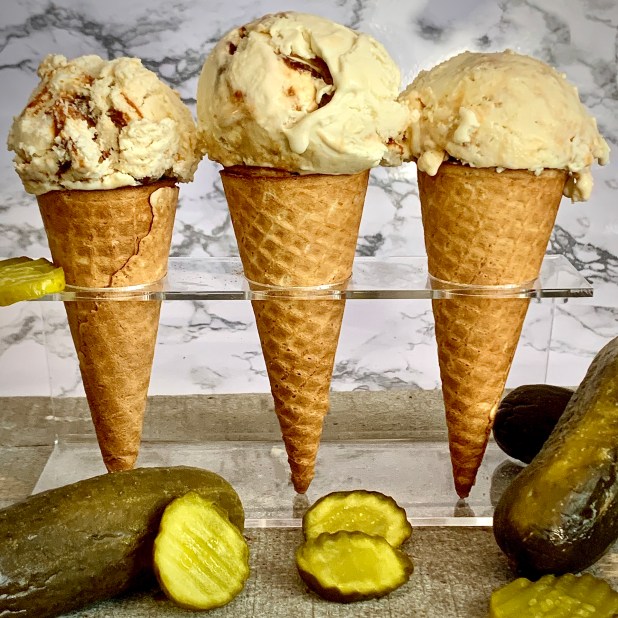
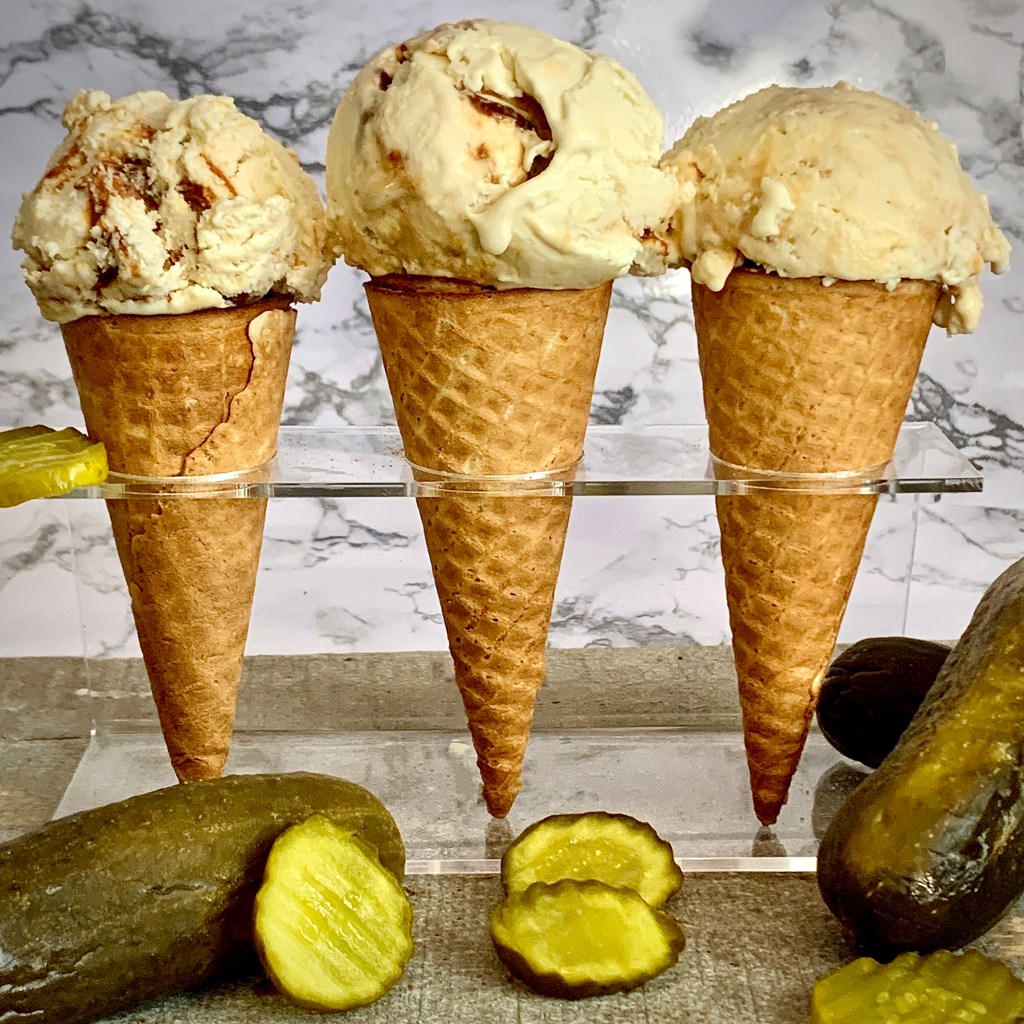
No, I haven’t finally taken leave of my senses! This is indeed a recipe for pickle ice cream…with peanut butter. Peanut butter caramel at that. Whist it might sound like I’ve thrown everything at this but the kitchen sink, all for the sake of sensationalist recipes, as ever there is method in my wild thinking.
For starters July is both National Pickle Month AND national Ice Cream month. See? Already I have a reason! I’ll have to come clean though, admitting I’m not an fan of pickles myself. The texture that is. The zesty, vinegar flavour has however proved quite addictive to me over the years. Which is where this recipe is a win.
The ice cream here carries the zesty, almost herbaceous flavour of the pickle itself without any of the (for me) unappealing nubs of vegetable. It carries a certain freshness to it which makes consuming it on Summer days all the more appealing.
So where does the peanut butter come on? Well, as so is often the case with me I fell down a food rabbit hole whilst doing research on the ever so humble pickle and its varying uses. One of the ones that popped up and immediately piqued my interest was the “PB & P” sandwich- Peanut Butter & Pickle. The peanut butter and pickle sandwich isn’t some new viral trend but has in fact been a low-profile favorite in the U.S. since it appeared on deli counters during the Great Depression. A little mentioned stalwart of many a grandparent out there it would seem. On trying it, the way that the creamy peanut butter plays off the crunchy, briny pickle is really kind of amazing. Give it a go!
Salted caramel swirl ice cream is one of my favorites- both taste and visuals are satiated tracing the sweet rivulets through sweet creamy mounds. So why not include that here. I use peanut butter as a base for the caramel swirl in order to tie all my reference points together – paying homage to bygone favorites with a nod to my own personal ones. And hey, it’s Summer! Who doesn’t like ice cream?
Check out this #recipe for Pickle Ice Cream w/ Peanut Butter Caramel Swirl
Heat granulated sugar and glucose in a heavy-duty saucepan over medium heat, stirring constantly (use a heat-resistant spoon or spatula). Melt the sugar into a thick brown, amber-colored liquid as you continue to stir. Be careful not to burn it!
Once sugar is completely melted, immediately stir in the peanut butter until melted and fully combined. The caramel will bubble rapidly when the peanut butter is added.
Return to heat when it’s combined and cook for 1 minute without stirring
Remove from the heat and carefully stir in the heavy cream in a slow, steady stream. There will be a steamy reaction so please be careful! After all the heavy cream has been added, stop stirring and allow to boil for 1 minute. Keeping watching in case it bubble sup too much. If it does, reduce the heat.
Remove from heat and stir in the salt. Set aside to cool to room temperature before using in the ice cream. The sauce will thicken as it cools
Pickle Ice Cream
Combine the pickles and brine in the carafe of a blender, then blend until pureed, about 1 minute
Strain the puree and discard any pulp. Save 1/3 cup pickle liquid and discard the rest
Beat the cream cheese in a large bowl with a mixer on medium-high speed until smooth and creamy
Add the condensed milk, honey and pickle liquid to the cream cheese and continue to mix until smooth
In a separate large bowl whip the heavy cream until firm peaks form. Fold in 1 cup of the whipped cream into the condensed milk/ pickle mixture until combined
Fold this lightened mixture into the whipped cream until well blended, being careful not to overwhip in case you deflate the mixture
Pour 1/3 of the mixture into a plastic container, or loaf pan, cover and freeze, for 1 hour. Keep the cream/ pickle mix in the fridge, covered
Remove from the freezer and drizzle over 1/2 caramel sauce in swirling pattern. Pour over another 1/3 of the cream/pickle mixture and return the ice cream to the freezer for another hour
Repeat Step 8 as above with the remaining caramel sauce and cream/pickle mixture. Before returning to the freezer run a chop stick or knife through the ice cream the swirl the mixtures together.
Cover and return to the freezer for minimum hours, or overnight.
To serve, remove the ice cream from the freezer 5-10 minutes before serving so that it is scoopable
Elvis. The very name conjures up images of sweaty excess, sexy rhythms and snake-hipped gyrations. I have to admit to not being a fan of the man himself but there’s one thing that I can’t deny and that’s his impact on the world.
Aside from his groundbreaking impact on the world of music and movies, Elvis’s impact even stretched as far as the food world. Yes it may not be fancy but the grassroots ingredients of peanut and banana have become synonymous with the Graceland god. Google “The Elvis” and you will find a plethora of entries on the unnervingly mouth-watering combination of peanut butter, banana and bacon- usually in sandwich form. Is this actually a combination so off the wall it works? The answer is actually- yes. The unctuous smoothness of the peanut butter and banana spiked by the salty bites of bacon crispiness stopping it becoming overwhelming and bland.
It was within a week of watching cookery competition shows and Netflix culinary food-show binging that I noticed a bizarrely serendipitous trend- the theme of PB&J and Elvis appeared to crop up rather a lot. We’re talking epiphany-like levels folks. The universe was speaking to me and it was saying, “Elvis”. But how to incorporate this make-up into something unexpected? The answer was literally right under my nose- I pondered the question whilst munching on a slice of last week’s banana loaf.
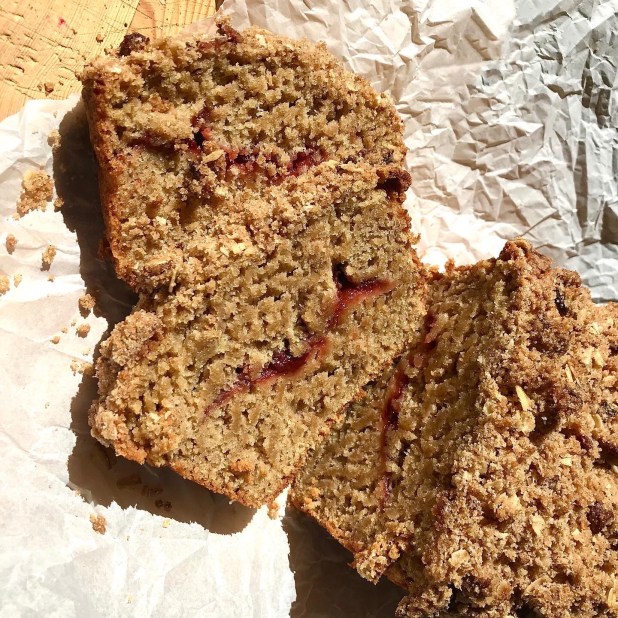
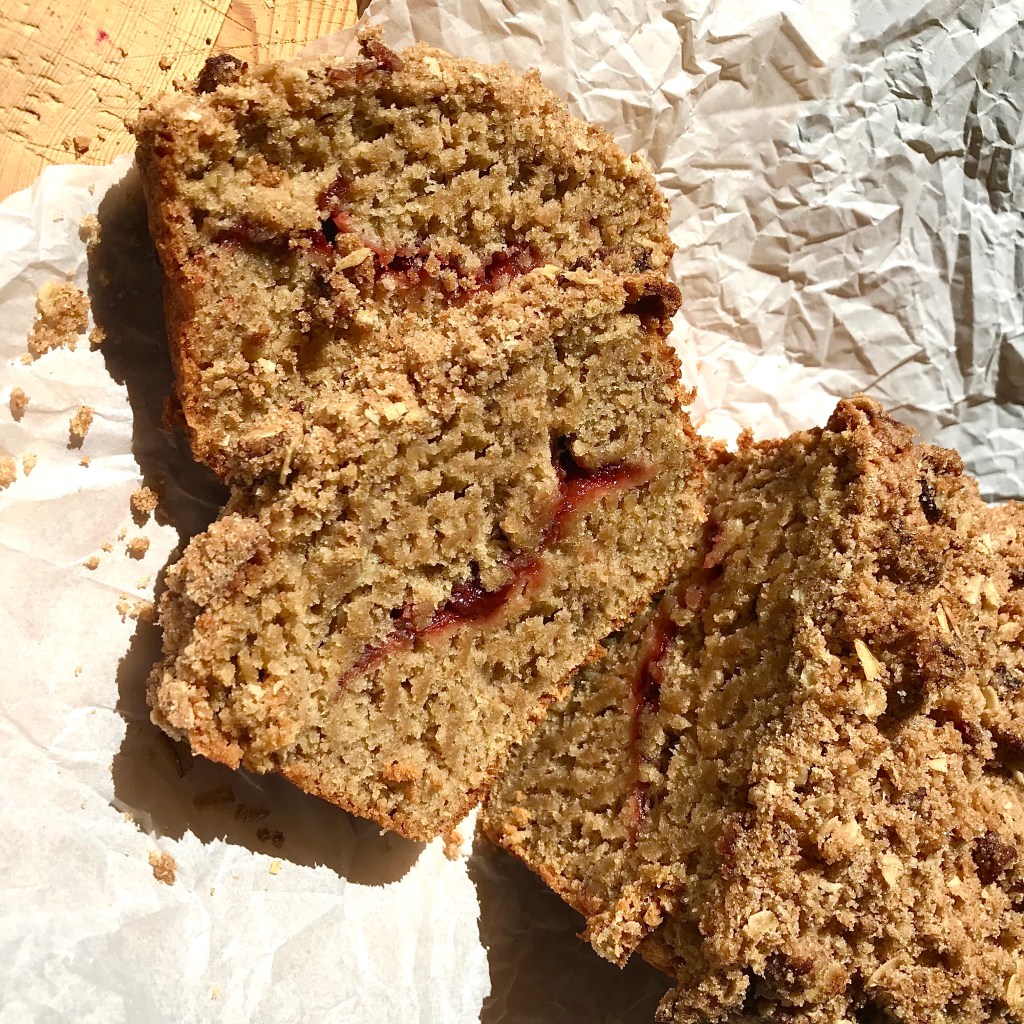
Now whilst I love banana bread, a certain Covid-quarantine ennui had settled on my taste buds in regards to it. I had become a lockdown Lancelot in a quest to revamp the moist. rich loaf- as my recipe for Buttermilk & Cardamom Banana Bread bares testament to. And this Memphis-kissed combination provided another excuse for kitchen experimentation.
The peanut/ banana combination was an obvious treatment for the loaf itself, and pockets of flavored jelly would of course provide surprising nuggets of sweet, sticky joy in the dough. But where to work in the final signature ingredient of the King? I didn’t want anything as obvious as just a couple of bacon slices on top. My other concern was that mixing bacon pieces into the batter would cause them to become chewy and soft gribene-esque morsels in the batter. So how better to avoid them becoming gummy crumbs than to put them outside the batter…on top…in a topping…a STREUSEL topping!
Et viola! Elvis Banana Bread…enjoy!
Ingredients
3 large bananas
4 Tbspn Peanut butter (smooth or crunchy to you taste)
1/2 cup Canola oil
1/3 cup milk
1 tspn Vanilla extract
2 1/3 cup AP flour
3/4 cup Dark brown sugar
2 tspn Baking powder
1 tspn cinnamon
1/4 tspn Kosher salt
1/3 cup Grape jelly (feel free to sub with whatever flavour you like)
Streusel Topping
5 slices bacon, cooked and crispy
1/4 cup Dark brown sugar
1/4 cup fine sugar
1/4 cup AP flour
1/2 tspn cinnamon
2 Tbspn Butter, cold and diced
Pinch Kosher salt
Method
To make the streusel topping
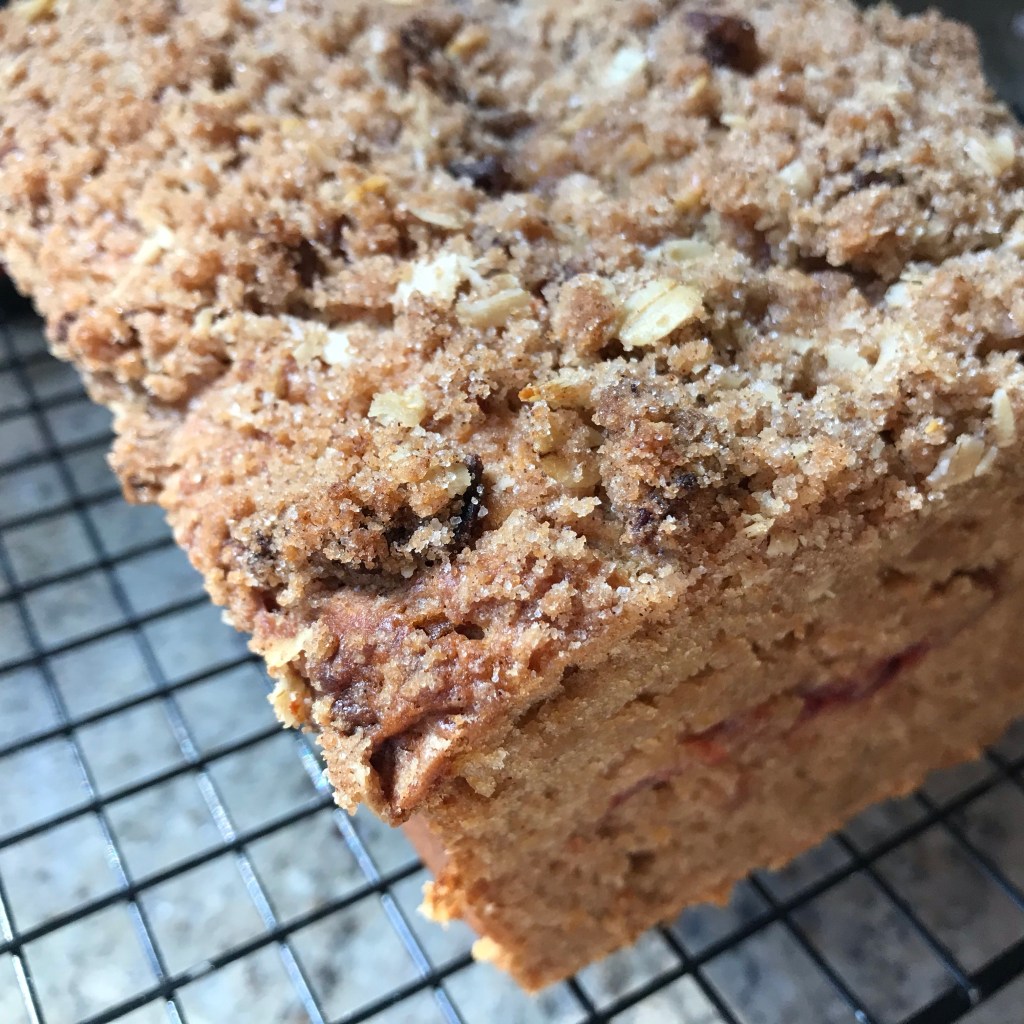
In a bowl combine both the sugars, flour, cinnamon, salt and butter pieces. Rub the mixture together with your fingertips until a pea-sized sand texture is achieved and a crumble is formed. Crumble in the crispy bacon slices, mix through and set aside until needed later. *This makes more than enough streusel topping with plenty left over for additional uses. It’ll keep in the fridge for up to 3 days in an airtight jar
To make the banana bread
Preheat the oven to 350°F. Grease a 9″ x 5″ loaf pan and line the bottom & with parchment paper (this will help to lift the baked loaf out)
In a large bowl, mash the bananas. Add the peanut butter, oil, milk and vanilla, whisk well to combine and set aside. In a separate bowl, whisk together the flour, sugar, baking powder, cinnamon and salt
Pour the banana mixture into the dry ingredients and fold together until just combined and there are no spots of dry floury residue
Pour 1 /2 of the batter into the loaf pan. Using a piping bag or spoon, place dollops of the jelly along the top of the loaf batter leavings about 1 inch border around. Once you’ve got the jelly piped in how you’d like, pour the remaining loaf batter over to cover the jelly and roughly level the top. Generously sprinkle over the streusel topping to an amount of your liking
Bake for 50 to 60 minutes, or until well risen and a toothpick inserted into the center comes out clean
Remove the baked loaf from the oven, allow to cool for 5 minutes in the loaf pan before lifting out using the parchment paper, and leave to cool completely on a rack before slicing
PB & J – Never have three letters caused such divisive reactions. To be honest the quintessential North American stable of childhood has often has left me baffled in the past. I guess the secret of it’s appeal lies in that age old combination of sweet and salty. Whilst I struggle with grasping it’s appeal in it’s original sandwich form I’ll confess to being partial to it in bake form with contradictory fervor. Just as long as it’s not with grape flavoring! That attraction still eludes me.
So imagine my interest when I stumbled upon this recipe. Although I wish I could lay claim to this recipe the credit all lies with the publication Bake From Scratch and their recent issue on “One Layer Cakes”, If you haven’t heard of BFS I’d definitely recommend checking them out. If not directly for their recipes then certainly as a source of inspiration as I have done in the past.
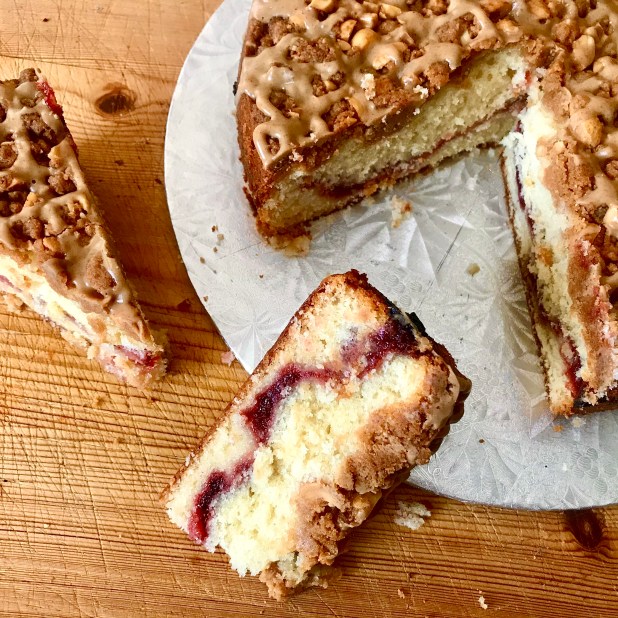
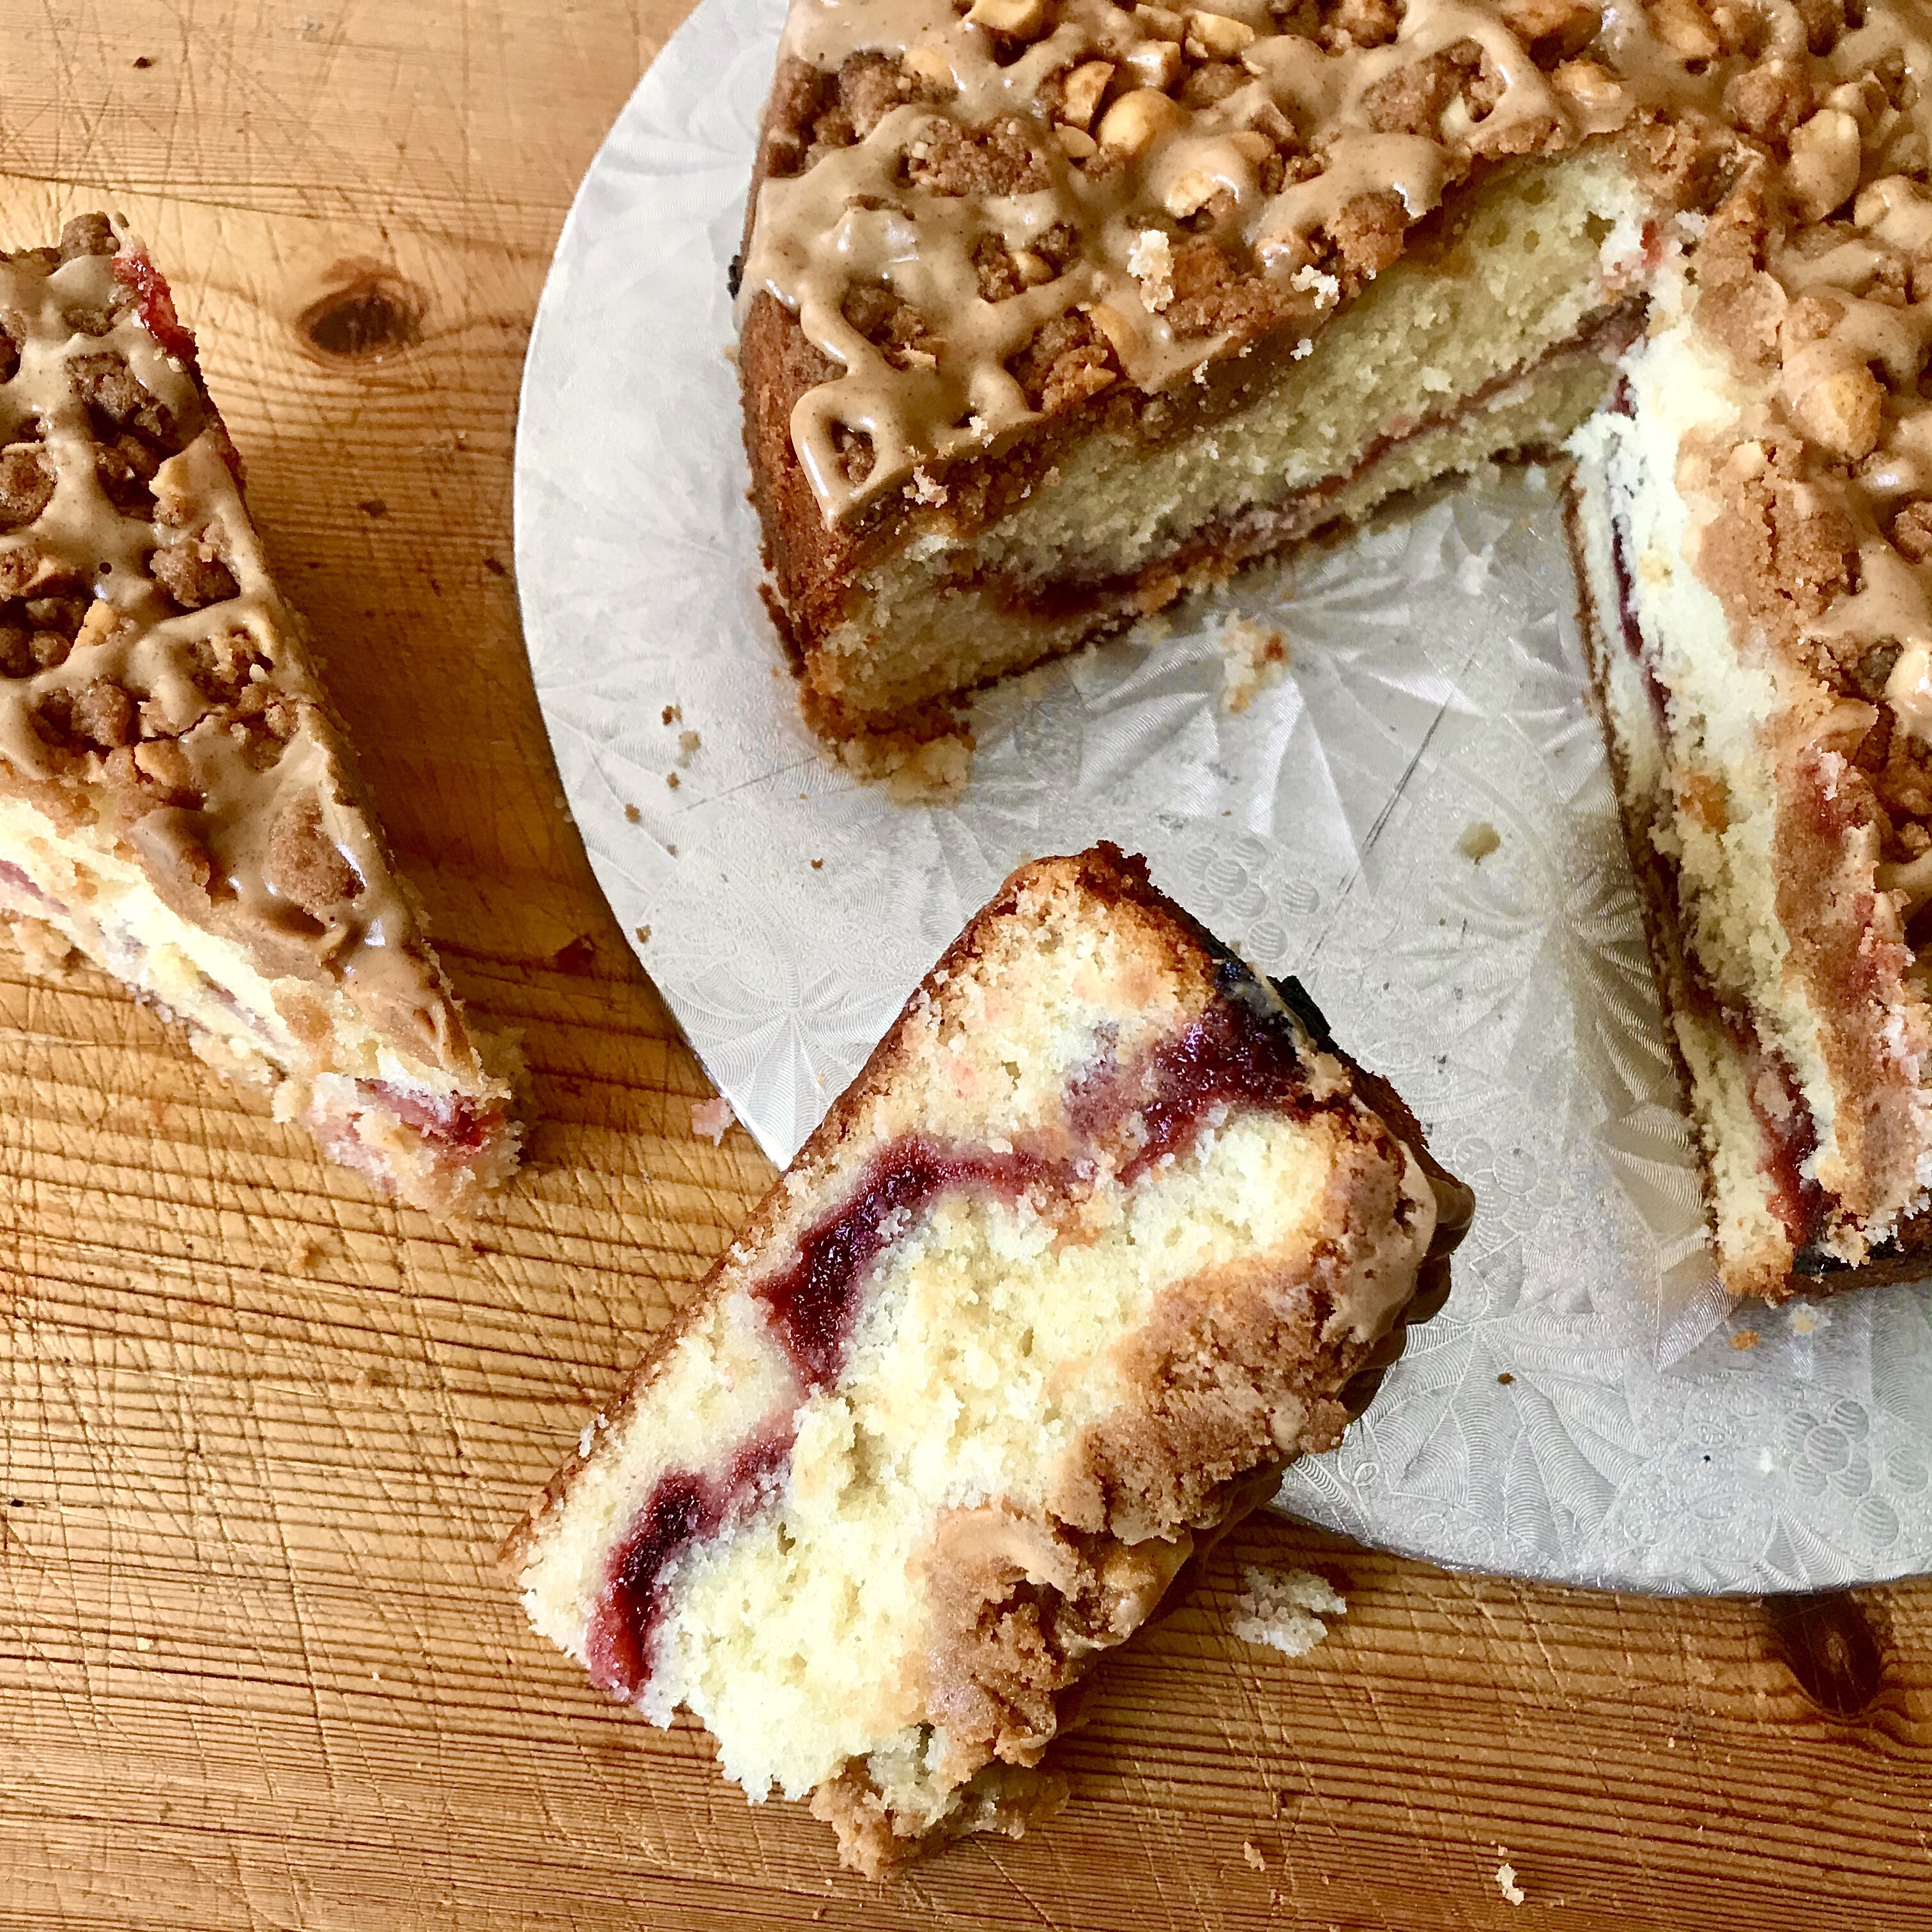
Whist the original recipe calls for making two 6″ single layer cakes I couldn’t help but think who on earth wants a cake that small! So I instead baked mine in a single 9″ with the only variance being a longer cooking time with the necessity for aluminium tenting the top of the cake towards the end of baking.
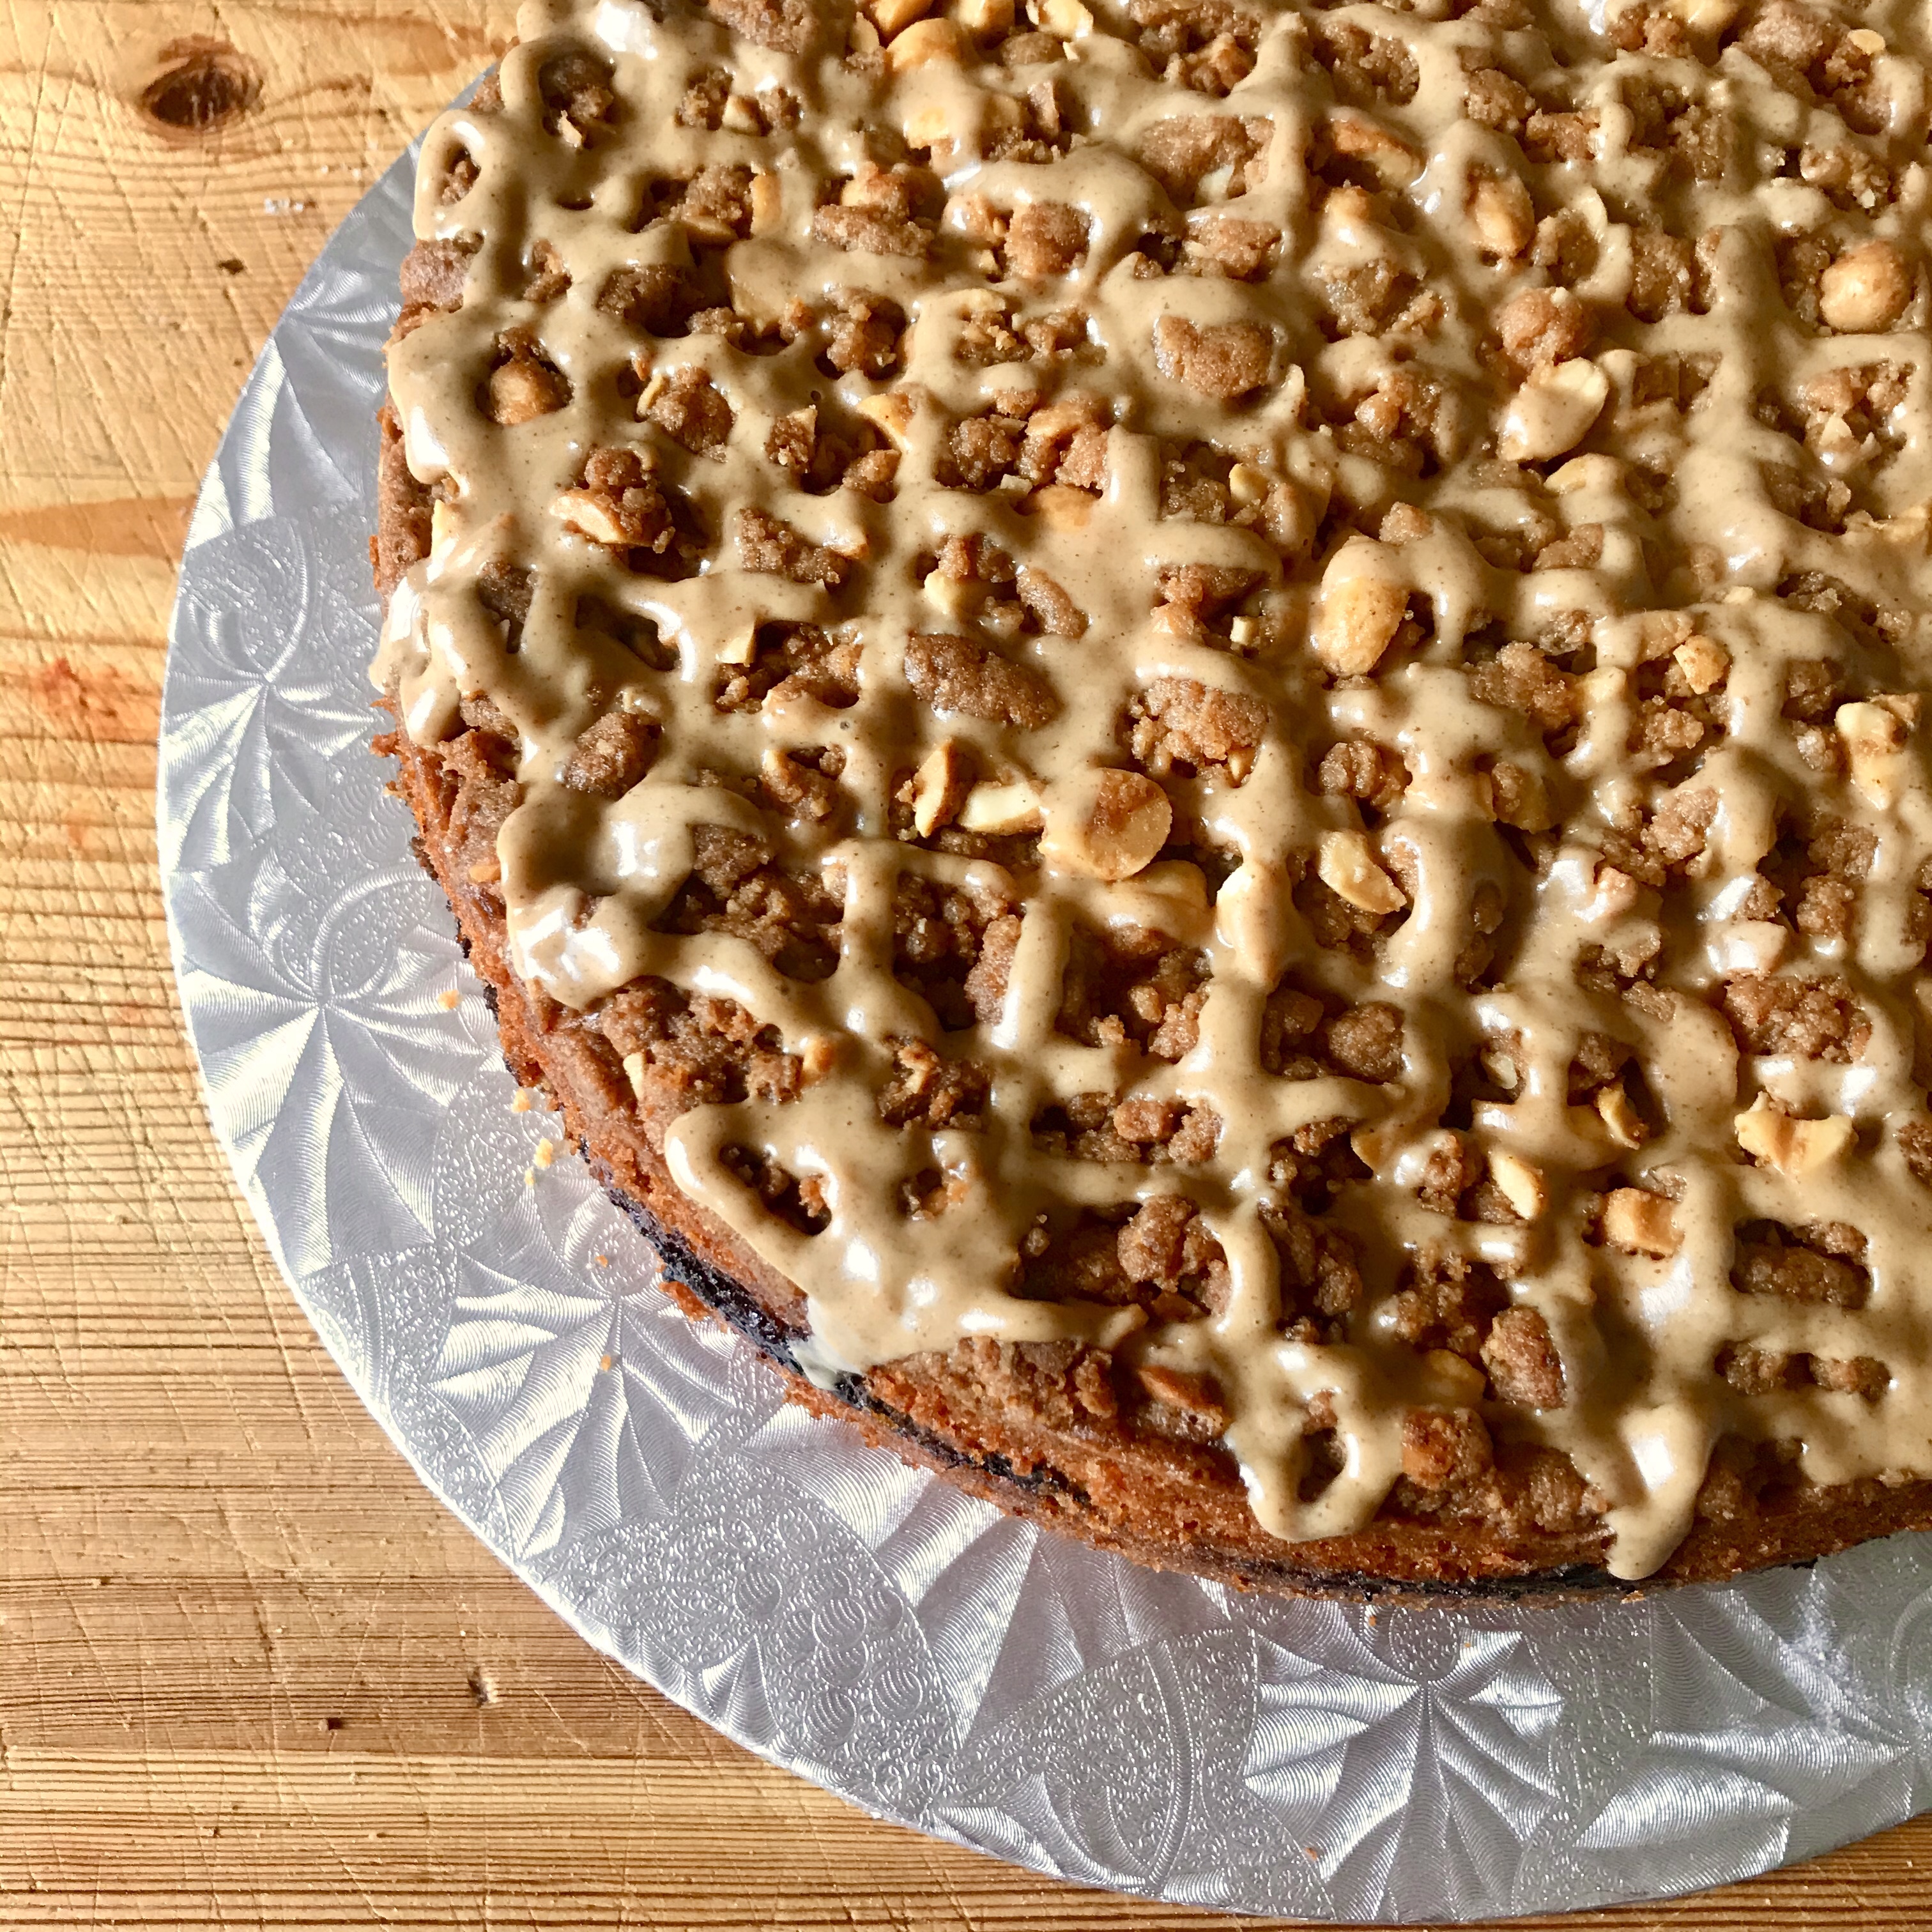
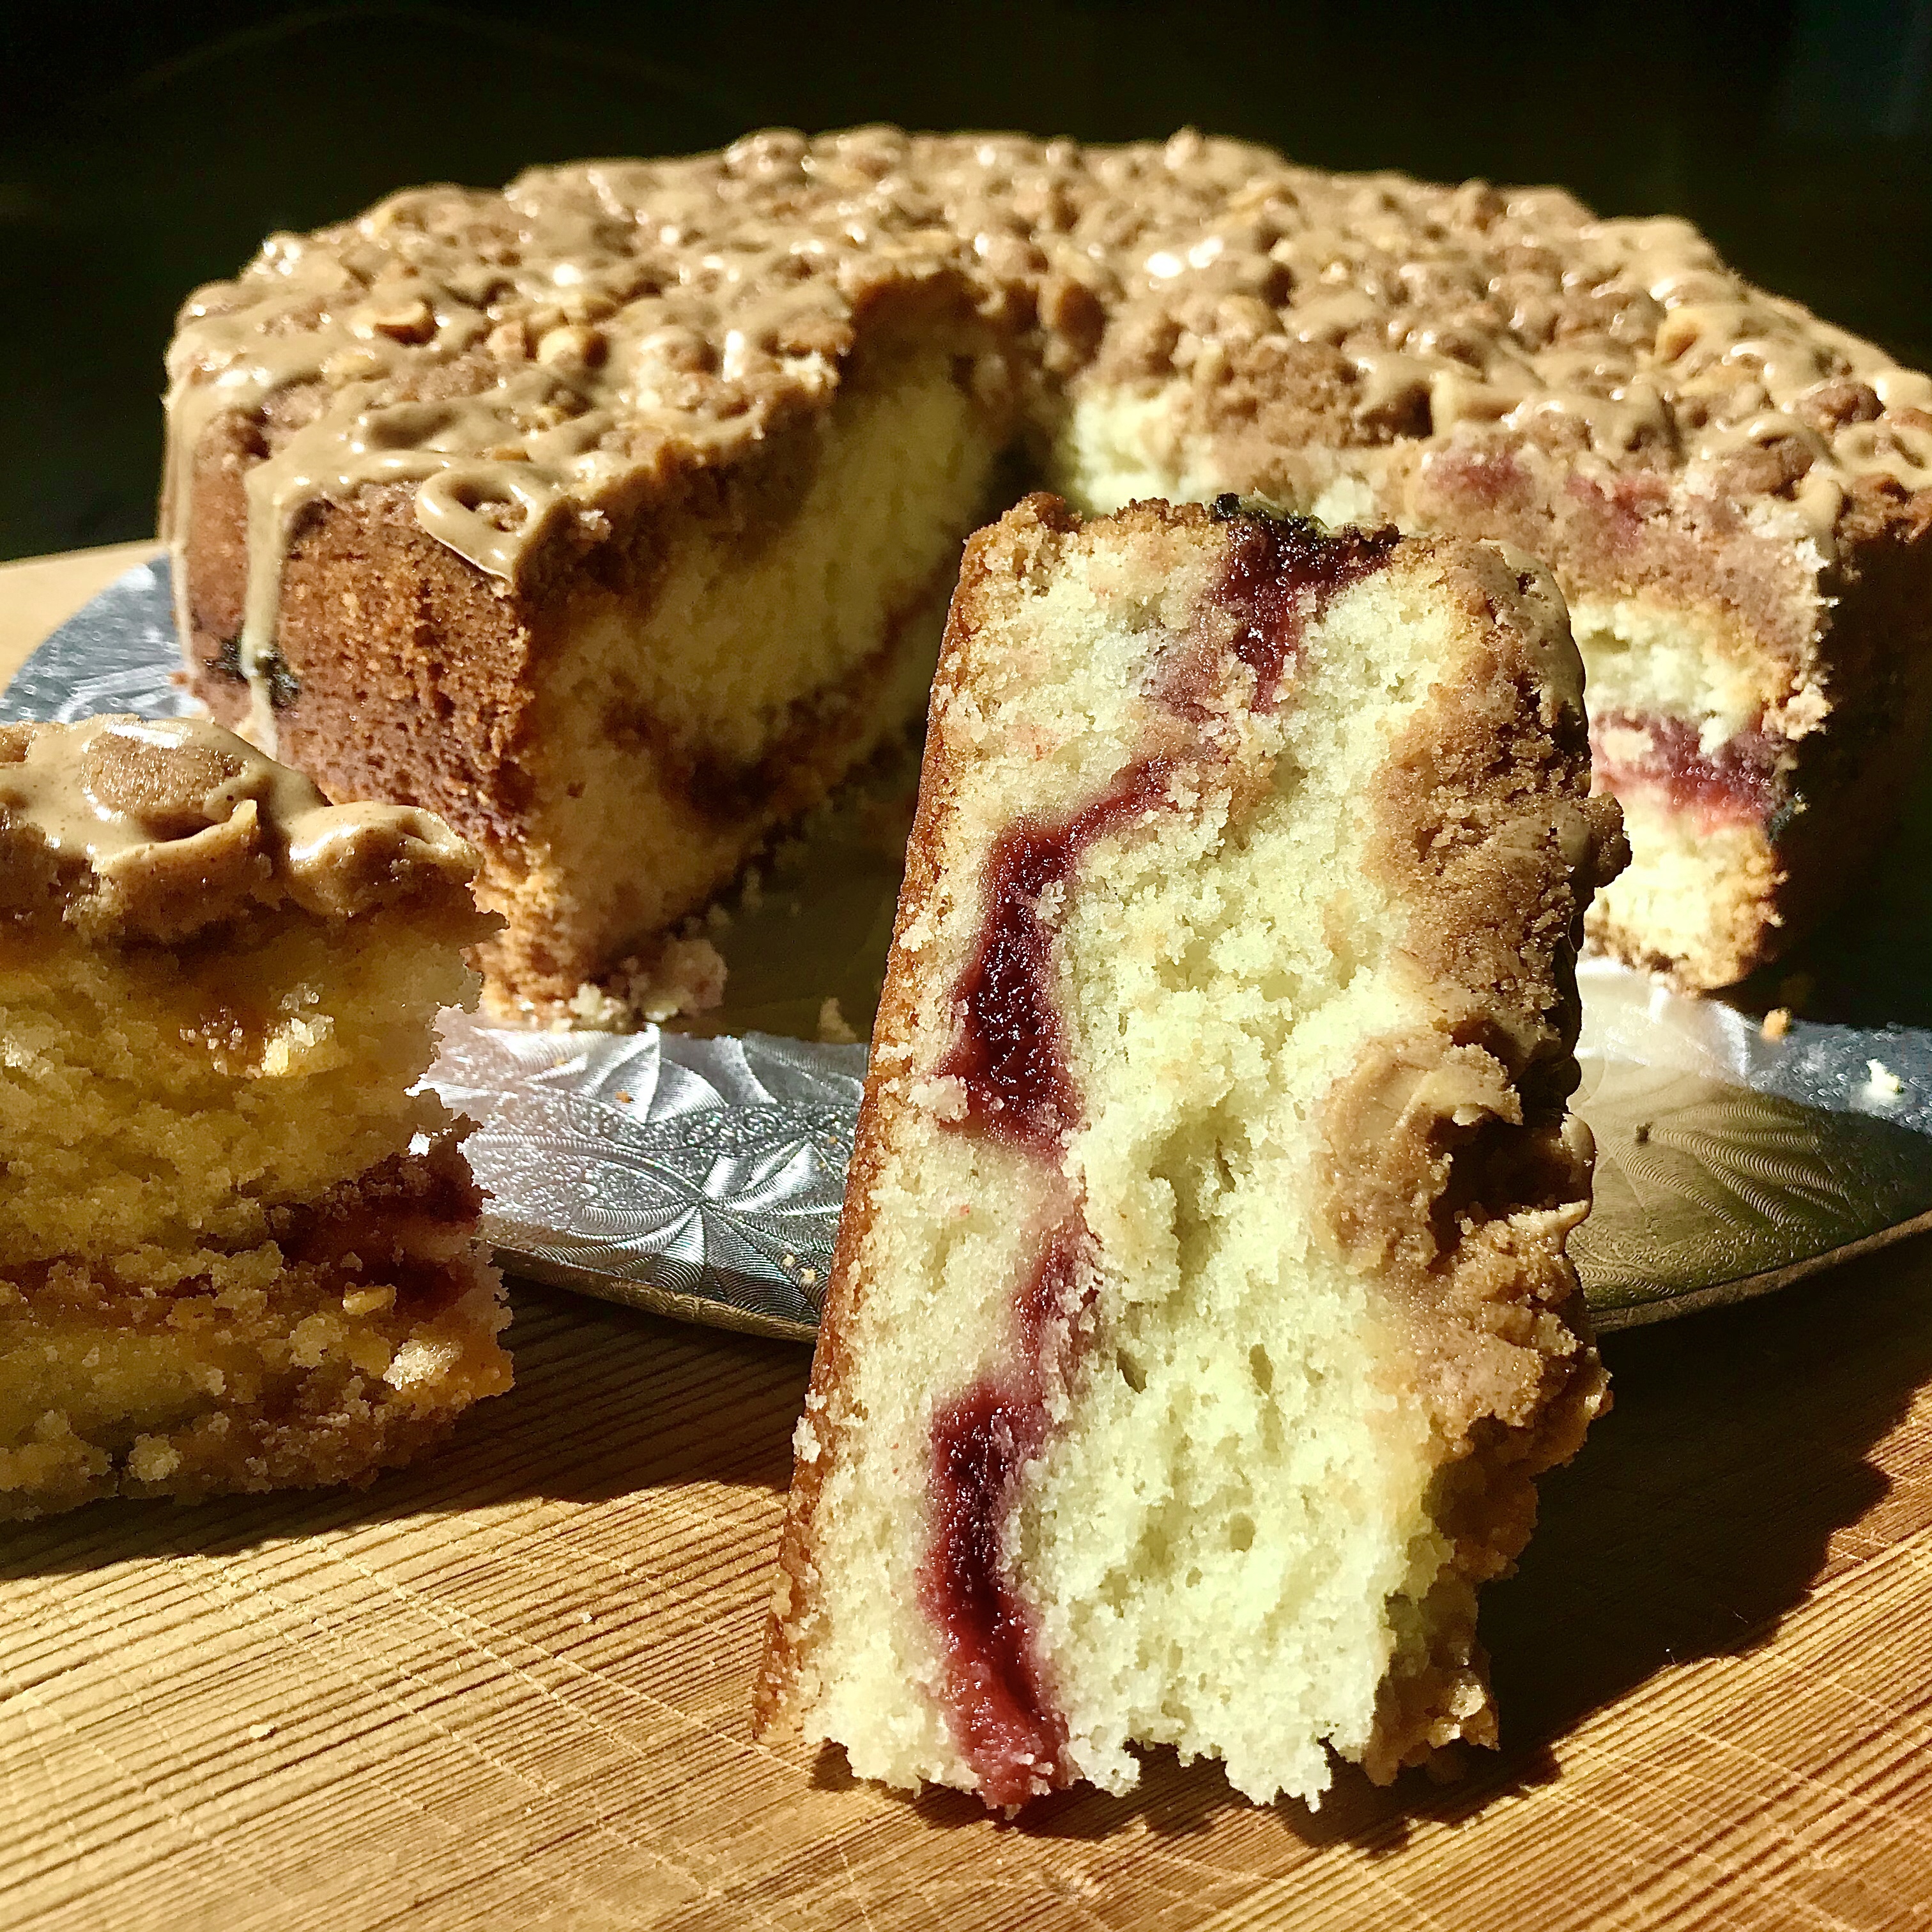
Prepare to surrender to the peanut buttery goodness! I love the crumbly peanut streusel topping- it’s a unique twist on the signature coffee cake feature. I’m sure jam/ jelly to suit your taste could be subbed in, there just happened to be strawberry lurking in my pantry. All in all this cake didn’t last long as it proved a quick hit with the kids. I kept mine on the counter top, in an airtight cake box, and after 4 days it was still tasty ever.
Ingredients
Streusel topping
1/3 cup All Purpose flour
1/4 cup firmly packed light brown sugar
1/4 cup smooth peanut butter
1 tablespoon salted butter, softened
1/3 cup salted peanuts, chopped
Cake
1/2 cup unsalted butter, softened
1 cup granulated sugar
2 large eggs
1 teaspoon vanilla extract
1 1/2 cups All Purpose flour
1 teaspoon baking powder
1/2 teaspoon kosher salt
1/2 cup buttermilk
3/4 cup strawberry jam
Garnish
Warmed peanut butter
Method
Preheat oven to 350°F. Spray a 9” round deep cake pan with baking spray and line with baking parchment
To make the streusel topping: In a medium bowl, whisk together flour and brown sugar. Stir in peanut butter and butter until mixture is crumbly. Crumble with your fingertips until desired consistency is reached. Stir in peanuts. Chill in the refrigerator until needed later
For cake: In the bowl of a stand mixer fitted with the paddle attachment, beat butter and sugar at medium-high speed until fluffy and pale, stopping to scrape sides of bowl. Reduce mixer speed to low. Add eggs, one at a time, beating well after each addition. Mix in the vanilla extract
In a separate medium bowl, whisk together flour, baking powder, and salt. Gradually add flour mixture to butter mixture in 3 stages alternately with buttermilk, beating just until combined after each addition. Pour 1/3 of the cake batter into your prepared tin. Spread on strawberry jam, and top with remaining batter, smoothing the top for a level surfaced. Sprinkle with the peanut streusel you prepared earlier
Bake until a wooden pick inserted in center comes out clean, 60-65 minutes, if needed loosely covering with foil to prevent excess browning. Let cool in pan for 15 minutes. Run a sharp knife around edges of cake to loosen sides. Invert onto a plate, and then invert again onto a wire rack. Let cool completely. Garnish with warmed peanut butter, if desired.
1 cup salted butter, room temperature, cut in to pieces
1 teaspoon vanilla extract
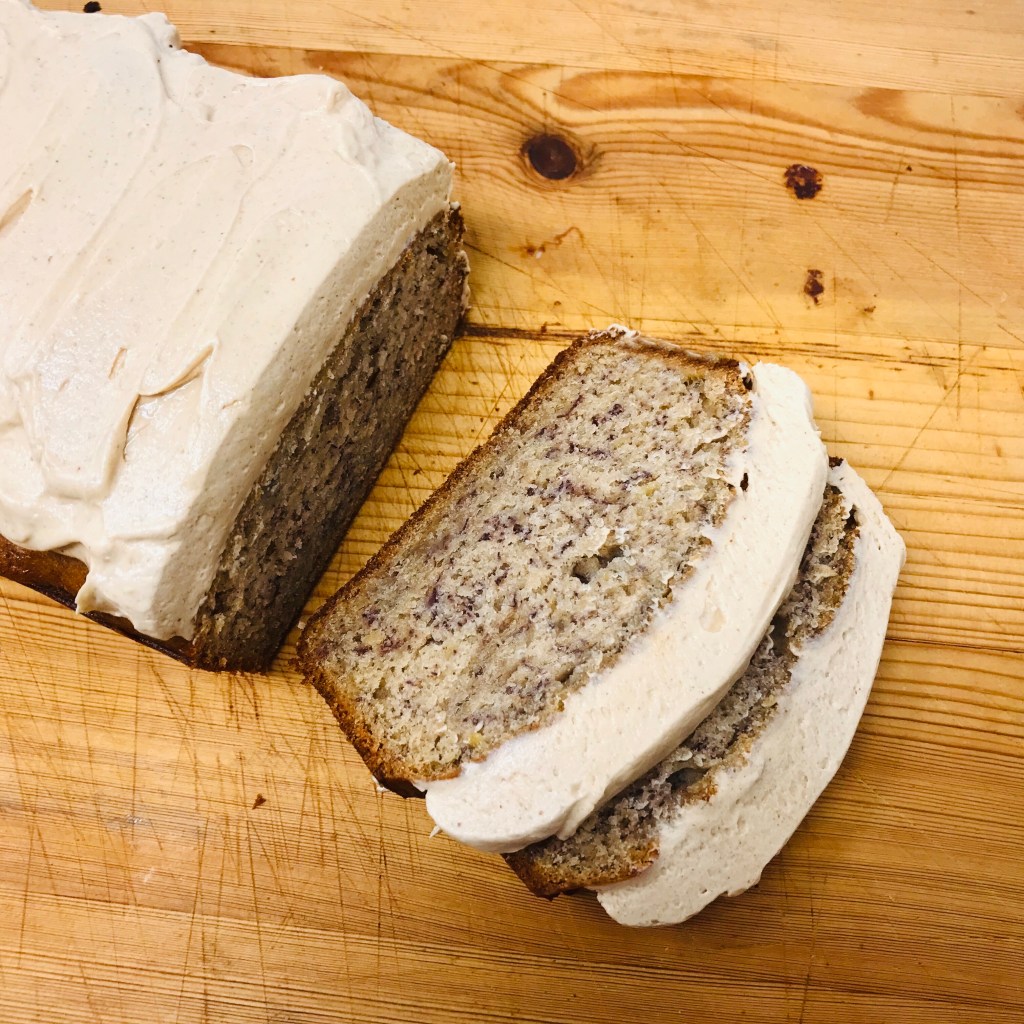
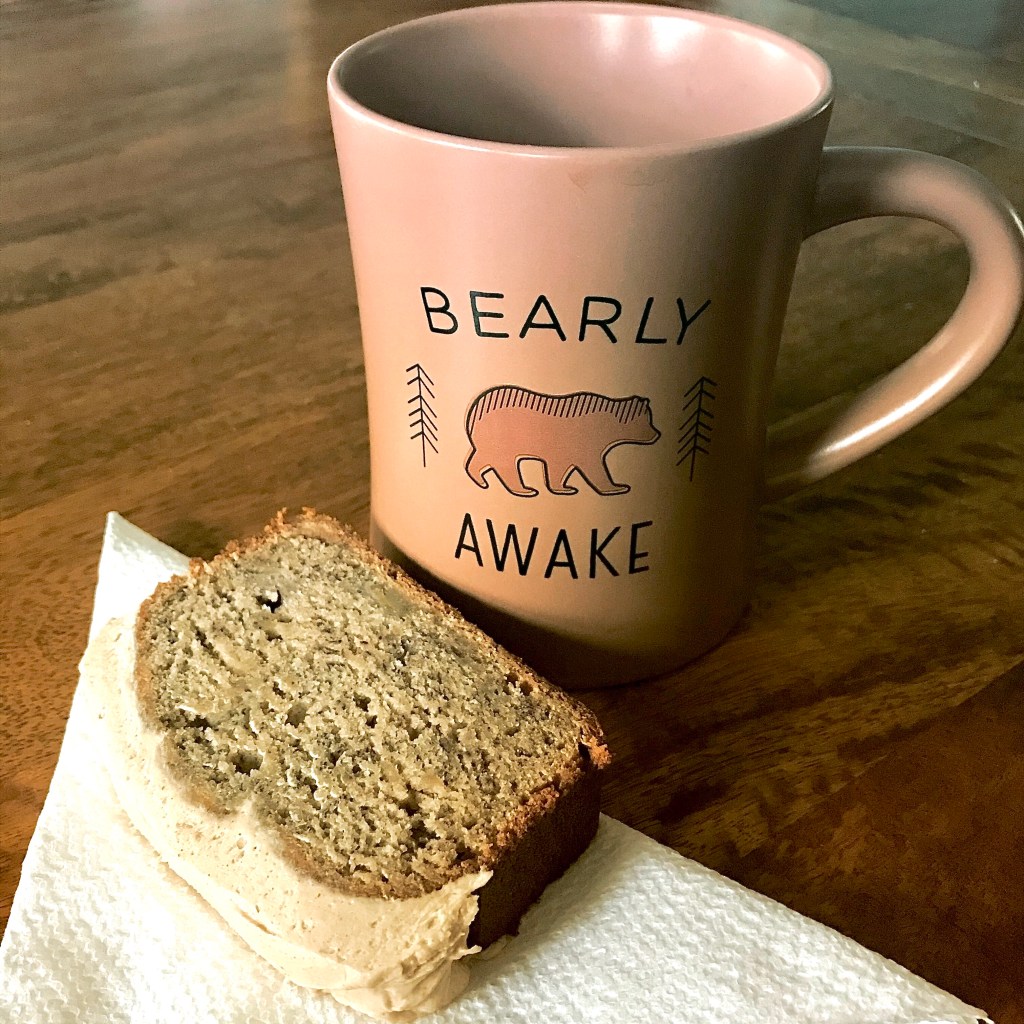
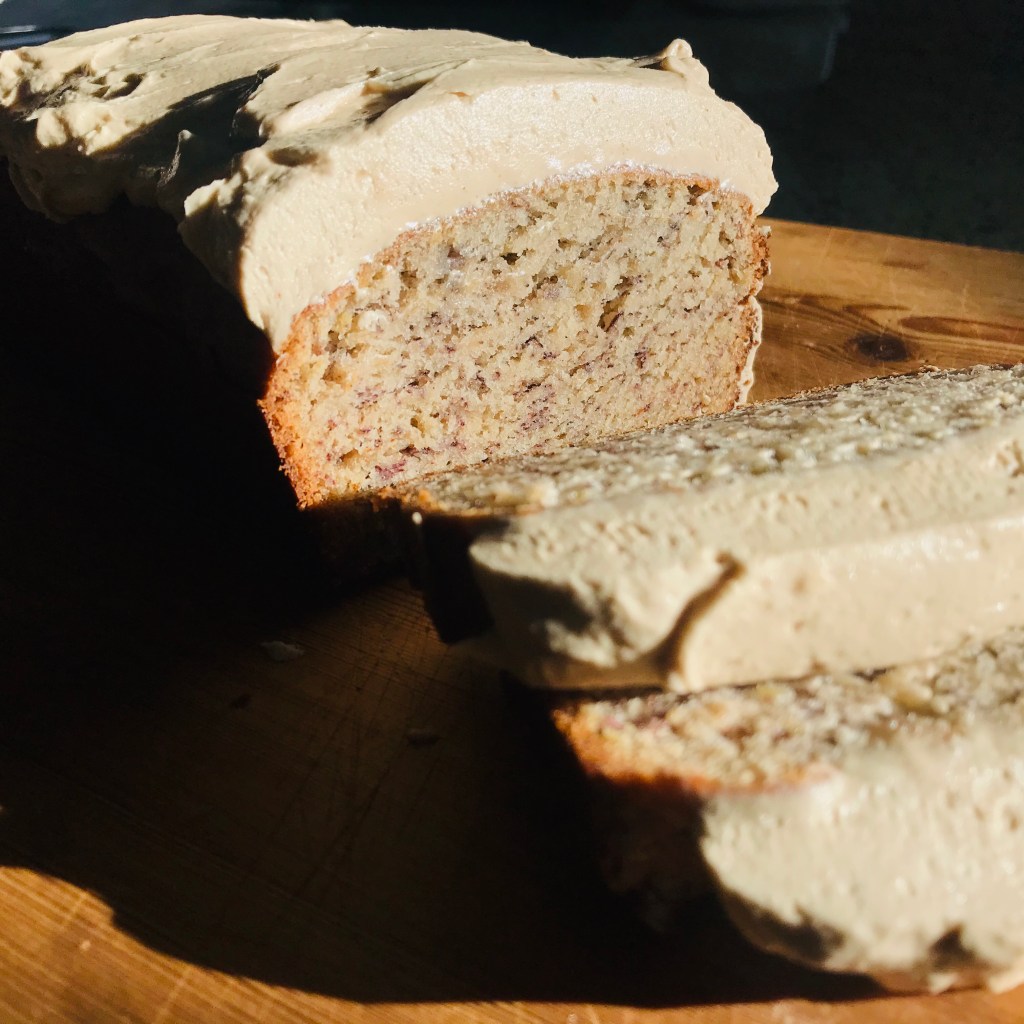
Buttermilk & Cardamom Banana Bread
2 1/2 cups All Purpose flour
1 1/4 cup sugar
2 large eggs
2 cups mashed over-ripe bananas (about 4)
1/2 cup buttermilk
1/2 cup butter, room temperature
1 teaspoon baking soda
1 teaspoon kosher salt
1 teaspoon ground cardamom
1 teaspoon vanilla extract
1/4 teaspoon ground cinnamon
Method
To make the Banana Loaves
Preheat oven to 350°F
Grease and line two 8.5″ x 4.5″ baking tins
In a large bowl combine the flour, baking soda, salt, cinnamon and cardamom. Set aside until needed
In bowl of stand mixer, with paddle attachment, cream the butter and sugar until pale and fluffy
Add eggs one at a time, beating well after each, until fully incorporated
In a separate jug whisk together the buttermilk, vanilla extract and bananas until combined
Add the banana mixture to the dry flour mixture from earlier. Fold well together until just combined
Divide and pour into the prepared loaf tins
Bake in preheated oven for 45-40 minutes, or until an inserted skewer comes out clean, and the tops of the loaves are golden brown
Remove from the oven and allow to cool on a rack for 15 minutes before running a spatula around the sides and turning the loaves out onto a cooling rack
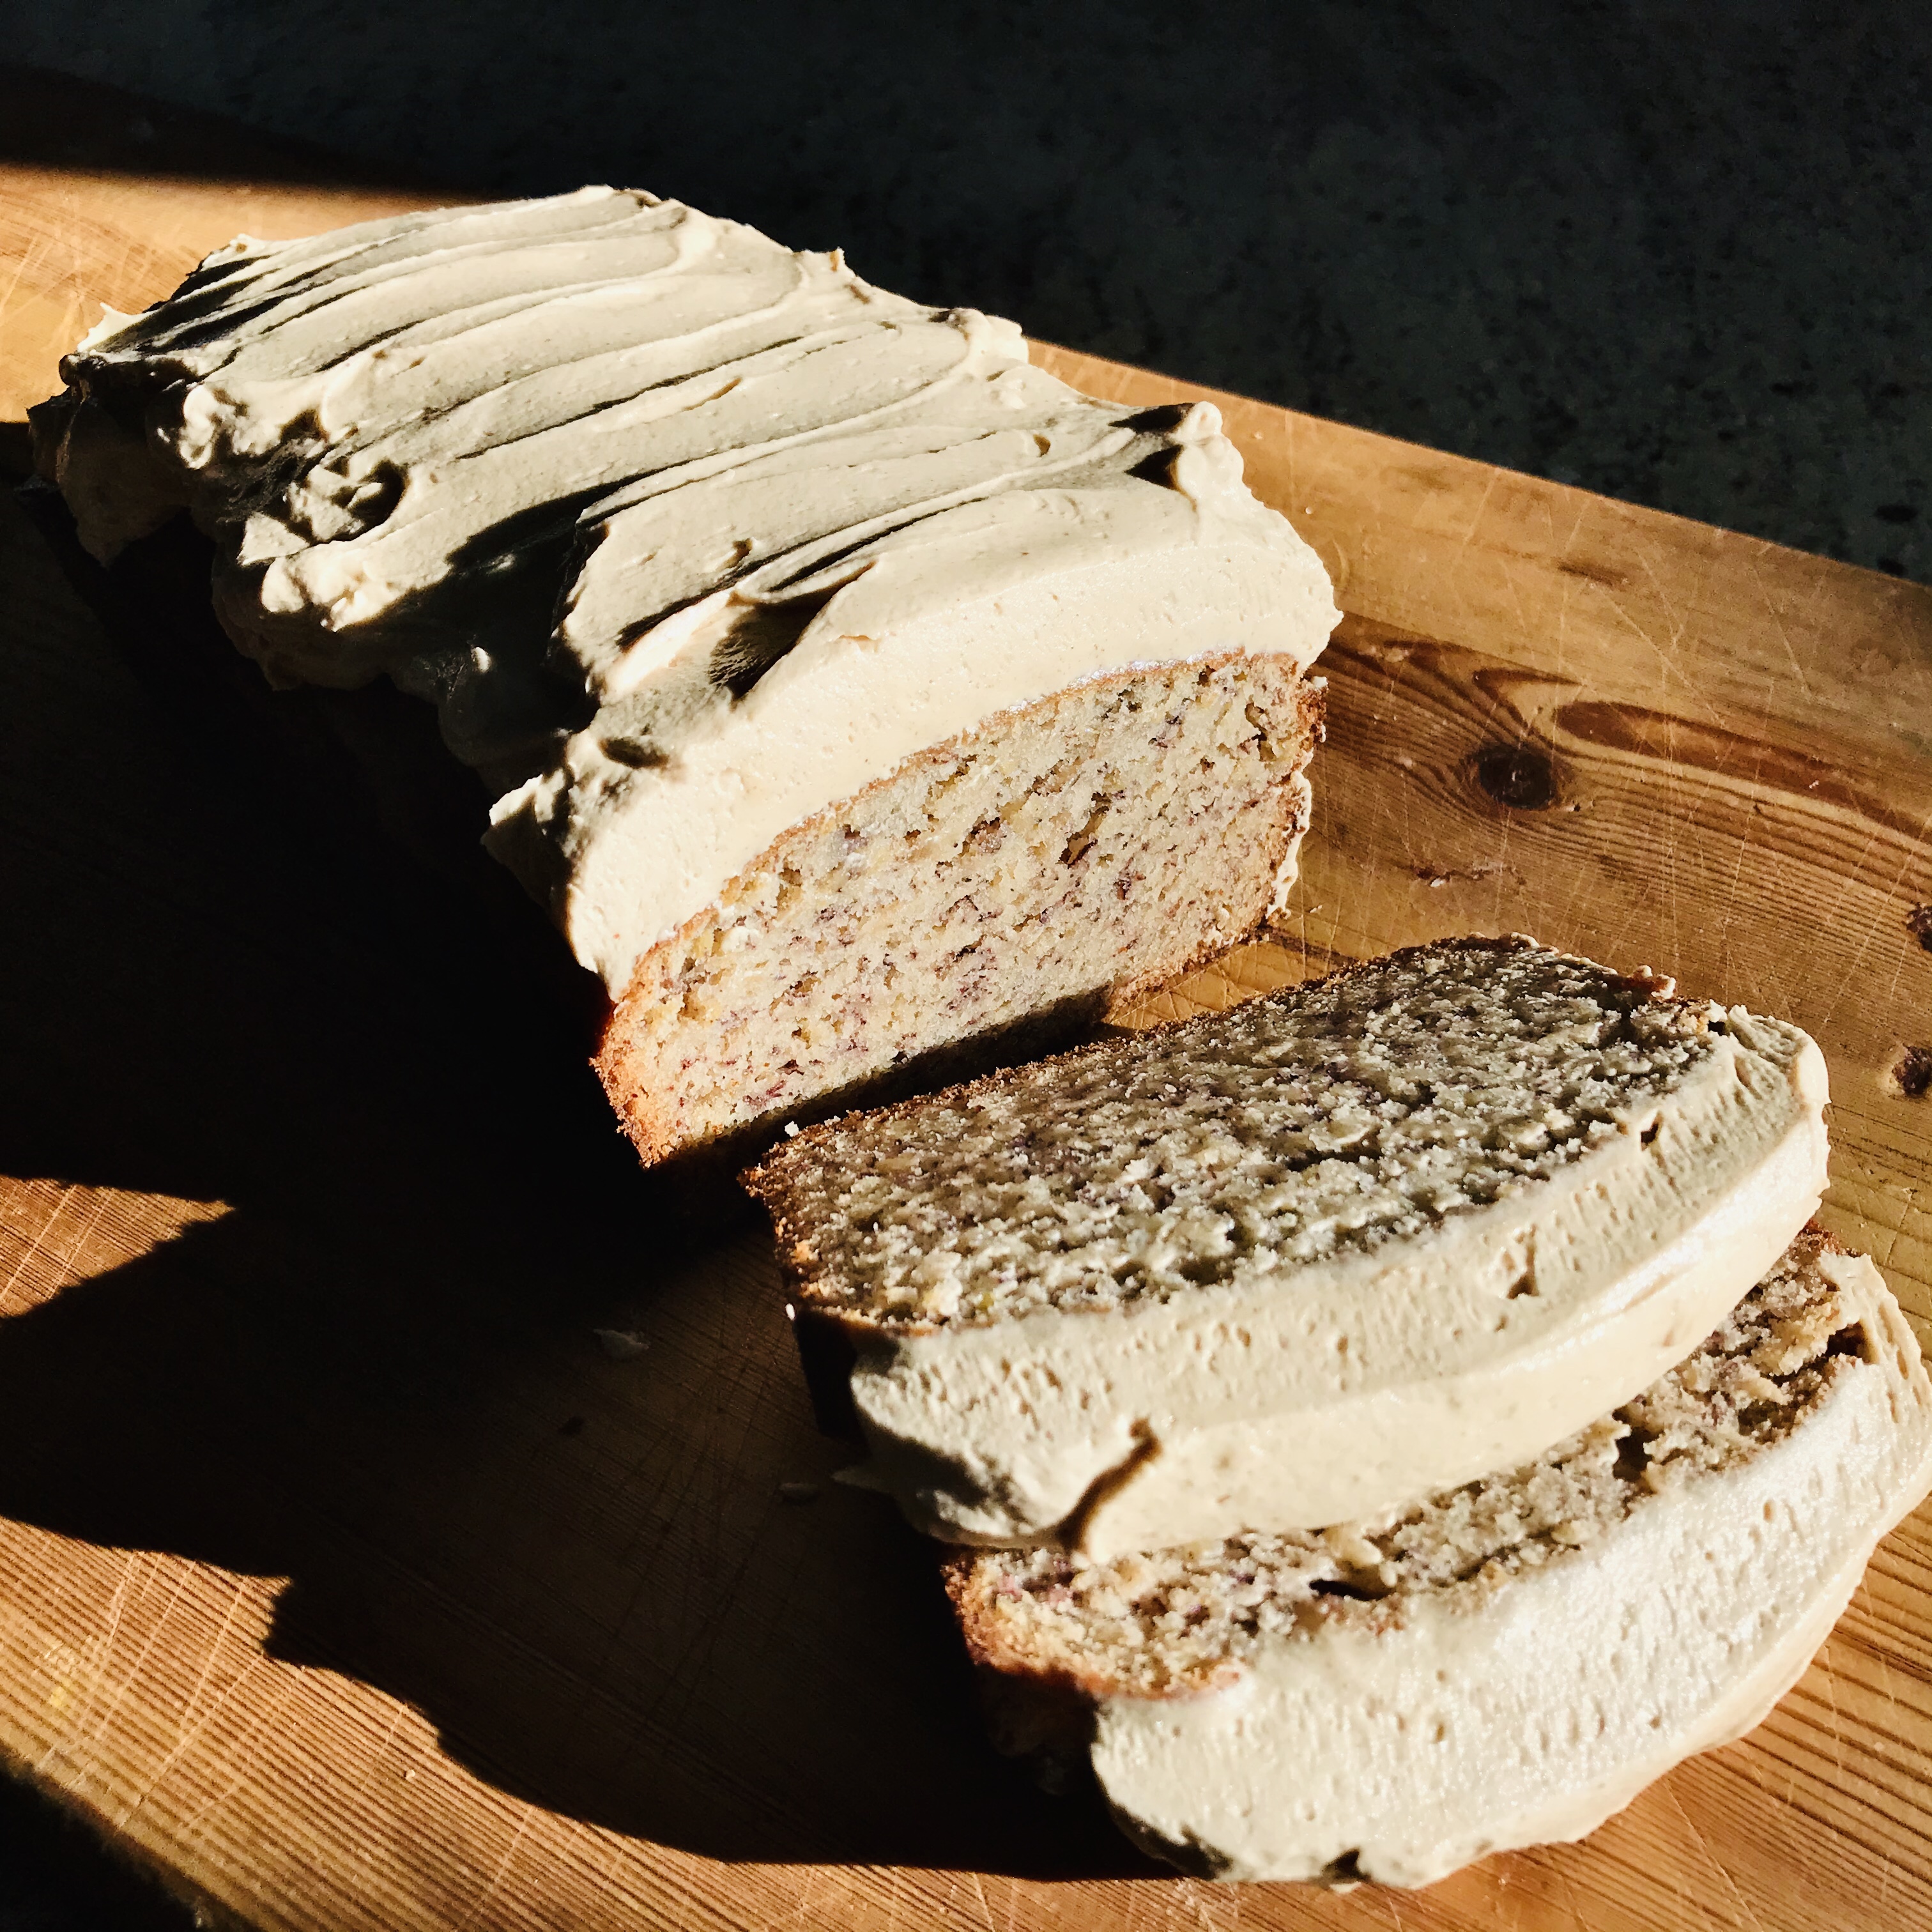
Leave the loaves to cool completely before topping with the Peanut Butter Frosting (see recipe below)
*These loaves can be stored in the freezer, without frosting topping, for up to 3 months. Wrap in cling wrap and then tightly in aluminium foil. To serve, remove and allow to defrost to room temperature before topping with whipped frosting
To make the frosting
Combine all ingredients in the bowl of a stand mixer fitted with paddle attachment
Beat on low/medium speed until all ingredients are combined
Once combined increase to high speed and whip for 5 minutes until light and fluffy
Use a spatula or spoon to spread on top of cooled banana bread loaves
*To store the frosting: Transfer to an airtight container. Will keep in the fridge for up to 5 days. To use remove from fridge and allow to soften to room temperature to become spreadable