Midnight Ginger Cake

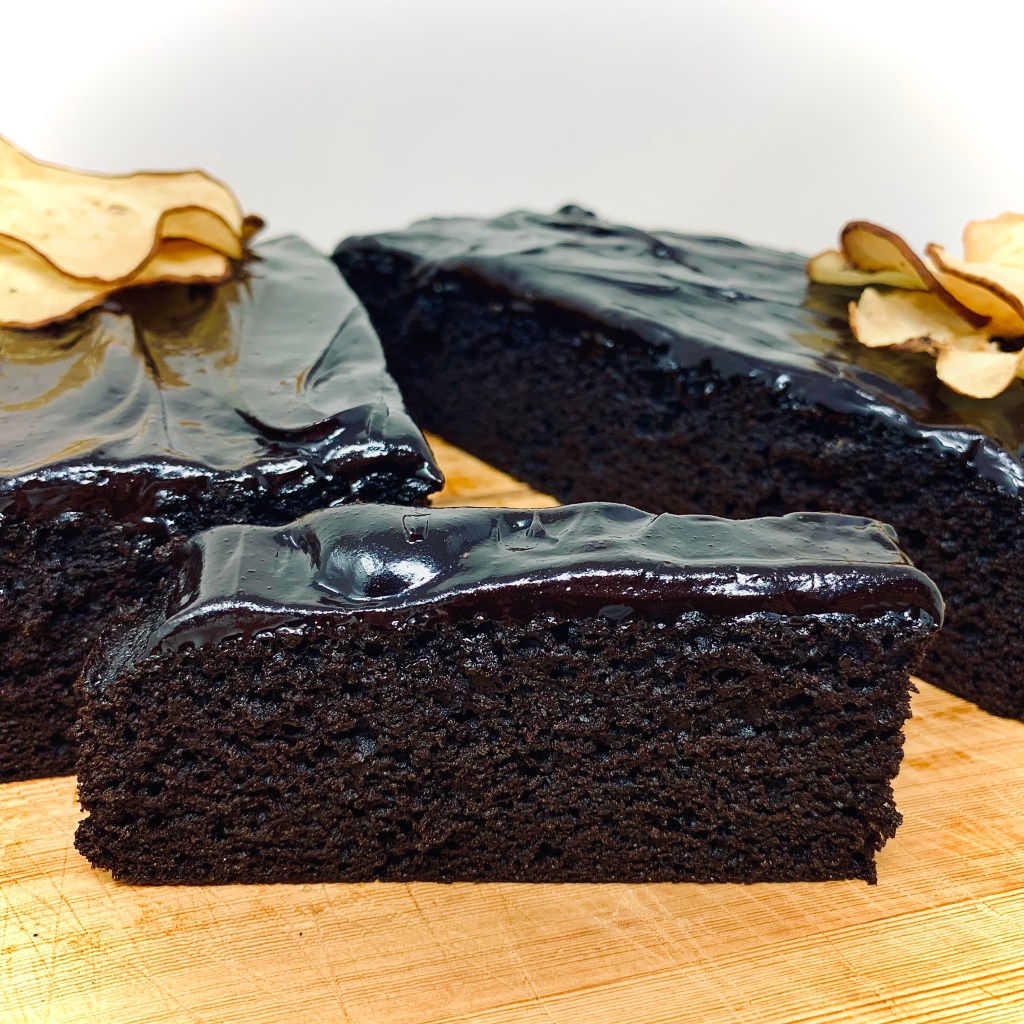
So this started as riff on my Spiced Chocolate Cake and grew from there. I absolutely love those chocolate-covered ginger biscuits. You know the ones – those crunchy, brittle ginger-snap like ones that have that slow-burning throaty heat, enrobed in decadent dark chocolate? Yup- I can easily demolish an questionably inhuman amount of them in one sitting! So I thought of recreating that addictive marriage of heat and bitterness in cake form. Not content with just any form if chocolate flavor I wanted an extra oomph! Switching up to using black cocoa not only gives in my view wonderfully deep, earthy chocolate flavor but also the alluring sumptuous midnight-black of the title. Although it does provide a chocolate flavor, it’s a world away from the sometimes cloying richness of a traditional cocoa-fueled cake.

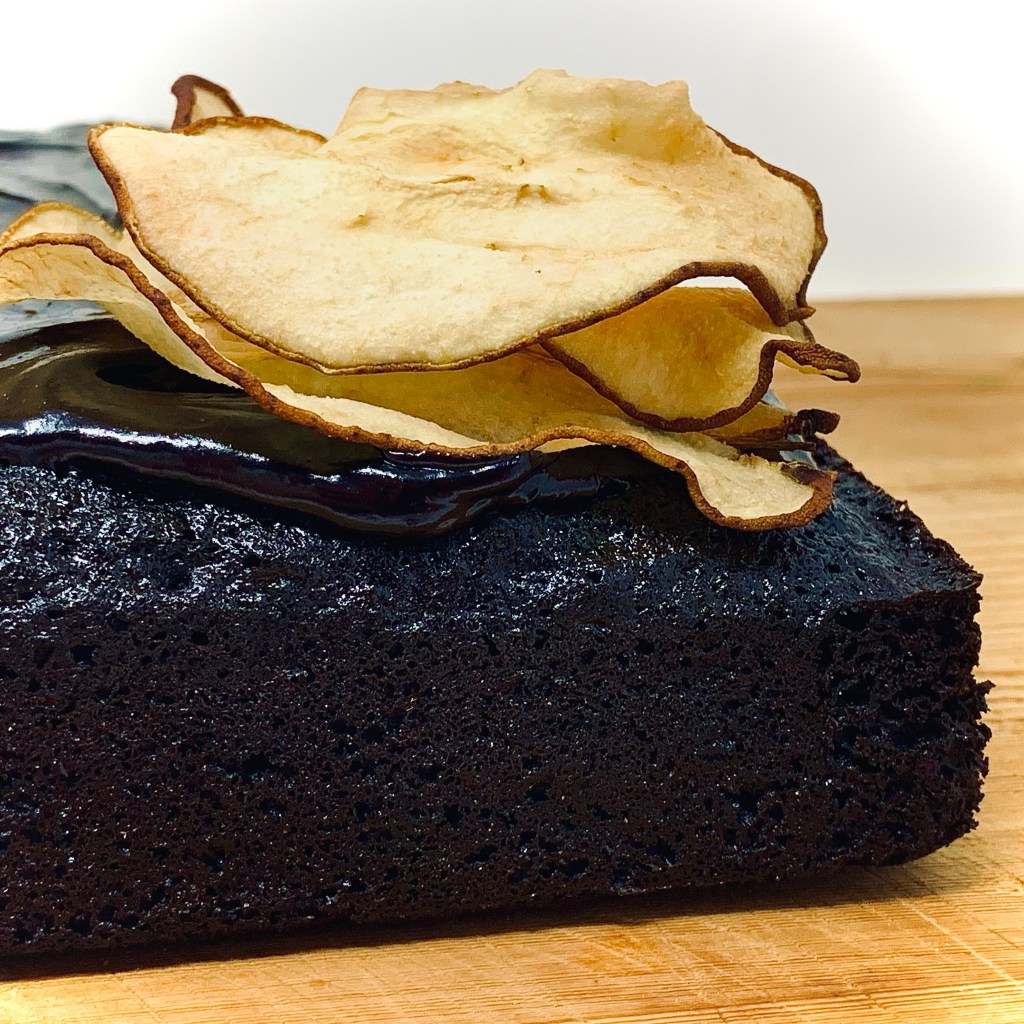
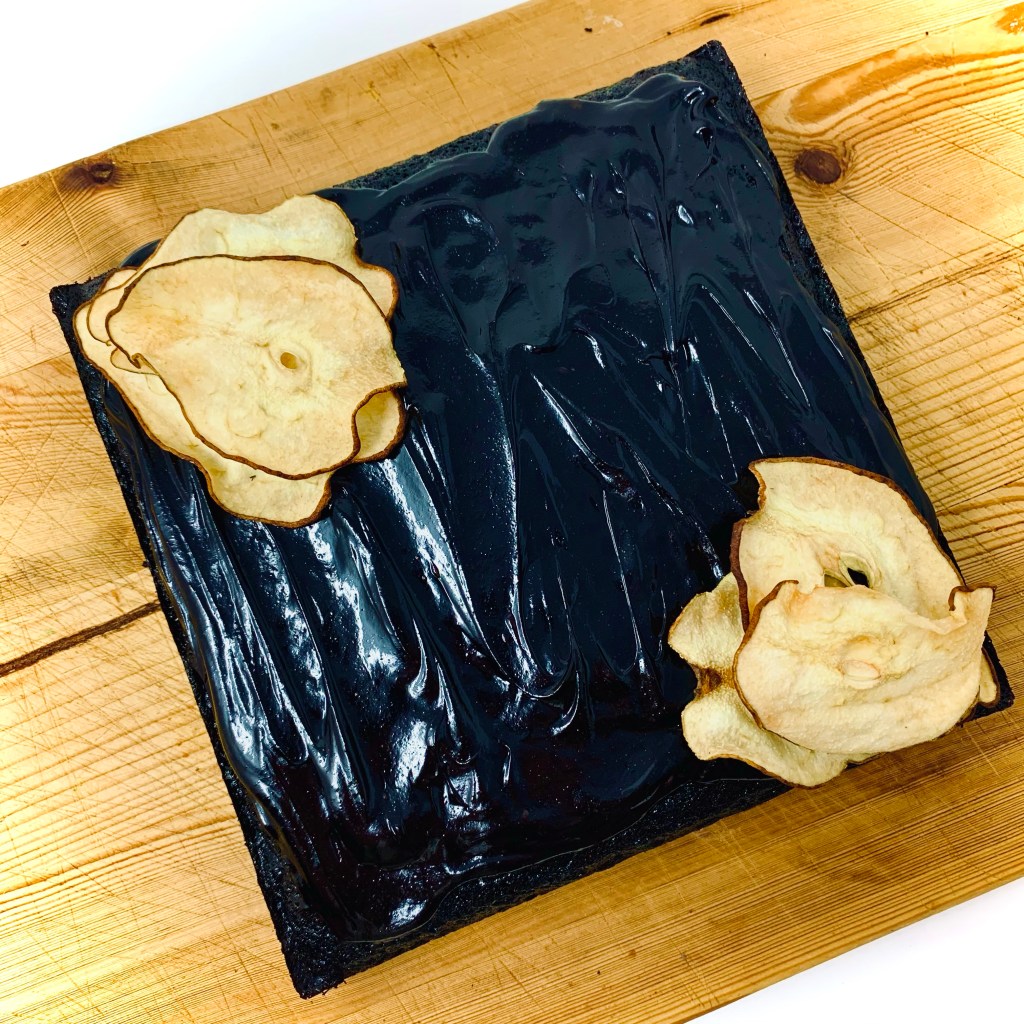
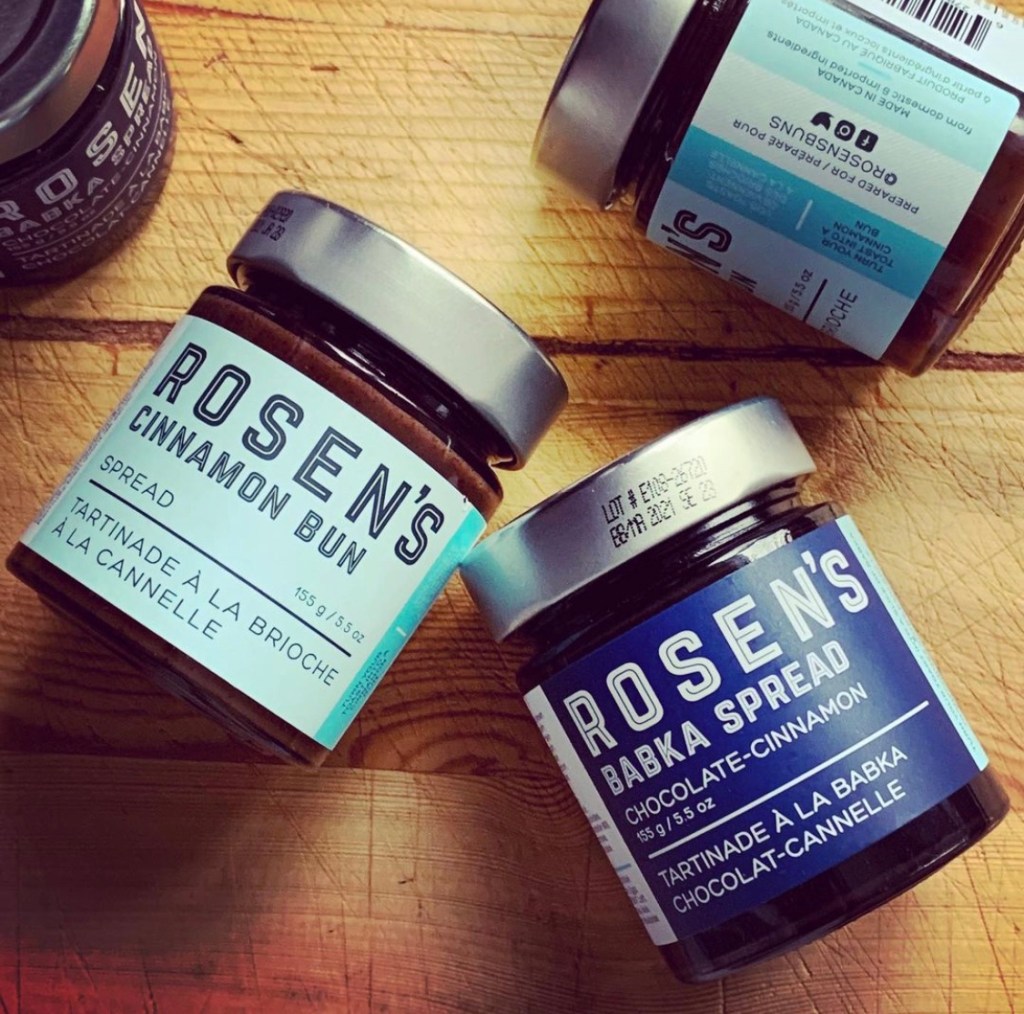
I also thought it would provide the perfect canvas for my newly acquired stock of Rosen Bun’s bun-inspired spreads– here, the deliciously addictive Babka variety, with it’s “deep chocolate flavor with a cinnamon left hook”. The darkly, luxurious flavors of the spread combining with the spicy, gingery antics of the cake. You can rest easy as using the spread here is nothing more complicated than spreading, or rather smearing, it in hypnotic, glossy waves of velvety, sweet goodness over the top of the cooled cake. In fact the hardest part is restraining yourself from scoffing the cinnamony-cocoa spread straight from the jar! Seriously – this is sinfully finger-licking good stuff. Check out the Rosen Buns website for a list of stockists.

Decoration of the finished covered cake is entirely to your own taste. I used dehydrated pear slices as I was experimenting with a newly purchased kitchen gadget. Using the dried pear slices as decoration rather than munching them straight out of the bag providing some form of self-deluding restraint in my mind!

As always with my posts where I mention, or name drop, specific items it’s done from a place of support and elevation. The producing companies are small, local Toronto businesses whose products have earned a special place in this cynical, hungry heart (and I mean LITERALLY). If there has been any compensation, sponsorship or re-imbursement, I’ll clearly flag it up for clarity and yes, it usually still involves me being head-over-heels with the product (case in point here, with the awesome team at Station Cold Brew Coffee).

I hope you enjoy this little exercise and experiment in flavors from me- who knows there may be more to come! In the meantime stay safe, stay home (and bake!) and mask up!

Ingredients

  • 1 cup all-purpose flour
  • 1/2 cup black cocoa powder
  • 3/4 tsp baking soda
  • 1/4 tsp salt
  • 3 tsps ground ginger
  • 1 tsp ground cinnamon
  • 1/4 tsp ground cloves
  • 1/2 cup Canola oil
  • 1/2 cup fancy molasses
  • 1/4 cup orange juice
  • 3/4 cup dark brown sugar
  • 2 eggs
  • 1/2 tsp vanilla extract
  • 1/4 cup whole milk
  • 1 jar Rosen’s Babka Spread

Method

  1. Combine the oil, molasses, juice and sugar in a small saucepan. Set it on low heat and stir till the sugar has dissolved. Set aside to cool for about 10 minutes
  2. In a bowl combine the flour, cocoa, baking soda, salt and spices. Whisk to combine and set aside until needed
  3. Preheat your oven to 325 degrees F. Grease an 8″ x 8″ square cake pan with oil and line it with baking parchment, allowing allow the edges to overhang for easy removal
  4. Transfer the cooled molasses mixture to a large mixing bowl and add in the eggs, vanilla and milk. Whisk well until smooth and well combined
  5. Fold in the flour mixture gradually into the liquid until incorporated. Make sure the there are no pockets of dried flour mixture. The final batter may look a little lumpy- this is okay
  6. Pour the batter into the prepared tin, level the top and bake for 35 to 40 minutes until a toothpick inserted into the center comes out clean. If the top is darkening quickly, cover the tin loosely with foil and continue baking
  7. Allow the cake to cool in the tin for 15 minutes, then invert, remove and place on a wire rack to cool completely.
  8. Once completely cool spread the babka spread over the top as you would a ganache. Decorate as you like. Here I’ve used some dehydrated pear slices (for no other reason than I was playing with a new piece of kitchen equipment!)
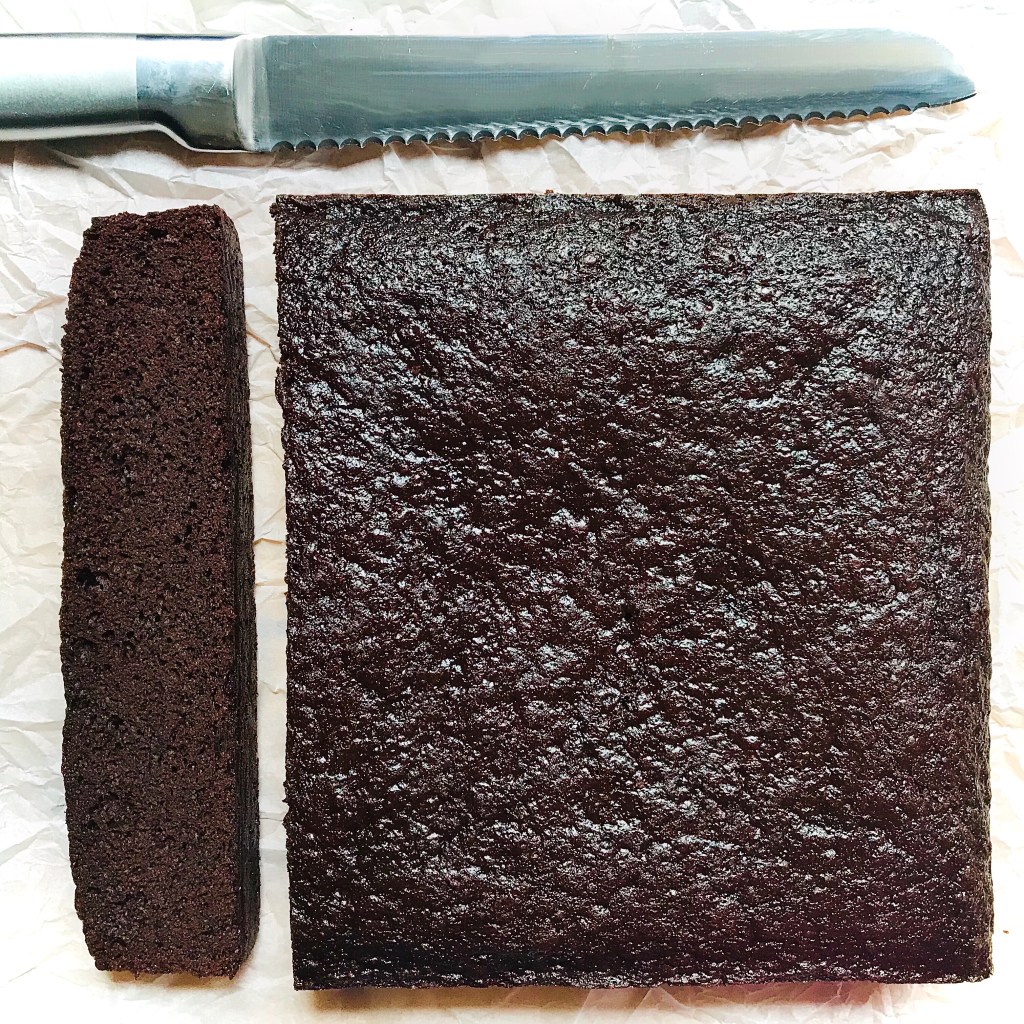
  9. Slice and enjoy!
  10. Store in an airtight container for about 3-4 days at room temperature

Spiced Chocolate Cake

This cake started out life as something different. In it’s original form it took inspiration from Bejamina Ebuehi’s “Hidden Pear Cake” from her book The New Way To Cake (which I thoroughly recommend). I loved the idea of having the pear fruit cheekily peaking though the ginger cake loaf, inviting you to dig in and explore what lies beneath. In one of my typical left of centre epiphanies I found myself reminiscing about a favorite childhood dessert- Pear Belle Helene. There always seemed to be something so refined and regal about this desert in my mind. Even now it conjures up images of sophistication and elegance- ivory pears poached to sweet, glistening tenderness slick with silky, warm chocolate syrup swirling hypnotically with pear syrup and melting vanilla ice cream.- each bite a sweet, sandy indulgence. So? could I create this in a cake? Well check out my IG feed for more details.

The resulting cake was good enough that I wanted to make it the feature on it’s own- fudgey, rich chocolate cake with a warming spiced undercurrent. For those of you in Ireland and the UK it has more than a passing resemblance to the infamous McVities Jamaica Ginger Cake. Here however the spicy ginger it is pared down a notch so it works in tandem with the rich chocolate flavor of the cake. Allowing this cake to sit for a day allows the texture and flavors to really develop. I would recommend making the cake and let to sit for at least a day in an airtight container at room temperature and bam! you’ll hit that sweet spot.

Now I’m somewhat of a puritan when it comes to eating cake. Not for me the silky adornment of cream or the smooth chilly sensations of ice cream- I like mine sliced pure & simple and this cake is a treat as such. However I do know that it tastes just as awesome when gently heated adjacent to a scoop of vanilla ice cream, or tenderly enrobed in smooth custard. The choice is yours.

Ingredients

  • 1 cup all-purpose flour
  • 1/2 cup cocoa powder
  • 3/4 tsp baking soda
  • 1/4 tsp salt
  • 2 tsps ground ginger
  • 1 tsp ground cinnamon
  • 1/4 tsp ground cloves
  • 1/2 cup Canola oil
  • 1/2 cup fancy molasses
  • 1/4 cup orange juice
  • 3/4 cup dark brown sugar
  • 2 eggs
  • 1/2 tsp vanilla extract
  • 1/2 tsp chocolate extract
  • 1/4 cup whole milk

Method

  • In a bowl combine the flour, cocoa, baking soda, salt and spices. Whisk to combine and set aside until needed
  • Combine the oil, molasses, juice and sugar in a small saucepan. Set it on low heat and stir till the sugar has dissolved. Set aside to cool for about 10 minutes
  • Preheat your oven to 325 degrees F. Grease an 8″ x 8″ square cake pan with oil or line it with baking parchment and allow the edges to overhang for easy removal
  • Transfer the cooled molasses mixture to a large mixing bowl and add in the eggs, vanilla and milk. Whisk well until smooth and well combined
  • Fold in the flour mixture gradually into the liquid until incorporated. Make sure the there are no pockets of dried flour mixture. The final batter may look a little lumpy- this is okay
  • Pour the batter into the prepared tin, level the top and bake for 35 to 40 minutes until a toothpick inserted into the center comes out clean. If the top is darkening quickly, cover the tin loosely with foil and continue baking
  • Allow the cake to cool in the tin for 15 minutes, then remove and place on a wire rack to cool completely before slicing. Store in an airtight tin for about 3-4 days at room temperature, or refrigerate, tightly wrapped, for a week

Pear & Almond Skillet Cake

img_8208

Almonds are a favorite of mine, no matter what the form. Whether it’s the sweet grainy Niederegger of Lubeck; soft indulgent amaretti of Italy or the crisp, salt sprinkled Grecian bar treats- I’m in. I get they can be divisive. Not everyone can take to the vaguely chemical woodiness of the nuts but whatever the form I remain a fan.

The lure of the almond nut has been such throughout time that people have even braved the  high levels of  hydrocyanic acid (HCN) of the wild, bitter almond to partake of it. Eating 50, or less, of the wild nut could potentially kill an adult with cyanide poisoning. Yet such was the allure of the nut that there are recipes from as far back as the 4th century as to how to neutralize the nutty nastiness within. St. Basil’s Hexaemeron, a Christian text from around the fourth century, contains the following guidance:

“Pierce an almond tree in the trunk near its roots, stick a fat plug of pine into its center and its almond seeds will undergo a remarkable change.”

It would seem that the introduction of a foreign botanical sample triggers a metabolic reaction which neutralizes the trees natural HCN production. I can’t testify to the effectiveness of this trick so in the words of all good PBS science programs- please don’t try this at home. But fear not folks,  thanks to a genetic mutation thousands of years ago, modern domesticated sweet almonds are delicious and safe to eat. Unless consumed in massive quantities wherein constipation; Vitamin E overdose and weight gain (to name a few) might result. Everything in moderation as they say! Enough serious talk- you came here to bake (or accidentally got redirected here whilst researching Michael Keaton’s back catalogue).

In my view almonds and pears are one of those quintessentially ideal pairings for baking with. Maybe it’s because they both conjure up images of lush, bacchanal orchard woodlands in my head? Or maybe it’s some other more exacting culinary scientific reasoning unbeknownst to me. As it is, this time of year with bumper pear crops just begs for some autumnal-tinged goods to be baked in the kitchen. I love this recipe as it’s very  much a no-fuss, rustic as you come affair. Cooking it in a skillet means no tin, springform or otherwise, to faff around with and presentation is as easy as pie (or should that be “cake” here? If you’re serving it warm why not go the whole way and slide a dollop of ice cream next to it on the plate? I can whole-heartedly recommend a French vanilla morphing into ribbons of silky, creaminess aside the fragrant cake.

I will hold my hands up and admit this – I also use the simple icing sugar dusting to hide the lack of my Instagram worthy pear pinwheel finish to the top of the cake. Of all the times I’ve made this cake I’ve only maneged the fluke of getting the pears to bake atop the surface twice. More often than not the pears sink that little bit and the batter rises that little bit so the pear slices get engulfed in the finish cake with morsels subtly peaking out here and there. Not that this is a bad thing I suppose? It could be argued that this adds an extra layer of interest with unexpected bites of fruitness throughout the cake. My point is don’t beat yourself up too much about not having the “pear wheel” on top or how it looks- this will taste seriously good anyway!

Ingredients

  • 1 cup and 2 Tbspns (separated) salted butter, softened
  • 1 1/2 cups fine sugar
  • 3 large eggs
  • 1 cup ground almonds
  • 1 cup AP flour
  • 1/4 tspn kosher salt
  • 1 Tbspn ground ginger
  • 1/3 cup milk
  • 1/2 teaspoon vanilla extract
  • 1/2 teaspoon almond extract
  • 2 medium Bosc pears, cored and sliced into 8 vertically
  • Icing sugar, to dust

bc40b2ec-f5bb-4808-86ba-b3573818a3d3

Method

  1. Preheat oven to 350°F, and place a 10″ cast iron skillet in to heat through
  2. In the bowl of a stand mixer fitted with the paddle attachment, beat butter and sugar at medium speed until pale and fluffy, I usually do it for 6- 8 minutes, stopping to scrape sides of bowl halfway through
  3. Add eggs, one at a time, beating well after each addition
  4. In a small separate bowl, whisk together ground almonds, flour, salt and ground ginger. Gradually add flour mixture to butter mixture in thirds, alternately with milk, beginning and ending with flour mixture, beating just until combined after each addition
  5. Beat in both the extracts until combined. Set mixture aside for now
  6. Carefully remove the hot skillet from oven and melt the 2 Tbspns butter on it, swirling to coat the bottom and sides
  7. Spoon batter into the heated, greased skillet and lightly spread to an even layer.
  8. Arrange pear slices in a pinwheel fashion over the top of the batter
  9. Bake until a wooden pick inserted in center comes out clean, 40 to 45 minutes.
  10. Remove and let the pan cool in pan for 10 minutes. Dust with icing sugar, and serve warm
  11. The finished cake can be sliced and stored in an airtight container for up to 3 days

1cdc2851-b059-4937-8c0c-beafdc4f0e18

Classic Angel Food Cake

img_6078

I recently tired making one of these to pass (yet another) day in self-isolation. I knew of it’s reputation for being a difficult and finicky cake to master. I’ve got to be honest- as long as you have the correct Angel Food/ Tube cake pan it’s a breeze. The recipe is a classic standard and sure it can be found with ease on Google. I’m posting it here for convenience as I’ve had a number of people inquiring about it.

A final parting word. Despite it’s fabled complication in the kitchen the cake itself is quite easy and well worth the effort. In my opinion it hands down beats any Japanese Souffle Cheesecake.

Angel Food Cake Checklist

  • Always use Cake Flour (see note below)
  • Always use room temperature egg whites
  • Always whisk/ sift the flour to aerate it
  • Always leave the cake pan ungreased
  • Always FOLD the mixtures together, do not beat
  • Always invert the baked cake straight out of the oven
  • Always allow to fully cool before removing from tin
  • Always use a serrated knife to cut cake slices to avoid squashing the crust

147fcae0-a4de-4e05-946e-8c4024911042

Ingredients

  • 1 1/2 cups Cake flour*
  • 2 cups sugar, divided
  • 14 large egg whites, room temperature
  • 1 teaspoon cream of tartar
  • 1/2 teaspoon kosher salt
  • 2 teaspoons vanilla extract

Special Equipment

  • 10″ Angel Food/ Tube cake pan

Method

  1. Preheat oven to 350°F
  2. In a medium bowl, whisk together flour and 1 cup sugar. Set aside until later
  3. In the bowl of a stand mixer fitted with the whisk attachment, beat egg whites at medium speed until foamy
  4. Add remaining 1 cup sugar. Increase mixer speed to high and immediately add cream of tartar and salt. Add vanilla extract, and beat until peaks form
  5. Transfer egg white mixture to a clean and dry large bowl. Gently fold in flour mixture in 4 additions just until combined. Transfer the batter to an ungreased 10-inch removable-bottom tube pan. Run a sharp knife through batter to remove any hidden air pockets, and smooth the top level
  6. Bake until cake is firm to the touch and an instant-read thermometer inserted near center registers 205°F (96°C) to 210°F (99°C), about 40 minutes.
  7. Remove from the oven and immediately invert pan** and let cool completely.
  8. When cool turn cake-side up and using an offset spatula, loosen cake from sides and remove bottom/ cake insert from pan surround. Loosen cake from bottom and tube by same method. Invert onto a cake plate and serve, cut using a serrated knife

    21fae060-1714-463a-be0f-15fc8d88f67a

    Served with blueberry & gin compote and peaches

    *When I was making this I discovered I didn’t have cake flour to hand. A frustration-saving substitution for cake flour is as follows

    For 1 cup of cake flour- 1 cup of All Purpose flour but remove 2 tablespoons of it. Add in 2 tablespoons of cornstarch and sift the mixture twice. Remeasure 1 cup of the resulting mix as 1 cup of cake flour. DO NOT use All purpose flour on it’s on in this recipe – your cake will have a texture verging on bread!

**Some Angel Food/ Tube cake pans come with pronged feet attached which allow for inverted cooling. If yours doesn’t have them (like mine) then invert the baked cake tin tube onto a narrow wine bottle neck or spirits miniature bottle (some balancing or leaning against something may be required)

PB & J Coffee Cake

img_5815

PB & J – Never have three letters caused such divisive reactions. To be honest the quintessential North American stable of childhood has often has left me baffled in the past. I guess the secret of it’s appeal lies in that age old combination of sweet and salty. Whilst I struggle with grasping it’s appeal in it’s original sandwich form I’ll confess to being partial to it in bake form with contradictory fervor. Just as long as it’s not with grape flavoring! That attraction still eludes me.

So imagine my interest when I stumbled upon this recipe. Although I wish I could lay claim to this recipe the credit all lies with the publication Bake From Scratch and their recent issue on “One Layer Cakes”, If you haven’t heard of BFS I’d definitely recommend checking them out. If not directly for their recipes then certainly as a source of inspiration as I have done in the past.

Whist the original recipe calls for making two 6″ single layer cakes I couldn’t help but think who on earth wants a cake that small! So I instead baked mine in a single 9″ with the only variance being a longer cooking time with the necessity for aluminium tenting the top of the cake towards the end of baking. 

Prepare to surrender to the peanut buttery goodness! I love the crumbly peanut streusel topping- it’s a unique twist on the signature coffee cake feature. I’m sure jam/ jelly to suit your taste could be subbed in, there just happened to be strawberry lurking in my pantry. All in all this cake didn’t last long as it proved a quick hit with the kids. I kept mine on the counter top, in an airtight cake box, and after 4 days it was still tasty ever.

img_5809

Ingredients

Streusel topping

  • 1/3 cup All Purpose flour
  • 1/4 cup firmly packed light brown sugar
  • 1/4 cup smooth peanut butter
  • 1 tablespoon salted butter, softened
  • 1/3 cup salted peanuts, chopped

Cake

  • 1/2 cup unsalted butter, softened
  • 1 cup granulated sugar
  • 2 large eggs
  • 1 teaspoon vanilla extract
  • 1 1/2 cups All Purpose flour
  • 1 teaspoon baking powder
  • 1/2 teaspoon kosher salt
  • 1/2 cup buttermilk
  • 3/4 cup strawberry jam

Garnish

Warmed peanut butter

Method

  1. Preheat oven to 350°F. Spray a 9” round deep cake pan with baking spray and line with baking parchment
  2. To make the streusel topping: In a medium bowl, whisk together flour and brown sugar. Stir in peanut butter and butter until mixture is crumbly. Crumble with your fingertips until desired consistency is reached. Stir in peanuts. Chill in the refrigerator until needed later
  3. For cake: In the bowl of a stand mixer fitted with the paddle attachment, beat butter and sugar at medium-high speed until fluffy and pale, stopping to scrape sides of bowl. Reduce mixer speed to low. Add eggs, one at a time, beating well after each addition. Mix in the vanilla extract
  4. In a separate medium bowl, whisk together flour, baking powder, and salt. Gradually add flour mixture to butter mixture in 3 stages alternately with buttermilk, beating just until combined after each addition. Pour 1/3 of the cake batter into your prepared tin. Spread on strawberry jam, and top with remaining batter, smoothing the top for a level surfaced. Sprinkle with the peanut streusel you prepared earlier
  5. Bake until a wooden pick inserted in center comes out clean, 60-65 minutes, if needed loosely covering with foil to prevent excess browning. Let cool in pan for 15 minutes. Run a sharp knife around edges of cake to loosen sides. Invert onto a plate, and then invert again onto a wire rack. Let cool completely. Garnish with warmed peanut butter, if desired.

img_5821