Smoked Pumpkin Cheesecake & Bourbon Brownies

Are we sitting comfortably? Yes? Good…because here’s another pumpkin recipe. In the spirit of the season, and let’s face it impending CV-19 induced re-lockdown, I’m going to be trying out the wide and various ways of using that seasonal wonder that is pumpkin. You lucky, lucky people! I’ll say right away that they’ll all be sweet bakes – well that’s the plan at the moment, so if you’re holding out for an orgasmic recipe for pumpkin risotto I’m afraid you’re out of luck.

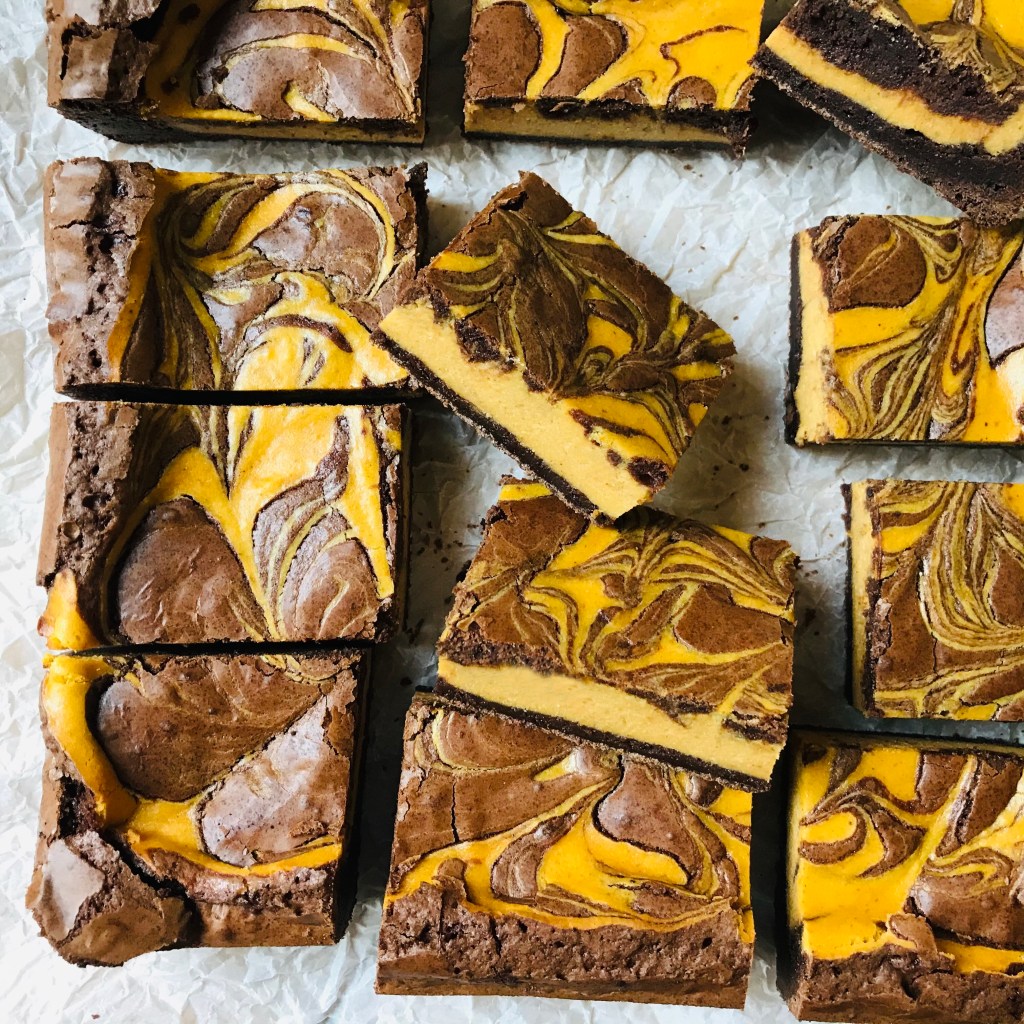
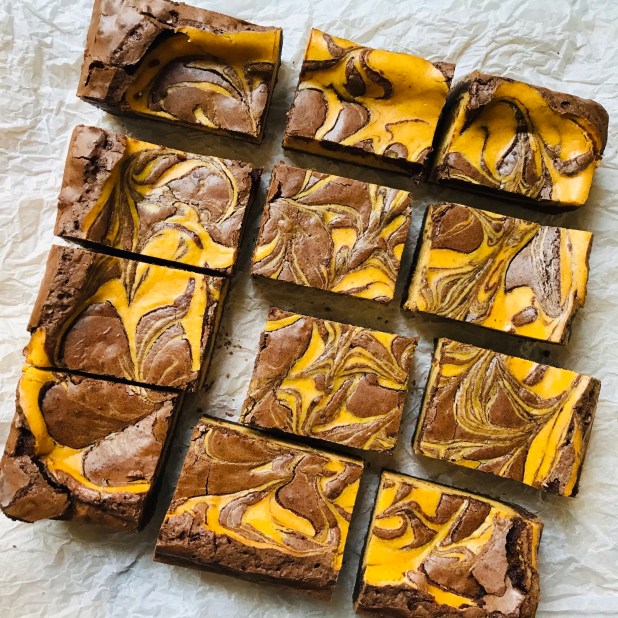
If you follow my blog and recipes you’ll know that brownies are near and dear to my heart. Some people have comfort blankies ala Linus, I have brownies. So it was only right that I should try weave together in kitchen mysticism (it is Halloween season after all!) my love the fudgey (never cakey) traybakes and that bulbous orange cucurbit.

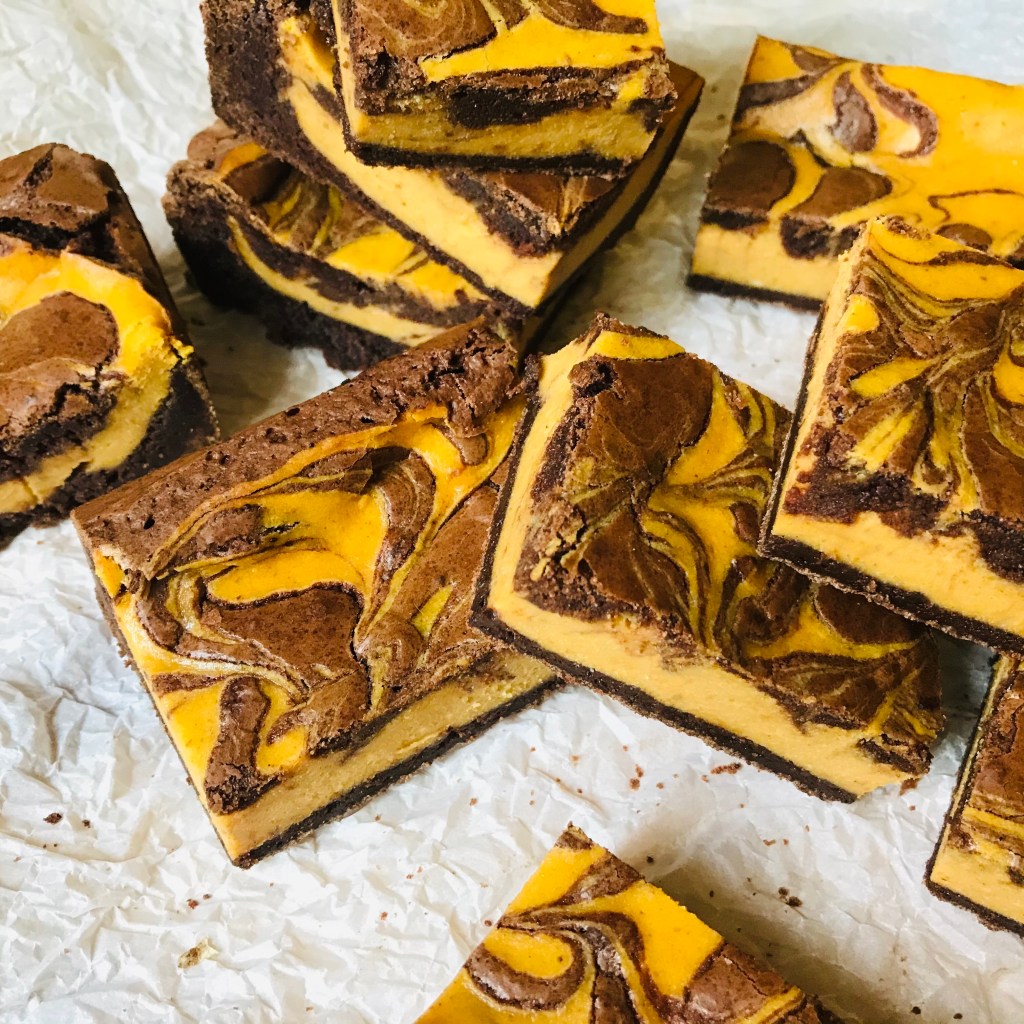
Using pumpkin in the cheesecake element of these brownies instantly renders them fudgey and decadent. I wanted to add another layer there, something to counter thought of sugar-laden PSL. So why not introduce a smokey element- camp-fires, late night and extra complex earthiness working to counter any lingering memories of saccharine heavy beverages.

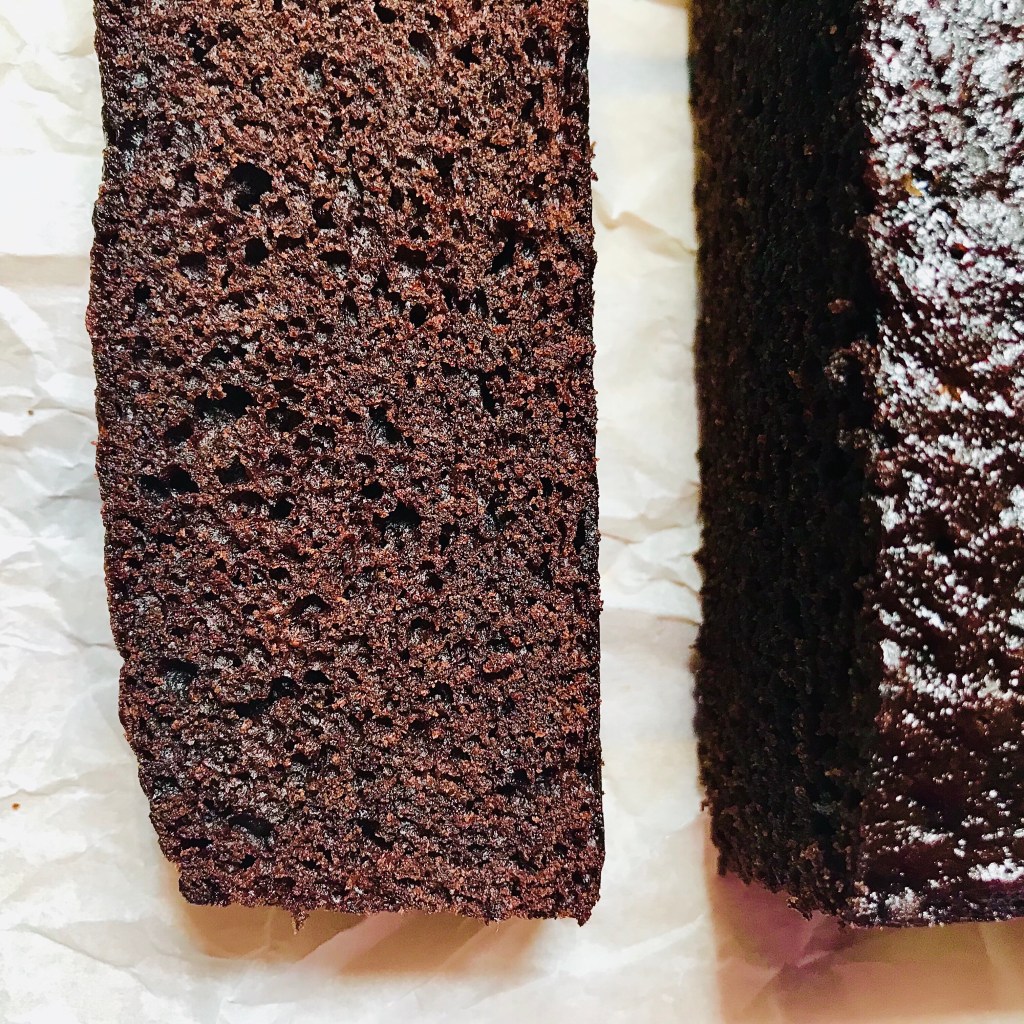
And why not make them a little more grown up too? These are, after all, brownies for the aficionado. Let’s chuck in some bourbon while we’re at it! For me the flavors of the sweet whiskey go so well with chocolate that it’s too good an opportunity to miss. I’ve also used some chocolate extract here as I really wanted to elevate the chocolate intensity too – like I said these ain’t no five ‘n’ dime brownies. To really bring out the texture of these brownies I find they taste so much better when served straight form the fridge.

So yes- buckle up people…I’ve got 4 weeks of pumpkin recipes left and so far it’s brownies and nanaimo bars down. Any guesses what’s next?

Ingredients

Brownie Batter

  • 1/2 cup butter
  • 1/2 cup semi-sweet chocolate chips
  • 1 cup sugar
  • 2 eggs
  • 1 tsp chocolate extract, eg Nielsen Massey (optional)
  • 2 Tbsp Bourbon
  • 1/2 cup AP flour
  • 1/2 cup cocoa, Dutched
  • 1/4 tsp Kosher salt

Cheesecake Batter

  • 8oz pack full fat cream cheese
  • 1 egg
  • 1/3 cup sugar
  • 1/2 cup pumpkin puree
  • 1 tsp vanilla extract
  • 1 tsp ground cinnamon
  • 1/2 tsp ground nutmeg
  • 1/2 tsp ground ginger
  • 1/4 tsp ground cloves
  • 1/2 tsp liquid smoke

*All ingredients to be at room temperature unless otherwise stated

Method

  1. Preheat your oven to 350 F degrees. Spray a 9×9 inch baking pan with cooking oil then line it with parchment paper
  2. In a large bowl, add the cream cheese and beat it until smooth and creamy. Add the rest of the cheesecake batter ingredients mix until well combined and smooth. Set aside until needed later
  3. In a small bowl a bowl set over simmering water, combine the butter and chocolate chips to melt, stirring them together to combine. Once fully melted remove the bowl from the heat and set aside to cool
  4. In a large bowl if a stand mixer, combine the eggs and sugar and whisk at high speed until pale, fluffy and increased in volume
  5. While you eggs are whisking in a bowl combine the AP flour, cocoa and salt
  6. Into the melted chocolate/ butter mixture add the chocolate extract and bourbon. Stir well to combine. Add these wet ingredients into your whisked egg mixture. Gently fold in until fully combined and uniform in appearance
  7. Sift in the dry ingredients and again gently fold in until well combined and uniform in appearance
  8. Pour about 2/3 of the chocolate batter into the prepared pan and smooth it out. Spread the cheesecake batter over the brownie batter. Dollop the remaining brownie batter over cheesecake batter by spoonfuls. Swirl the batters together by running aknife or a skewer back and forth through the pan
  9. Place the baking pan in the oven and bake for 40 to 50 minutes, or until center is set. Using a cake tester or skewer test the centre of the brownie pan – it should come out with few crumbs or a little mixture still on it. The brownies will continue to cook once removed from the oven
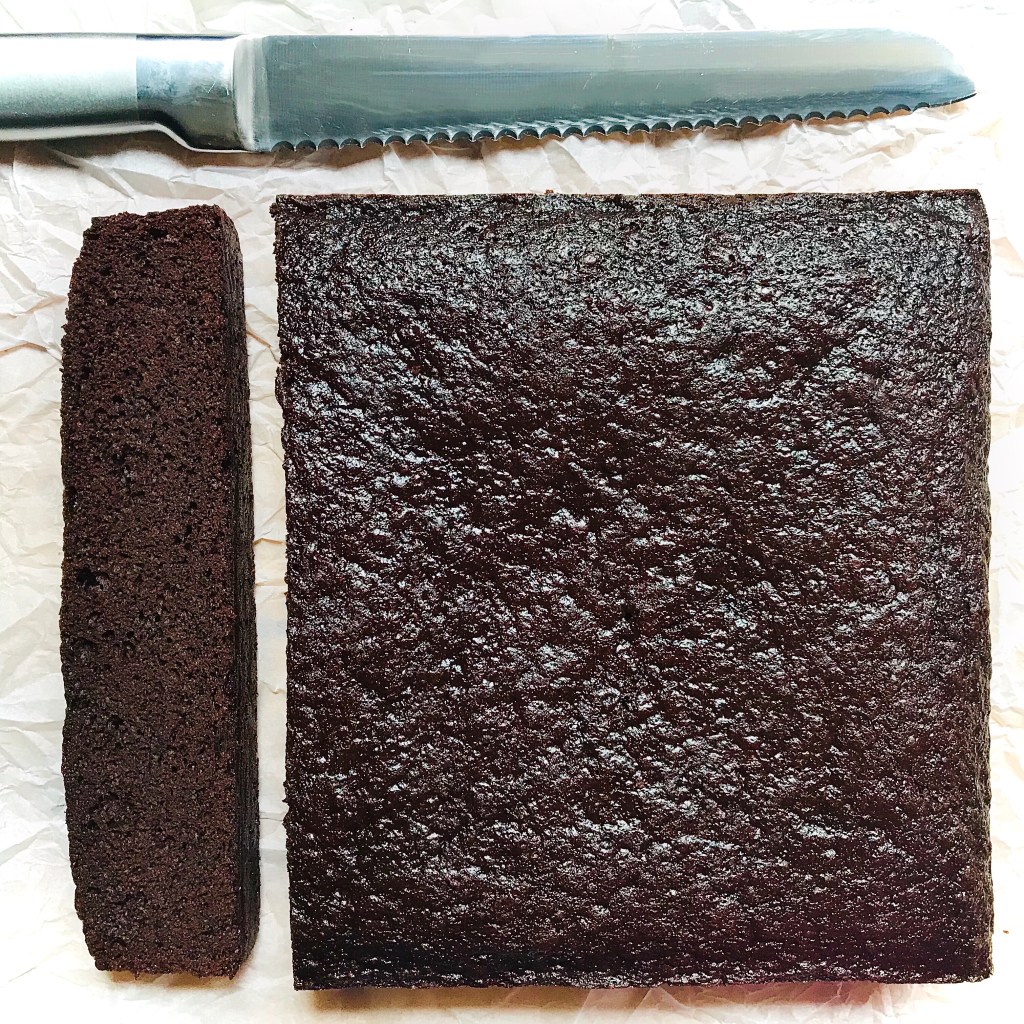
  10. Remove from the oven and allow to cool completely on wire rack and chill before cutting and serving. I usually cut mine in to 4 x 3 giving me 12 brownies. They’re quite rich so I’ve found this to be the ideal size

Spiced Chocolate Cake

This cake started out life as something different. In it’s original form it took inspiration from Bejamina Ebuehi’s “Hidden Pear Cake” from her book The New Way To Cake (which I thoroughly recommend). I loved the idea of having the pear fruit cheekily peaking though the ginger cake loaf, inviting you to dig in and explore what lies beneath. In one of my typical left of centre epiphanies I found myself reminiscing about a favorite childhood dessert- Pear Belle Helene. There always seemed to be something so refined and regal about this desert in my mind. Even now it conjures up images of sophistication and elegance- ivory pears poached to sweet, glistening tenderness slick with silky, warm chocolate syrup swirling hypnotically with pear syrup and melting vanilla ice cream.- each bite a sweet, sandy indulgence. So? could I create this in a cake? Well check out my IG feed for more details.

The resulting cake was good enough that I wanted to make it the feature on it’s own- fudgey, rich chocolate cake with a warming spiced undercurrent. For those of you in Ireland and the UK it has more than a passing resemblance to the infamous McVities Jamaica Ginger Cake. Here however the spicy ginger it is pared down a notch so it works in tandem with the rich chocolate flavor of the cake. Allowing this cake to sit for a day allows the texture and flavors to really develop. I would recommend making the cake and let to sit for at least a day in an airtight container at room temperature and bam! you’ll hit that sweet spot.

Now I’m somewhat of a puritan when it comes to eating cake. Not for me the silky adornment of cream or the smooth chilly sensations of ice cream- I like mine sliced pure & simple and this cake is a treat as such. However I do know that it tastes just as awesome when gently heated adjacent to a scoop of vanilla ice cream, or tenderly enrobed in smooth custard. The choice is yours.

Ingredients

  • 1 cup all-purpose flour
  • 1/2 cup cocoa powder
  • 3/4 tsp baking soda
  • 1/4 tsp salt
  • 2 tsps ground ginger
  • 1 tsp ground cinnamon
  • 1/4 tsp ground cloves
  • 1/2 cup Canola oil
  • 1/2 cup fancy molasses
  • 1/4 cup orange juice
  • 3/4 cup dark brown sugar
  • 2 eggs
  • 1/2 tsp vanilla extract
  • 1/2 tsp chocolate extract
  • 1/4 cup whole milk

Method

  • In a bowl combine the flour, cocoa, baking soda, salt and spices. Whisk to combine and set aside until needed
  • Combine the oil, molasses, juice and sugar in a small saucepan. Set it on low heat and stir till the sugar has dissolved. Set aside to cool for about 10 minutes
  • Preheat your oven to 325 degrees F. Grease an 8″ x 8″ square cake pan with oil or line it with baking parchment and allow the edges to overhang for easy removal
  • Transfer the cooled molasses mixture to a large mixing bowl and add in the eggs, vanilla and milk. Whisk well until smooth and well combined
  • Fold in the flour mixture gradually into the liquid until incorporated. Make sure the there are no pockets of dried flour mixture. The final batter may look a little lumpy- this is okay
  • Pour the batter into the prepared tin, level the top and bake for 35 to 40 minutes until a toothpick inserted into the center comes out clean. If the top is darkening quickly, cover the tin loosely with foil and continue baking
  • Allow the cake to cool in the tin for 15 minutes, then remove and place on a wire rack to cool completely before slicing. Store in an airtight tin for about 3-4 days at room temperature, or refrigerate, tightly wrapped, for a week

Rum Chocolate Banana Pudding

I wish I could say this was inspired by some long-lost childhood memory or fortuitous epiphany but sadly no. The truth of the matter is that this Rum Chocolate Banana Pudding found it’s way in to my kitchen for no other reason than indulgence.

Since moving here to Canada I’ve succumbed to the North America love of “pudding”- that smooth, creamy, slippery dairy concoction of comforting goo. Yes I’m aware it has it’s nay-sayers who believe it should be kept to the confines of school lunchrooms and toddler snack times but… I LOVE it! Banana pudding hailing from the Deep South’s Hall of Comfort Food Fame, is one of Life’s simple pleasures and it’s easy to see why this layered dessert has made it’s way into the repertoire of home cooks on a national scale.

Personally I find it a reassuringly less pompous affair than it’s cousin- the English Trifle. Neat lines of composition are neither desired nor required here; and keep anything resembling jello to yourself! This dish is less about show and more about bringing sublime joy to the eater’s face- making them grin from ear to ear whilst filling their belly. Think of this as the oral equivalent of sliding into the comfiest armchair, wrapped in the fluffiest duvet, in the dusky porch twilight. Each spoonful a testament to the pudding’s sinfully indulgent, creamy cocoa laden, booze-tinged delights. Yes- I think it’s that good!

When you do try it feel free to disagree- all the more for me!

Ingredients

Pudding

  • 1 cup heavy cream
  • 2 cups milk
  • 4 oz semi-sweet chocolate, chopped in pieces
  • 1/2 cup fine sugar
  • 6 egg yolks, room temperature
  • 3 Tbspn cornstarch
  • 2-3 tspns dark rum , dependent on personal taste (if you prefer an alcohol-free version use artificial rum extract)
  • 1 tspn vanilla extract
  • 320g (1 box) vanilla wafers eg Nilla
  • 6 large bananas, peeled and sliced apx 1/4″ slices

Topping

  • 2 3/4 cups whipping cream, whipped
  • 1/4 cup graham crumbs
  • 1/2 cup semi sweet chocolate chips
  • 2 Tbspn light corn syrup
  • 3 Tbspn butter
  • I tspn Vanilla extract

Method

  1. Place milk and cream in a large saucepan and bring to a simmer. Whisk in the chocolate pieces and heat until melted and smooth. Remove from the heat
  2. In a separate bowl, whisk together the yolks, sugar, and cornstarch in a large bowl. Add in 1/4 cup of the chocolate/ milk mixture and whisk to combine. Add in another 1/4 cup of the chocolate mixture and again whisk until fully combined
  3. Pour the warmed egg/ chocolate/ milk mixture back in to the saucepan with the other part of the chocolate/ milk mixture. Whisk to combine and heat over medium-high heat and continuously whisk until thickened
  4. Remove from the heat, stir in 1 tspn vanilla extract, and transfer to a clean bowl. Place a piece of plastic wrap over the surface of the pastry cream and let cool to room temperature
  5. When cooled, spread about 1 cup of the chocolate pastry cream into an 11 by 11-inch glass dish. Layer the wafers, bananas, and pastry cream in the bowl, ending a layer of wafers. Cover tightly and refrigerate until chilled, at least 4 hours or overnight
  6. Just before serving, spread or pipe the top of the pudding with whipped cream and return to the fridge while you make the chocolate drizzle
  7. In a double-boiler combine the chocolate chips, corn syrup and butter. Stir until melted. Remove from heat and stir in the vanilla extract. Set aside to cool until slightly warm
  8. Remove the pudding from the fridge and drizzle over the chocolate sauce to personal taste and serve
  9. The finished pudding will keep in the fridge for up to 3 days. When storing cover lightly with cling-wrap

Salted Fudge Brownie Cookies

88c37393-69ad-4fa6-9efd-8aeb4d4e215e

So waaaaaay back when- in a time when we could still hug each other; be in public without looking like random members of GI Joe or when Lysol still stocked grocery store shelves, I baked brownies. A LOT of brownies. The quantity of brownies baked in my kitchen was only just outdone by the amount of experimental cupcake flavors I would try tempt people with (Vanilla genoise w/ white truffle buttercream frosting, topped with strawberry, black pepper and a balsamic drizzle anyone?) Brownies satiated my passion for baking and my love of chocolate. In fact so much so was this the case that I ended up winning the title of Observer Food Monthly Best Reader’s Recipe 2014. The victorious recipe was my Smokin’ Pig Licker Brownies and can be found here if you interested.

Anyway I digress, as so often seems to be the case when I write these days! The current abundance of time indoors led me to wonder if this basic brownie recipe could be tweaked and applied to cookie format. And I was not to be the first. I’ll be perfectly  honest and admit I was utterly coerced by the glut of crinkle cookie images that seemed to be flooding my feed along with those of the omnipresent sourdough. The cookie recipe here follows pretty much the base template of brownies – melted choc/ butter combo; dry ingredients stash and sugar/egg volume. A dash of baking powder adds some leavening power to the cookie “dough balls” and stops them becoming a singular cookie en masse on the baking tray.

Overall I gotta admit to them being a tasty success, if thinner than I expected. I guess the word “brownies” in my head is synonymous with thick and chunky (applies to me in all walks of life!) so I was a little perturbed when these cookies baked to be a bit thinner. Nonetheless they still had the fudgy texture that I love of brownies and the crinkle topping certainly provided a certain visual ASMR.

So add these the long ever-growing list of what I should start calling “Quarantine Cookies”. Little morsels of baked goodness that have become my tasty alternative to crossing days off a calendar. The only downside being that whilst my repertoire is expanding so too, it would seem, is my waistline!

Stay safe!

img_5856

Ingredients

  • 1 1/4 cup All Purpose Flour
  • 1/4 cup Dutch process cocoa (if you can’t get this standard cocoa is fine as long as it’s unsweetened)
  • 1 teaspoon baking powder
  • 1/4 teaspoon Kosher salt
  • 8 oz semi-sweet chocolate, broken into pieces
  • 1/2 cup salted butter
  • 1 1/2 teaspoons coffee extract
  • 2/3 cup brown sugar, packed
  • 1/2 cup fine sugar
  • 2 eggs, large
  • Optional: Flaky sea salt, to finish (I use Maldon)

Method

  1. Heat oven to 350°F and line two large baking sheets with parchment paper
  2. In a medium bowl, whisk together the flour, cocoa powder, baking powder and Kosher salt until combined.  Set aside until needed later
  3. Combine the butter and chocolate pieces in a bowl over a pan of water. Gently heat over medium-low heat until melted, stirring occasionally to combine. When fully melted remove the bowl from the hot water/ heat, add in the coffee extract and give one final stir to combine. Set aside until needed
  4. While the butter/chocolate mixture is melting, combine the eggs, brown sugar and granulated sugar together in the bowl of a stand mixer. Beat on medium-high speed until pale and increased in volume
  5. Slow and steadily add the chocolate mixture into the egg mixture and fold them together until uniform in color and it is just combined
  6. Sift in the dry mixture, again fold it in until just combined
  7. Set aside for 5 minutes and the mixture will thicken
  8. Using a large (3 tablespoon measurement) scoop drop batter balls onto your prepared baking sheet, spaced at least two inches apart.  The batter will be runny and will spread as the cookies bake.  (Sprinkle each cookie with a pinch of flaky sea salt, if using)
  9. Bake for 10-12 minutes, until the tops of the cookies are crinkled and slightly domed. Remove cookies from the oven and transfer the pan to a wire baking rack to cool. Leave the cookies to cool completely on the pan before removing. The cookies will flatten and crinkle even further as they firm up and cool down

*These cookies will keep in a sealed container for up to 5 days, or freeze for up to 3 months

8088cac6-4352-4095-ae81-f67cdb2c4bdd

Flourless Chocolate Cake

img_5483

Okay this was a surprise hit which a lot of you have been asking about. I made it as I was itching to bake but given current times I’m having to be somewhat frugal with particular ingredients, namely flour and yeast. My yeast problem I appear to have solved (there’s a post coming on that) but flour is still a questionable item, which appears to elude me.

Flourless chocolate cake seems to be one of those things that always pops up on a menu, appealing to all and sundry. So it seemed a pretty perfect fix here. I’ve tried it a few times with varying results across the board from fudgey & brownie like to cakey (and to be honest pretty dry). The recipe here results in the former-  fudgey and reminiscent of the best brownie, just thick enough to whisper indulgence but thin enough not to push you over the edge of regret. A surprise addition of instant coffee granules helps amplify the chocolate flavour without pushing it in to the realms of mocha flavoring.

I tend to like the cake just as is, with a snowy dusting of icing sugar. But feel to dress it up anyway you like – a scoop of cool vanilla ice cream perhaps? or maybe a drizzle of booze-laden cream maybe? The rules are yours to make…or break.

img_5478

Ingredients

  • 1 cup semi-sweet chocolate chips
  • 1/2 cup salted butter
  • 3/4 sugar
  • 1/4 teaspoon kosher salt
  • 1 teaspoon vanilla extract
  • 3 large eggs, beaten
  • 1/2 cup cocoa powder
  • 1 teaspoon instant coffee granules
  • Icing sugar, to dust (optional)

Method

  1. Preheat your oven to 375 degrees F. Grease and line an 8″ cake pan. Set aside until needed later
  2. Combine the chocolate and butter in a large microwave-safe bowl, and heat for 30 seconds. Remove stir and heat again for another 30 seconds. Stir until the chocolate is melted and the mixture is smooth. (or you can melt them together in a heat-proof bowl over a double-boiler)
  3. Add the sugar, salt, vanilla extract and stir to combine well
  4. Add the beaten eggs and stir until smooth and uniform in color
  5. Finally add in the cocoa powder and instant coffee granules. Stir until just combined- be careful not to over-mix here
  6. Pour the batter into your prepared cake pan, gently smoothing the top. Bake at the preheated temperature for 25 minutes, or until the the top has a thin crust and the centre reads 200 degrees F on an instant read thermometer.
  7. Remove the cake from the oven and place on a cooling rack fro 10 minutes. After this time use an offset spatula (or butter knife) to run around the edges of the cake and loosen it from the pan.
  8. Place your serving plate on top of the cake in the pan and carefully turn it upside down to invert the cake out onto your serving plate. Let the cake cool completely, either at room temperature or in the fridge. If cooling in the fridge remove it at least 30 minutes prior to serving to allow it to come to best temperature.
  9. To serve dust the top of the cake liberally with icing sugar if desired.

926dfc67-3fc3-498e-9887-dc000dd1448b