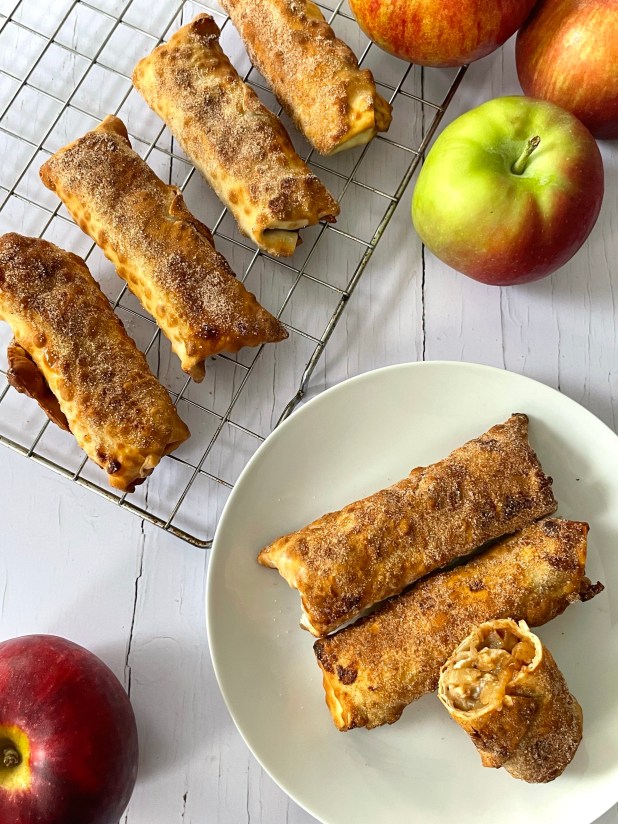
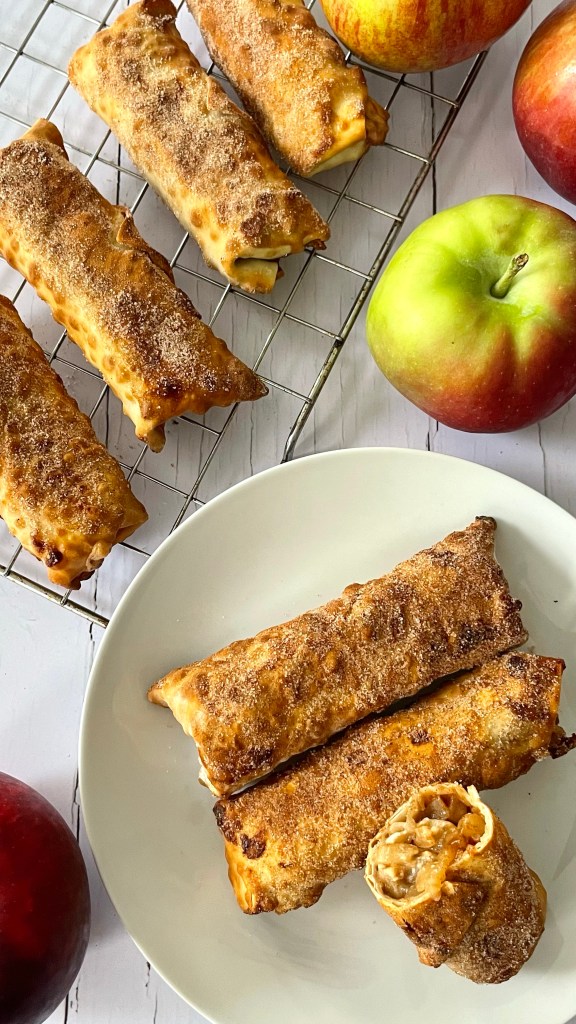
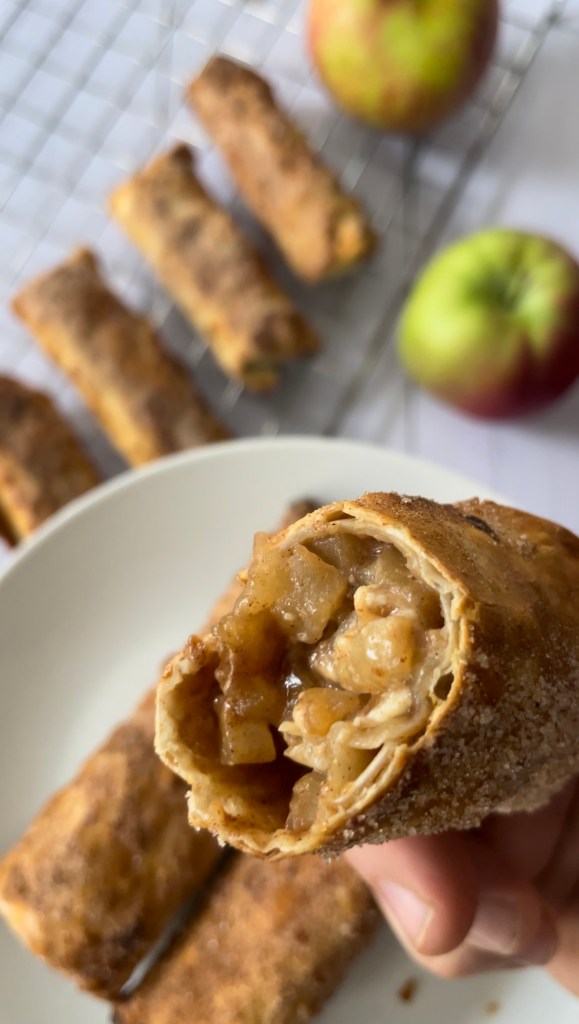
In a small bowl, combine apples, brown sugar, 2 teaspoons cinnamon and cornstarch and mix well
With a corner of an egg roll wrapper facing you, spread 1 scant tablespoon cream cheese to within 1 in. of edges.
Place 2-3 tablespoons apple mixture just below center of wrapper
Fold bottom corner over filling; moisten remaining wrapper edges with water. Fold side corners toward center over filling. Roll egg roll up tightly, pressing at tip to seal. Repeat with remaining egg roll wrappers
In batches, arrange egg rolls in a single layer on greased tray in air-fryer basket; spritz with cooking spray (I usally do mine in 2 batches of 4)
Cook until golden brown, 5 minutes. Turn; spritz with cooking spray. Cook until golden brown and crisp, usually another 5 minutes.
On a separate plate, combine sugar and remaining 1 teaspoon cinnamon; roll hot egg rolls in mixture to coat (using a tongs help!)
Serve and enjoy! (Leave to rest for about 5 minutes as the internal filling can be quite hot!)
*If you’re upscaling this recipe for more than 8 apple pies, I’ve found it best to make and cook 8 at a time. Any more and you risk letting the ones sit uncooked becoming soggy
**Cooked apple pies can be quickly reheated in your air-fryer preheated at 350F for 3 minutes
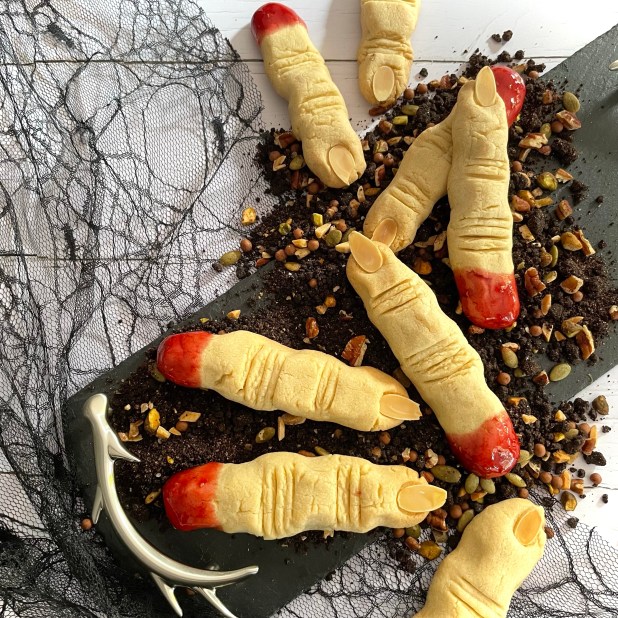
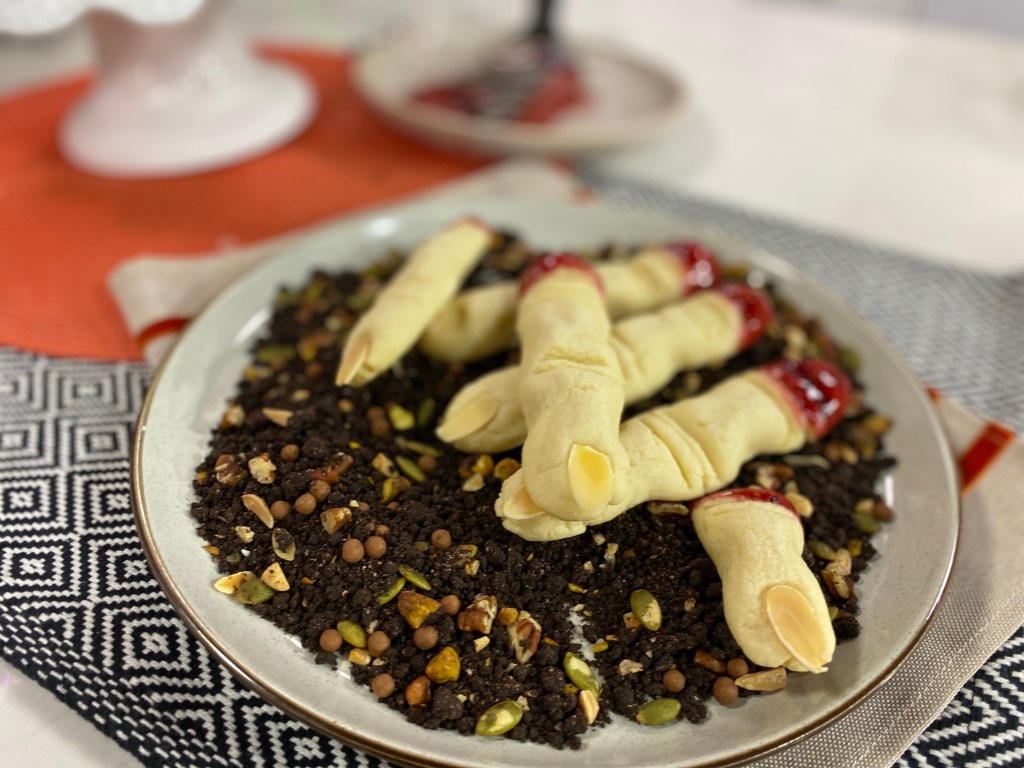
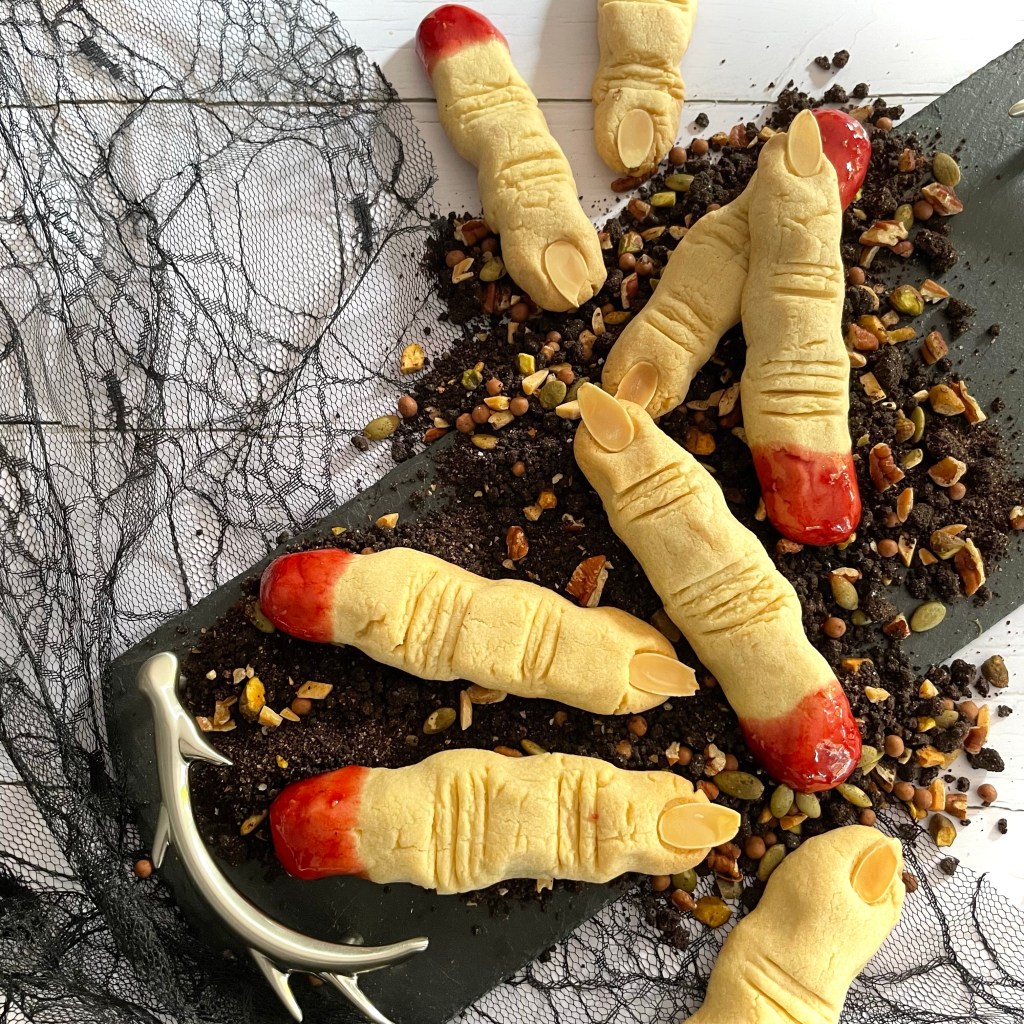
What’s Halloween without a little treat from the Other World, huh? These delightfully dreadful cookies are a wonderful treat to have lying around at any festively freakish gathering. A spin on traditional sugar cookies, they really do look more than the sum of their parts. They’re also easy enough that you can rope in some ghoulish little helpers for the fun.
A point to note that like all sugar cookies, you want to avoid baking them to the usual cookie state of “golden brown”- this will result in them being a tad too hard for enjoyment. Bake them for the time required below, or until hte edges are just starting to turn a light golden brown. The cookies may look under-baked but trust me here- they will taste so much better!
½ cup (1 stick) unsalted butter, at room temperature
1 cup sugar
1 large egg, at room temperature
1 teaspoon pure vanilla extract
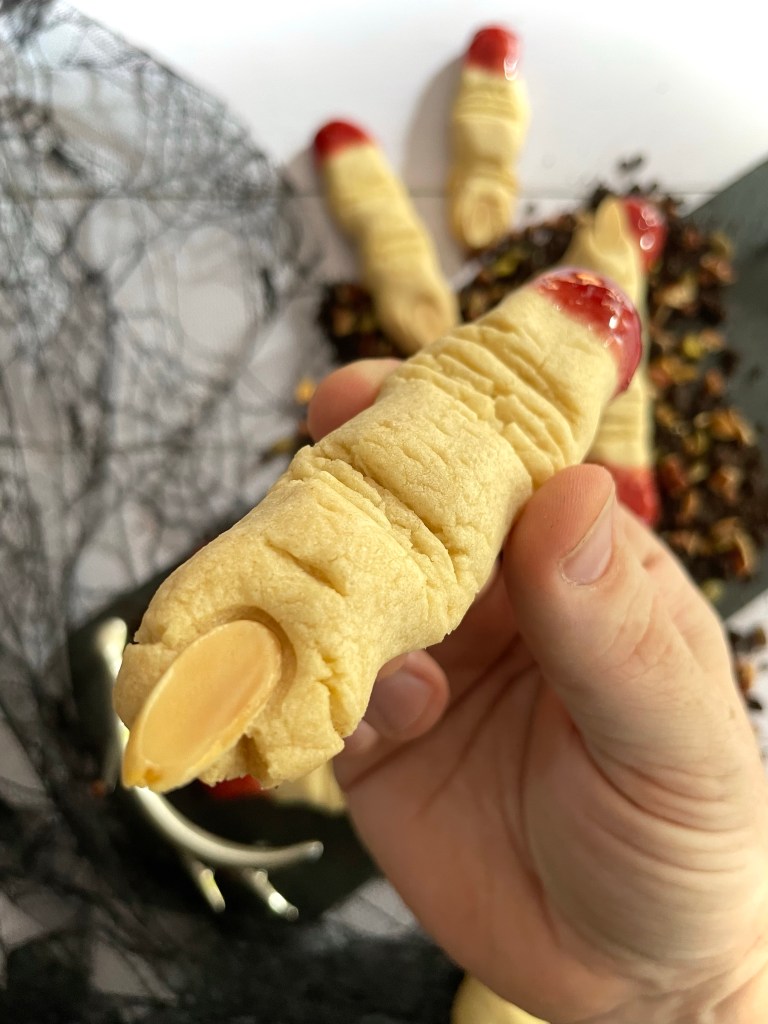
28 large, flaked almonds
½ cup smooth, raspberry jam
1 Tablespoon light corn syrup
Method
Graveyard Dirt
Melt butter in the microwave in a small glass or ceramic bowl (microwave safe) and allow to cool to room temperature
In a large mixing bowl, blend the sugar, salt, and cocoa powder until thoroughly mixed
While whisking, slowly add the melted butter and continue mixing gently until blended, but dry
Using a fork, continue mixing until it looks like dark soil
At this stage mix in the chopped nuts to give the soil texture
Spoon the “dirt” on to your serving plate or tray, ready for your finger cookies
Fingers Cookies
Preheat the oven to 325 degrees F. Prepare a cookie sheet with baking spray or line with a silicone mat, or baking parchment. Set aside until needed
In a medium bowl, whisk together the flour, baking powder and salt. Set aside until needed
In the bowl of a stand mixer fitted with the paddle attachment, beat the butter and sugar together until light and fluffy, scraping down the sides of the bowl with a spatula as needed, about 10 minutes
Add in the egg, vanilla and mix until well combined and smooth.
Gradually beat in the dry flour mixture, ¼ cup at a time until a dough forms
Remove the bowl and using about 1 1/2 tablespoons of dough at a time, roll the dough between your palms into 5-inch-long fingers about 1/2-inch thick. Firmly press a sliced almond into the end of each finger to make fingernails
Make several horizontal cuts, about 1/4 inch deep, in the center of each finger to make mimic skin folds at the knuckles. Gently press the dough on either side of the cuts to shape the knuckles
Arrange the fingers on the prepared baking sheet and bake until light golden, 16 to 18 minutes
Transfer the fingers to a wire rack and cool completely
While the cookies cool, in a small saucepan, combine the jam, corn syrup and heat over low heat until warm, about 2 minutes, stirring gently
Dip the blunt ends of the fingers in the warm jam and arrange on a plate of the graveyard dirt for serving
Makes 4 individual portions, or one 8″ x 8″ large portion
Ingredients
Cake
1 ½ cups all-purpose flour
½ cup granulated sugar
1 ½ tsp baking powder
1 pinch salt
½ cup cold unsalted butter, cut into pieces
½ cup milk
Sauce
1 cup maple syrup
1 cup packed light brown sugar
½ cup water
¼ cup unsalted butter
1 tsp vanilla extract
Method
Cake
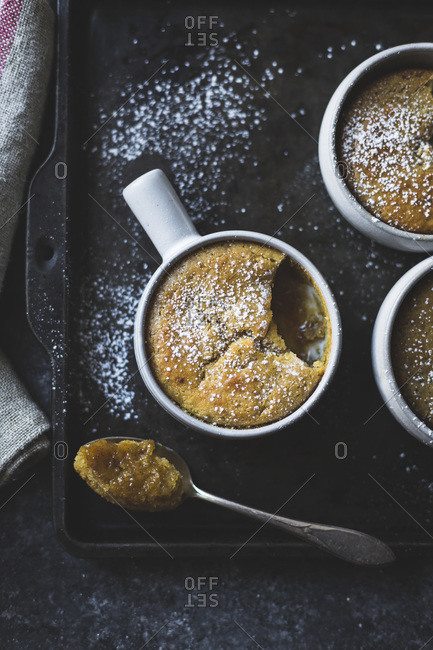
Preheat the oven to 350º. Lightly grease 4 individual (0.25L) mini-cocottes, ramekins or other ovenproof dishes and place them onto a baking tray
Sift the flour, sugar, baking powder and salt into a large mixing bowl. Add the butter and use a pastry cutter or your fingertips to work the butter into the flour until a rough, crumbly mixture – similar to thick breadcrumbs, or damp sand, is achieved
Add the milk, and stir just until the mixture comes together
Spoon this into the prepared smaller baking dishes. Set aside while you prepare the sauce
Sauce
Combine the maple syrup, brown sugar, water, butter, and vanilla in a pan and bring to a boil over high heat, stirring occasionally
Once it reaches a rolling boil, remove it from the heat and ladle this over the cake in the ramekins
Bake the puddings for about 30 minutes, until a tester inserted into the centre of a pudding comes out almost clean
Remove from the oven and let the puddings cool for about 15 minutes before serving (be careful syrup is hot!)
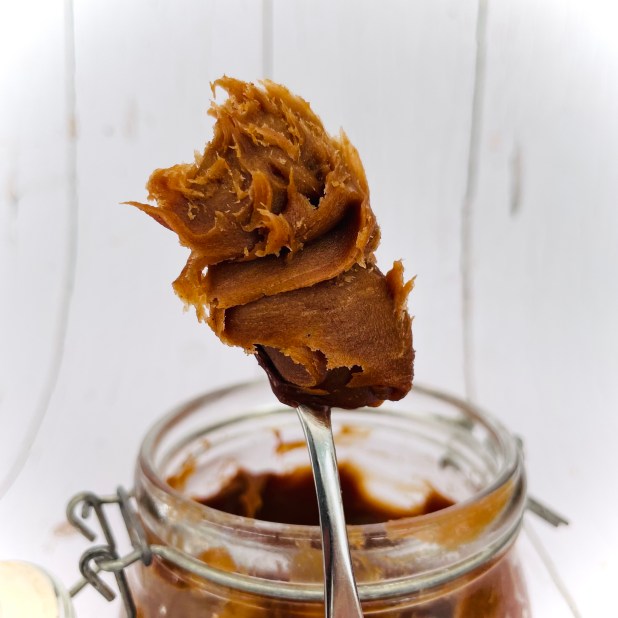
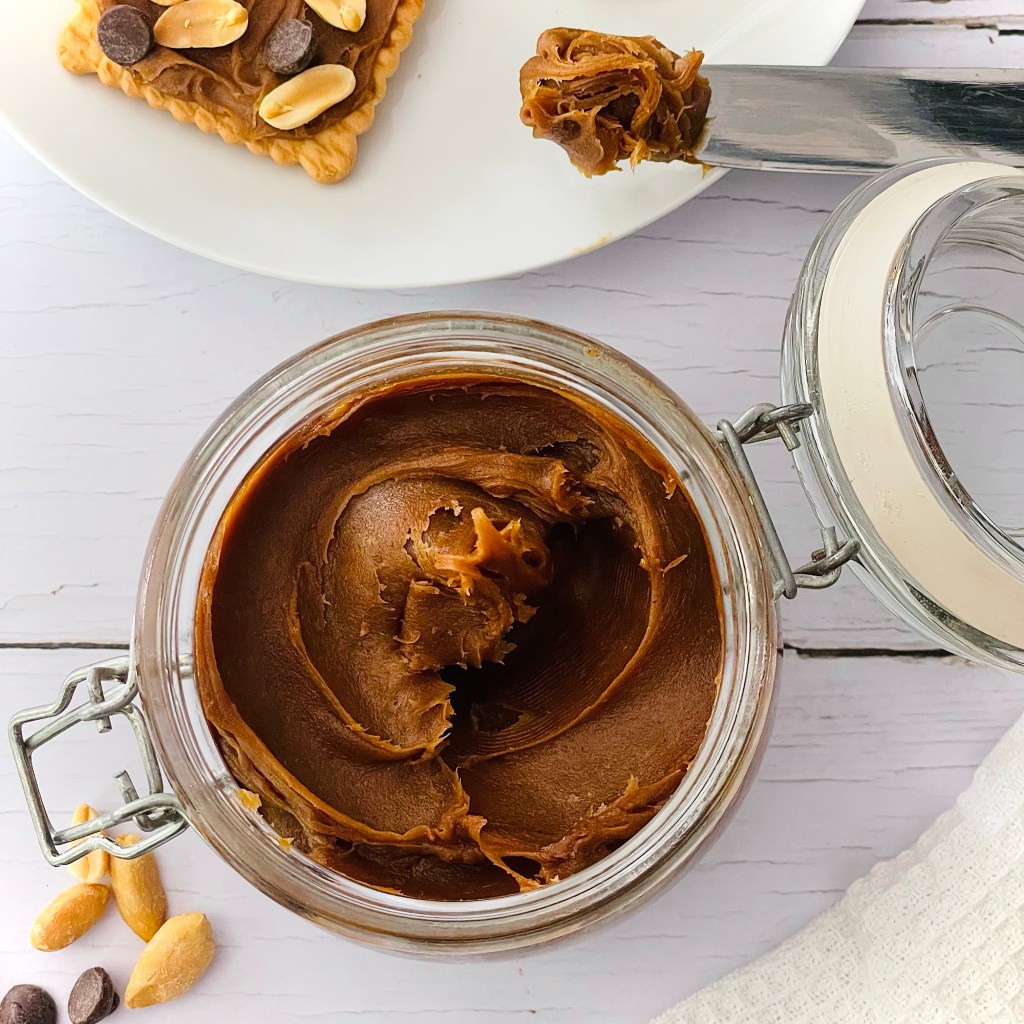
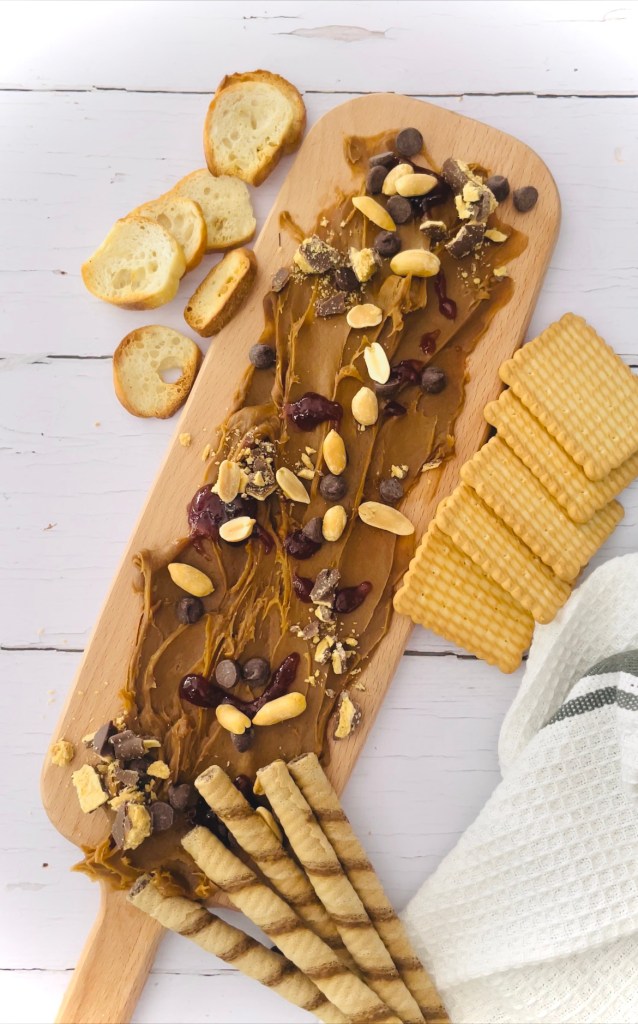
Place the cookies in a food processor and blend to your desired cookie butter texture. The finer the crumb off cookie the smoother the final result will be
Transfer the processed cookie crumbs from the processor to a medium pan and combine with brown sugar, evaporated milk, water, ground cinnamon, dark corn syrup, and salt
Heat over a medium heat, stirring until the mixture is well combined, the sugar has dissolved and the cookies crumbs have almost dissolved. If the mixture starts to bubble, reduce the heat to a simmer
Remove from the heat and place in a heat proof bowl. Leave to cool for 5 minutes
Add in the coconut oil, stirring carefully until melted and almost incorporated
Using an immersion blender, blend the mixture until it is fully emulsified and thick
Transfer to a sterilised glass jar and transfer to the fridge to allow the mixture to set. This allows the dispersed coconut oil to fully set within the mixture
To use remove the cookie butter from the fridge and allow to come to room temperature for best taste
1/2 stick unsalted butter, cubed and at room temperature
1 1/2 tablespoon chai spice mixture
Method
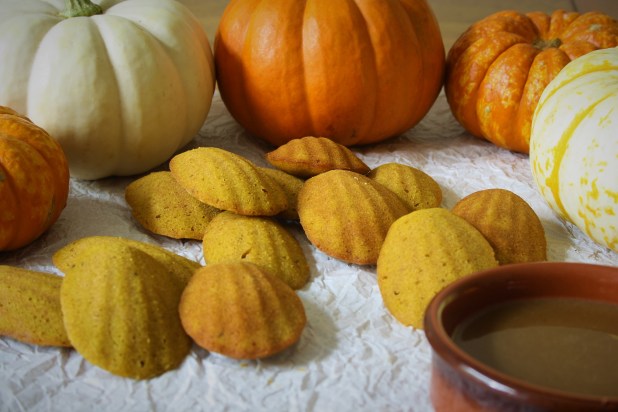
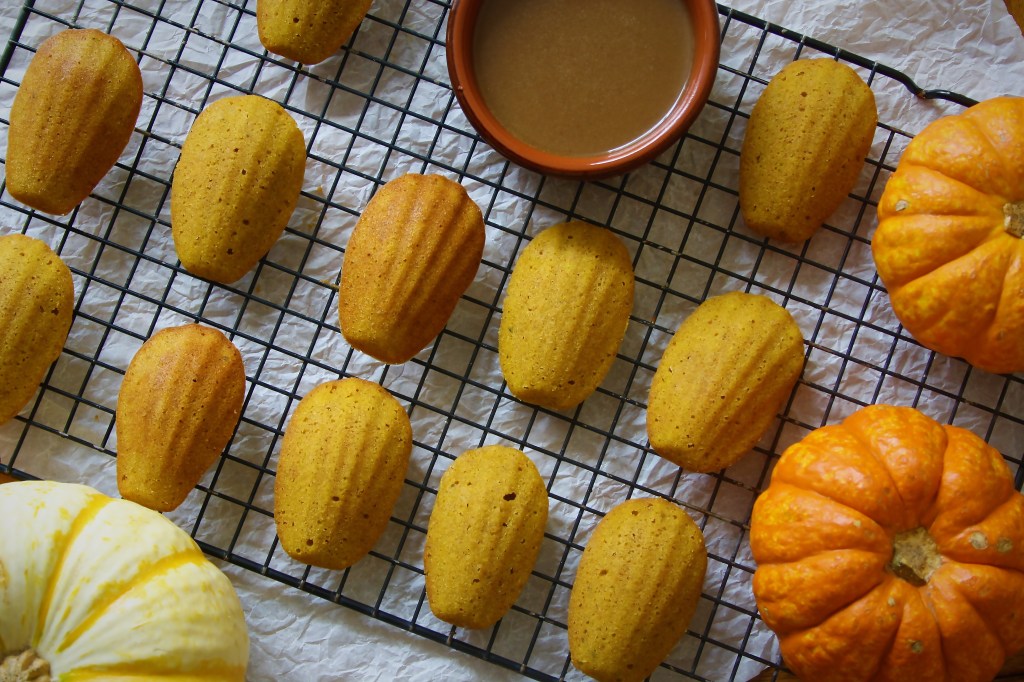
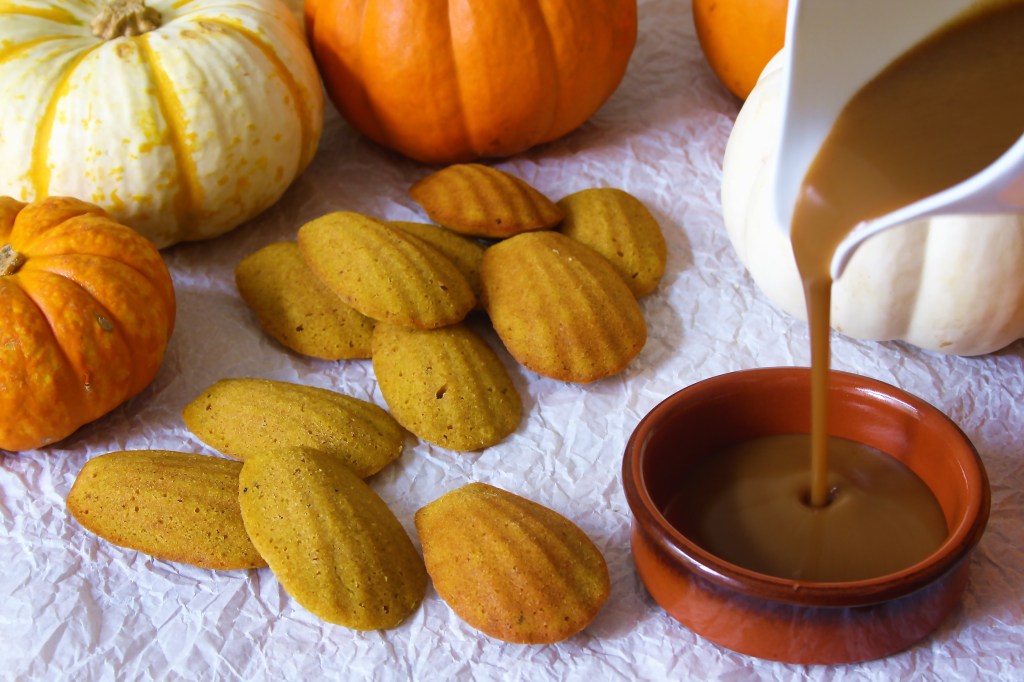
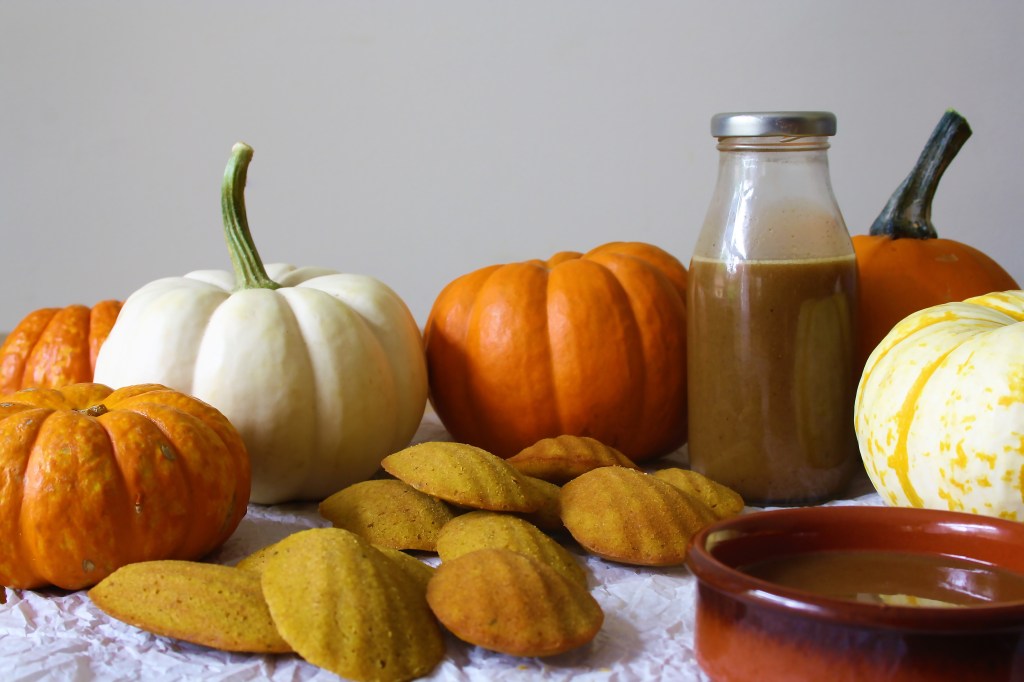
Madeleines
Preheat the oven to 350 degrees. Coat two 12-shell madeleine pans with baking spray or cake release. (Or brush with melted butter and coat with flour, tapping out the excess flour)
Melt the butter in a small saucepan over medium heat until it is a brown color, It will now start to have a “nutty” smell. Remove the pan from the heat and allow to cool (You’ll notice small brown/black particles. Don’t worry these are all part of brown butter!)
In a bowl combine the flour, baking powder, salt, mixed spice and tonka bean. Whisk., to combine and set aside until needed
In a stand mixer bowl add the eggs and sugar and with the whisk attachment mix on medium-high until the mixture is light in color, thick, and fluffy, about 5 minutes. Add the pumpkin puree and mix on slow until combined
After removing the bowl from the mixer, fold in the flour mixture gently by hand. Once the flour is completely added, gently pour in the cooled melted butter and fold it into the mixture until completely incorporated. Scrape the bottom and sides of the bowl to make sure no pockets of unmixed ingredients
Pour the madeleine batter into a large piping bag (fitted with plain circular nozzle, or snip the end of the bag off)
Fill the prepared trays with batter in each mould to 3/4 depth
Bake the madeleines for 10-12 minutes or until puffed and golden
Let cool in the pans for 5 minutes and then move to a wire rack
*Keep in an airtight container for up to for 2-3 days. The madeleines can also be frozen for up to 2 months and then reheated in the microwave or in a 350F oven before serving.
Caramel Dipping Sauce
In a heavy-based saucepan combine the brown sugar and water. Heat until the sugar dissolves
Increase the heat and allow the sugar mixture to deepen in color, approximately 240F (Soft Crack on sugar thermometer)
*exercise care in these next few steps!
Remove the saucepan with the melted sugar from the heat and add in the salted butter. Whisk briskly and carefully so that it melts and becomes incorporated into the sugar mixture. It may hiss and spit so please take care!
Next add the cream in a steady stream and stir to fully incorporate. Again take care at this point.
Stir in the chai spice mixture
Pour into the small ramekins or mini-milk bottles to serve with the pumpkin madeleines
**The final caramel sauce will keep for up to 2 weeks in your refrigerator. I find it’s best if removed from the fridge about 30 minutes before serving to allow it the return to full “saucy goodness”. If you prefer it warmed, heat in a microwavable container in 10-15 second bursts until it at desired temperature