Yields: 8 to 10 servings
Ingredients
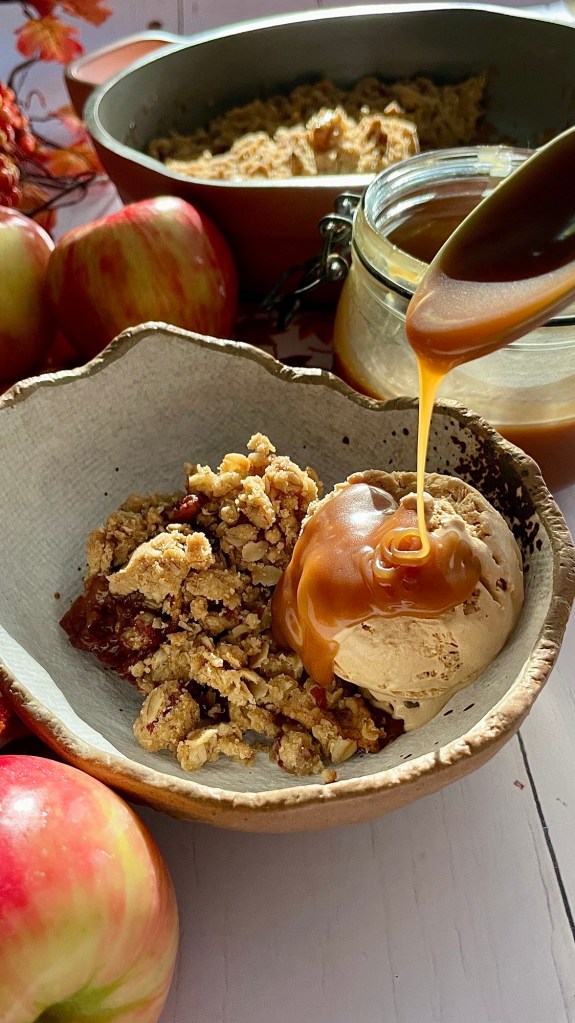
Caramel Sauce
- 1 ½ cups granulated sugar
- 2 Tablespoons light corn syrup
- ¼ teaspoon cream of tartar
- ½ cup water
- ¼ cup unsalted butter, cubed, room temperature
- 1 cup whipping, heavy cream, room temperature
- Sea salt flakes, to taste
Filling
- 1 ¼ kg tart, firm apples, such as Ganny Smith, Jonathan or Honeycrisp (about 6 medium apples)
- Grated zest of 1 orange
- Grated zest of 1 lemon
- 1 Tablespoons freshly squeezed orange juice
- 1 Tablespoons freshly squeezed lemon juice
- 1 teaspoons good quality vanilla paste or extract
- 1teaspoon ground cinnamon
- ½teaspoon ground cardamom
- ⅛teaspoon ground cloves
- Pinch of kosher salt
Crisp Topping
- 1 cup all-purpose flour
- 1 cup old-fashioned rolled oats
- ⅓ cup chopped pecans
- ⅓ cup light brown sugar
- ½ teaspoon kosher salt
- ½ cup unsalted butter, softened
Method
Caramel Sauce
- Combine the sugar, corn syrup, cream of tartar and water in a large saucepan set over a medium–low heat. Bring to the boil and cook for 10–12minutes until it becomes a deep gold colour, but not dark brown. DO NOT STIR at any point. If you need to you can gently swirl the pan to make sure the mixture is melting evenly. When the caramel begins to colour, it will darken quickly so keep a close eye on it
- Once it reaches the correct color, quickly, but carefully, remove the pan from the heat. Add the butter cubes and using a wooden spoon gently stir until the butter has melted and is well combined. It will bubble a little and release steam so take care not to burn yourself!
- Next, add the cream and again slowly stir, again taking care not to burn yourself from the rising steam
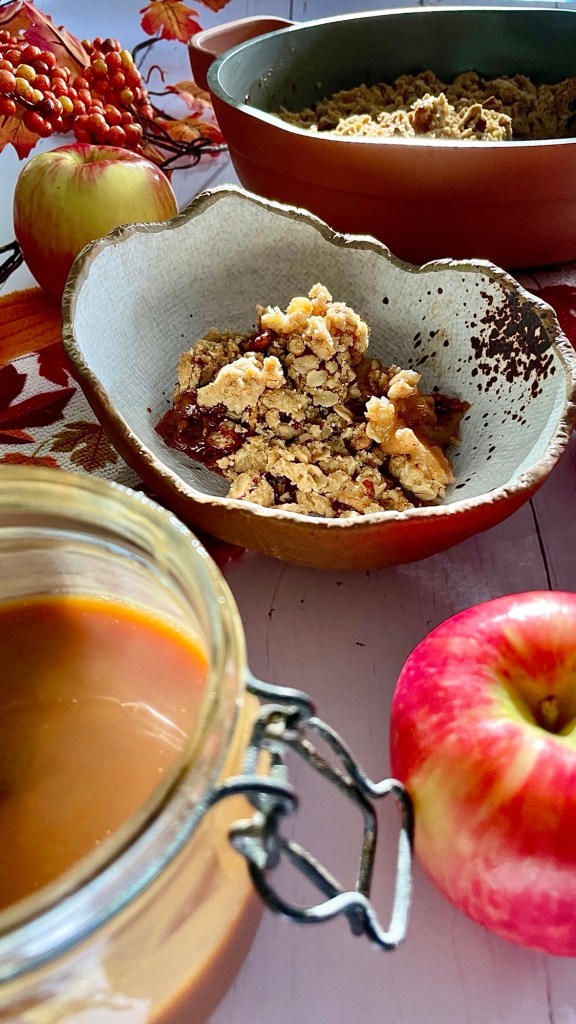
- Once well combined, add sea salt flakes to taste (carefully tasting as you go!) and whisk to combine. Set aside to cool completely in a hat-proof container while you prepare the rest of the crisp*
Filling
- Heat your oven to 350F degrees and lightly butter/ oil a 9- or 10-inch oven-safe skillet
- Peel, core and slice the apples into ½-inch slices
- Combine the sliced apples, both zests, both juices, vanilla extract, spices and salt in a large bowl, and stir to combine. Drizzle ½ cup cooled caramel sauce over the top and stir again. Scrape the apples and all their juices into your prepared skillet
Topping
- In the same bowl, combine the flour, oats, pecans, sugar and salt. Stir until well combined, then add the butter and mash it into the dry ingredients with your fingers until crumbs form. Pour the crumb topping evenly over the apples
- Bake the crisp until the topping is golden and the juices are bubbling, 40 to 50 minutes
- Serve warm with more warm caramel sauce and ice cream
*Store any remaining sauce in an airtight container in the refrigerator for about a week. It can be rewarmed for later use in a saucepan over low heat.

 So I wanted a bar. But it had to be the right kind. I had previously made Hello Dolly Bars, or as they’re also known as Magic Cookies Bars, but I had found them too sweet and gloopy. Maybe I added too much condensed milk caramel or not enough dry ingredients? Either way I was far from happy with them and the resulting bars were deliciously mutated into ice cream topping instead. “Waste not, want not” etc etc.