Peach Cobbler Cake

I adore peaches. Nothing sums up Summer quite like the heady waft of a ripe peach just before you bite in, followed by the trickles of sweet juice running down your chin. Ahh Summer days! Needless to say as a result I’m a sucker for all things peach- bakes and desserts. One of my favourites being Peach Cobbler. Being synonymous with the American South there’s a deluge of recipes of the sweet peachy dish which has been baked into the history and hearts of people, each tweaked in accordance with individual family traditions and tastes.

You will of course by now know of my love for the unexpected in baking, turning things on their heads. So why not Peach Cobbler- but make it cake? Yes, I know it’s been done before…but featuring tea as an ingredient? Welcome to my world!

For those of you who followed my adventures in the kitchen of Food Networks Canada’s Great Chocolate Showdown, you’ll of course remember there was a Tea Challenge- where bakers were tasked with incorporating a selected tea into their desserts. The perfect springboard for this recipe!

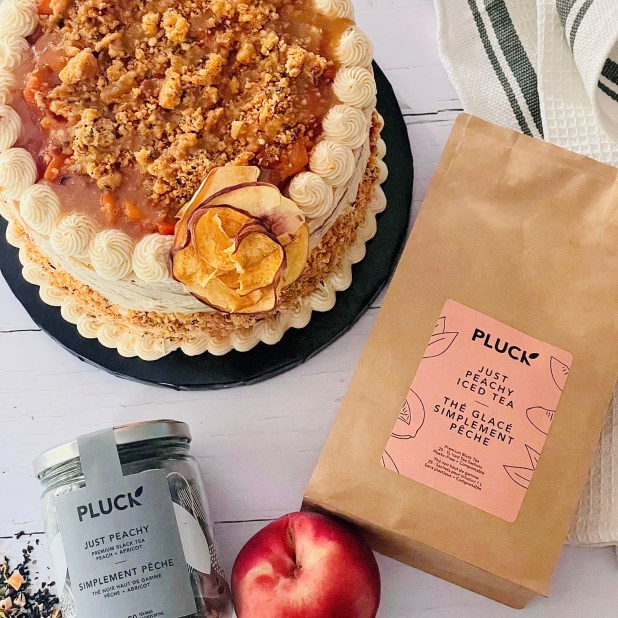
This recipe gave me the perfect opportunity to work with Pluck Teas. Pluck Teas is an award-winning female-founded Canadian small business and tea maker, producing premium quality tea blends in Toronto for tea drinkers who value quality and sustainability. Hand-blended in small batches with several of the brand’s favourite ingredients (like lavender, grapes and ginseng) grown and dried in Ontario, ensuring that the product is fresh while also reducing the brand’s carbon footprint.

I’ve created this Peach Cobbler Cake using their “Just Peachy” tea blend. “Just Peachy” is one of Pluck’s black teas – a delicious, soft, and fruity infusion featuring a full black tea character layered with luscious ripe peaches. Perfect for a Summer tea treat!

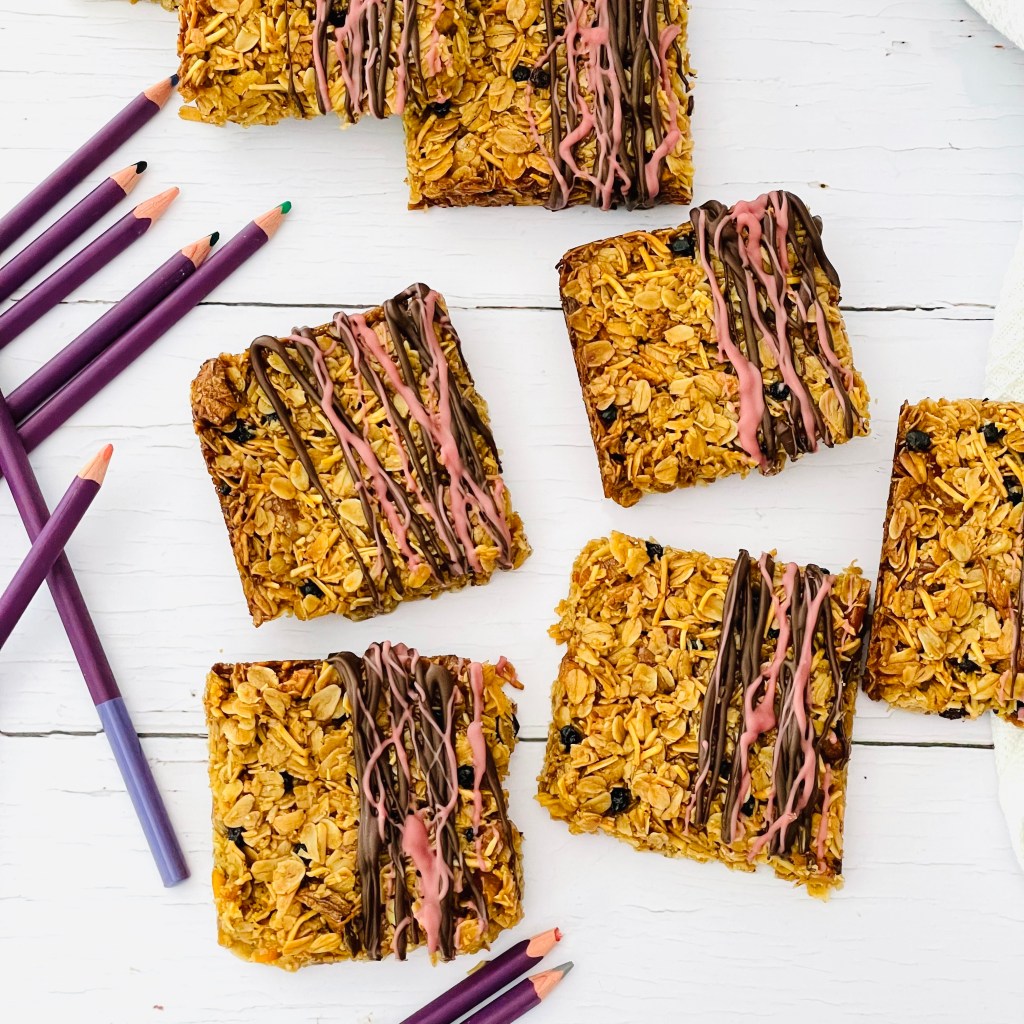
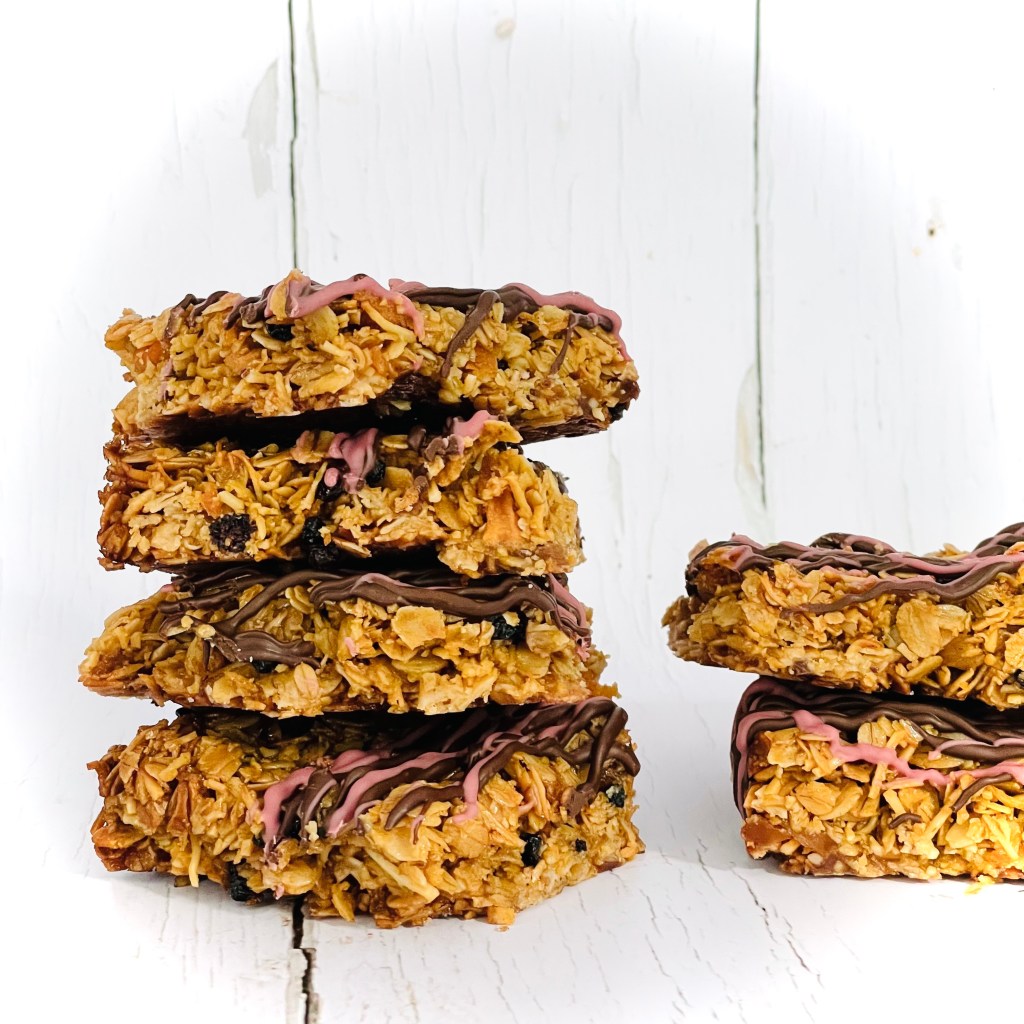
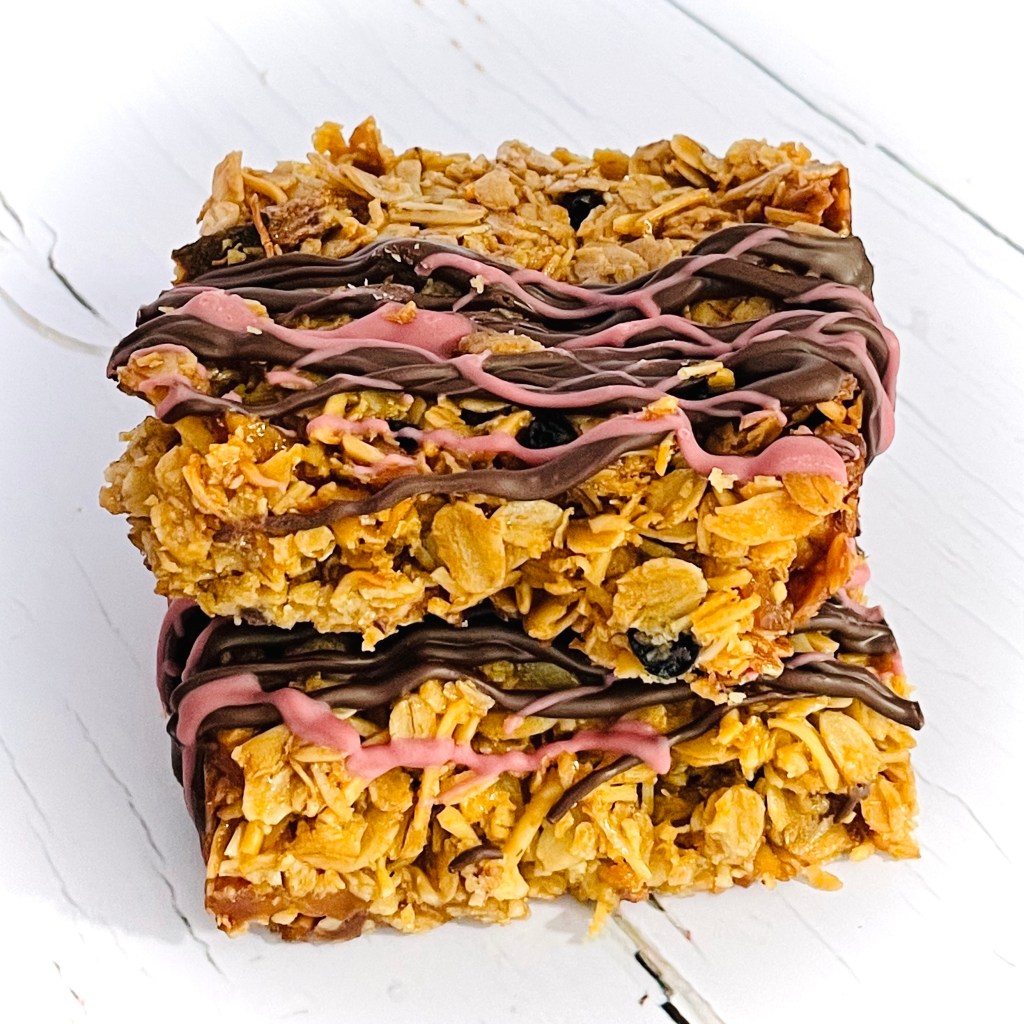
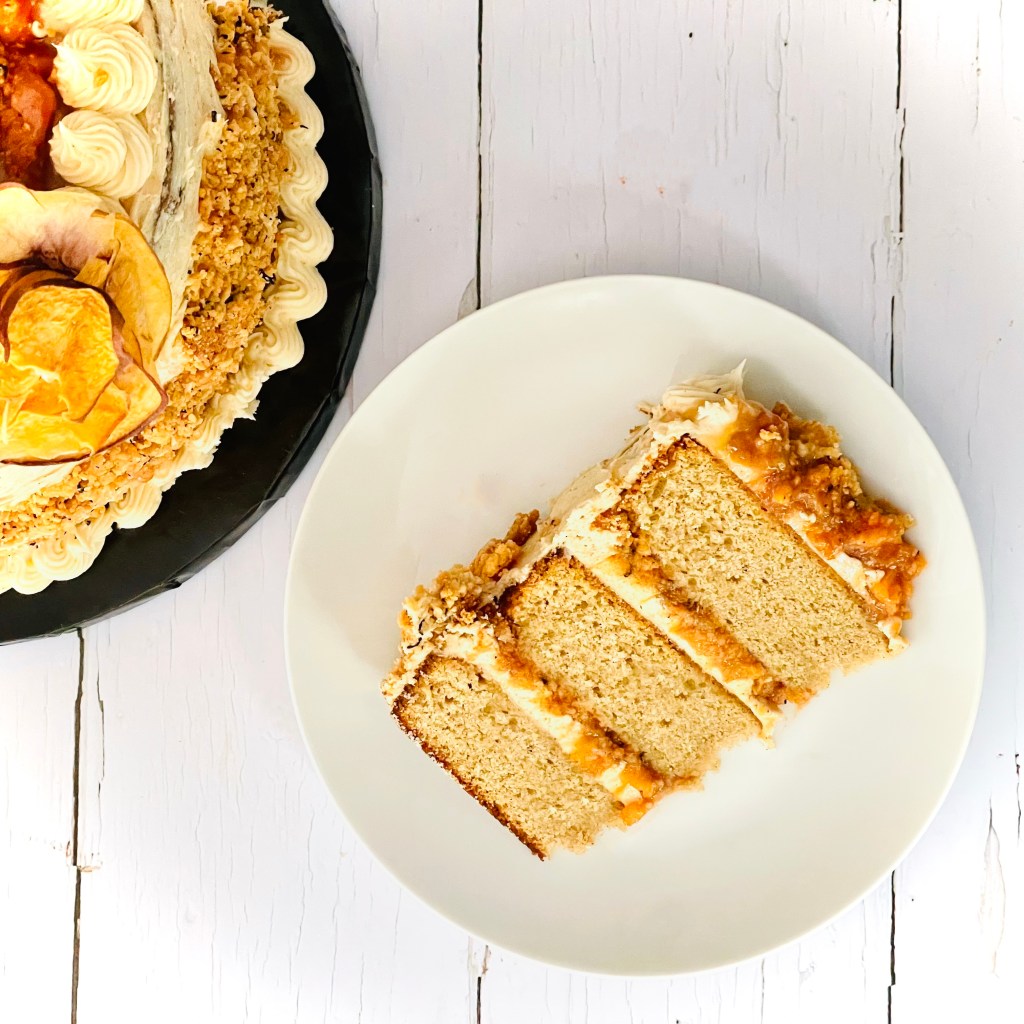
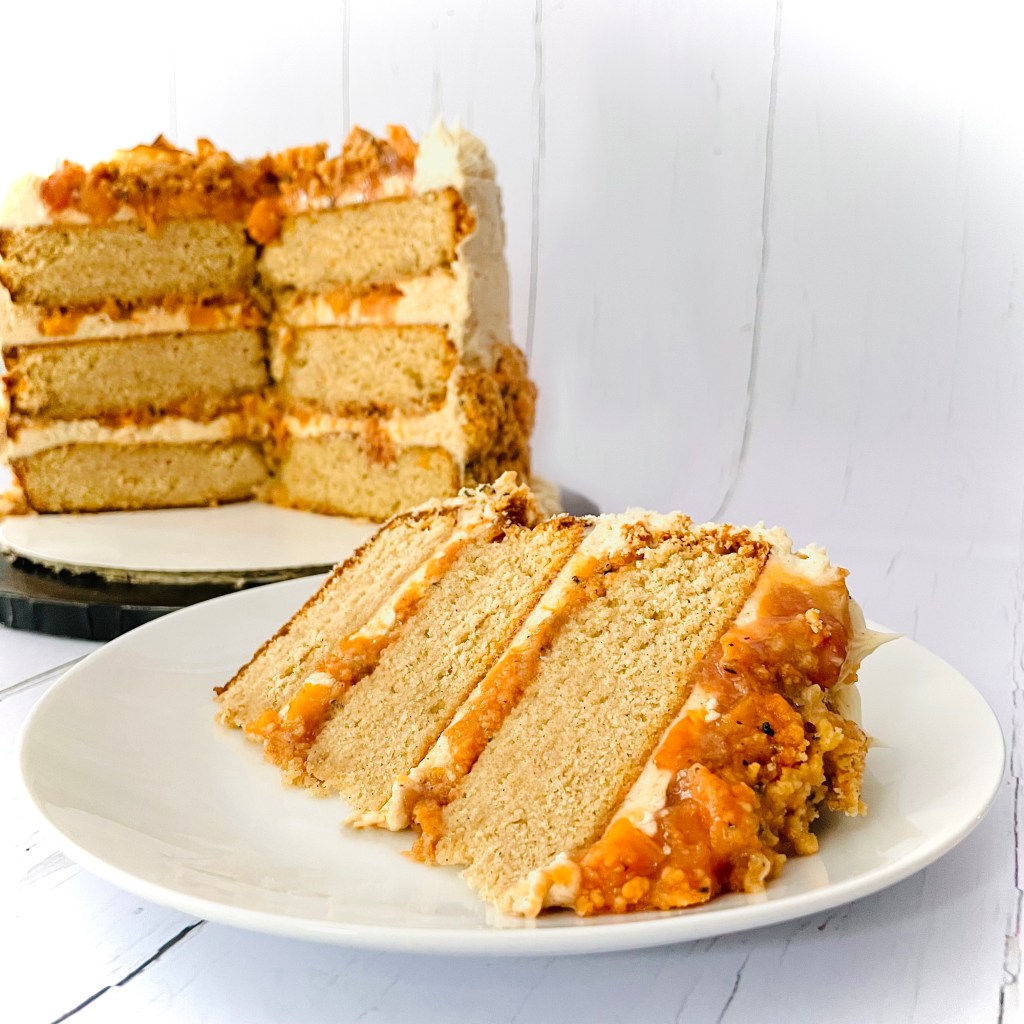
Layers of tasty cinnamon sponge filled with juicy Ontario peaches, peach flavoured crunch, enrobed in sumptuous brown butter buttercream, and finished with a delectable caramel drizzle. All infused with Pluck “Just Peachy” tea blend. Everybody likes tea and cake, right?

*This is a sponsored post

Ingredients

Cinnamon Sponge Cake

  • 2/3 cup milk, room temperature
  • 1 sachet Pluck Tea “Just Peachy” tea*
  • 3 cups all-purpose flour
  • 1 Tablespoon baking powder
  • 2 teaspoons ground cinnamon
  • 3/4 teaspoon salt
  • 1 cup butter, room temperature
  • 2 cups granulated sugar
  • 4 large eggs, room temperature
  • 2 tsp vanilla extract, or paste

Cake Syrup

  • 1 cup water
  • 1 sachet Pluck Tea “Just Peachy” tea*
  • 1 cup white sugar

Peach Filling

  • 5 Peaches, diced
  • 1 Tablespoon lemon juice
  • 1/3 cup brown sugar
  • 1 sachet Pluck Tea “Just Peachy” tea*
  • ¼ teaspoon fresh nutmeg
  • 1 Tablespoon corn-starch

Peach Crunch

  • 20 Golden Oreo Cookies
  • 1 sachet (85g) Peach Jell-O powder
  • 1 sachet Pluck Tea “Just Peachy” tea*
  • ¾ cup butter, melted

Brown Butter Buttercream

  • 1/3 cup whole milk
  • 1 sachet Pluck Tea “Just Peachy” tea*
  • 1 ½ cups (3 sticks) butter (divided in to 2 sticks and 1)
  • ½ teaspoon Kosher salt
  • 5 cups powdered sugar

Caramel drizzle

  • 1/3 cup boiling water
  • 1 sachet Pluck Tea “Just Peachy” tea*
  • 1 Tablespoon liquid glucose, or light corn syrup
  • 1 ½ cups sugar
  • ¾ cup heavy cream, room temperature
  • 1 teaspoon Kosher salt
  • 3 Tablespoons butter, room temperature

*Pluck Tea “Just Peachy” sachets used here are from the “Just Peachy” Iced Tea selection. If you are using “Just Peachy” loose leaf it is 2 ½ Tablespoon equivalent (along with using a tea steeper ball where required)

Method

Cinnamon Sponge Cake

  1. Preheat oven to 350F. Grease and flour three 8″ cake rounds and line with parchment
  2. In a small pan combine the milk and tea sachet. Gently heat the milk to just below boiling. Remove from heat, set aside to infuse until needed later
  3. In a medium bowl, whisk flour, baking powder, cinnamon, and salt until well combined. Set aside
  4. Using a stand mixer fitted with a paddle attachment, cream butter until smooth. Add sugar and beat on med-high until pale and fluffy (approx 10mins)
  5. Reduce speed and add eggs one at a time fully incorporating after each addition. Add vanilla
  6. Alternate adding flour mixture with cooled milk/ tea infusion, beginning, and ending with flour (3 additions of flour and 2 of cooled milk/ tea infusion). Fully incorporating after each addition
  7. Spread batter evenly between the prepared pans and smooth the tops.
  8. Bake for approx. 35mins or until a toothpick inserted into the centre comes out mostly clean
  9. Place cakes on wire rack to cool for 10mins then turn out onto wire rack to cool completely

Caramel Drizzle

  1. In a large pan, steep the tea sachet in the boiled water for 15mins.
  2. Remove the tea sachet, add in the sugar, and glucose (or light corn syrup if using). Swirl the sugar to ensure it is fully soaked with the tea infusion
  3. Heat over a low heat until the sugar is melted, gently swirling the occasionally
  4. Increase to high heat to bring to a boil, allow to boil for 1 minute, then reduce to medium heat and simmer for 7 minutes
  5. Remove from heat, add the heavy cream and salt. Take care here as the mixture will steam and bubble. Whisk at a steady pace to combine the mixture. If the caramel seizes around your whisk don’t worry continue to stir until almost combined
  6. Return the pan to a medium heat and simmer for a further minute to fully melt the caramel. If the caramel bubbles too high, reduce the heat
  7. Your caramel should now be smooth. Remove from heat, and gently stir in the butter pieces a Tablespoon at a time, ensuring each is fully melted before adding the next
  8. Once all the butter has been added, transfer to bowl to cool fully

Cake Syrup

  1. Combine all the syrup ingredients in a pan. Heat gently to dissolve the sugar
  2. Increase to a boil for 1 minute, then remove from heat and allow to infuse for 15 minutes before removing the tea sachet
  3. Set aside to cool until needed

Peach Filling

  1. In a large pan combine the chopped peaches, brown sugar, lemon juice and tea sachet
  2. Bring to a gentle boil, stirring occasionally and taking care not to break the tea pouch
  3. Once boiling reduce heat and simmer for 5 minutes
  4. After this time remove the tea sachet, add in the corn starch. Continue to simmer until the mixture has thickened
  5. Remove from heat, transfer to a bowl to cool. The mixture will thicken further as it cools. Set aside until needed

Peach Crunch

  1. Preheat your oven to 350F. Line a baking tray with baking parchment
  2. Place the Oreo cookies in the bowl of a food processor, and process to a medium crumb
  3. In a medium bowl, combine the cookie crumbs and the Jell-O powder. Stir to combine
  4. Add in ½ cup of the melted butter and stir to combine. You’re looking for texture similar to cheesecake crumb base (damp sand). If the mixture is too dry, add the remaining butter a Tablespoon at a time until the desired texture is achieved
  5. Once ready, spread the crumb on to the prepared baking try and bake f or 7- 8 minutes
  6. Remove from the oven and set aside to cool until needed

Brown Butter Buttercream

  1. In a small pan, combine the milk and tea sachet. Heat until just below boiling, remove from heat and set aside to infuse until needed
  2. In a pan, heat 1 cup (2 sticks) of butter until fully melted. Continue to heat until the butter starts to foam. Take care in case the butter bubbles up too much. If it does, reduce the heat until it subsides, then return the heat. Continue to heat the butter, stirring constantly, until you noticed it start to turn a light brown and smell a nutty aroma. Transfer the browned butter to a heat proof bowl, chill until cool and almost set
  3. Once cooled, combine the brown butter and remaining stick of butter in the bowl of a stand mixer, along with the salt. Beat until smooth and fully combined
  4. Add in the powdered sugar 1 cup at a time, beating between each addition until fully combined
  5. To the butter/ sugar mixture, add the milk/ tea infusion a tablespoon at a time. Beat rapidly between each addition to whip the buttercream
  6. When all the milk has been added increase to a high speed and whip for 2 minutes until light and fluffy
  7. Set aside and start assembling the cake

Cake Assembly

  1. Gently brush the top side of each sponge layer with some of the cake syrup. Use enough so that the layers feel moist to the touch
  2. Place the first sponge layer on a cake board, syrup side up. Spread a layer of butter cream over the top. Pipe an additional border around the edge of the sponge layer
  3. Inside the buttercream border, spread some of the peach filling. Top this with the peach crunch sprinkled over (breaking up any large pieces)
  4. On top of this place the next sponge cake layer and repeat the process with fillings and the third/ top layer
  5. Apply a crumb coat of buttercream to the cake, before a final coat of buttercream, finished to your preference
  6. Finish the top sponge with any remaining peach filling and a final sprinkling of peach crunch before drizzling with the caramel sauce (to your preference)

*I like to pipe a border around the edge of the top layer to keep the final peach filling/ crunch layer in place

Smoked Pumpkin Spice Latte Donuts

Makes 18-20

Ingredients

Donuts

  • 1 3/4 cups All-Purpose flour
  • 1 teaspoon baking powder
  • 1 teaspoon baking soda
  • ½ teaspoon salt
  • 1 ½ teaspoons ground cinnamon
  • 1 teaspoon pumpkin pie spice
  • ½ cup canola oil
  • 3/4 cup packed brown sugar
  • 2 large eggs, at room temperature
  • 1 cup fresh or canned pumpkin puree
  • 1/3 cup milk, room temperature
  • 1 teaspoon liquid smoke
  • 1 teaspoon pure vanilla extract

Milk Glaze

  • 3 cups powdered sugar
  • 5 Tablespoons milk
  • ½ teaspoon extract

Coffee Glaze

  • 2 teaspoons espresso powder
  • 2 teaspoons water
  • Brown food coloring, optional

Optional

Pumpkin Spice mix, to decorate

Method

Donuts

  1. Preheat oven to 350°F. Spray/brush donut pan with non-stick spray. Set aside
  2. Whisk the flour, baking powder, baking soda, salt, cinnamon, and pumpkin pie spice together in a large bowl until combined. Set aside.
  3. In a medium bowl, whisk the oil, brown sugar, eggs, pumpkin puree, milk, liquid smoke, and vanilla extract together until combined. Pour the wet ingredients into the dry ingredients, then fold everything together gently just until combined and no white streaks of flour remain
  4. Using a piping bag, pipe the batter into the donut pans, filling about halfway
  5. Bake for 10-11 minutes or until the edges and tops are lightly browned. Cool donuts in the pan for 2 minutes then transfer to a wire rack. Re-grease the pan and bake the remaining donut batter
  6. Leave to cool fully before glazing

Glazes

  1. In a small saucepan, combine the milk glaze ingredients
  2. Cook over low-medium heat, whisking occasionally, until the glaze is warm, the sugar has melted and, after a brief pause, starts to form a crust on top. Remove from heat
  3. Dip one side of each doughnut into the glaze, gently shaking it to allow any excess glaze to drip off. Be sure to stir the glaze between each doughnut to prevent a crust forming in the pan. If the glaze in the pan sets too quickly, simply heat over a gentle heat, stirring till it is smooth again
  4. Set donuts on a cooling rack for the glaze to set
  5. Once all the doughnuts are glazed, add the coffee glaze ingredients to the remaining glaze. Stir the glaze until all the espresso powder has dissolved. Add a drop of brown food coloring, if using and stir to a uniform color
  6. Pour the espresso glaze into a piping bag, and drizzle over the doughnuts (preferably with a piece of parchment paper under them)
  7. Sprinkle a pinch of pumpkin spice mix, if using, over each donut to finish and set aside to fully set

Fruit Flapjacks

First of all let’s clear up the looming misunderstanding. In this recipe my use of the term “Flapjack” is as used in the UK and Ireland, as opposed to it’s North American connotation.

If you find yourself unfamiliar with Flapjacks as they appear here well then you’re in for a treat. Defined as “a sweet, tray-baked oat bar, most commonly made from rolled oats, butter, brown sugar and golden syrup“- growing up they were the stuff of school-time treats. Like so many other bakes with a traditional heritage, a love of these oatty morsels falls into two distinct camps- soft & chewy or crunchy & crumbly. Both however offer comforting butteriness and sweetness with each rustic bite. At the end of the day it’s all a matter of time and taste.

The easiest way to describe a flapjack is to think of it as a granola bar. Like it’s pseudo-healthy breakfast cousin it’s basis is in the “slick ‘ em and stick ’em” method of ingredients. Here it’s the butter providing the “slick ’em” element with the “stick ’em” being provided by the amalgamation of sugar, corn & maple syrups, and molasses. The aforementioned ingredients and oats are the basic building blocks, carrying any number of preferred add-ins. Dried fruit, chocolate chips, caramel are all fair game here.

Having mentioned the flapjacks featured ingredient, the humble rolled oat, I feel it fair to offer a sliver of insight here. Flapjacks can be made using just the one type of oats- Rolled Oats (sometimes known as Jumbo Oats). I have found, however, that by using a mix of rolled oats and quick oats a sturdier, less crumbly flapjack is the end result, the latter oats providing a finer grain to act as an infill to the voids between the larger oat flakes.

Above all the flapjack is a bake that is easily tweaked to personal preference for taste and texture proving a lasting favorite that has stood the test of time. Once you have the essential slick ’em, stick ’em and oats in place the Flapjack World is your oyster!

Makes 12

Ingredients

  • 2 2/3 sticks salted butter
  • 1/2 cup brown sugar, packed
  • 2 tablespoon golden corn syrup
  • 2 tablespoons fancy molasses
  • 2 tablespoons maple syrup
  • 1/2 teaspoon kosher salt
  • 2 cups jumbo rolled oats
  • 2 cups quick oats
  • 1 cup shredded coconut
  • 1 teaspoon vanilla essence
  • 1 1/4 cup dried fruit slices, chopped (I’ve used a mix of apple, pear, apricot and mango)

Method

  1. Preheat your oven to 325 degrees F (350 degrees F for a crunchier flapjack). Line and grease a 9′ x 12′ baking tin with baking parchment
  2. In a large bowl combine the oats, coconut and dried fruit. Stir well to mix and break up any fruit clumps. Set aside for now
  3. In a medium pan melt the butter with the sugar, syrup, molasses vanilla extract and salt. Stir well to combine until sugar has dissolved.
  4. Pour the butter mixture over the oat mixture and stir well to ensure all the dry ingredients are coated
  5. Tip the flapjack mixture into your prepared tin and press evenly for a flat surface
  6. Bake in your preheated oven, middle shelf,  for 25 minutes for chewy, 30 minutes for crunchy, until set and golden
  7. Remove from the oven, wait for 5 minutes, then gently score the flapjacks, not going the full way through. For the size of tin I use here, I cut so I have 3 by 4 “square” pieces (2 cuts x 3)
  8. Allow to cool completely in the tin. When fully cooled re-score where you’ve previously cut this time going the full way through
  9. If you want to lend an extra decadent touch, drizzle over some melted chocolate

Fluffiest Pizza Rolls

Who doesn’t love pizza? Yes- that age old question. From my experience a pretty good fan base is kids. I know my two are 100% on board with this, and with these rolls even more so. I think part of the enjoyment for them is knowing that they’ll get to sample the fruits of their labor at the end. Over the years I’ve learned that letting kids take ownership of tasks (no matter how small) can yield bountiful positive results and enjoyment all round. But…I’m here to talk pizza (rolls)!

These pizza rolls are perfect on so many fronts – pizza is popular; you can rope the kids in to helping; guests can eat as much as they like; they’re easily transportable outdoor eating in the summer weather. Like I said- the perfect tear and share popular summer bite. For a snack or appetizer I use one, for a main I use two paired with a leafy, summer salad. Let’s not forget it customizable too. If pepperoni isn’t your thing, swap it in for chicken, or ham.

You’ll notice a couple of things with this recipe. The dough can appear wetter than usual when fully mixed, This is what makes the end baked roll so fluffy. It really is a case of “wetter is better”. You also see that I mention cornmeal in the recipe. Whilst this isn’t an ingredient in the rolls as such, dipping their bases in it and baking them results in a wonderfully toasted, crispy bottom with a delightful crunch.

One last piece of advice before I go. These pizza rolls are at their best fresh out of the oven however if there are any left they can be wrapped, stored in the fridge and reheated for enjoying later.

Makes 12

Ingredients

Pizza Sauce

  • 6oz can tomato puree
  • 1 can (15oz) tomato sauce
  • 1 Tablespoon dried oregano
  • 1 Tablespoon dried thyme
  • 2 Tablespoons Italian seasoning
  • 1 teaspoon garlic powder
  • 1/2 teaspoon garlic salt
  • 1/2 teaspoon onion powder
  • 1/2 teaspoon fresh ground black pepper
  • 1 teaspoon sugar

Pizza Rolls

  • 4 cups bread flour
  • 2 1/4 teaspoons quick yeast
  • 1 Tablespoon Kosher salt
  • 1 Tablespoon sugar
  • 1 Tablespoon Italian seasoning
  • 1 egg
  • 1 1/2 cups warm water
  • 1/4 cup oil

Filling/ Topping

  • 2 cups pizza sauce, recipe above
  • 1 cup shredded mozzarella
  • 1 cup shredded sharp cheddar
  • 1 Tablespoon Italian seasoning
  • 1 cup shredded parmesan
  • 1 cup pepperoni, diced/ shredded
  • 1/2 cup cornmeal
  • Olive oil

Method

Pizza Sauce

  1. Combine all the sauce ingredients in a bowl, stir well, cover and set aside on the counter until needed

Pizza Rolls

  1. In the bowl of a stand mixer, with dough hook attachment, combine the flour, yeast, salt, sugar, and Italian seasoning
  2. Add the egg and combine on low speed
  3. Add in 3/4 of the liquid and mix on speed 2 to to combine. The dough should come together and start “cleaning the sides of the bowl”. If you dough is still “shaggy” gradually add in some of the remaining liquid until it comes together
  4. Knead on this speed for 7 minutes, until it is uniform and spring to the touch. It will be a bit sticky!
  5. Transfer to an oiled bowl, cover and leave in a warm place to rise until doubled in size (mine usually takes between 50mins to 1 hour)
  6. Line a 9″ x 12″ baking tray with baking parchment, leaving about a 2″ overhang all the way around. This will help fish the baked pizza rolls out of the tin
  7. In medium bowl, combine the mozzarella, cheddar, parmesan and Italian seasoning. Set aside
  8. Spread the cornmeal onto a plate and set aside
  9. Once doubled in size, tip out onto a well-floured counter and knock back the air from the risen dough
  10. Form into a rough rectangular shape 20″ x 12″ with long edge facing you
  11. Spread the surface of the dough with 2 cups of the pizza sauce. Next sprinkle over 2/3 of the cheese mixture, followed by 1/2 of the pepperoni
  12. Taking the long edge, roll the dressed dough up into a long log shape. It’ll get messy- there’s no getting away from it but doing it slow and easy helps keep most of the filling inside
  13. Cut the rolled up log into 12 pieces* and dip the bottom of each piece into the cornmeal. Place the rolls into the prepared baking tray, cornmeal side down in 3 x 4 formation allowing a small gap between each
  14. Preheat your oven to 350F
  15. Cover with some oiled cling wrap and set aside to rise for approximately 35 to 40 minutes. By the end of this time you’ll notice they will have risen again and be quite snug in the baking tray
  16. Brush with some olive oil and bake in your preheated oven for 15 minutes, at which point remove from the oven, sprinkle over the remaining cheese mixture, followed by the remaining pepperoni, return to the oven and continue baking for a further 15 to 20 minutes until the crust is golden, the cheese has melted and the pepperoni is nicely crisped up
  17. Remove from the oven and leave in the pan for 5 minutes. After this time remove from the pan using the baking parchment overhang, serve and enjoy with the remaining pizza sauce for dipping

*A handy trick for cutting your individual rolls is to use some dental floss (unflavored and clean) or some fishing line (again clean!). Cut a length, wrap it it around the long dough log at where you want to cut and pull together. Slices will be clean and you don’t run the risk of squashing them. Repeat to cut more.

Brown Butter Banana Muffins

Makes 12

Ingredients

Streusel Topping

  • 1/3 cup packed brown sugar
  • 2 tablespoons all-purpose flour
  • 1/8 teaspoon ground cinnamon
  • 4 tablespoons butter
  • 1/4 cup rolled oats

Banana Muffins

  • 1/3 cup unsalted butter
  • 1 1/2 cups all-purpose flour
  • 1 teaspoon baking soda
  • 1 teaspoon baking powder
  • 1/2 teaspoon salt
  • 3 large bananas, mashed
  • 3/4 cup white sugar
  • 1 egg, lightly beaten

Method

  1. Preheat oven to 375°F (190°C). Lightly grease 12 cup muffin tray
  2. In a thick-bottomed pan over medium heat, add the butter, whisking frequently. Continue to cook until fully melted. Once melted the butter will foam up a bit, then subside. Watch carefully as lightly browned specks begin to form at the bottom of the pan. Smell the butter; it should have a nutty aroma. Pour into a bowl to stop the butter from cooking further and possible burning. Set aside to cool until needed
  3. In a small bowl, mix together brown sugar, flour, cinnamon, and oats. Cut in the butter until mixture damp sand. It’s fine if there are peas-sized pieces of butter remaining. Set aside until needed
  4. In a large bowl, mix together 1 1/2 cups flour, baking soda, baking powder and salt. In another bowl, beat together bananas, sugar, egg and melted butter. Stir the banana mixture into the flour mixture just until moistened. It will still appear a little lumpy
  5. Spoon batter into prepared muffin cups, about 2/3 full. Sprinkle the streusel topping over muffins
  6. Bake in preheated oven for 18 to 20 minutes, until a toothpick inserted into center of a muffin comes out clean
  7. Let cool for 10 minutes before removing from the tin and serving