4oz semi-sweet chocolate, chopped into chunks, or chocolate chips
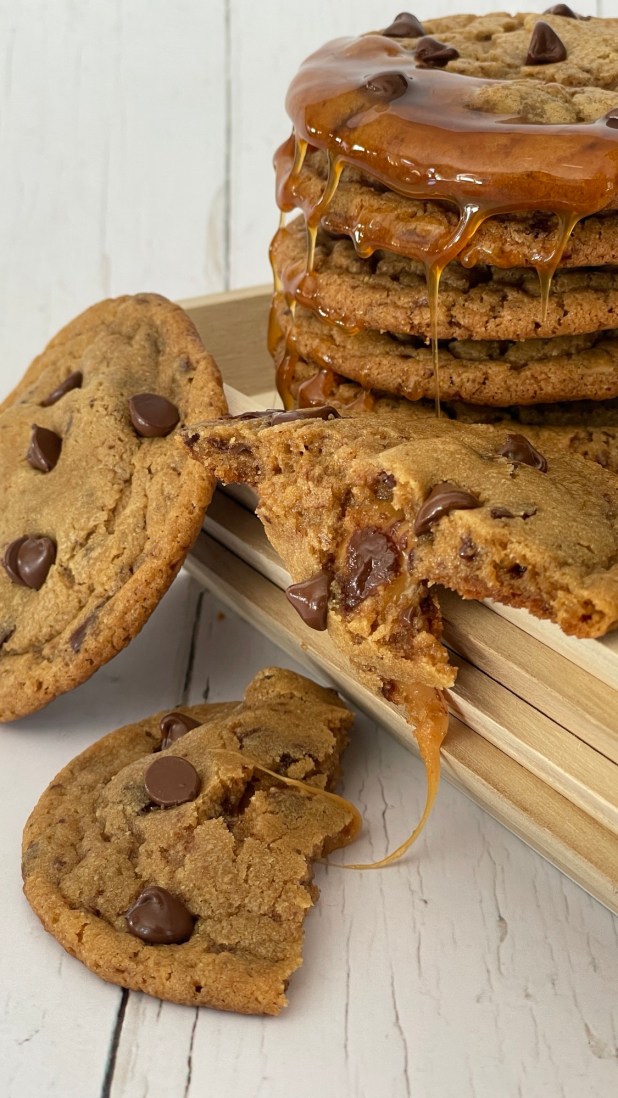
12 caramel candies
Method
Line a cookie sheet with baking parchment and set aside until needed
In the bowl of a stand mixer beat the butter, brown sugar and white sugar until creamy
Mix in the egg, followed by the cookie butter spread and continue mixing until fully combined. Add in the vanilla paste (or extract) and again mix to combine fully
In a separate bowl, combine the flour, baking soda, baking powder, milk powder, salt and whisk to combine
Gradually add the combined dry ingredients into the sugar/butter mixture. Mix on medium/low speed until fully incorporated
Fold in the chocolate chunks, or chips. Mix until well mixed through the dough (I find here it easier to fold by hand rather than using a spatula or spoon. It just depends on what you’re more comfortable with)
Cover the dough with cling wrap and refrigerate the dough for at least 1 hour
Near the end of the cookie chilling time, preheat your oven to 325°F
Using a medium cookie scoop (2 tbspn apx) shape the dough into 1 inch balls- you should have at least 24 in total
Place a caramel candy between two cookie dough balls and squash the dough together to reshape into a larger cookie dough ball. Place the balls of dough about 3 inches apart on the pre-lined cookie sheet
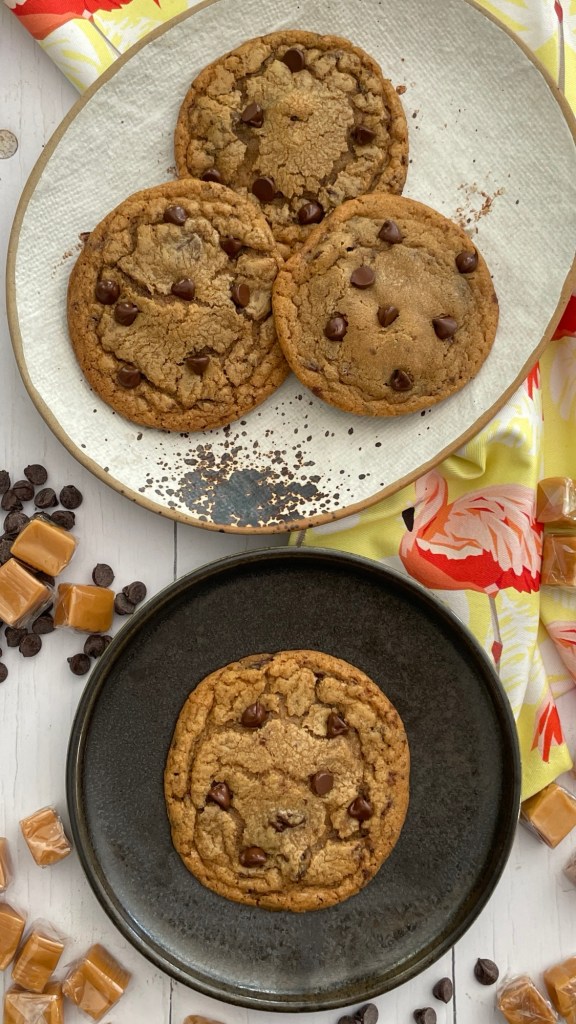
Bake at 325°F for 18-20minutes. The cookies will spread slightly spread and be domed where the caramel candy is. Remove the cookies from the oven and let cool on their baking sheets for 5 minutes. Stud with additional chocolate chips if wanted. After that, transfer the cookies to a rack to cool completely*
Serve and enjoy! Cookies will keep in an air-tight container for up to one week
*The caramel centres will become firmer as they cool. If you want a softer, gooier centre, microwave the cookie for about 15 seconds,
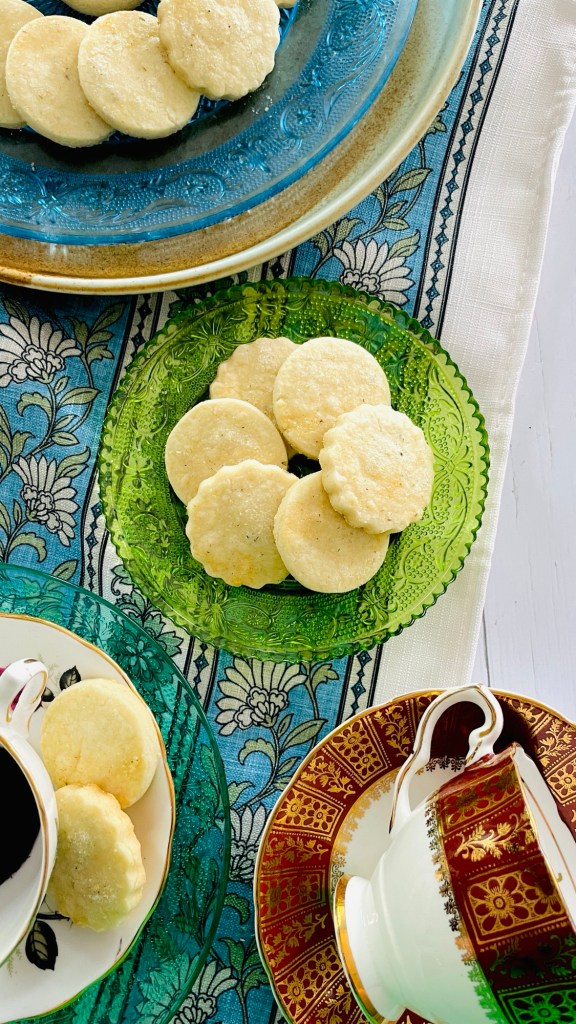
Combine the sugar, lavender, lemon zest, and grated tonka bear in the bowl of a food processor and pulse until combined
Cream together the butter and 1/2 cup lavender sugar mixture, until light and fluffy, about 3-5 minutes. Add the flour and salt. Beat until combined, and dough starts to become crumbly. Add 1-2 tablespoons of lemon juice until the dough comes together
Roll out the dough on a lightly floured surface to 1/4 inch thickness. Cut out the cookies using your preferred cookie cutter. I used 1 1/2 inch fluted and plain circular cutters for bite-size cookies. Carefully transfer the cookies to a parchment-lined baking sheet using a spatula.
Cover the baking sheet with plastic wrap and refrigerate for 10-15 minutes. Roll out the leftover scraps, and repeat with the dough
While the cookies are chilly, reheat the oven to 325 degrees F. Brush each cookie with beaten egg white, then sprinkle with the remaining lavender sugar
Bake the cookies on the middle rack of the oven for 12-13minutes or until just lightly golden on the edges. Cool on the baking sheet for 5 minutes, then transfer to a wire cooling rack to cool completely
Cookies can be stored in an airtight container for up to 4 days.
Preheat the oven to 350 degrees F. Grease mini loaf pan* with baking spray
In a medium bowl, whisk together the flour, baking powder, baking soda and salt
In a separate medium bowl, combine the sugar, and orange zest. Rub together for a few minutes to release the orange natural oils. Add the orange juice and whisk together until the sugar is fully dissolved. Whisk in the sour cream, then the eggs and finally the olive oil
Gently whisk the dry ingredients into the wet ingredients
Pipe or spoon the batter into the prepared mini loaf pans, taking care to fill them no more than halfway full. Bake until the cakes are golden, spring back to the touch, and a toothpick inserted into the center comes out clean, 22-25 minutes
Let cool for 30 minutes, then remove the cakes from the pans to a cooling rack and let cool completely, about 20 minutes more
Glaze/ To Finish
Combine the powdered sugar, milk, rosewater in a bowl and mix until a smooth paste forms
Dip the tops of each loaf into the glaze, allowing any excess to run off. Place on a rack set over some parchment paper. Sprinkle tops with dried rose petals and allow to fully dry and set
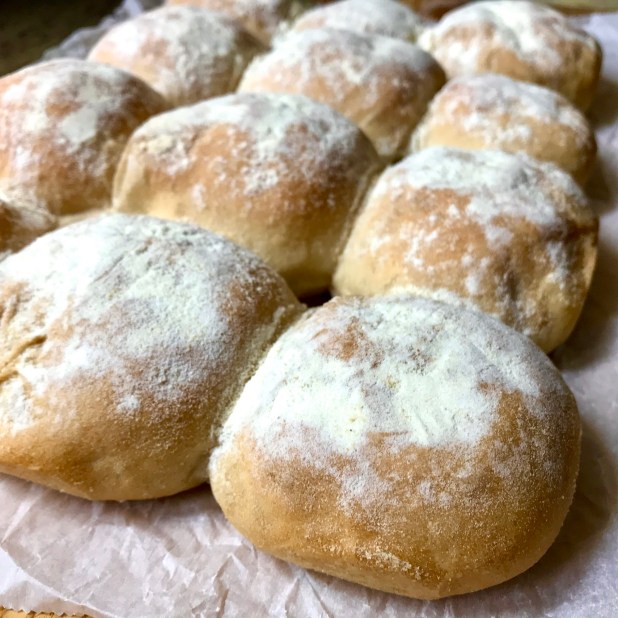
Coming from Waterford, in South-East Ireland, there are a few things that are corner stones of my childhood – Waterford Crystal; Hurling and…of course – the blaa. “The what?”, I hear you say. Well, are you sitting comfortably? The blaa is basically a bread roll. But there are a couple of features that set it apart. Roughly square-shaped, liberally dusted with flour, it has a soft chewy texture and pleasing bitter tasting crust that is dear to the heart of Waterford natives. Many a school lunch’s main feature was a buttered blaa with “Red Lead” (pink sliced deli sausage meat) or filled with Tayto crisps. Quintessential Deise fare if ever there was any!
Dating from 17th century, blaas are well ingrained into the history of Waterford. In their original form blaas were thought to be made from the scraps left over from families baking their own bread. The name “Blaa” is thought to have been possibly derived from the old Huguenot word ‘Blaad’ – an old French word for flour, or ‘Blanc,’ – a French word meaning white, which refers to the white floury appearance of the baked blaas. To the best of my knowledge there is yet to be a confirmed origin.
Such is the fame of the humble blaa that in 2013, the Waterford Blaa Bakers Association (yes there is such thing!) succeeded in getting PGI designation for the Waterford Blaa. “PGI” stands for Protected Geographical Indication, which essentially means that only Blaas made by specialist bakers in Waterford city and county can be called Blaas. This guarantees an authentic heritage product, based on the traditional methods and the unique skills of the bakers- think champagne; Parmigiano-Reggiano and Melton Mowbray pork pies. Basically if you see something called a “Blaa” for sale outside of Waterford? It’s not the real deal. Waterford Blaas are now supplied by traditional family bakers operating since the 1800’s. Sadly these days the family bakers have diminished with but a handful remaining.
Whilst this recipe isn’t PGI approved, it has stood the test of time in my family. Having been passed down through generations (to date I’ve confirmed 3) there apparently has been no tweaks or amends to the original recipe. It remains true with a form that conjures memories of frenzied Saturday morning sibling debates as to whose turn it was to fetch the weekly dozen from the local store. I’ve eaten in some fancy restaurants with both divine and questionable cuisine. However I’ll be perfectly honest and say I have yet to experience anything that makes my heart swell and induce instant comfort like biting into a buttered blaa filled with Tayto cheese & onion crisps. Flour-dusted lips savouring that sweet chew contrasting with crunchy savoriness. Bliss!
Makes 12
Ingredients
4 cups bread flour
2 1/4 teaspoons active yeast
2 Tablespoons sugar
1 Tablespoon fine salt
2 Tablespoons butter, softened
1/4 cup full milk, room temperature
1 1/3 cup warm water
Additional 1/2 cup bread flour, or All purpose flour, for dusting
Method
In a pan, combine the milk and butter. Heat gently until the butter is melted. Set aside and leave to cool while you prep the rest of the ingredients, stirring occasionally
Lightly oil a large bowl and set side until needed later
Sift the flour into the bowl of a stand mixer. To one side of the bowl add the yeast and to the opposite side add the salt. Add the sugar in the middle
Combine the warm water and milk/ butter mixture and stir well. With the dough hook attachment working on slow speed, slowly add the liquid to the dry ingredients in a steady stream. Continue to add until 50 ml remain. Depending on your kitchen conditions eg temperature and humidity, you may not need to add all the liquid- only add enough liquid for your dough to form a ball, where it cleans the bottom of the bowl. Continue to knead on slow for 7 mins. The dough should come together in a ball that is smooth and elastic to touch, without cracking or breaking
Remove the dough ball from your mixer bowl and place in the preoiled bowl. Cover and set aside to proof in a warm place for between 50-60 mins until doubled in size
After this time, punch down the risen dough to knock back the air. Gather the dough in to a smooth ball shape, place back in the same prepared bowl and recover for a second proof. This proof won’t take as long, between 30 – 40 mins. DO NOT SKIP this step as it helps to add to the distinctive flavor of the finished blaas
Once the second proofing has been done, remove the dough from the bowl and divide equally into 9 or 12, depending on how big you want your final blaa to be. An amount of 9 will give a more traditional palm-sized blaa
Roll each of the equally-sized pieces into a smooth ball and place together in a high-sided pan. I tend to use a roasting tray that I have dusted/ dredged with flour. Place the dough balls side by side until you have a “sheet formation”. Ideally they should be spaced so that when they finish rising they touch each other. The “mouths” that are formed from this at the sides of the baked blaa are a distinguishing feature allowing easy opening
Gently press down on the dough balls to slightly flatten them. You dont want to do it hard enough to completely squash them. Just enough to make the more “puck -like” in shape as opposed to a spherical dough ball
Cover the dough balls with oiled clingwrap and allow to rise in a warm place for a further 30-40 minutes
Preheat your oven to 425 F. By this time the balls should have risen and be touching each other
Dust the tops of the blaas liberally with the additional flour and place on the middle shelf. Bake for 20-25 mins. The tops of the blaas should be browned and bases sound hollow when tapped
Remove the baked blaas from the tin and allow to cool before serving
Blaas are best eaten on the day they are baked. If you do have any left the following day you can refresh them by wrapping in foil and baking them at 375F for 10 mins. Overall they will keep in an airtight container for up to 3 days. They can also be frozen when baked. Allow to cool completely, place in an airtight freezer bag and freeze. To use, remove from freezer and allow to come to room temperature before serving
Coat 9×9” baking pan with nonstick vegetable oil spray, or line with baking parchment, leaving overhang on all sides
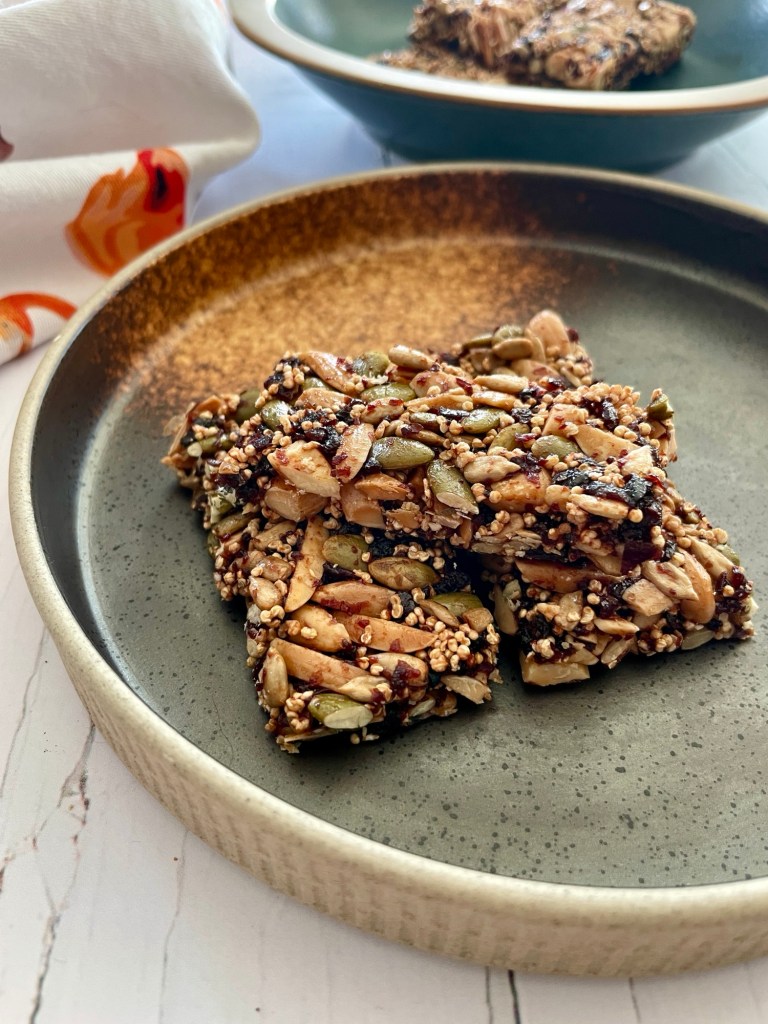
Toast almonds, pumpkin seeds, and sunflower seeds on a rimmed baking sheet, stirring occasionally, until golden brown, for 10–12 minutes. Let cool
Reduce oven temperature to 200°
Process cherries, brown rice syrup, salt, and 2 Tablespoons water in a food processor until smooth. Transfer to a medium bowl add the puffed amaranth and stir in toasted almond mixture.
Press firmly into prepared pan and bake for 20–25 minutes until no longer sticky
Remove from the oven and let cool in the pan. Remove from the pan and cut into bars
Bars can be stored at room temperature in an airtight container for up to a week
Chocolate Peanut Butter Teff Cookies
Makes 12-15 (dependent on cookie scoop size)
Ingredients
1 ½ cups teff flour
½ teaspoon sea salt
1 ripe banana (100g peeled), mashed
½ cup smooth peanut butter, or other nut/seed butter
¼ cup maple syrup
¼ cup extra virgin olive oil
½ cup unsweetened oat milk
1 egg
½ teaspoon vanilla extract
¼ teaspoon almond extract
¼ cup semi-sweet chocolate chips
Method
Pre-heat the oven to 350F and line a baking tray with baking parchment
Combine the teff flour and salt in a large mixing bowl, whisking together
Add all of the wet ingredients (mashed banana, peanut butter, maple syrup, olive oil, milk, egg, vanilla extract and almond extract) and mix well until fully combined
Fold in the chocolate chips
Scoop the mixture using a cookie scoop, spacing evenly on the baking tray
Bake in the oven for 10-12 minutes. This will keep the cookies quite soft – leave in for a few more minutes if you like a crunchier cookie
Remove from the oven and place on a colling rack to cool fully
Mocha Black Bean Brownies
Makes 9 (or 12 bite size)
Ingredients
1 cup very strong brewed coffee
1 cup dried dates, pitted
1 ½ cups low sodium Black Beans, drained and rinsed
¼ cup pumpkin puree
1 teaspoon vanilla extract
2 tablespoon pure maple syrup
⅔ cup cocoa powder
⅔ cup spelt flour
2 tablespoon ground chia seeds
1 teaspoon baking powder
¼ cup chopped walnuts
Method
In a bowl combine the brewed coffee and the dates, and allow to soak at least 20 minutes
After this time, pour the coffee and dates into a blender, and blend on high until very smooth. Set aside until needed later
Preheat your oven to 350 degrees
In the same food processor, add black beans, pumpkin puree, vanilla, coffee/ date mixture and maple syrup. Process on high until the mixture is smooth. This may take a few times, scraping down the side and bottom of the processor bowl. You want to make sure there are no large pieces of black beans or bean skin remaining
Combine the cocoa powder, spelt flour, ground chia seeds and baking powder in a separate large bowl and whisk to combine
Add the wet ingredients from the food processor to the bowl of dry ingredients, and stir well to mix
Transfer the mixture to a 9×9 brownie pan, lined with parchment paper. Sprinkle the walnuts over the top
Bake for about 30-35 minutes, until cracks begin to form on the top, and the edges are visibly cooked.
Remove from the oven and allow to cool in pan for 10 minutes before removing to a wire cooling rack
Allow to cool completely before slicing
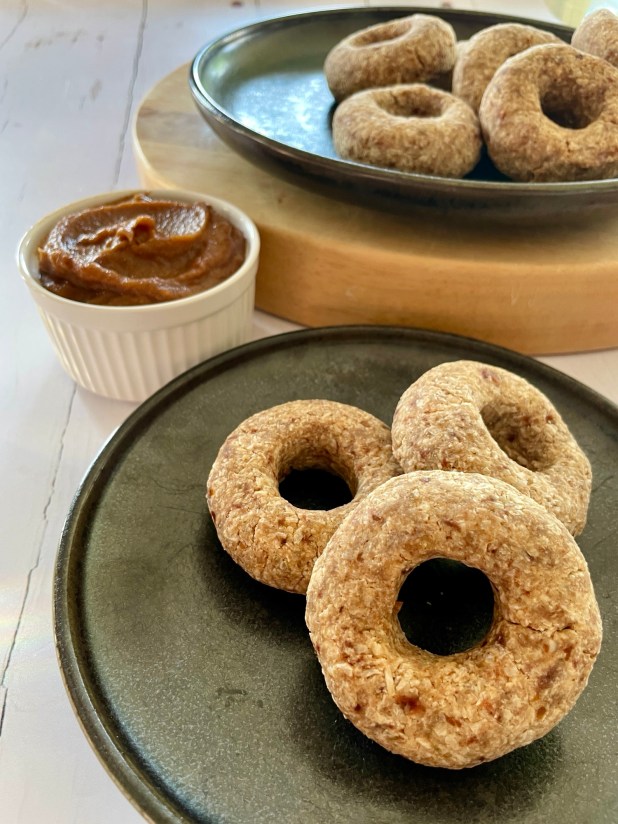
Sprouted Buckwheat Baked Donuts
Makes 6
Ingredients
Donuts
1 cup dry buckwheat, sprouted*
2 cups shredded, unsweetened coconut
1 apple, grated
5 medjool dates, soaked and pitted
1/2 teaspoon cinnamon
1/4 teaspoon vanilla extract
Cinnamon Date Glaze
1 cup medjool dates, soaked and pitted
¼ cup soaking water, approximately
1 teaspoon ground cinnamon
Method
Donuts
Preheat your oven to 150°F
Combine everything in a food processor and process until a sticky dough forms
Wet your hands and then split the dough into 6 equal parts
Using your hands, roll each part into a ball and then use your thumbs to make a hole in the centre of each ball. Continuously use your hands to smooth together the dough as you dig a hole in the centre to make a donut shape
Place on an oven-proof, oiled cooling rack and bake in your preheated oven for 3 hours. After this time look for a hard outside and cakey inside, test with a skewer
Remove from the oven and set aside to cool while you make the glaze
Glaze
Place the dates into a food processor and blend to a paste. Adding the water depends on how soft and moist the soaked dates are. Add any water until you have a smooth, glaze-like consistency. Scrap down the sides and bottom of the bowl between blending
Add in the cinnamon and process sone last time to combine. Check for taste and add kosher salt if neeed
Once the glaze has been prepared, transfer to a bowl. Dip your dounts to glaze or drip the glaze over your donuts with a spoon or piping bag