1 ½ Cups + 4 Tablespoons butter cubed, room temperature
6-10 Tablespoons Baileys Irish Cream, or similar, to your taste
Method
Make the chocolate vinegar cake as per the recipe, omitting the ganache topping. Set aside and leave to cool while you make the swiss meringue buttercream
In a heatproof bowl set over a pan with some water (making sure the bowl does not touch the water) combine the sugar and egg whites and heat, whisking until the mixture reaches about 150F or the sugar has dissolved and the texture has slightly thickened and its foamy. If you rub the mixture between your fingers you should not feel the sugar granules. This should take about 3-5 minutes depending on how warm your stove is
Add the mixture to the bowl of your stand mixer fitted with a whisk attachment and whisk on medium speed until the mixture has cooled. It will look thick and glossy
Add the butter chunks gradually while running the whisk at medium speed. Wait until previous batch has been incorprated before adding the next. During the course of adding the butter the mixture may look curdled and look like it’s split. Fear no, it all part of the process! Continue to whisk and it will come back together, becoming a lush smooth texture. (*If the butter looks like is separating and looks greasy- it could be because its too warm so place the bowl in the fridge for 10-15 minutes then start mixing again)
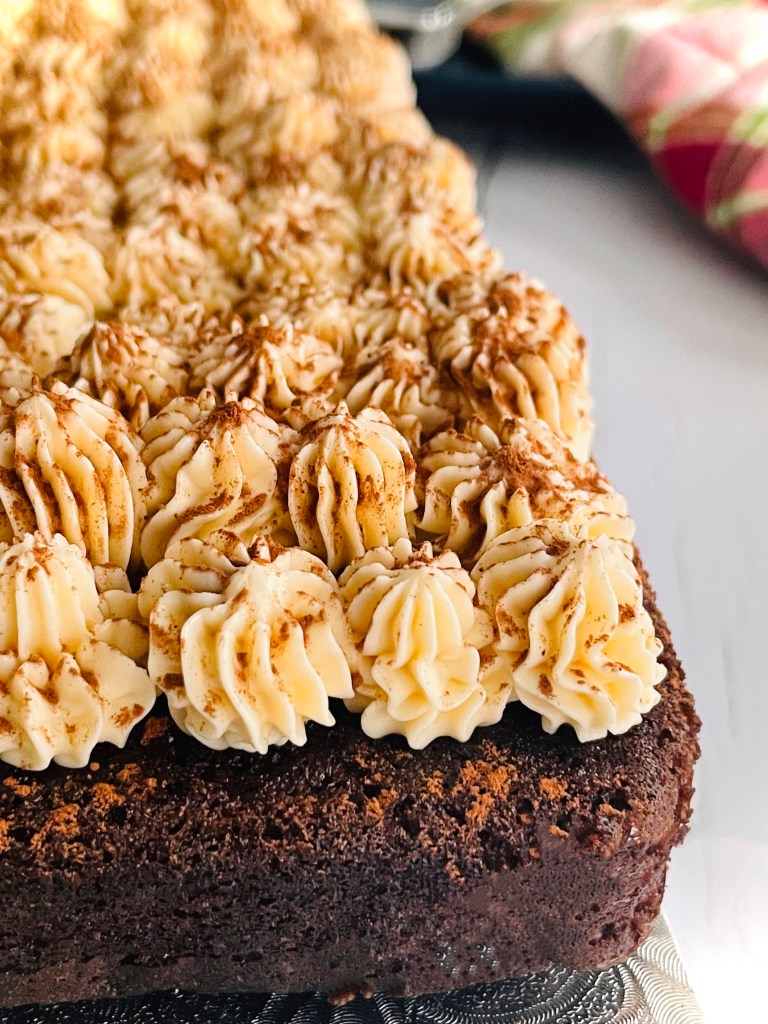
Swap your paddle attachment for the whisk attachment and add in the Irish cream liqueur, to your taste preference. Beat on medium speed until fully incorporated
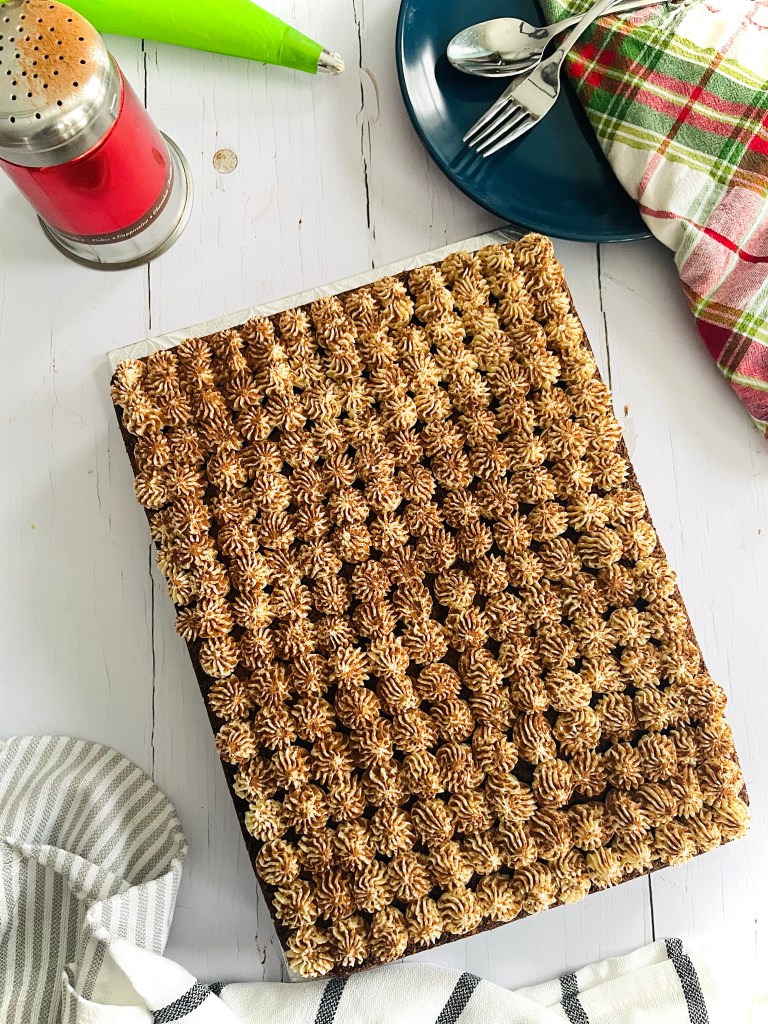
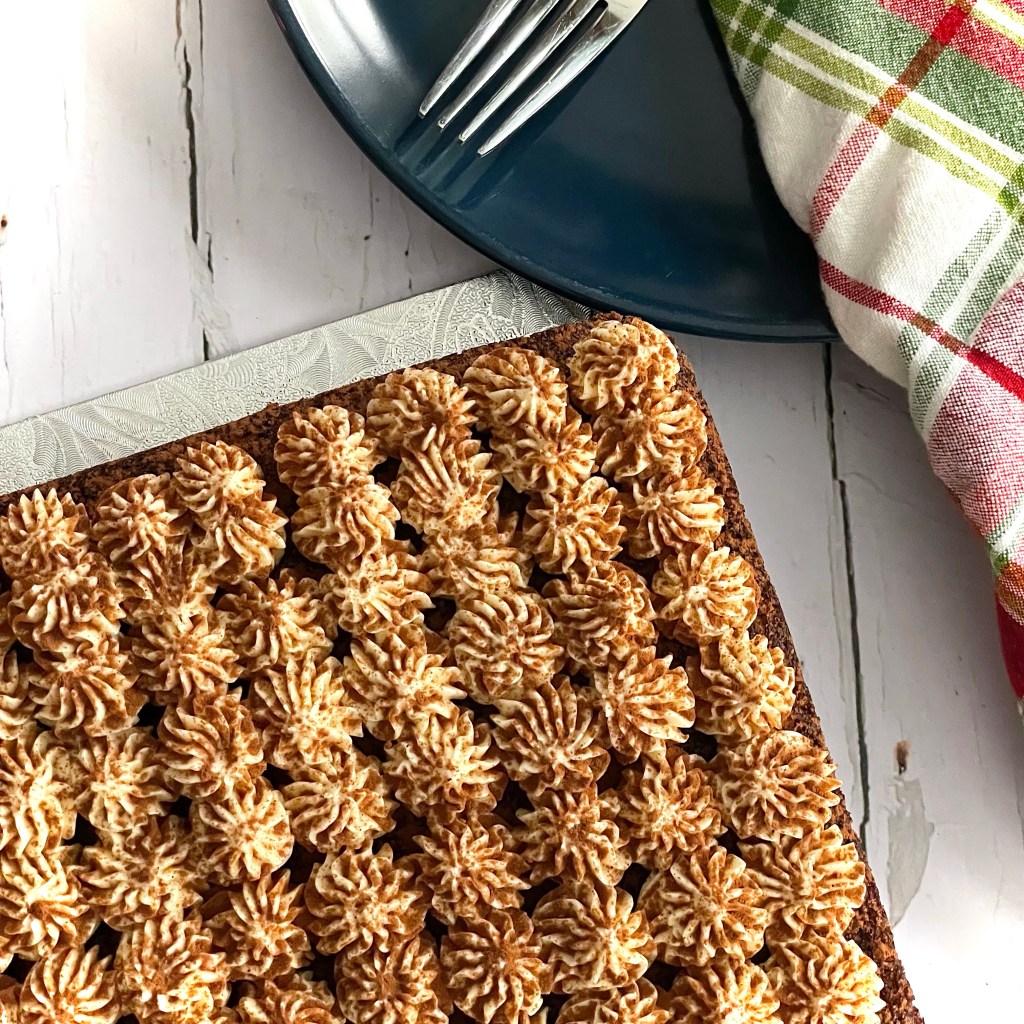
Once fully cooled you can piping or spread the butter cream onto the chocolate layer cake. Dust with cocoa powder, slice and serve. *I pipe it on using an open star tip for that “authentic” look
12 tablespoons (1½ sticks) unsalted butter, room temperature
½ cup whole milk, room temperature
2 teaspoons red food coloring gel*
1 teaspoon apple cider vinegar
“Coal” Candy
3 tablespoons unflavoured popping candy
½ tablespoon coconut oil
1 tablespoon black cocoa
*Measurement dependant on strength of color. Please note that if using liquid coloring a larger quantity may be required, which in turn may affect the consistency of what you’re coloring. Color to personal preference
Method
Midnight Chocolate Cake
Preheat your oven to 350F
Prepare 3 no. 8” diameter baking pans by greasing/spraying and lining with baking parchment
In a large bowl combine all the cake ingredients- the flour, sugar, cocoa powder, black cocoa, espresso powder, baking soda, salt, water, canola oil, vanilla extract, and vinegar
Whisk slowly until fully combined, making sure to scrape the bottom of the bowl to avoid any dry ingredient residue. Continue mixing until fully blended and smooth
Divide and pour into your prepared pans. If needed gently tilt the pans to allow the cake batter to flow into an even layer
Bake in your preheated oven for between 20-25minutesm or until a cake tester, or skewer, comes out clean when inserted into the centre of the cake. Remove the cake from the oven allow to cool in tin for 5 minutes in a rack
After allowing to cool for 5 minutes, remove from the pans and allow the cakes to cool fully before decorating
Ganache Filling and Decoration
For the ganache, place the chocolate pieces in a medium heatproof bowl
Heat the heavy cream/ whipping cream, in a small pan over a medium heat until just below boiling (look for small bubbles at the edge of the cream in the pan)
Remove the cream from the heat and gently pour the warmed cream over the chocolate pieces in the bowl. Leave to rest for 5 minutes
After 5 minutes, gently stir the chocolate/ cream mixture with a whisk to emulsify it. It will appear mottled and speckled at first but continue gently stirring until it thickens and is uniform in color
Once fully smooth and uniform in color, set aside and leave to fully cool for 1 hour before dividing the mixture into two separate bowls. After 30 mins, using an electric whisk, beat one of the bowls of mixture to a fluffy, whipped consistency (this will be your filling ganache). Set both aside for about another hour until the they to a spreadable consistency. (The cooling/thickening process can be speeded up by placing the bowls of mixture in your refrigerator)
Buttercream Frosting
In a bowl, sift together the powdered sugar and cocoa powder. Set aside
In the bowl of a stand mixer fitted with a paddle attachment, beat the butter beat on medium speed for 2 minutes. Scrape down the sides and bottom of the bowl
Reduce the speed to low and the add in sugar/cocoa mixture a cup at a time. Combine on low speed until all the sugar/ cocoa mixture has been added
With mixer on low speed, add in milk, red food coloring and vinegar
Increase speed medium and mix for 2 minutes until smooth. After this time, increase the speed to medium/ high and whip for a further 2 minutes
“Coal” Candy
Put the coconut oil into a heat proof bowl and heat in a microwave for 20 seconds until the coconut oil is melted
Add in the popping candy and stir to fully coat it in the melted oil
Add the black cocoa and stir until an even color and it looks like “coal dust”
To assemble and decorate
Level off the cake layer to flat
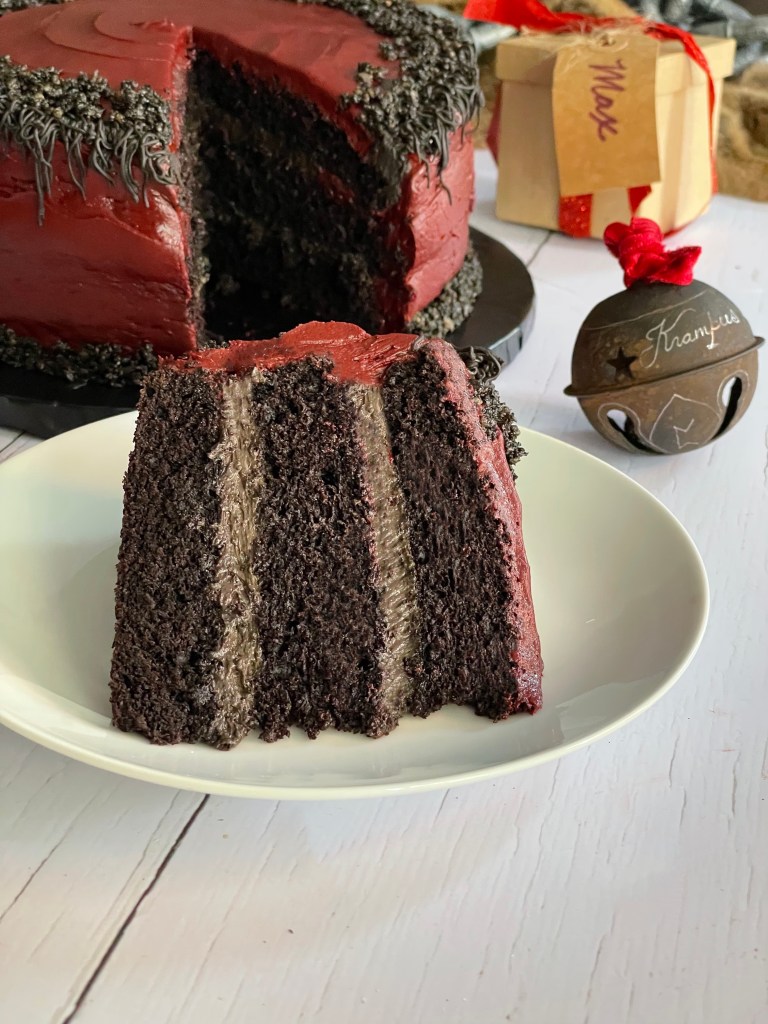
Frost each layer with a ring of frosting. Pipe or spread an even layer of the whipped chocolate ganache inside the ring of buttercream frosting. Stack the next layer on top and repeat the process.
Using the buttercream frosting apply a light crumb coating on the outside of the cake and let the cake chill in the refrigerator for 20 minutes.
Frost the cake the remaining frosting, and chilli again for a further 20 minutes
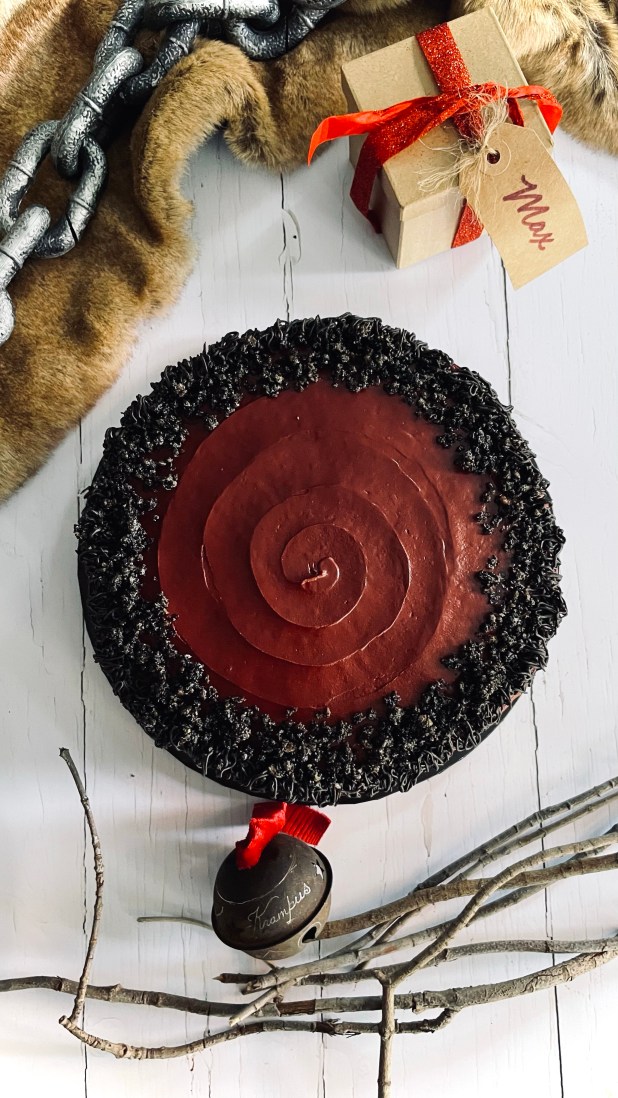
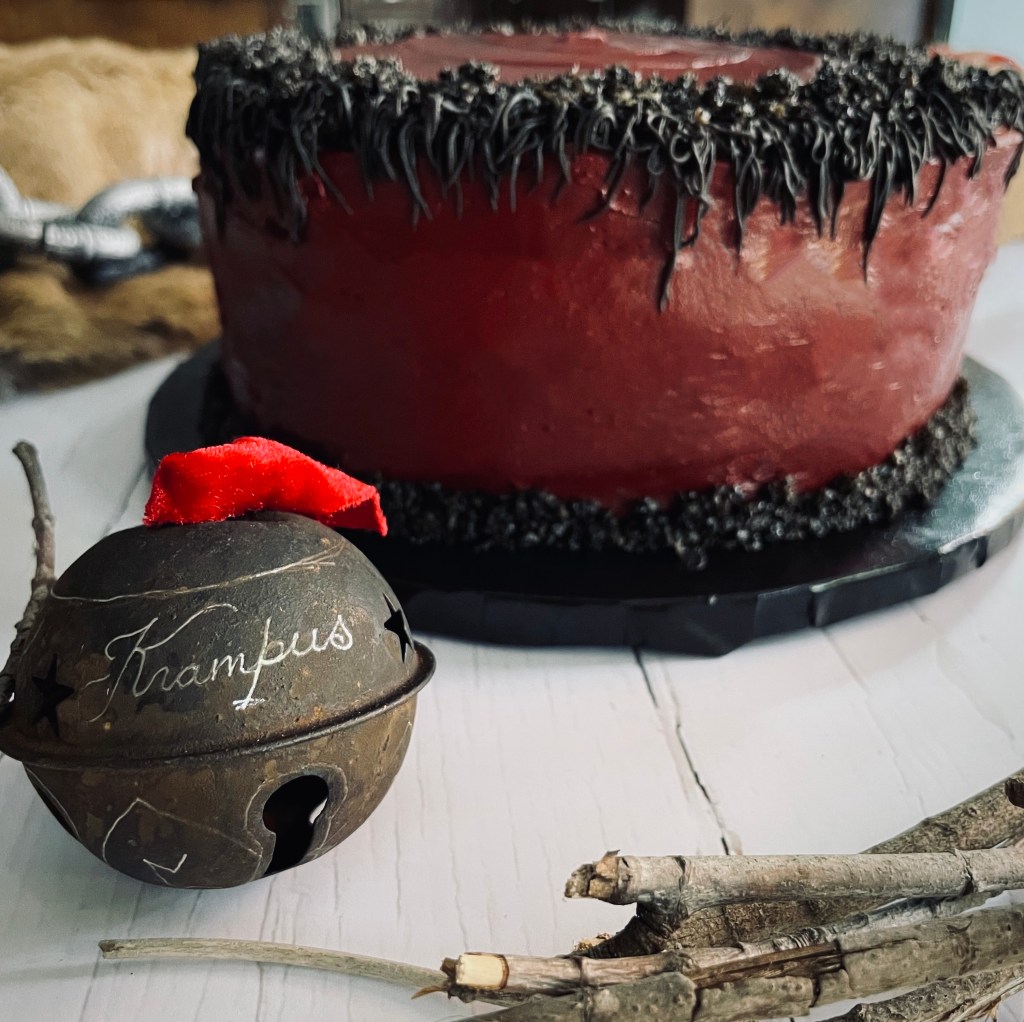
Use the remaining (unwhipped) ganache to decorate the cake. You can either apply a final top layer by smoothing the ganache on top, or as I’ve done, using a Wilton #233 tip apply a “fur trim” to the edge.
Now don’t raise your eyebrows like that! No, I it’s not a typo- there is indeed vinegar listed in this cake. Going by it’s other moniker “Depression Chocolate Cake”, this may well be one of those recipes that probably everyone’s baking inclined grandparent would probably have in their repertoire. Dating from a time of the Great Depression, when things like eggs, milk, butter and sugar were really expensive and scarce, this recipe keeps them to a minimum. So much that with it’s absence of eggs and dairy the sponge itself can be considered vegan. If you want to finish to completion with it’s delectable ganache topping and still remain vegan-friendly, I’ve included some recommendations at the end of the recipe.
Another bonus with this recipe? Minimal washing up! In fact if you choose to cake it the classic way as a sheet cake to be eaten from the pan, you can save on that singular, additional bowl for clean up. Just make sure to omit the baking parchment lining and use a non-stick pan. Dump everything in the pan, exert a bit more restraint when mixing together and away you go! No bowl, all-in-one sheet cake.
Finishing with chocolate ganache is entirely optional. Some people prefer just a simple dusting of powdered sugar, others prefer just to leave it completely naked and bask in the unadulterated chocolatiness of the sponge itself. Whatever way you decide to finish it, I’m pretty sure you wont be making it just the once!
For the ganache topping, place the chocolate pieces in a medium heatproof bowl
Heat the heavy cream/ whipping cream, in a small pan over a medium heat until just below boiling (look for small bubbles at the edge of the cream in the pan)
Remove the cream from the heat and gently pour the warmed cream over the chocolate pieces in the bowl. Leave to rest for 5 minutes
After 5 minutes, gently stir the chocolate/ cream mixture with a whisk to emulsify it. It will appear mottled and speckled at first but continue gently stirring until it thickens and is uniform in color
Once fully smooth and uniform in color, set aside and leave to fully cool before spreading (usually takes about 2 hours at room temperature). The mixture will thicken to spreadable consistency after this time
Preheat your oven to 350F
Prepare a 9” x 12” baking pan by greasing and lining with baking parchment
In a large bowl combine all the cake ingredients- the flour, sugar, cocoa powder, baking soda, salt, water, canola oil, vanilla extract, and vinegar
Whisk until fully combined, making sure to scrape the bottom of the bowl to avoid any dry ingredient residue. Continue mixing until fully blended and smooth
Pour into your prepared pan. If needed gently tilt the pan to allow the cake batter to flow into the corners
Bake in your preheated oven for between 20-25minutesm or until a cake tester, or skewer, comes out clean when inserted into the centre of the cake. Remove the cake from the oven allow to cool in tin for 5 minutes in a rack
After allowing to cool for 5 minutes, invert the cake onto a cooling rack lined with baking parchment
Remove the tin and lining baking parchment paper and allow the cake to cool fully below finishing with your chocolate ganache topping
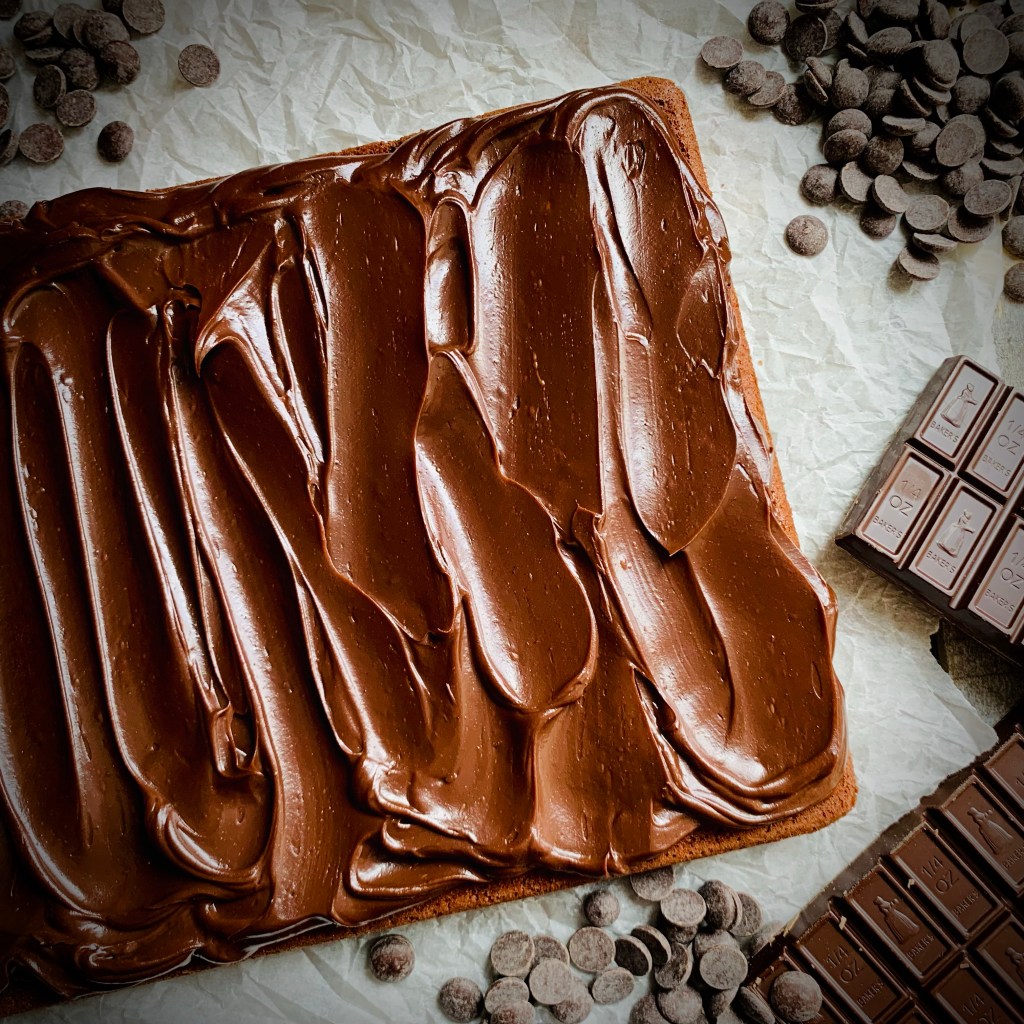
Once your cake has fully cooled, pour your chocolate ganache topping over the surface and spread with an offset spatula to cover the cake
Slice however you like and enjoy!
*Whilst the cake sponge in this recipe is vegan, the chocolate ganache isn’t. If you want a complete vegan friendly cake substitute 1 cup full-fat coconut milk (Make sure to fully shake it before using). Also make sure that your chocolate that your using is vegan-friendly.
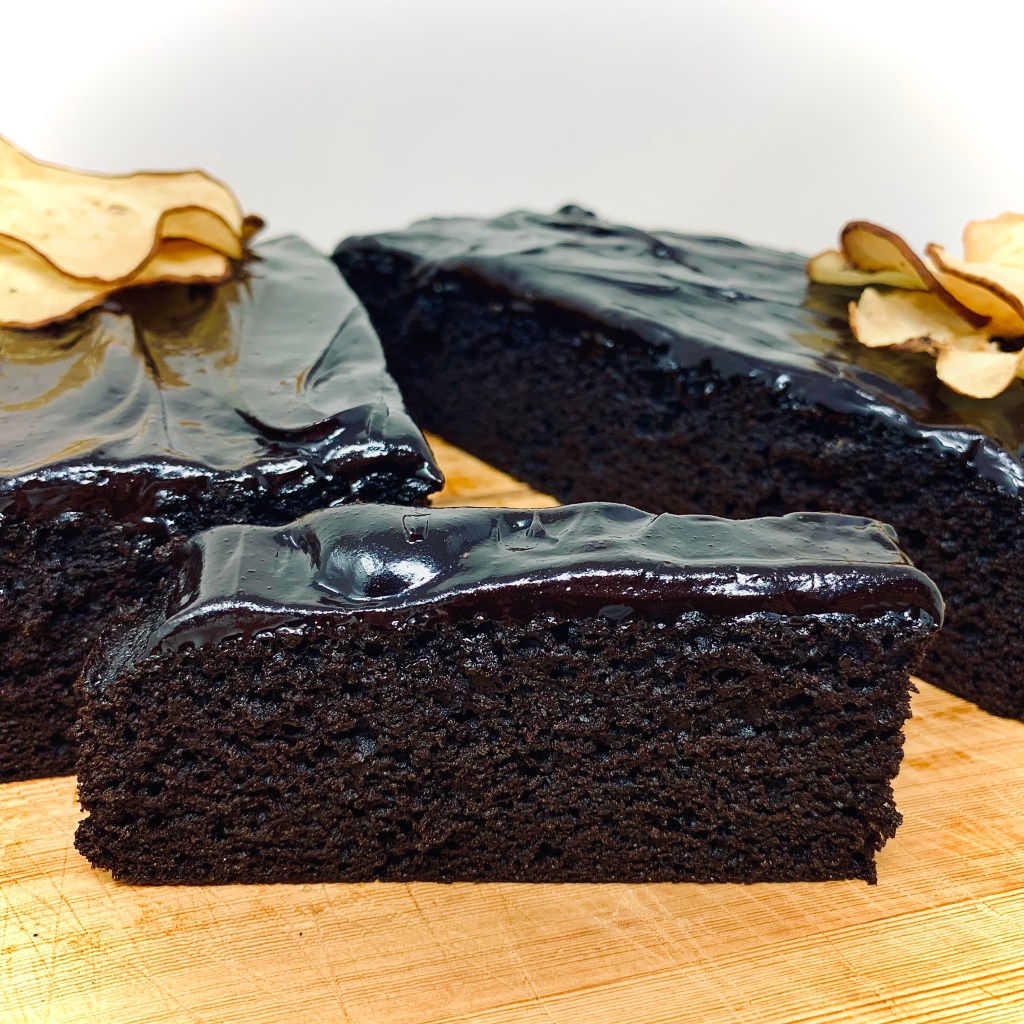
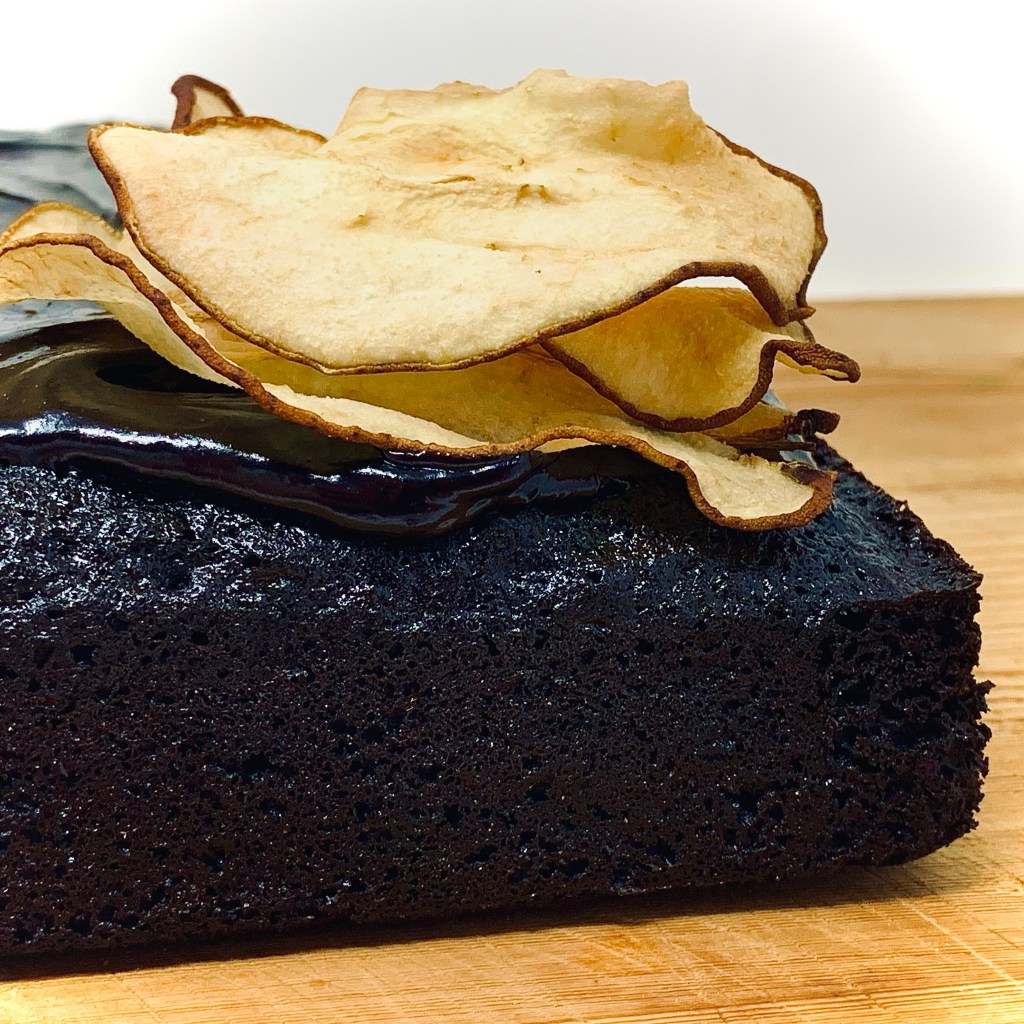
So this started as riff on my Spiced Chocolate Cake and grew from there. I absolutely love those chocolate-covered ginger biscuits. You know the ones – those crunchy, brittle ginger-snap like ones that have that slow-burning throaty heat, enrobed in decadent dark chocolate? Yup- I can easily demolish an questionably inhuman amount of them in one sitting! So I thought of recreating that addictive marriage of heat and bitterness in cake form. Not content with just any form if chocolate flavor I wanted an extra oomph! Switching up to using black cocoa not only gives in my view wonderfully deep, earthy chocolate flavor but also the alluring sumptuous midnight-black of the title. Although it does provide a chocolate flavor, it’s a world away from the sometimes cloying richness of a traditional cocoa-fueled cake.
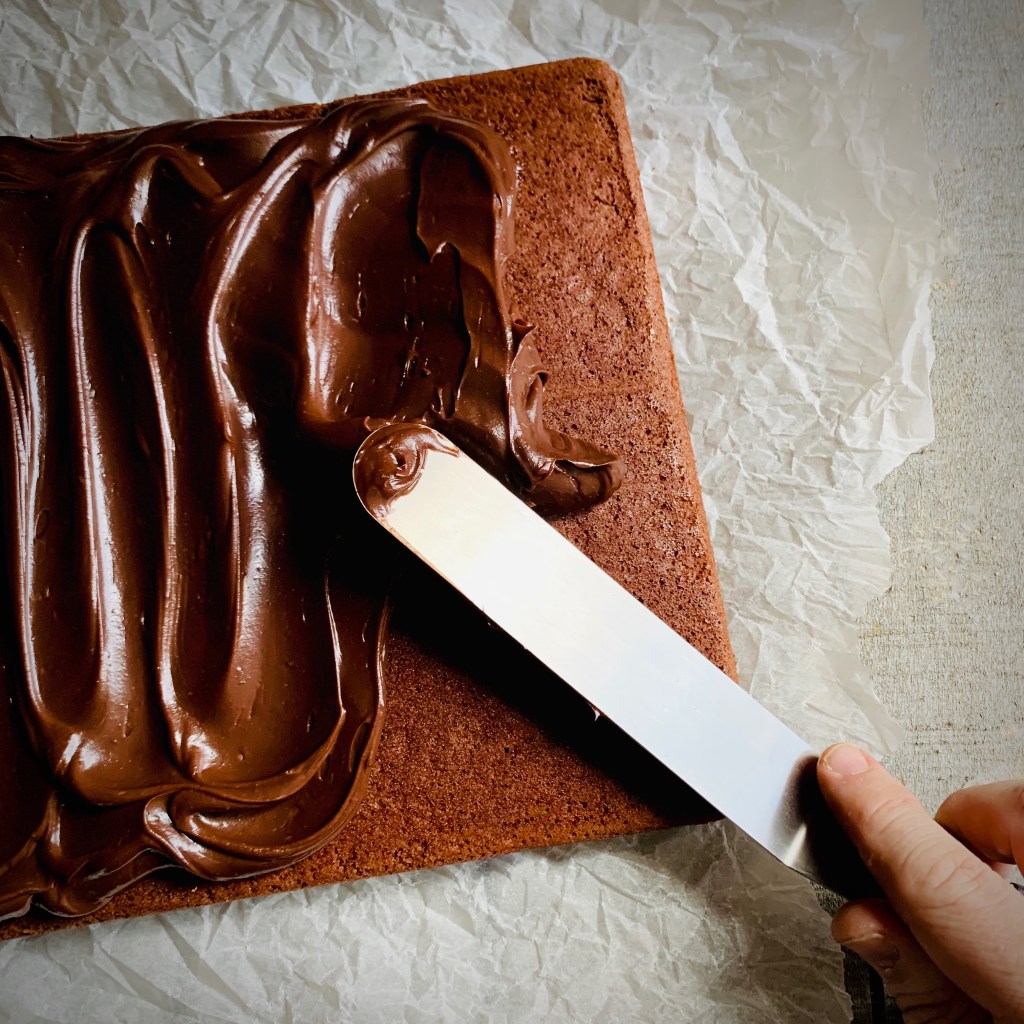
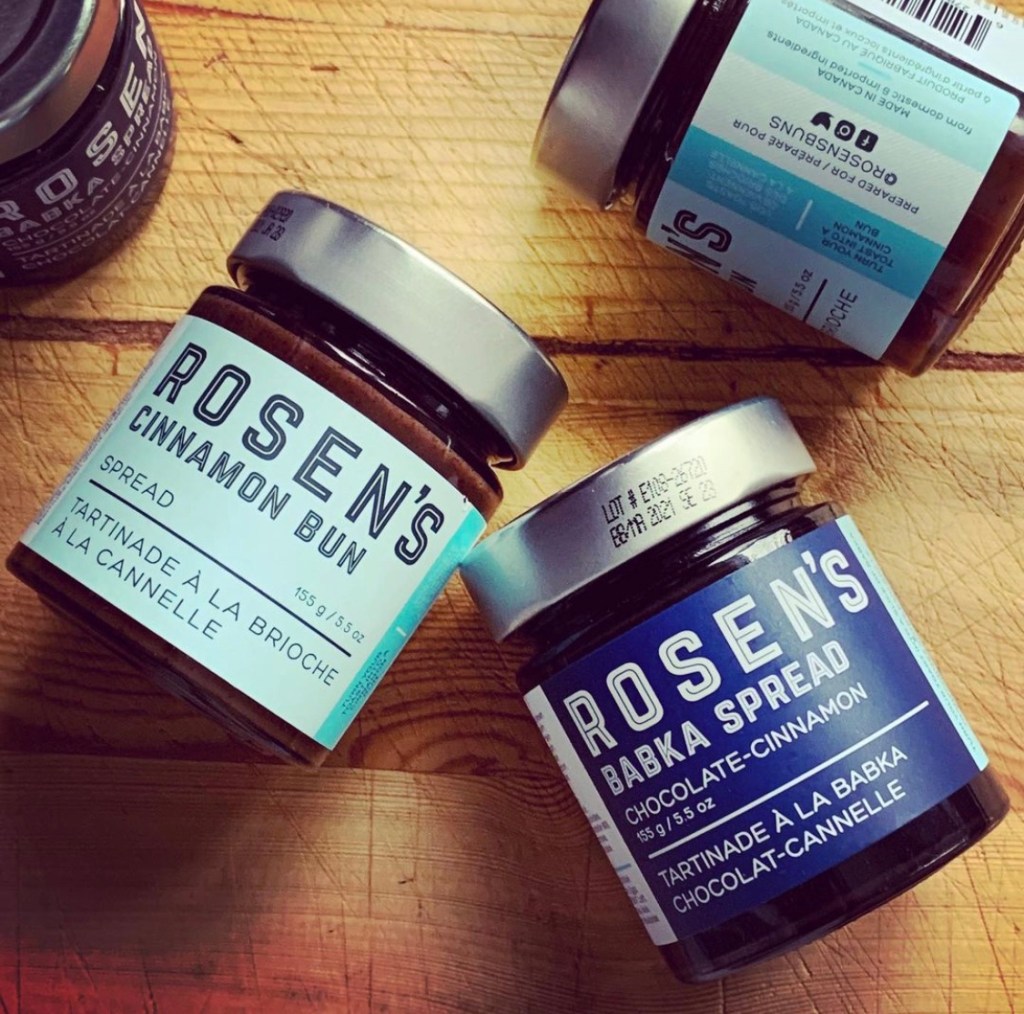
I also thought it would provide the perfect canvas for my newly acquired stock of Rosen Bun’s bun-inspired spreads– here, the deliciously addictive Babka variety, with it’s “deep chocolate flavor with a cinnamon left hook”. The darkly, luxurious flavors of the spread combining with the spicy, gingery antics of the cake. You can rest easy as using the spread here is nothing more complicated than spreading, or rather smearing, it in hypnotic, glossy waves of velvety, sweet goodness over the top of the cooled cake. In fact the hardest part is restraining yourself from scoffing the cinnamony-cocoa spread straight from the jar! Seriously – this is sinfully finger-licking good stuff. Check out the Rosen Buns website for a list of stockists.
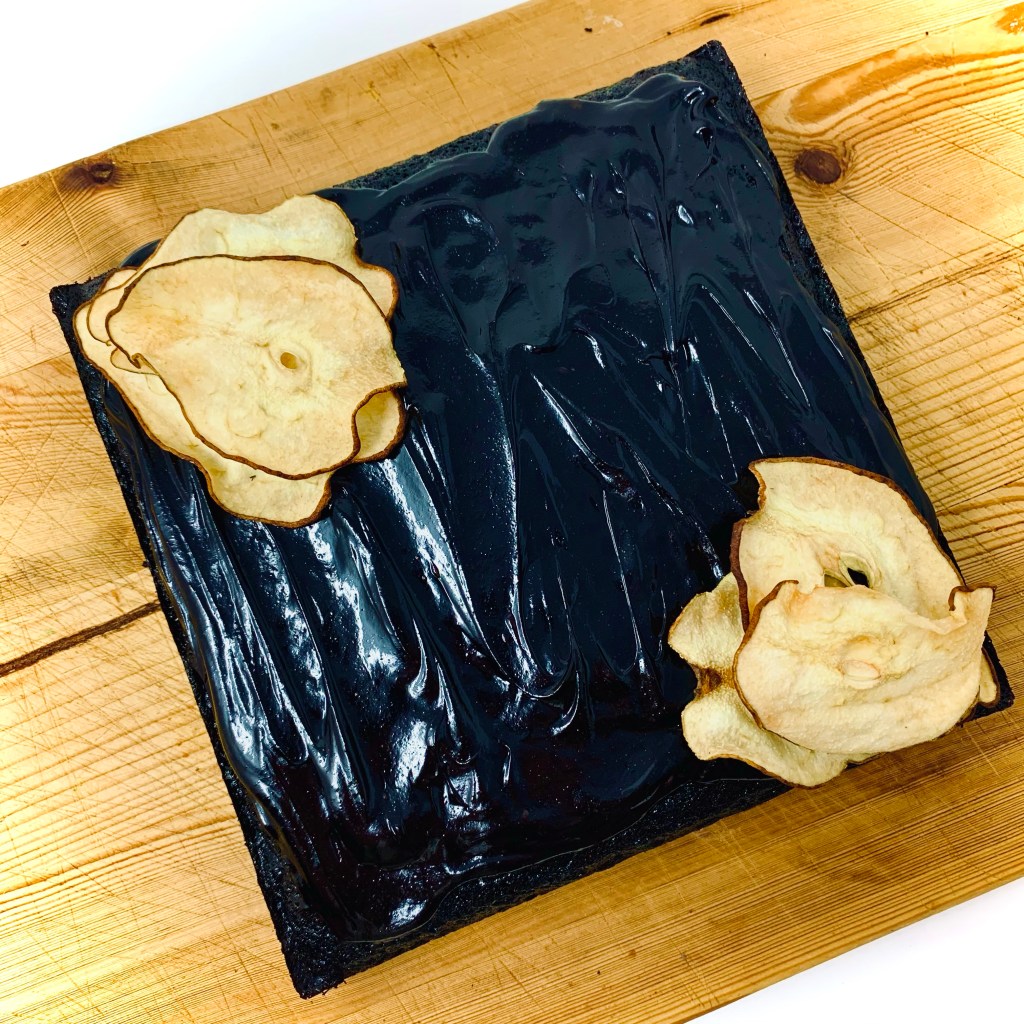
Decoration of the finished covered cake is entirely to your own taste. I used dehydrated pear slices as I was experimenting with a newly purchased kitchen gadget. Using the dried pear slices as decoration rather than munching them straight out of the bag providing some form of self-deluding restraint in my mind!
As always with my posts where I mention, or name drop, specific items it’s done from a place of support and elevation. The producing companies are small, local Toronto businesses whose products have earned a special place in this cynical, hungry heart (and I mean LITERALLY). If there has been any compensation, sponsorship or re-imbursement, I’ll clearly flag it up for clarity and yes, it usually still involves me being head-over-heels with the product (case in point here, with the awesome team at Station Cold Brew Coffee).
I hope you enjoy this little exercise and experiment in flavors from me- who knows there may be more to come! In the meantime stay safe, stay home (and bake!) and mask up!
Ingredients
1 cup all-purpose flour
1/2 cup black cocoa powder
3/4 tsp baking soda
1/4 tsp salt
3 tsps ground ginger
1 tsp ground cinnamon
1/4 tsp ground cloves
1/2 cup Canola oil
1/2 cup fancy molasses
1/4 cup orange juice
3/4 cup dark brown sugar
2 eggs
1/2 tsp vanilla extract
1/4 cup whole milk
1 jar Rosen’s Babka Spread
Method
Combine the oil, molasses, juice and sugar in a small saucepan. Set it on low heat and stir till the sugar has dissolved. Set aside to cool for about 10 minutes
In a bowl combine the flour, cocoa, baking soda, salt and spices. Whisk to combine and set aside until needed
Preheat your oven to 325 degrees F. Grease an 8″ x 8″ square cake pan with oil and line it with baking parchment, allowing allow the edges to overhang for easy removal
Transfer the cooled molasses mixture to a large mixing bowl and add in the eggs, vanilla and milk. Whisk well until smooth and well combined
Fold in the flour mixture gradually into the liquid until incorporated. Make sure the there are no pockets of dried flour mixture. The final batter may look a little lumpy- this is okay
Pour the batter into the prepared tin, level the top and bake for 35 to 40 minutes until a toothpick inserted into the center comes out clean. If the top is darkening quickly, cover the tin loosely with foil and continue baking
Allow the cake to cool in the tin for 15 minutes, then invert, remove and place on a wire rack to cool completely.
Once completely cool spread the babka spread over the top as you would a ganache. Decorate as you like. Here I’ve used some dehydrated pear slices (for no other reason than I was playing with a new piece of kitchen equipment!)
Slice and enjoy!
Store in an airtight container for about 3-4 days at room temperature
Okay this was a surprise hit which a lot of you have been asking about. I made it as I was itching to bake but given current times I’m having to be somewhat frugal with particular ingredients, namely flour and yeast. My yeast problem I appear to have solved (there’s a post coming on that) but flour is still a questionable item, which appears to elude me.
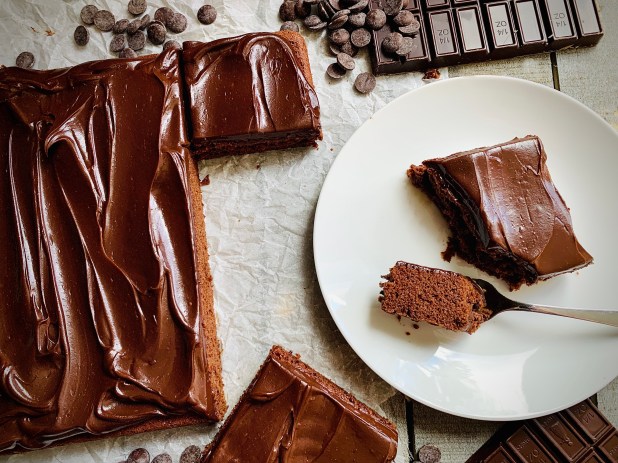
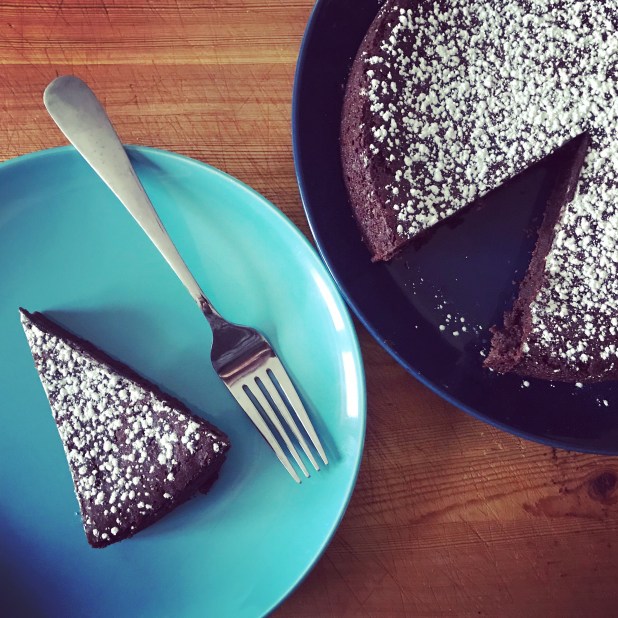
Flourless chocolate cake seems to be one of those things that always pops up on a menu, appealing to all and sundry. So it seemed a pretty perfect fix here. I’ve tried it a few times with varying results across the board from fudgey & brownie like to cakey (and to be honest pretty dry). The recipe here results in the former- fudgey and reminiscent of the best brownie, just thick enough to whisper indulgence but thin enough not to push you over the edge of regret. A surprise addition of instant coffee granules helps amplify the chocolate flavour without pushing it in to the realms of mocha flavoring.
I tend to like the cake just as is, with a snowy dusting of icing sugar. But feel to dress it up anyway you like – a scoop of cool vanilla ice cream perhaps? or maybe a drizzle of booze-laden cream maybe? The rules are yours to make…or break.
Ingredients
1 cup semi-sweet chocolate chips
1/2 cup salted butter
3/4 sugar
1/4 teaspoon kosher salt
1 teaspoon vanilla extract
3 large eggs, beaten
1/2 cup cocoa powder
1 teaspoon instant coffee granules
Icing sugar, to dust (optional)
Method
Preheat your oven to 375 degrees F. Grease and line an 8″ cake pan. Set aside until needed later
Combine the chocolate and butter in a large microwave-safe bowl, and heat for 30 seconds. Remove stir and heat again for another 30 seconds. Stir until the chocolate is melted and the mixture is smooth. (or you can melt them together in a heat-proof bowl over a double-boiler)
Add the sugar, salt, vanilla extract and stir to combine well
Add the beaten eggs and stir until smooth and uniform in color
Finally add in the cocoa powder and instant coffee granules. Stir until just combined- be careful not to over-mix here
Pour the batter into your prepared cake pan, gently smoothing the top. Bake at the preheated temperature for 25 minutes, or until the the top has a thin crust and the centre reads 200 degrees F on an instant read thermometer.
Remove the cake from the oven and place on a cooling rack fro 10 minutes. After this time use an offset spatula (or butter knife) to run around the edges of the cake and loosen it from the pan.
Place your serving plate on top of the cake in the pan and carefully turn it upside down to invert the cake out onto your serving plate. Let the cake cool completely, either at room temperature or in the fridge. If cooling in the fridge remove it at least 30 minutes prior to serving to allow it to come to best temperature.
To serve dust the top of the cake liberally with icing sugar if desired.