Spiced Chocolate Cake

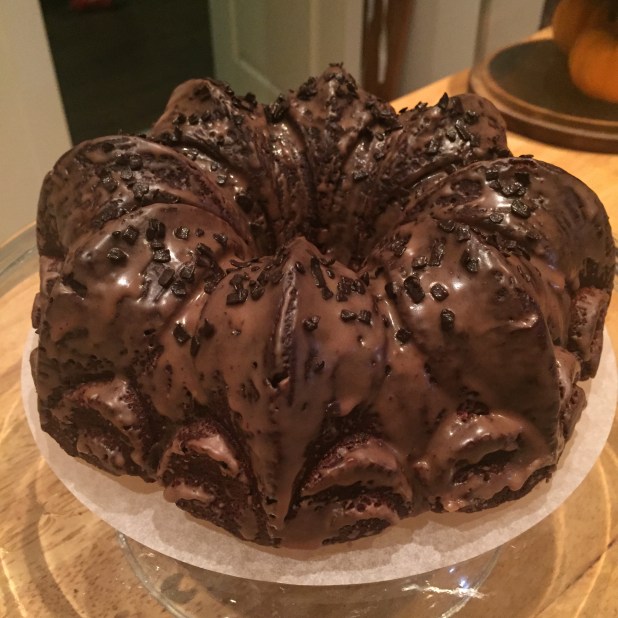
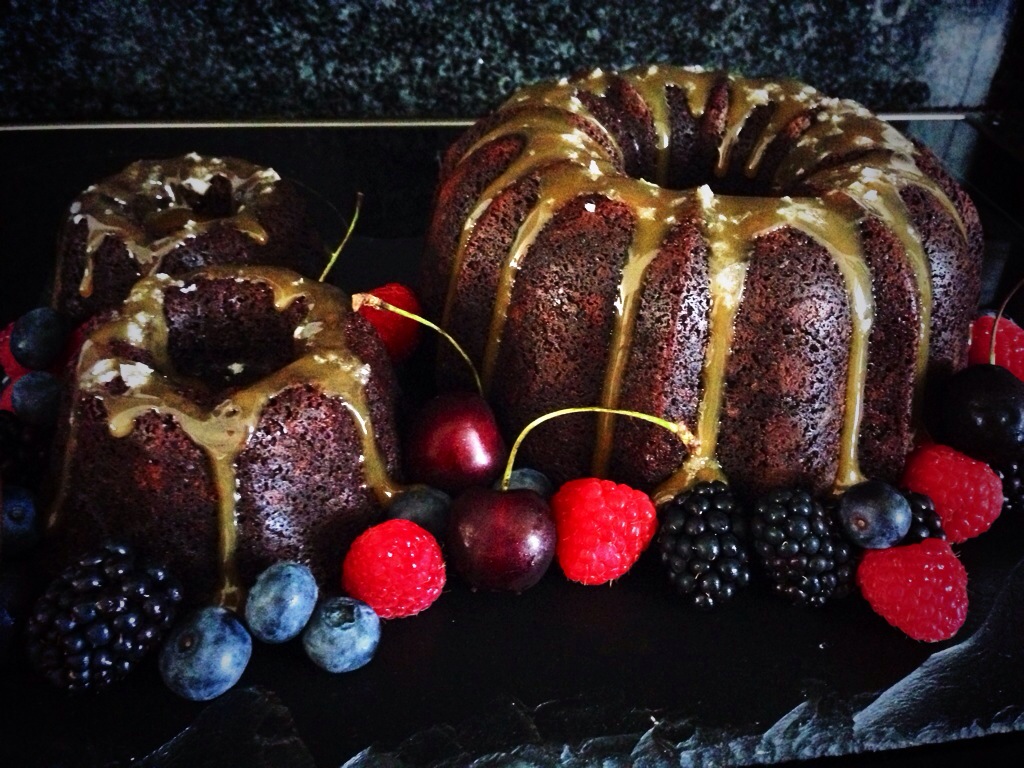
This cake started out life as something different. In it’s original form it took inspiration from Bejamina Ebuehi’s “Hidden Pear Cake” from her book The New Way To Cake (which I thoroughly recommend). I loved the idea of having the pear fruit cheekily peaking though the ginger cake loaf, inviting you to dig in and explore what lies beneath. In one of my typical left of centre epiphanies I found myself reminiscing about a favorite childhood dessert- Pear Belle Helene. There always seemed to be something so refined and regal about this desert in my mind. Even now it conjures up images of sophistication and elegance- ivory pears poached to sweet, glistening tenderness slick with silky, warm chocolate syrup swirling hypnotically with pear syrup and melting vanilla ice cream.- each bite a sweet, sandy indulgence. So? could I create this in a cake? Well check out my IG feed for more details.

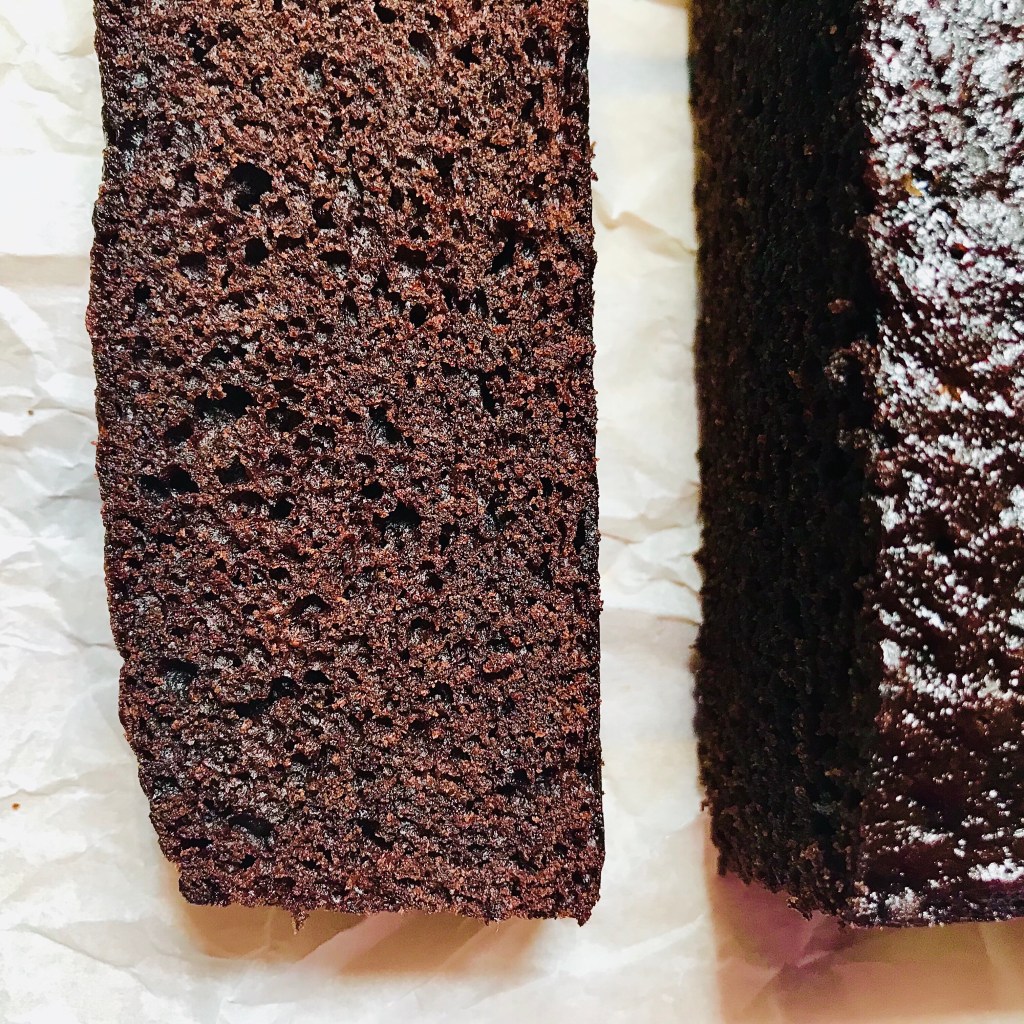
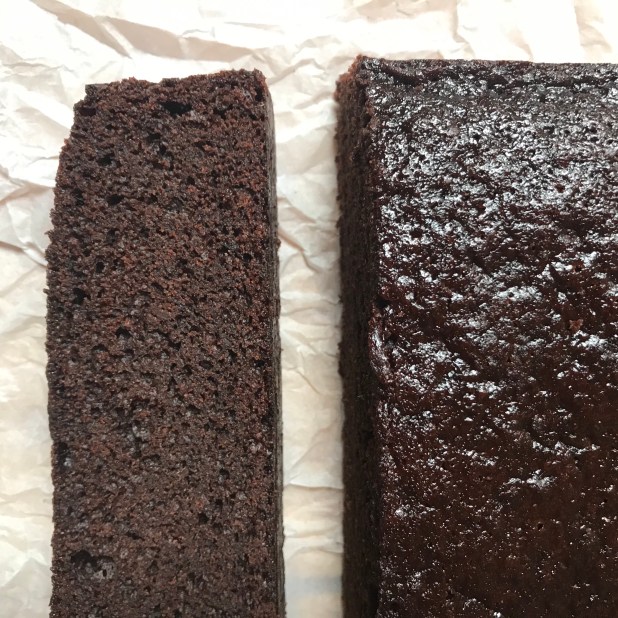
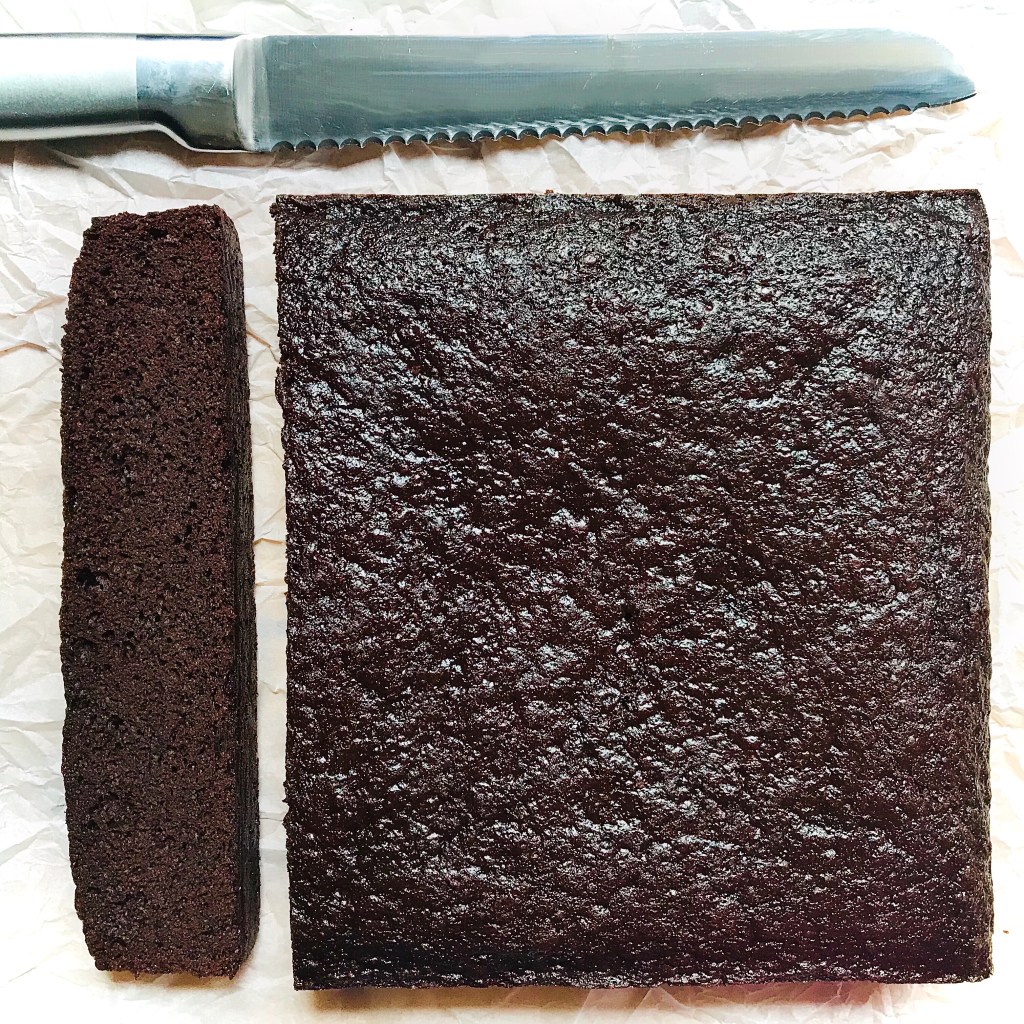
The resulting cake was good enough that I wanted to make it the feature on it’s own- fudgey, rich chocolate cake with a warming spiced undercurrent. For those of you in Ireland and the UK it has more than a passing resemblance to the infamous McVities Jamaica Ginger Cake. Here however the spicy ginger it is pared down a notch so it works in tandem with the rich chocolate flavor of the cake. Allowing this cake to sit for a day allows the texture and flavors to really develop. I would recommend making the cake and let to sit for at least a day in an airtight container at room temperature and bam! you’ll hit that sweet spot.

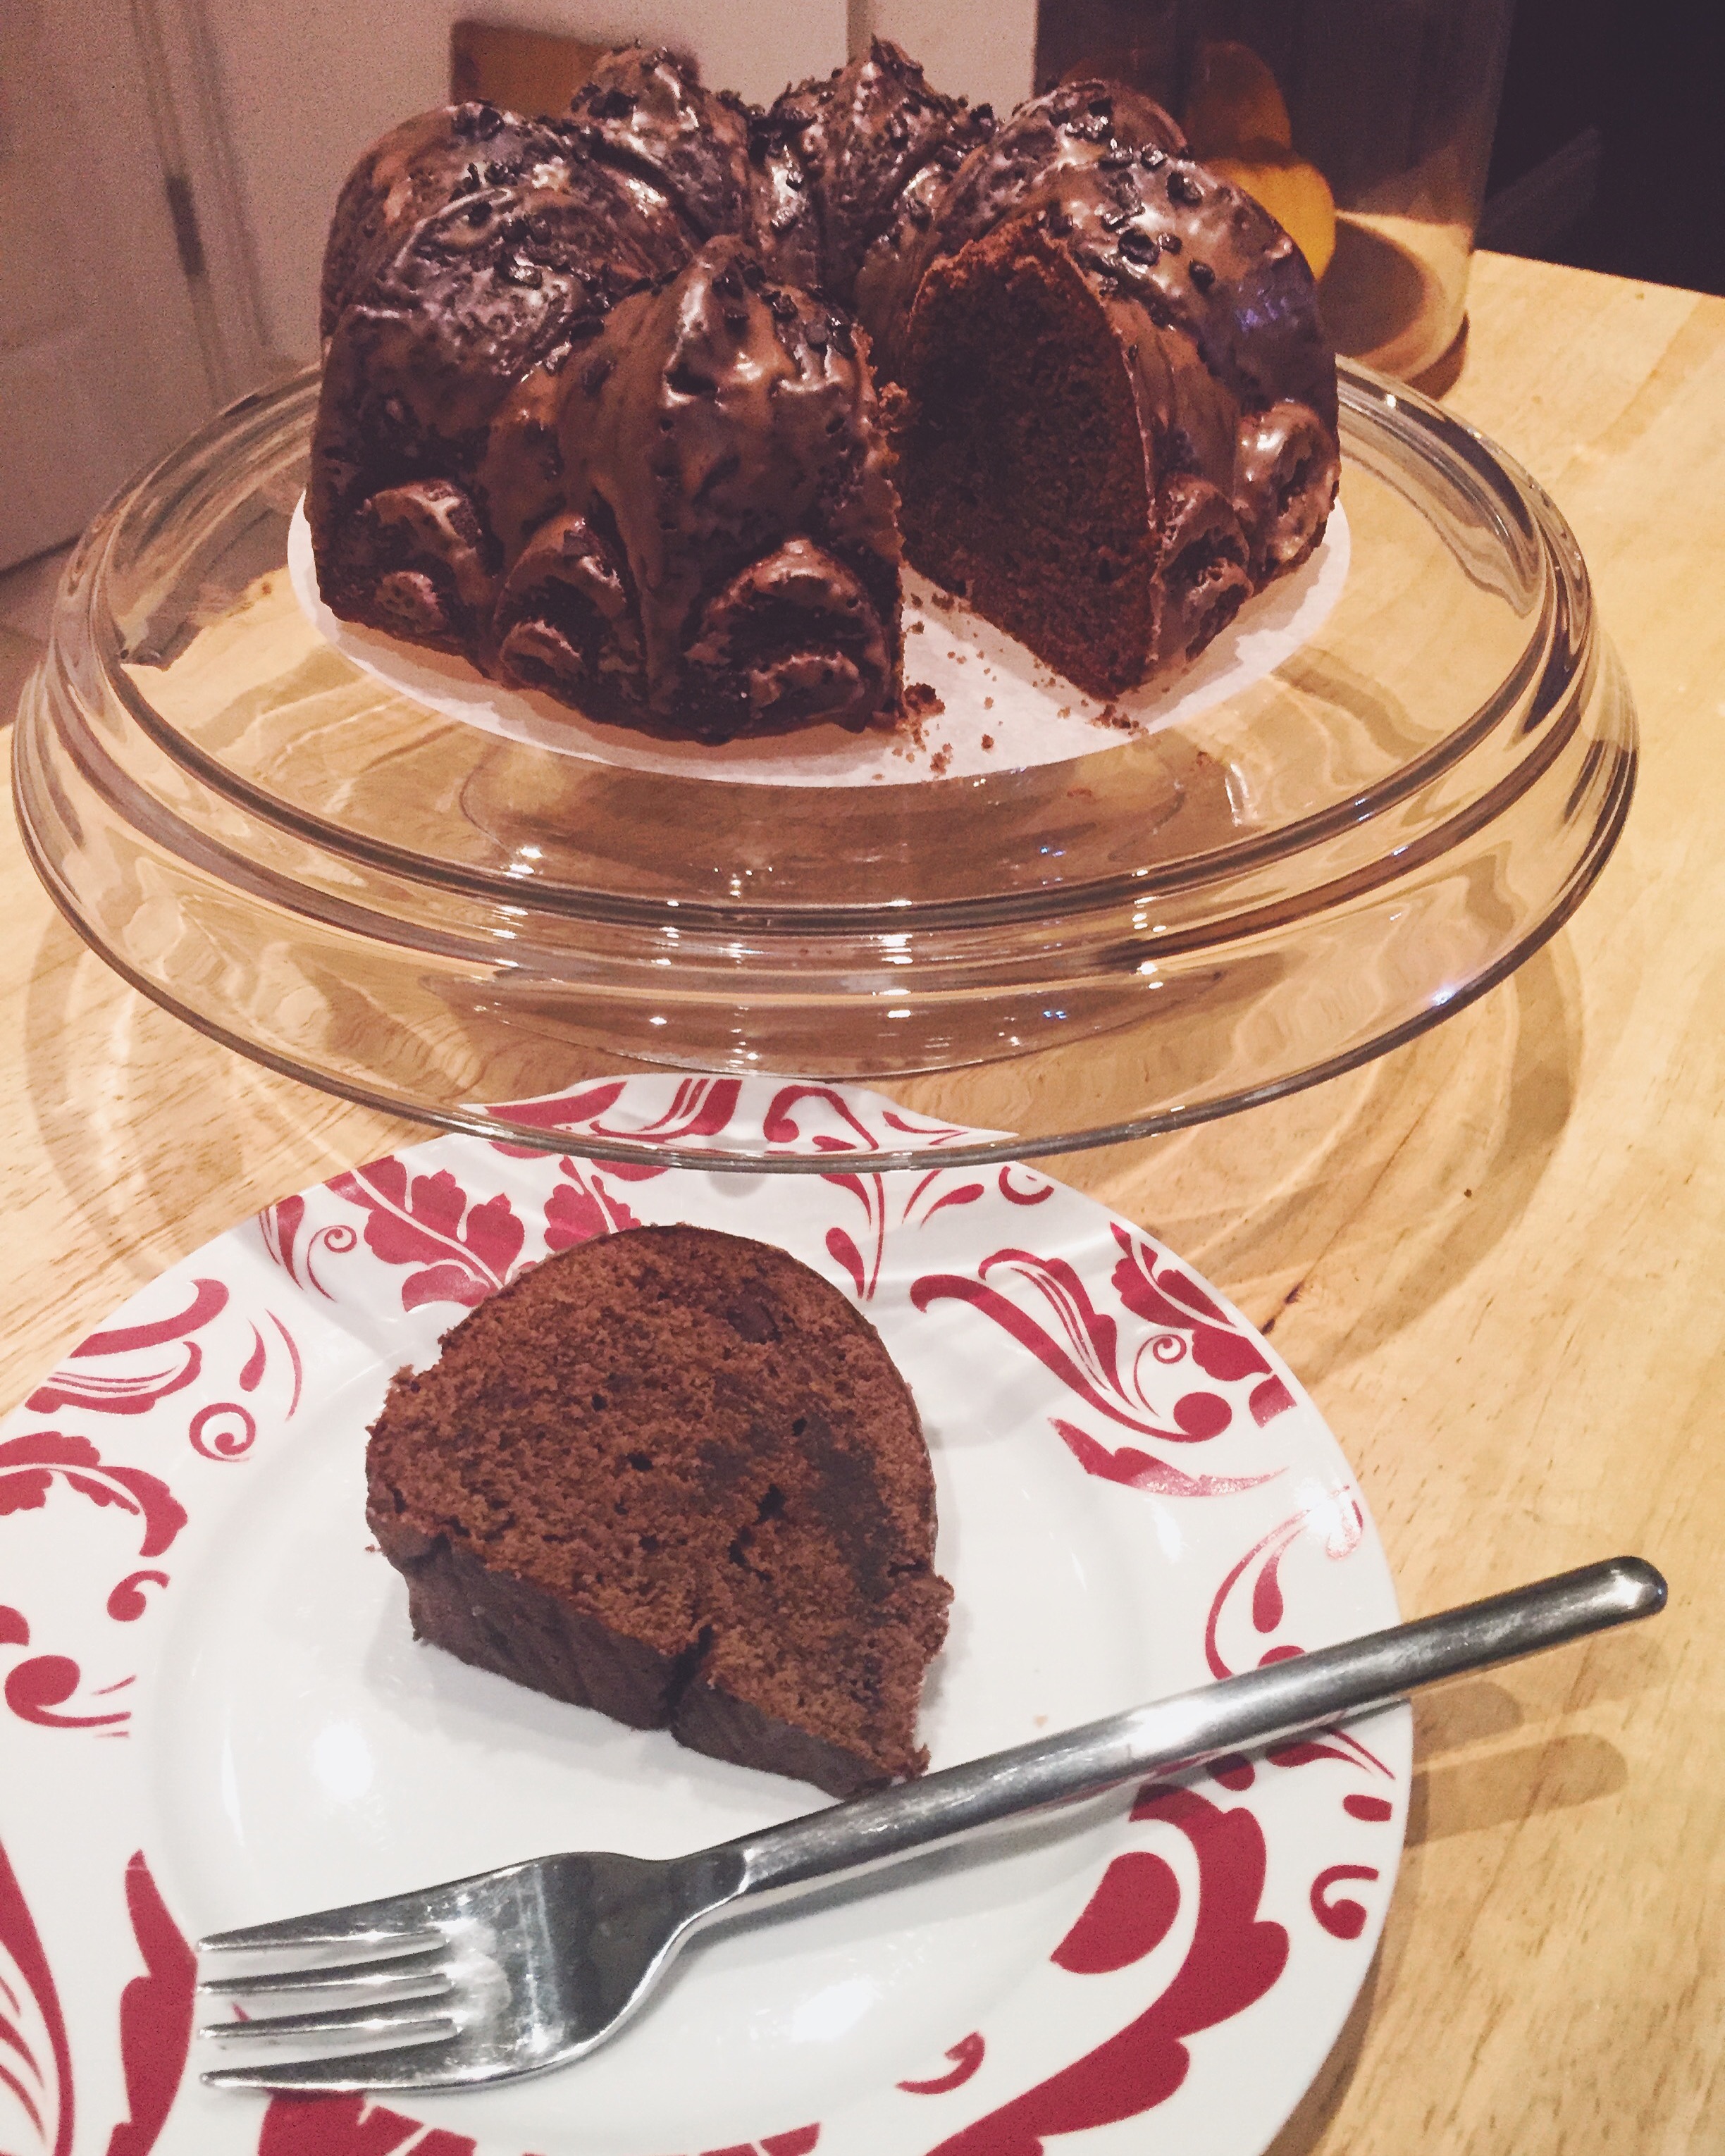
Now I’m somewhat of a puritan when it comes to eating cake. Not for me the silky adornment of cream or the smooth chilly sensations of ice cream- I like mine sliced pure & simple and this cake is a treat as such. However I do know that it tastes just as awesome when gently heated adjacent to a scoop of vanilla ice cream, or tenderly enrobed in smooth custard. The choice is yours.

Ingredients

  • 1 cup all-purpose flour
  • 1/2 cup cocoa powder
  • 3/4 tsp baking soda
  • 1/4 tsp salt
  • 2 tsps ground ginger
  • 1 tsp ground cinnamon
  • 1/4 tsp ground cloves
  • 1/2 cup Canola oil
  • 1/2 cup fancy molasses
  • 1/4 cup orange juice
  • 3/4 cup dark brown sugar
  • 2 eggs
  • 1/2 tsp vanilla extract
  • 1/2 tsp chocolate extract
  • 1/4 cup whole milk

Method

  • In a bowl combine the flour, cocoa, baking soda, salt and spices. Whisk to combine and set aside until needed
  • Combine the oil, molasses, juice and sugar in a small saucepan. Set it on low heat and stir till the sugar has dissolved. Set aside to cool for about 10 minutes
  • Preheat your oven to 325 degrees F. Grease an 8″ x 8″ square cake pan with oil or line it with baking parchment and allow the edges to overhang for easy removal
  • Transfer the cooled molasses mixture to a large mixing bowl and add in the eggs, vanilla and milk. Whisk well until smooth and well combined
  • Fold in the flour mixture gradually into the liquid until incorporated. Make sure the there are no pockets of dried flour mixture. The final batter may look a little lumpy- this is okay
  • Pour the batter into the prepared tin, level the top and bake for 35 to 40 minutes until a toothpick inserted into the center comes out clean. If the top is darkening quickly, cover the tin loosely with foil and continue baking
  • Allow the cake to cool in the tin for 15 minutes, then remove and place on a wire rack to cool completely before slicing. Store in an airtight tin for about 3-4 days at room temperature, or refrigerate, tightly wrapped, for a week

Salted Fudge Brownie Cookies

88c37393-69ad-4fa6-9efd-8aeb4d4e215e

So waaaaaay back when- in a time when we could still hug each other; be in public without looking like random members of GI Joe or when Lysol still stocked grocery store shelves, I baked brownies. A LOT of brownies. The quantity of brownies baked in my kitchen was only just outdone by the amount of experimental cupcake flavors I would try tempt people with (Vanilla genoise w/ white truffle buttercream frosting, topped with strawberry, black pepper and a balsamic drizzle anyone?) Brownies satiated my passion for baking and my love of chocolate. In fact so much so was this the case that I ended up winning the title of Observer Food Monthly Best Reader’s Recipe 2014. The victorious recipe was my Smokin’ Pig Licker Brownies and can be found here if you interested.

Anyway I digress, as so often seems to be the case when I write these days! The current abundance of time indoors led me to wonder if this basic brownie recipe could be tweaked and applied to cookie format. And I was not to be the first. I’ll be perfectly  honest and admit I was utterly coerced by the glut of crinkle cookie images that seemed to be flooding my feed along with those of the omnipresent sourdough. The cookie recipe here follows pretty much the base template of brownies – melted choc/ butter combo; dry ingredients stash and sugar/egg volume. A dash of baking powder adds some leavening power to the cookie “dough balls” and stops them becoming a singular cookie en masse on the baking tray.

Overall I gotta admit to them being a tasty success, if thinner than I expected. I guess the word “brownies” in my head is synonymous with thick and chunky (applies to me in all walks of life!) so I was a little perturbed when these cookies baked to be a bit thinner. Nonetheless they still had the fudgy texture that I love of brownies and the crinkle topping certainly provided a certain visual ASMR.

So add these the long ever-growing list of what I should start calling “Quarantine Cookies”. Little morsels of baked goodness that have become my tasty alternative to crossing days off a calendar. The only downside being that whilst my repertoire is expanding so too, it would seem, is my waistline!

Stay safe!

img_5856

Ingredients

  • 1 1/4 cup All Purpose Flour
  • 1/4 cup Dutch process cocoa (if you can’t get this standard cocoa is fine as long as it’s unsweetened)
  • 1 teaspoon baking powder
  • 1/4 teaspoon Kosher salt
  • 8 oz semi-sweet chocolate, broken into pieces
  • 1/2 cup salted butter
  • 1 1/2 teaspoons coffee extract
  • 2/3 cup brown sugar, packed
  • 1/2 cup fine sugar
  • 2 eggs, large
  • Optional: Flaky sea salt, to finish (I use Maldon)

Method

  1. Heat oven to 350°F and line two large baking sheets with parchment paper
  2. In a medium bowl, whisk together the flour, cocoa powder, baking powder and Kosher salt until combined.  Set aside until needed later
  3. Combine the butter and chocolate pieces in a bowl over a pan of water. Gently heat over medium-low heat until melted, stirring occasionally to combine. When fully melted remove the bowl from the hot water/ heat, add in the coffee extract and give one final stir to combine. Set aside until needed
  4. While the butter/chocolate mixture is melting, combine the eggs, brown sugar and granulated sugar together in the bowl of a stand mixer. Beat on medium-high speed until pale and increased in volume
  5. Slow and steadily add the chocolate mixture into the egg mixture and fold them together until uniform in color and it is just combined
  6. Sift in the dry mixture, again fold it in until just combined
  7. Set aside for 5 minutes and the mixture will thicken
  8. Using a large (3 tablespoon measurement) scoop drop batter balls onto your prepared baking sheet, spaced at least two inches apart.  The batter will be runny and will spread as the cookies bake.  (Sprinkle each cookie with a pinch of flaky sea salt, if using)
  9. Bake for 10-12 minutes, until the tops of the cookies are crinkled and slightly domed. Remove cookies from the oven and transfer the pan to a wire baking rack to cool. Leave the cookies to cool completely on the pan before removing. The cookies will flatten and crinkle even further as they firm up and cool down

*These cookies will keep in a sealed container for up to 5 days, or freeze for up to 3 months

8088cac6-4352-4095-ae81-f67cdb2c4bdd

Soured Cream Coffee Cake w/ Walnut & Oat Streusel and Smoked Maple Glaze

I used to find coffee cakes confusing. Well at least I did when I first moved to Canada. To me a “coffee cake” was exactly that- a cake with coffee IN it. Possibly a symptom of a childhood growing up heavily influenced by Mary Berry, Delia Smith and Darina Allen, a coffee cake came in one format alone – Coffee and Walnut cake. Reminiscent of weekend baking with my mother and lazy Sunday afternoon teas, it smacked of luxury and thrillingly contained that most adult of ingredients – Coffee! Or more precise that stalwart ’80s cupboard staple “Champ Coffee essence”. Thick, syrupy it was bottled black magic to a kid with a blossoming interest in baking.

Fast-forward 30 or so years and imagine my confusion reading recipes for coffee cake and wondering where the heck that smoldering caffeine hit was? Yes, yes I know- hindsight now makes me see how short-sighted and literal I was. Lateral thinking was called for. A simple mistake in my defense I’ll plead. Almost as simple as the recipe for this cake here. Soured cream gives a moist crumb hiding a streak (and topping!) of oaty, cinnamon goodness and finished with a drizzle of smokey maple sweetness. This really perfect accompaniment to your caffeine rush no matter what the tine of day. 


Ingredients

  • 1 1/2 sticks salted butter, softened
  • 1 1/2 cups granulated sugar
  • 3 large eggs
  • 1 1/2 teaspoons vanilla extract
  • 1 1/4 cup soured cream
  • 2 1/2 cups All Purpose flour
  • 1/2 teaspoon baking soda
  • 2 teaspoons baking powder
  • 1/2 teaspoon kosher salt
  • 1 tablespoon ground cinnamon

Streusel topping

  • 1/2 cup All Purpose flour
  • 1/4 cup dark brown sugar
  • 1/2 teaspoon kosher salt
  • 2 teaspoons ground cinnamon
  • 3 tablespoons cold butter, cut into small chunks
  • 3/4 cup walnuts, lightly toasted
  • 3/4 cup rolled oats

Drizzle

  • 1/2 cup icing sugar
  • 2 tablespoons smoked maple syrup (if you can’t get smoked maple syrup, traditional maple syrup will do just fine)

Method

  1. Preheat your oven to 350° F. Grease and flour a 10” tube (angel food) pan
  2. In the bowl of a stand mixer (with paddle attachment) cream the butter and sugar together until light and fluffy. This may take up to 10mins.
  3. While the butter and sugar cream together, make the streusel. In a bowl combine the brown sugar, flour, cinnamon, salt and butter pieces. Rub the mixture together with your fingertips until a pea-sized sand texture is achieved and a crumble is formed. Mix in the toasted walnuts and set aside until needed later
  4. To the creamed butter/sugar add the eggs one at a time, ensuring each is fully incorporated before moving onto the next
  5. When all the eggs have been mixed in, add the vanilla and soured cream and mix until just incorprated
  6. In a separate bowl combine the flour, baking powder, baking soda, salt and cinnamon. Whisk well the break down any lumps
  7. On low speed add the flour mixture to your wet mixture gradually, I usually do it 1/4 cup at a time, waiting for each to be fully incorporated before adding the next
  8. Continue adding the flour until it is all used and just combined into the mixture. Lightly fold using a spatula to make sure the batter is completely mixed
  9. Spoon half the batter into the prepared pan and spread/level with a knife spatula. Sprinkle on 1 cup of the streusel mixture evenly.
  10. Spoon the remainder of the batter on top and spread evenly. Finish with a final layer of the remaining streusel mixture on top
  11. Bake in preheated even for 50- 60mins, until a cake tester comes out clean
  12. Let cool on a wire rack for 30mins. After this carefully remove the cake from the baking tin, streusel-side up, and set aside to cool further
  13. While the cake cools, in a jug combine the icing sugar and maple syrup. Stir until a smooth pourable is achieved. If the mixture is still a bit stiff add a few drops of milk to make it runny. Drizzle the glaze over to top of the cake to your desired amount  and leave to fully cool before slicing and serving
  14.  This coffee cake will keep at it’s best in a sealed container at room temperature for up to 5 days. Avoid storing the cake in the refrigerator as this will dry it out.

#BakeMumsDay with Dr. Oetker

IMG_3421

As a child I remember Mother’s Day was pretty much like every other day apart from two things. One – my father bought my mother flowers. This never normally happened. Two- I would rather unsuccessfully try to bake my mother something whilst keeping her completely in the dark. “Baking Incognito” if you will. This in itself was no mean feat given that my mother was (and still is despite her ailments) one of those archetypal Gaelic matriarchs who perpetually inhabit the kitchen, who know the correct oven temperature despite the dial markings having been eroded from years of use, and who insist that portion sizes are too small if you can still see the plate you’re being served on. Think Mary Berry meets Mrs. Brown. Yeah- there you have it.

Before I go any further I feel it only right I should clarify that by saying, “ …bake my mother something…” what I in fact mean is raiding the kitchen cupboard for what usually turned out to be a Green’s cheesecake packet mix and adding my own “special touch” to it. Yes, even as a nipper I was gustatorily experimental! A box mix enfant terrible! Said special touches ranged from grated chocolate topping to a hidden banana filling to that time where I added so much Baileys (I told you it was Baking Incognito!) that the final cheesecake was not as much sliceable as it was pourable.

Fast forward 30 years and now I’m the Gaelic “matriarchal” figure in my household, even down to intuitive temperature skills, but with added facial hair. People often ask me where I came up with the name “Mr. Mom’s”. It was actually whilst scrolling through my social media feed a couple of years ago on Mother’s Day that I noticed a post. It was from a woman wishing, “A Happy Mother’s day to all the Moms, Grandmas, and let’s not forget the Mr. Moms (in reference to gay male parents). I liked it, it resonated with me as a gay dad and it stuck. The rest, as they say, is history.
History that has led to my children being the first wave of my “tasting panel”. Even when their critique is not required it is doled out in precocious abundance. Baking with them is like looking at the world from an angle askew. Ingredients are suddenly wondrous and methods appear mystical- yet it all happens with a déjà vu tinged familiarity.

Mother’s Day for us is about the female influences and role models that our children have in our family. A chance for Granny and Auntie to step into the spotlight, and for me to step into the kitchen with the kids. Food gifts are something I completely endorse. To me a food gift is more than just the gift itself. It’s about the time taken to think how suitable it may be, the time taken to create it, and make sure it’s worthy of its recipient. Knowing that every step of the way the creator had the recipient in mind. And in the case of Mother’s Day in their heart as well.

To celebrate this Mother’s Day, Dr. Oetker has teamed up with GBBO finalist Ian Cumming to create a recipe book that encourages kids to get in the kitchen to create some tasty treats for Mum. Brimming with fun recipes and tips, it’s a great way to introduce your little ones to the wonders of the kitchen. All with adult supervision of course!
Dr. Oetker wants to encourage children to bake with their dad, grandma or auntie and create a special surprise gift for mum. To do this, they have created a fun and engaging Mother’s Day-themed recipe book especially for children, featuring illustrations of four simple recipes from Ian Cumming, GBBO finalist and dad of two.

One of the recipes are these adorable chocolate flowerpot cupcakes-

Chocolate Flowerpot Cupcakes

Developed by Ian Cumming, the man who showed a flair for innovative interpretation of bakes, gives a suitably endearing twist on the traditional chocolate cupcake. Whether they’re for mums or grandmas, these adorable “flowerpot” cupcakes are certain to charm on Mothering Sunday. Using some delightful touches from the Dr. Oetker range lends that extra special touch for that extra special mothering influence in your life. Because the Dr. Oetker decorating range is so easy to use they’re ideal for little hands in helping out. If your children are anything like mine you may find it a struggle to actually have a full batch of completed cupcakes without some “disappearing”!

The Bake Mum’s Day recipe book can be downloaded here www.oetker.co.uk/mothersday The team at Dr. Oetker asked me to lend a hand in providing some tips for you whilst making the recipe. After all there’s always room for a little Mr. Mom’s twist on things!

– Make sure all your ingredients are at room temperature. This saves so many problems- from lumpy cupcake batter to possible splitting.

– If you’re using silicone flowerpot moulds (available from quality bake shops) I find it best if you “grease the mounds” beforehand with butter. For ease I just pop on a disposable glove, grab a finger-full of butter and apply. Using your finger makes it a lot easier than trying to use a brush or any other method to get into those fiddly crevices.

– When you remove the cupcakes from the oven, leave to partially cool (about 5 mins) remove from the flowerpot molds and leave to cool completely. While the cakes are cooling clean, rinse, and dry the molds. Then before you serve pop the cakes back into the molds. This means it’s so much easier for guests to get the cakes out nice and neatly upon serving.

– For some added texture I trim any domed top from the cakes, spread with a layer of Dr. Oetker chocolate cupcake icing, sprinkle on some crushed Bourbon biscuits (soil) and top with a swirl of Dr. Oetker cupcake icing as per the recipe.

– When you do have your children helping out, I find it saves so much mess and cleaning up if you have everything weighed out and in plastic bowls; plates; beakers. That way the little ones can actively enjoy getting the ingredients together and you don’t have to worry about them spilling heavy bags of flour, or breaking shells into the mixture.

Dr. Oetker Twitter Competition
For more family friendly recipes, head over to www.oetker.co.uk

They are also running a competition on Twitter to win a copy of the book as well as some baking goodies. To enter, just RT their competition tweet and follow @DrOetkerBakes

IMG_3417

IMG_3404

This post is in collaboration and sponspored by Dr. Oetker.

#Recipe: Chocolate, Guinness & Black Garlic Bundt cake with Smoked Chocolate glaze

So I’ve (eventually) gotten around to posting this recipe- massive apologies for the delay. This cake first started out as an experiment using black garlic and was finished with a salted caramel sauce and served with forest fruits. I wanted to create something that looked and tasted indulgent but had a slight edginess to it- nothing too frou-frou! For me it was a Gothic romance in cake form. Time moved on and so did the recipe development. I replaced the salted caramel with a chocolate glaze but wanted to still keep my (signature) twist. And so liquid smoke was added. Depending on how much you use, this wonderful ingredient adds a tasty smoky flavour and in this case married really well with the black garlic of the bundt. It’s availble online or from good food ingredient stores.

iness; Chocolate and Black Garlic Bundt

The original version of the Chocolate, Guinness & Black Garlic bundt cake

Bundt cake mixture

375g plain flour

1/2 teaspoon baking powder

1/2 teaspoon salt

70g unsweetened cocoa powder

225g butter, softened

110g unsalted butter, chopped and softened

600g caster sugar

1 teaspoon vanilla extract

5 eggs

125ml milk

125ml Guinness stout (from a bottle as opposed to a can)

6 cloves black garlic, chopped

100g dark chocolate chips or pieces

Chocolate glaze

12 Tablespoons icing sugar

4 teaspoons whole milk

1 tablespoon liquid smoke

*this mixtures makes enough for a very ample bundt cake (using a 25cm tin) or 2 standard sized ones (I used Nordicwares Fleur De Lis and Anniversary tins)

2015-11-18 16.52.49

To make the bundt cake

  • Preheat the oven to 170 C. Grease and flour  your Bundt cake tin(s)- or if your like me spray the inside with cake release spray.
  • Sift flour, baking powder, salt and cocoa together into a bowl and place to one side.
  • In a jug combine the milk and the Guinness. Set
  • In the bowl of your stand mixer, cream butter, margarine, sugar and vanilla until light and fluffy. (A tip here is to keep beating until you can no longer feel the sugar grains between you fingers).
  • Add eggs one at a time, beating well after each. Add flour mixture alternately with the milk/Guinness mixture. Mix to combine.
  • Add in the chopped black garlic cloves and chocolate chips. Mix well.
  • Pour into your prepared Bundt tin(s). Bake in the preheated oven for 70 minutes or until a skewer inserted into cake comes out clean. Let cool for 10 minutes in the tin, then turn out onto a wire rack and cool completely before glazing.

To make the glaze

  • Combine all the ingredients in a jug and mix well to combine until smooth. The mixture should fall easily from  your whisk and leave a slowly sinking trail in the bowl. If you find the mixture too stiff add some more milk in 1/2 teaspoon increments.

To finish

  • Place the cake on a cooling rack with some foil or baking parchment underneath to catch the drips.
  • Drizzle or paint the glaze onto the fully cooled cake until coated.
  • Spinkle with finishing decoration of you choice.
  • Slice, serve and enjoy!2015-11-18 16.55.00-1