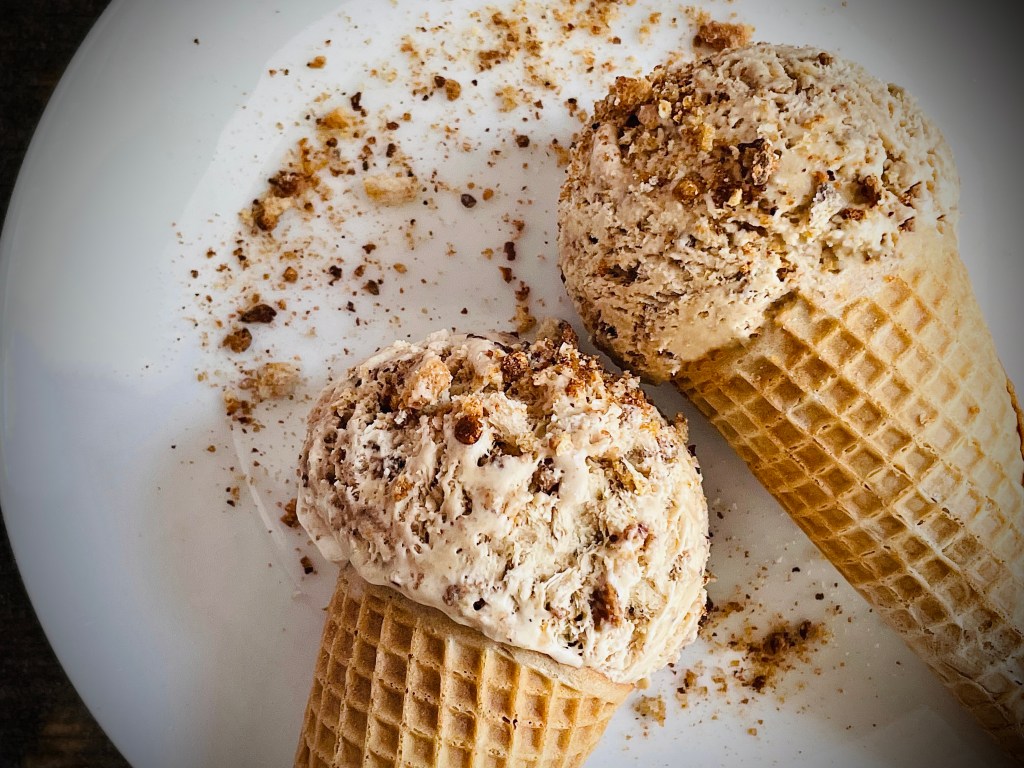
3 cups brown (wholewheat) bread, cut into small cubes
1 Tablespoon maple syrup
½ cup brown sugar
2 ½ cups whipping cream
1 can (14oz) sweetened condensed milk
1 cup Porter stout
Method
Set your broiler to high. Line a baking sheet with aluminium foil
In a large bowl combine the brown bread cubes, maple syrup and brown sugar. Toss to combine and coat the cubes in brown sugar
Transfer the coated cubes to the prepared baking sheet and spread in a even layer, avoiding clumps. Any stray sugar can be sprinkled over
Place under the broiler for between 5 to 10 minutes, tossing frequently, until toasted and crispy. Use a spatula to turn the bread pieces as the sugar makes them extremely hot to handle and you risk burning your fingers
Remove and leave on the baking sheet to cool fully
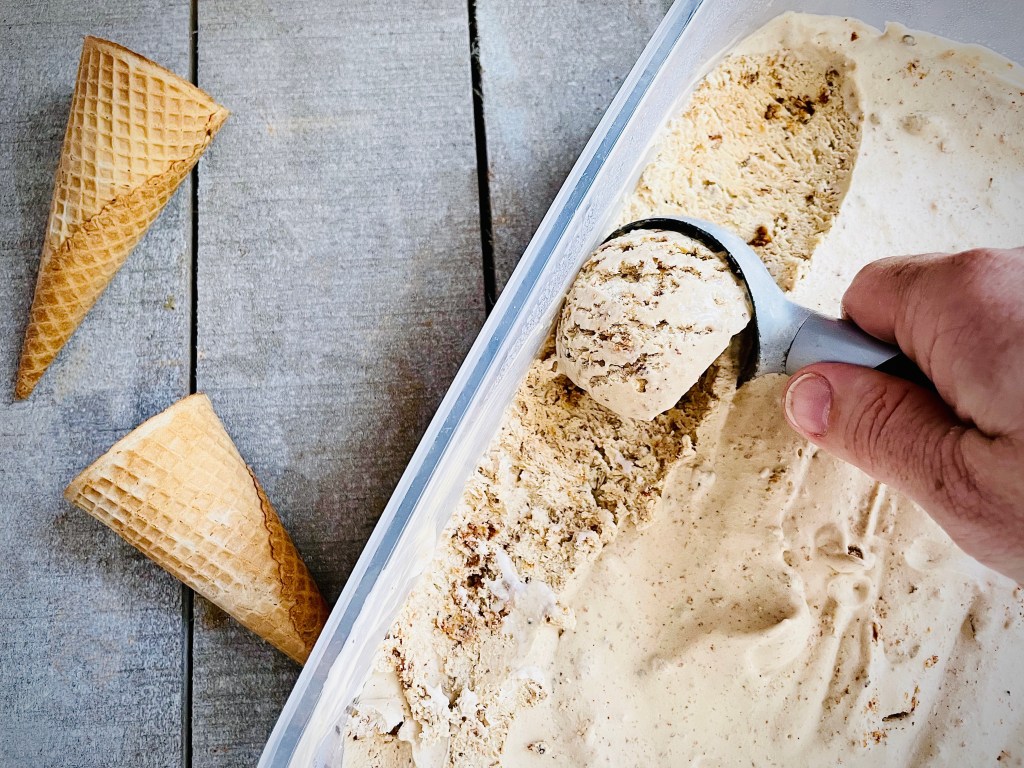
When cooled fully, blitz in a food processor to make crumbs. You don’t want them to be too fine so I usually do about 3-4 pulses
Set aside until needed later
Whip the cream until soft peak stage using either a hand mixer, or a stand mixer
In a separate bowl, or container, (I use a 1 Pint deli cup) combine the condensed milk and porter, stirring until mixed
Pour the porter mix into the whipped cream and gently fold to full combine
Add in most of the toasted brown breadcrumbs, reserving ½ cup for serving. Fold in the crumbs again using a gentle motion as you don’t want to deflate the cream
Pour the mixture into a freezer-proof container, cover the surface with plastic wrap and freeze leave until fully frozen, minimum 6 hours
To serve ice-cream remove from freezer and leave at room temperature for 5 mins before scooping to serve
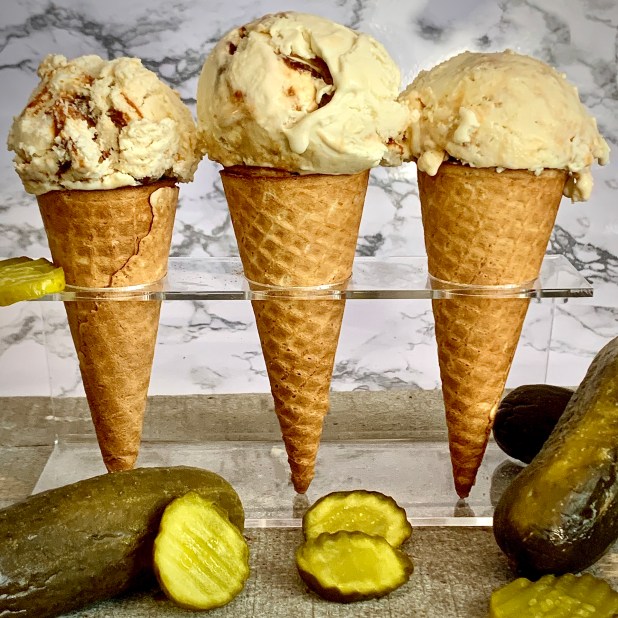
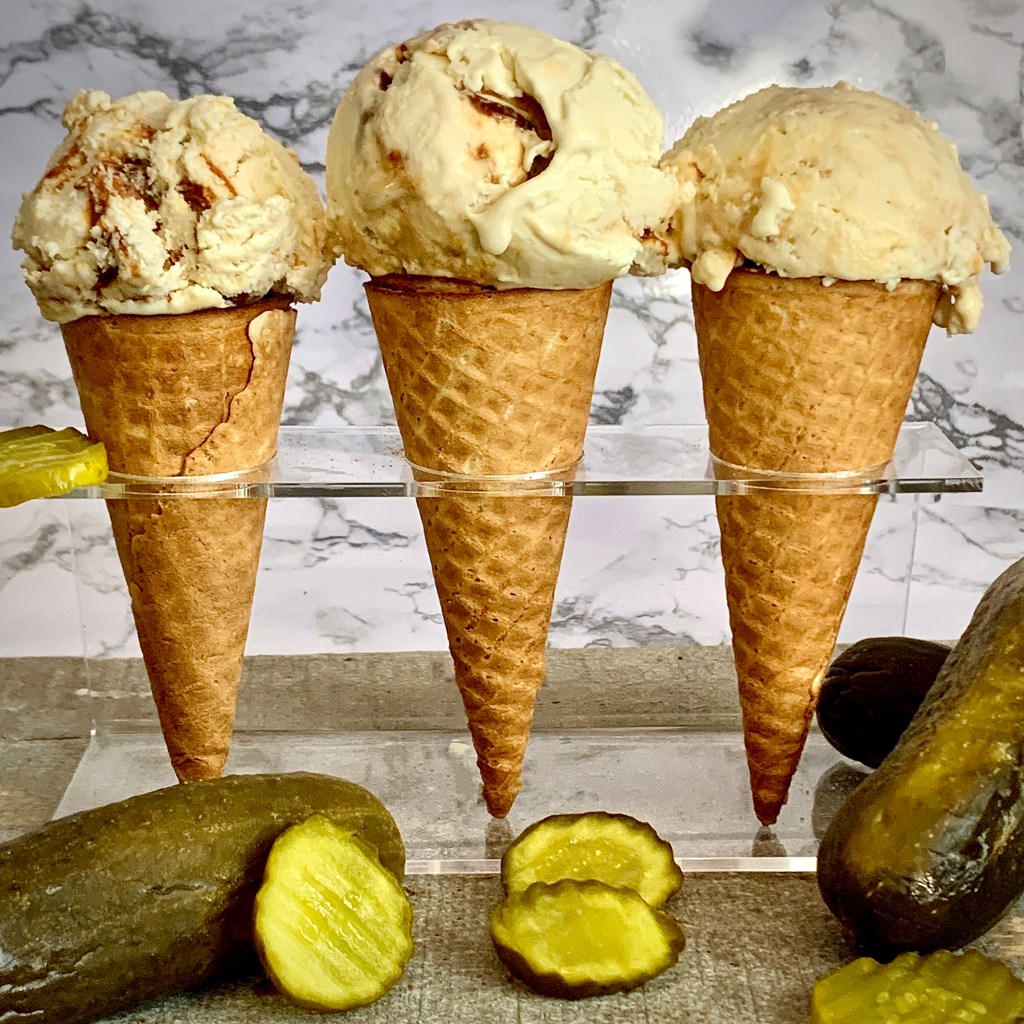
No, I haven’t finally taken leave of my senses! This is indeed a recipe for pickle ice cream…with peanut butter. Peanut butter caramel at that. Whist it might sound like I’ve thrown everything at this but the kitchen sink, all for the sake of sensationalist recipes, as ever there is method in my wild thinking.
For starters July is both National Pickle Month AND national Ice Cream month. See? Already I have a reason! I’ll have to come clean though, admitting I’m not an fan of pickles myself. The texture that is. The zesty, vinegar flavour has however proved quite addictive to me over the years. Which is where this recipe is a win.
The ice cream here carries the zesty, almost herbaceous flavour of the pickle itself without any of the (for me) unappealing nubs of vegetable. It carries a certain freshness to it which makes consuming it on Summer days all the more appealing.
So where does the peanut butter come on? Well, as so is often the case with me I fell down a food rabbit hole whilst doing research on the ever so humble pickle and its varying uses. One of the ones that popped up and immediately piqued my interest was the “PB & P” sandwich- Peanut Butter & Pickle. The peanut butter and pickle sandwich isn’t some new viral trend but has in fact been a low-profile favorite in the U.S. since it appeared on deli counters during the Great Depression. A little mentioned stalwart of many a grandparent out there it would seem. On trying it, the way that the creamy peanut butter plays off the crunchy, briny pickle is really kind of amazing. Give it a go!
Salted caramel swirl ice cream is one of my favorites- both taste and visuals are satiated tracing the sweet rivulets through sweet creamy mounds. So why not include that here. I use peanut butter as a base for the caramel swirl in order to tie all my reference points together – paying homage to bygone favorites with a nod to my own personal ones. And hey, it’s Summer! Who doesn’t like ice cream?
Check out this #recipe for Pickle Ice Cream w/ Peanut Butter Caramel Swirl
Heat granulated sugar and glucose in a heavy-duty saucepan over medium heat, stirring constantly (use a heat-resistant spoon or spatula). Melt the sugar into a thick brown, amber-colored liquid as you continue to stir. Be careful not to burn it!
Once sugar is completely melted, immediately stir in the peanut butter until melted and fully combined. The caramel will bubble rapidly when the peanut butter is added.
Return to heat when it’s combined and cook for 1 minute without stirring
Remove from the heat and carefully stir in the heavy cream in a slow, steady stream. There will be a steamy reaction so please be careful! After all the heavy cream has been added, stop stirring and allow to boil for 1 minute. Keeping watching in case it bubble sup too much. If it does, reduce the heat.
Remove from heat and stir in the salt. Set aside to cool to room temperature before using in the ice cream. The sauce will thicken as it cools
Pickle Ice Cream
Combine the pickles and brine in the carafe of a blender, then blend until pureed, about 1 minute
Strain the puree and discard any pulp. Save 1/3 cup pickle liquid and discard the rest
Beat the cream cheese in a large bowl with a mixer on medium-high speed until smooth and creamy
Add the condensed milk, honey and pickle liquid to the cream cheese and continue to mix until smooth
In a separate large bowl whip the heavy cream until firm peaks form. Fold in 1 cup of the whipped cream into the condensed milk/ pickle mixture until combined
Fold this lightened mixture into the whipped cream until well blended, being careful not to overwhip in case you deflate the mixture
Pour 1/3 of the mixture into a plastic container, or loaf pan, cover and freeze, for 1 hour. Keep the cream/ pickle mix in the fridge, covered
Remove from the freezer and drizzle over 1/2 caramel sauce in swirling pattern. Pour over another 1/3 of the cream/pickle mixture and return the ice cream to the freezer for another hour
Repeat Step 8 as above with the remaining caramel sauce and cream/pickle mixture. Before returning to the freezer run a chop stick or knife through the ice cream the swirl the mixtures together.
Cover and return to the freezer for minimum hours, or overnight.
To serve, remove the ice cream from the freezer 5-10 minutes before serving so that it is scoopable
I can just bet your reaction upon reading the title of this recipe post. Furrowed brow, wrinkled nose…who knows…maybe even a snort of disbelief? “Garlic in a dessert? Well surely that CAN’T be right. He’s pushed fooling around with flavors too far this time!” Well for those of you who have been on this weirdly, wonderful flavor train of mine for while you might remember I have long been a advocate of black garlic and it’s uses in the sweeter side of things in the kitchen- check out my Living in the Black from a few years ago. Yes THAT long!
To give any newcomers a quick rundown-
Black garlic is fresh raw garlic that changes with time through the use of low heat and humidity of about 70% in a process called the Maillard reaction. During this process, the cloves turn a distinct black color. The garlic’s texture and flavor change as well. The flavor of black garlic has the slight tang of tamarind or balsamic vinegar and a mild sweetness that resembles rich molasses with the complexity and umami notes of soy sauce. Its cloves are much softer than fresh garlic, and stickier.
Thank you for coming to my TED talk.
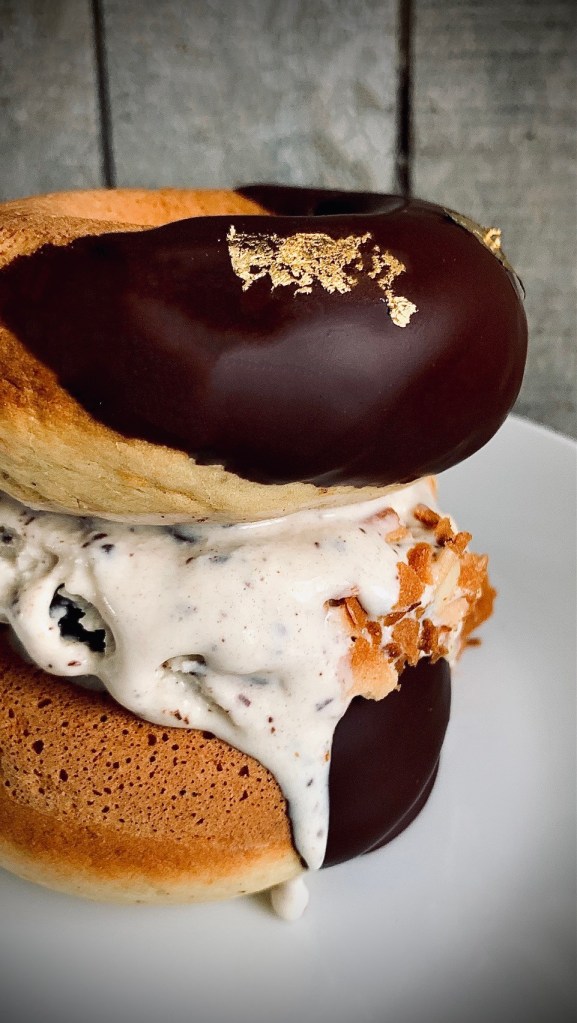
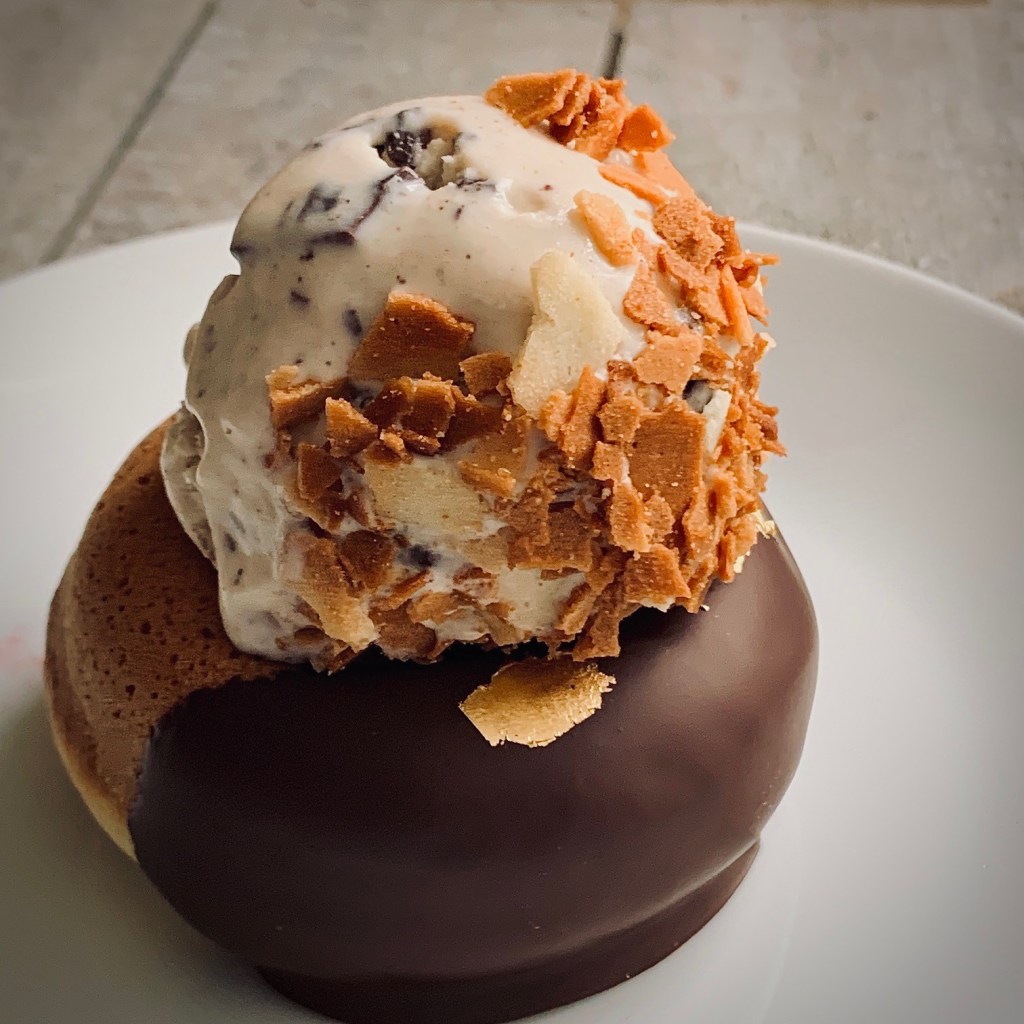
Here I’ve initially paired the black garlic itself with some dark chocolate in an ice cream. The ice cream itself is left wholly unflavored save for a touch of sweetness from a little honey. This allows the flavor of the black garlic to shine through, and work really well with the bitter sharpness of the dark chocolate. for me it’s a wonderfully decadent, almost avant-garde treatment of the humble stalwart dessert. I should point out that for me this recipe is all the more appealing as it’s a “no churn” recipe, you just need to tale a bit more time in the planning of it.
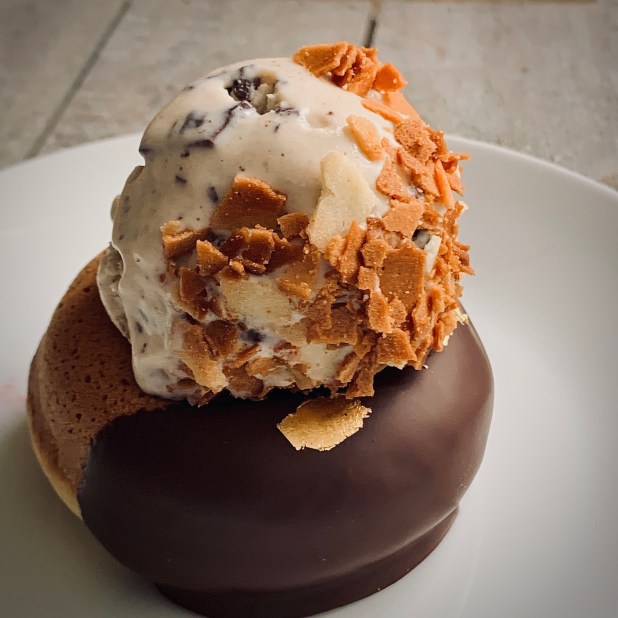
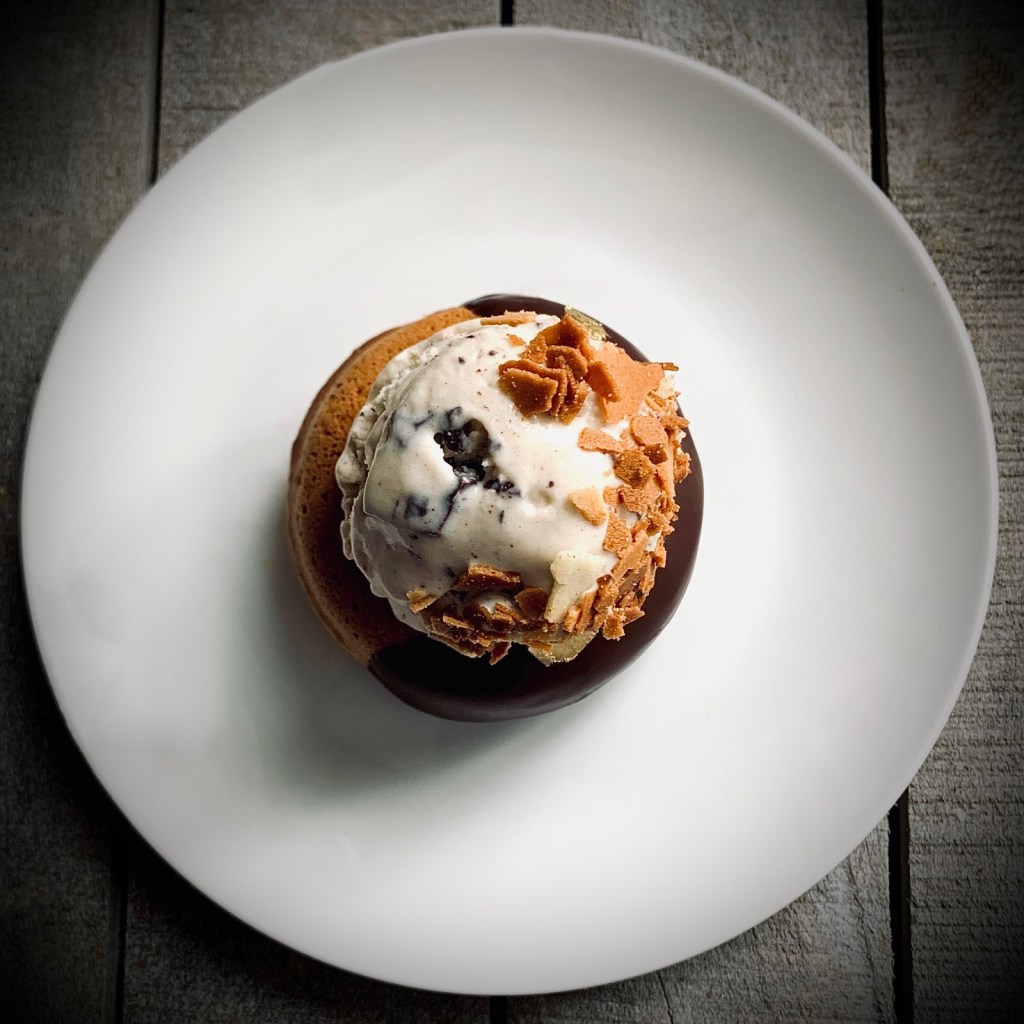
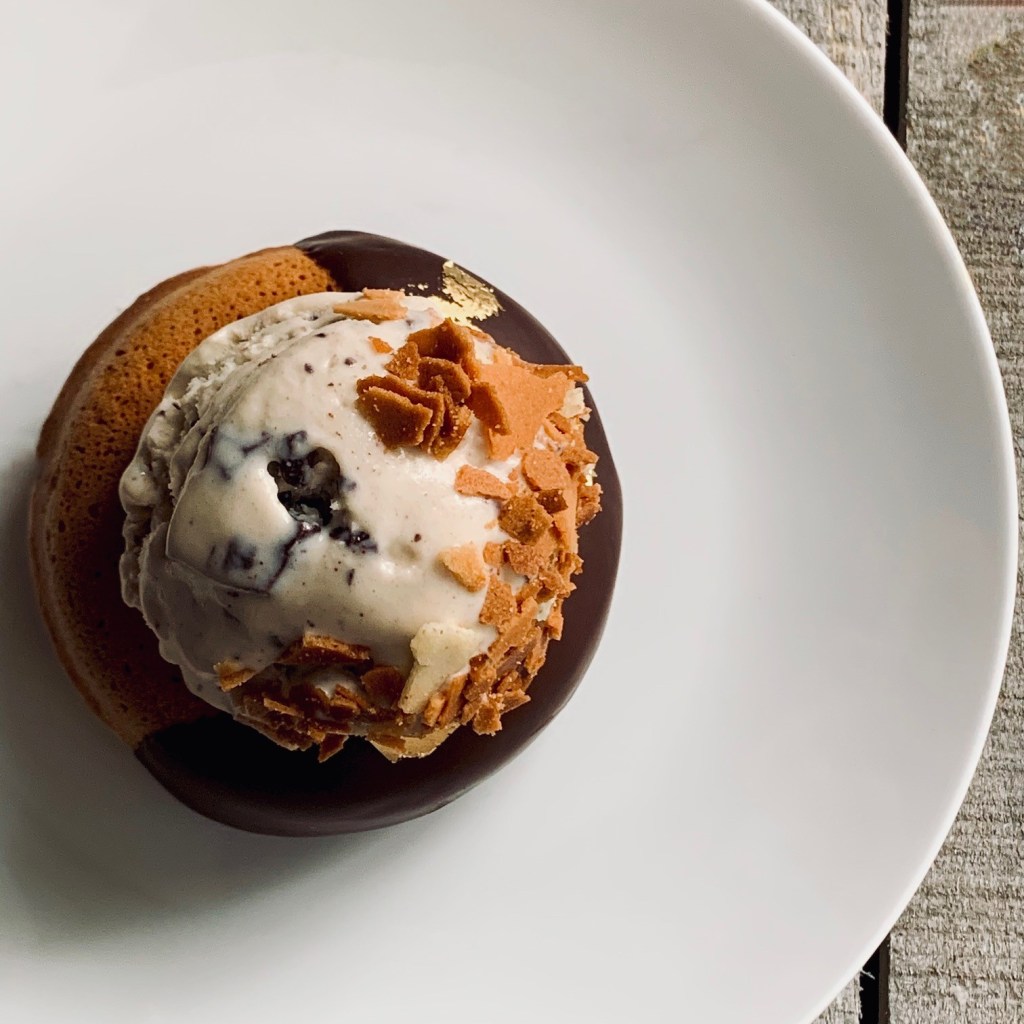
As for the donuts (which are baked, not fried) the whole idea for this came from a quest to create an ice cream sandwich that was just “a little bit” different. Black Garlic was my “gimmick” in the ice cream and well off course something left of center was needed as the sandwich vessel itself. That’s where the donuts come in. The flavors of orange and fennel aren’t just a random selection for intrigue value. The fennel anise, citrus of orange and that molasses-like tang of black garlic work together in a combination that takes on a herbaceous-like quality that does indeed elevate this beyond your usual ice cream sandwich.
Be warned though- unique elevated flavors or not, this is still an ice cream sandwich- so be prepared to get messy!
Black Garlic Ice Cream Sandwich Recipe #recipe #greatchocolateshowdown
2 cups and 1/2 cup heavy whipping cream, separated
2 cloves black garlic, squashed to a paste
1 1/2 teaspoons honey
1 can (14oz) sweetened condensed milk
4oz dark chocolate, cut in to chunks
Orange & Fennel Donuts
½ cup (1 stick) butter, softened at room temp
½ cup sugar
¼ cup light brown sugar
Zest of 2 large oranges
2 ½ cups AP flour
1 ½ teaspoon baking powder
¼ teaspoon bicarb of soda
¾ teaspoon salt
2 teaspoons ground fennel
2 eggs, room temperature
1 Tablespoon orange juice
1 teaspoon vanilla extract
1 cup whole milk, room temperature
To Decorate
6oz Dark chocolate, melted
Gold leaf, optional
Dragees, optional
Feuilletine, optional
Method
Black Garlic Ice Cream
In a large saucepan combine 2 cups of heavy whipping cream and the black garlic paste
Heat over a medium heat, stirring occasionally until small bubbles start to form at the edge of the milk
Reduce heat to low for 5 mins
After 5 mins remove from heat and leave to infuse for 15 mins. After this time strain the cream/ garlic mixture in to a small bowl to remove the garlic pieces
Cover surface with plastic wrap to prevent skin and place in refrigerator to cool fully
Once the cream mixture has cooled fully, transfer to a large bowl, add in the 1/2 cup of whipping cream and whisk to soft peak stage
Fold in honey and condensed sweetened milk until fully incorporated
Pour the mixture into a freezer-proof container, cover the surface with plastic wrap and freeze for 2 hours
After 2 hours, remove ice cream from freezer and fold in chocolate chunks
Return to freezer and leave until fully frozen, minimum 6 hours
To serve ice-cream remove from freezer and leave at room temperature for 5 mins before scooping to serve
Orange & Fennel Donuts
Preheat oven to 425 degrees C. Prepare donut pans with butter, or baking spray
In stand mixer bowl with paddle attachment, cream the butter, sugars and orange zest until light and fluffy (apx 3 mins)
In a separate medium bowl combine the flour, baking powder, baking soda, salt, ground fennel and whisk together
Reduce mixer speed to medium, add eggs and vanilla extract and beat until combined, scraping the sides occasionally
Reduce speed to low and add in flour mixture in 2 batches, alternating with milk. Mix until just combined
Transfer batter to piping bag with an open nozzle (or just snip the end off) and pipe in donut pan. Bang to remove bubbles
Bake for 10- 12 minutes until springy, skewer test until clear
Leave to cool in pan for 5 minutes then remove to rack to cool fully
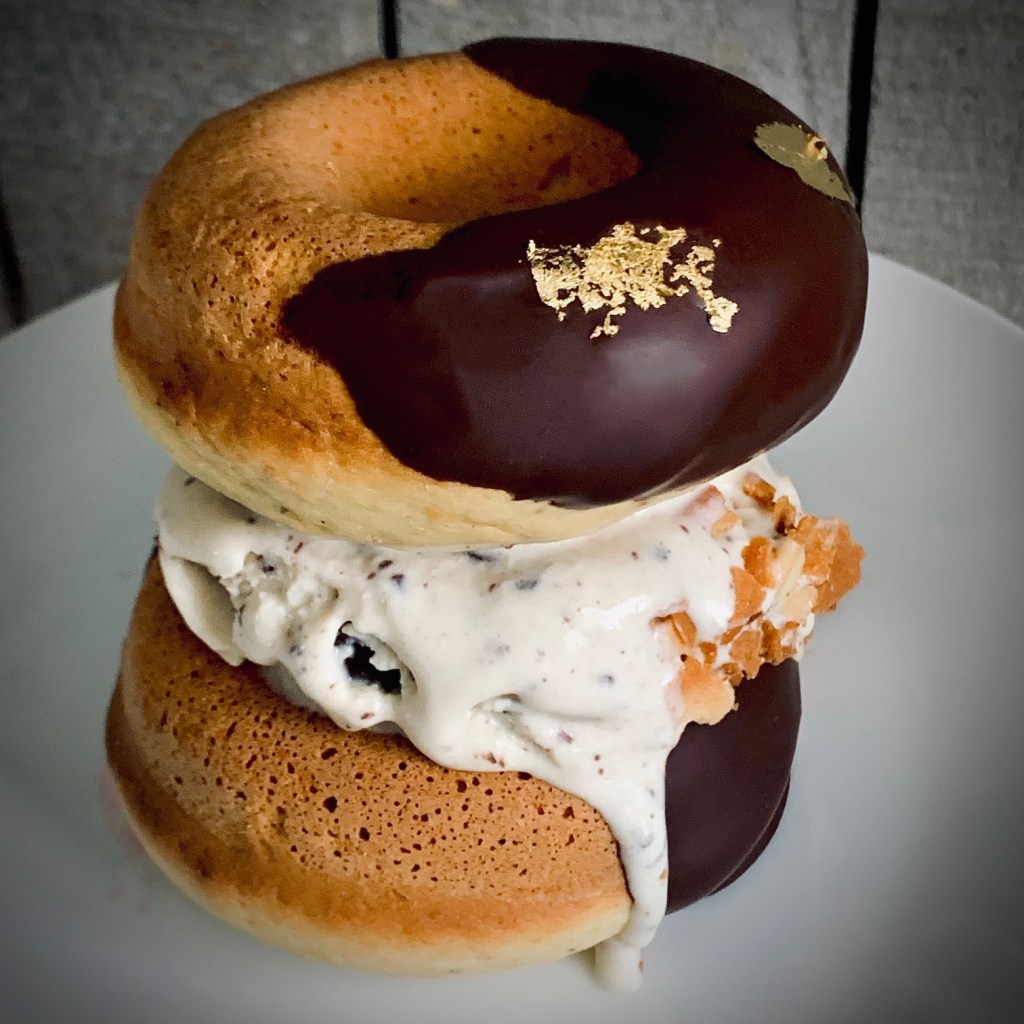
To finish the donuts dip in the melted chocolate and decorate to you liking
*Serve the ice cream and donuts however you like. Single scoop on a single donut and dusted with some feuilletine, adding some tasty textural crunch (I highly recommend this!); single scoop in an epic double donut sandwich or double scoop in a double donut extravaganza. The choice is yours- go WILD!