Golden Coconut Shortbread

a9fe5f0b-2a7a-4a1d-931f-4ebf3156ab5f

Shortbread is the stuff of legend in our house. Having a family that is Scottish means they’re well qualified to judge what falls in the parameters of acceptability. A fussy bunch they are and rightly so. Many a commercial highland cookie has fallen for being “too crumbly”, “not buttery enough” or “too damp” to name a few of criticisms. So I set about experimenting to find that correct combination of ingredients that would yield a shortbread that crumbly enough with falling to pieces; buttery enough would feeling too greasy or damp in your mouth and crisp enough to yield enough with a satisfying snap. In the words of everyone’s favourite flaxen haired domestic critic, “Just right”.

The historic recipe for shortbread hails from Scotland and in it’s basic form is one part sugar; two parts butter and 3 parts plain flour. Time and tide has, like many an ancestral recipe, meant that the original recipe has been tweaked and adjusted with many families input and alterations.

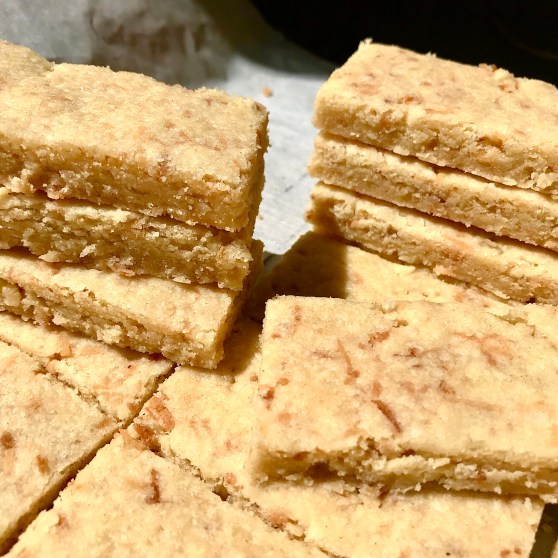
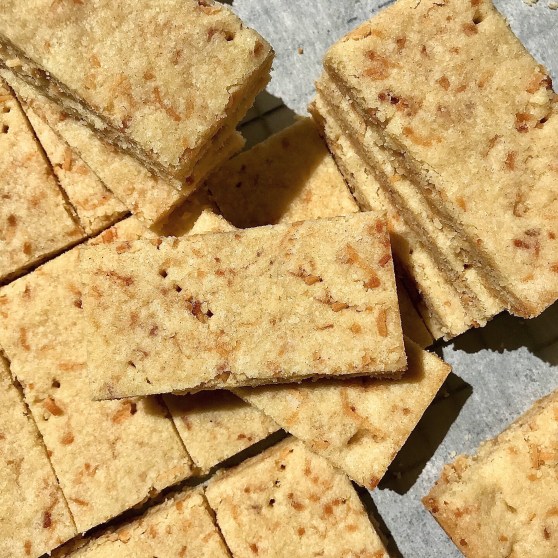
My recipe here has been tweaked from an original from my mom. I found the additions of the more unusual dry ingredient of semolina, rice flour and cornstarch increase the more desirable textures of crispness and crumbliness without marring the buttery taste. The inclusion of the ancient grain flour of Red Fife was purely a whimsical  addition as I was exploring baking with differing flour types at the time. It adds a subtle nutty flavor to the finished shortbread cookie that works really well with the signature butteriness of the cookie. And the toasted coconut? Well who doesn’t like toasted coconut?

img_6492

Ingredients

  • 1 cup shredded coconut
  • 1 cup AP Flour
  • 2/3 cup Red Fife flour
  • 1/3 Semolina
  • 2 Tablespoons Rice Flour
  • 1 1/2 Tablespoons Cornstarch
  • 1/2 cup and 2 tablespoons fine sugar, divided
  • 1/2 Teaspoon Kosher salt
  • 1 cup/ 2 sticks salted butter, cold and cubed

Method

  1. Lightly grease and line a 9″ x 12″ traybake tin
  2. In a pan over a medium heat toast the shredded coconut until fragrant and lightly browned. Remove from heat and set aside until needed
  3. In a large bowl combine the flour, semolina, rice flour, cornstarch, sugar and salt. Whisk together to further combine
  4. Add in the cubed butter and rub together with your fingertips until the mixture is just beginning to bind together. Every so often do a  quarter turn of the bowl to make sure you’re using all the dry mixture. You’ll want a texture somewhere between breadcrumbs and damp sand before you stop. Be wary of overworking the butter into the mixture – you want to avoid a dough that is feels slimey from the butter melting too much into the dry ingredients
  5. Tip in the toasted coconut and lightly rub in with your fingers until combined
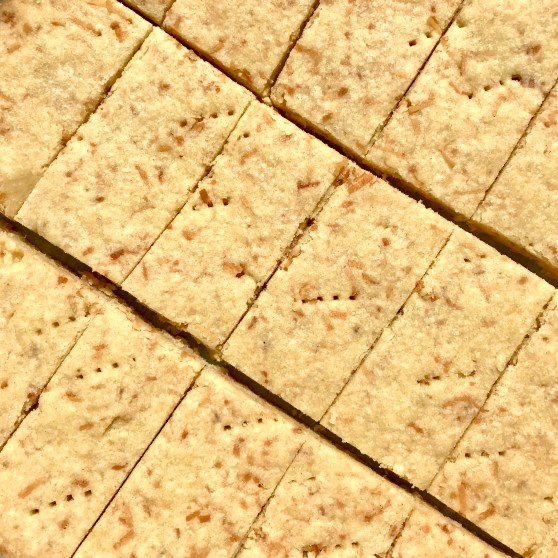
  6. Tip the crumb mixture into your prepared tin and press the dough so that it forms a solid layer. Level the surface with the back of a spoon or measuring cup, making sure the mixture is evenly spread and uniform. Prick all over with a fork
  7. With a knife or pizza cutter score the shortbread into 24 rectangular pieces (2 cuts by 7 cuts) taking care not to actually cut the full way through
  8. Refrigerate for 30 mins minimum
  9. Preheat your oven to 325°F
  10. Remove the shortbread from the fridge and bake for about 35 minutes or until a very pale golden brown.
  11. Remove from the oven and cut fully through the baked shortbread with a knife or pizza cutter at the score lines you previously made
  12. Sprinkle with remaining 2 tablespoons of fine sugar and leave to cool in the tin for 15 minutes. Carefully lift the fingers out of the tin with a palette knife or the parchment paper overhang and finish cooling on a wire rack
  13. Store in an airtight tin for up to a week

img_6494


Millionaire’s Shortbread

img_5688

“Millionaire’s Shortbread”, “Caramel Slice”, “Millionaire’s Slice”…call them what you will these caramel laden shortbread bites remain hugely popular from many a childhood memory. Investigation would point to it’s origin’s thanks to our Antipodean friends in the ’70s and as such the initial recipe remains unchanged- buttery shortbread, sweet caramel and luxurious chocolate.

Yes it may seem like such a chore laboring to make each of those individual layers but the end result is surely worth it? None of the intrinsic layers require any great skill in the kitchen, but with some attention and patience a batch of delicious Millionaire’s Shortbread is pretty much a cinch. 

The shortbread layer is first out of the starting block. The pale, crumbly dough that you’ll press into you pan will be baked to a golden, buttery slab of goodness. I mention in the recipe below a handy trick that I’ve used over time and in addition have seen cited in a few other recipes. Using a measuring cup or spoon to compact the freshly baked biscuit layer helps avoid surplus crumbling when slicing the baked shortbread. Simply press the back of the measuring cup (I find 1/3 cup a good size) or spoon gently but firmly on to the shortbread surface in it’s entirety, taking can not to drag it lest you pull some of still-setting crumbs with you. Once this is done you can leave to cool (or pop it in the fridge as I do) and carry on. See- that wasn’t so hard was it? 

And now for the infamous caramel layer! Yes, boiling sugar in a pan and the resulting caramel can sound daunting but with some care and a good candy thermometer on hand those fears will soon be waylaid. I have two pointers here a) constant gentle stirring is a lifesaver in order to avoid the molten mixture catching at the bottom of the pan and charring b) adding in heavy cream to the caramel mixture not only adds a luxurious touch but also keeps the mixture emulsified and avoiding separation which can occur due to heating the condensed milk. The last thing you want ruining your hard work is a gluey, grainy approximation of caramel. 

As for the final finishing chocolate layer, the one that always gets me salivating, there is one common pitfall. One that I can admit to making more than a few times. Don’t forget to add butter to your chocolate for the finishing coating. Practice has taught me that just melting the chocolate and slathering it on in it’s virgin state leads to a brittle layer that frustratingly cracks at every cut and bite. Including the butter incorporates enough yield into the final set surface that you can achieve those insta-worthy cut pieces and decedent mouthfuls without covering yourself in chocolate splinters.

If you do venture to make these you’ll see (and taste) just why they have proven so popular again and again, and indeed traveled the world over. Just remember to share!

c79e439e-b05d-4385-b31a-9a5eb4a4658e

Ingredients

Shortbread Base

  • 2 1/2 cups all-purpose flour
  • 1/2 cup granulated sugar
  • 3/4 teaspoon kosher salt
  • 2 sticks salted butter, melted

Caramel Filling

  • 1 (14-ounce) can sweetened condensed milk
  • 1 cup brown sugar, packed
  • 1/2 cup heavy cream
  • 1/2 cup golden corn syrup
  • 1 stick salted butter
  • 1/2 teaspoon salt

Chocolate Topping

  • 8 ounces semi-sweet chocolate
  • 1 tablespoon salted butter

Method

Shortbread Base

  1. Pre-heat your oven to 325°F. Grease and line a 13×9″ baking pan with parchment paper leaving some hanging over edges of pan to lift out after baking
  2. In a large bowl combine the flour, sugar, and kosher salt. Add melted butter and stir until flour is mixed and dough is crumbly
  3. Transfer to your prepared baking pan and press evenly over bottom of prepared pan. Using fork, pierce dough at regular intervals all over. Bake for 30 minutes, or until light golden brown and firm to touch
  4. Remove from oven. While still warm, use a the back of a measuring cup and press surface of shortbread slightly to compress. Although this part is optional it helps when cutting later. Set aside until needed later

Caramel Filling

  1. Combine the caramel ingredients together in large saucepan. Cook over medium to low heat, stirring frequently to avoid any scorching on bottom for 20 minutes, or until mixture reaches 240°F (Soft Ball stage on candy thermometer)
  2. Carefully pour over shortbread while hot and spread to even thickness. Let cool completely for 1 1/2 hours, or until caramel is firm to the touch

Chocolate Topping

  1. In a small microwave safe bowl melt the chocolate and butter in microwave for 30 second intervals on high, stirring in between until melted. Stir to incorporate the butter until smooth. I find that 2 blasts in the microwave is usually enough
  2. Pour the chocolate over the cooled caramel layer and tilt pan to cover to edges and look smooth or use a spatula or knife and spread back and forth across the surface. Refrigerate the finished shortbread for a couple of hours or until the chocolate topping is set
  3. Lift out of pan using parchment overhang onto a cutting board. Slice into bars*. For the size of tin I use here, I cut so I have 3 by 8 rectangular “bars” (2 cuts x 7)

*I’ve found the best way to slice the shortbread so that you get neat, clean bars is as so- Remove the fully cooled shortbread traybake from the refrigerator about 15 minutes before you want to slice. Fill a tall heat-proof jug full of boiling water so that it covers the blade of a sharp knife. Let the knife stand in the jug for 2 minutes. CAREFULLY wipe the knife off of any water and make your cut into your shortbread. Slice once- quickly and smoothly, then stand the knife back in the jug of boiling again. You don’t need to leave it for long this time, a simple full plunge of the blade will do. Again CAREFULLY wipe the blade clean of any water or chocolate residue. Carry on cutting, plunging and wiping until all the traybake is cut to your required size. Leave for a few minutes so the cur bar edges firm up then serve.

img_5683