Flourless Chocolate Cake

img_5483

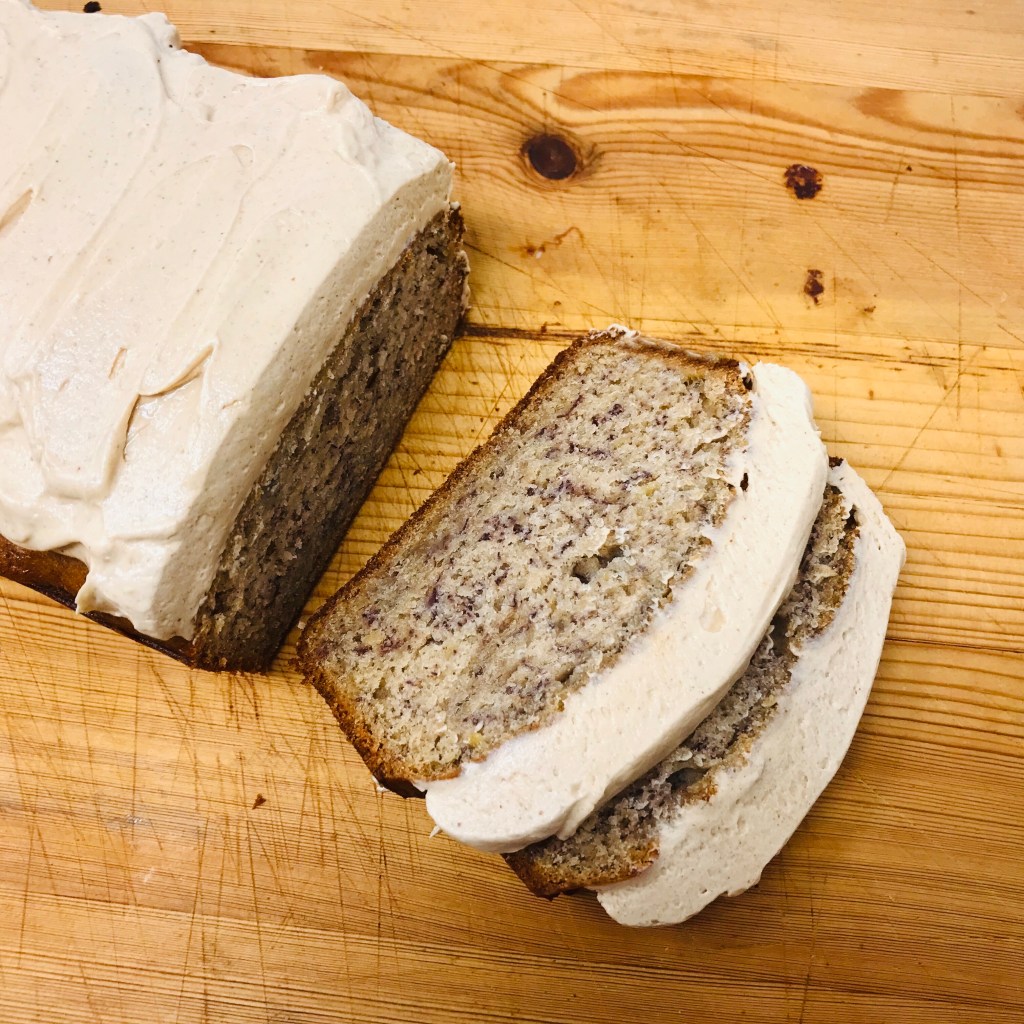
Okay this was a surprise hit which a lot of you have been asking about. I made it as I was itching to bake but given current times I’m having to be somewhat frugal with particular ingredients, namely flour and yeast. My yeast problem I appear to have solved (there’s a post coming on that) but flour is still a questionable item, which appears to elude me.

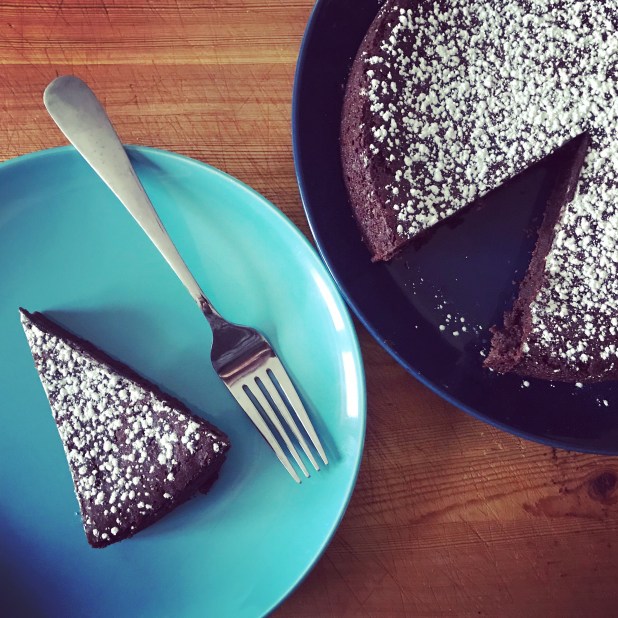
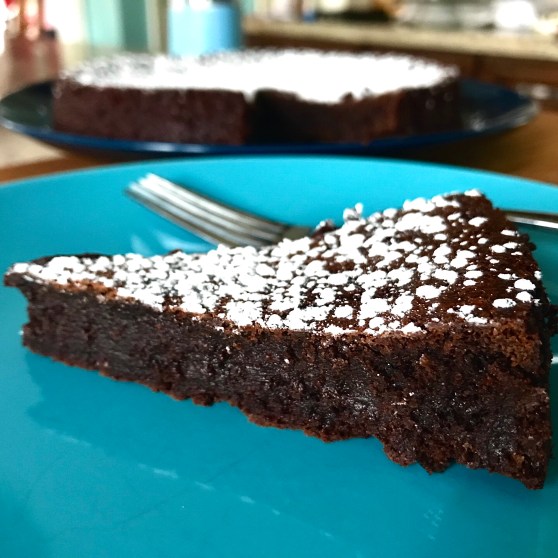
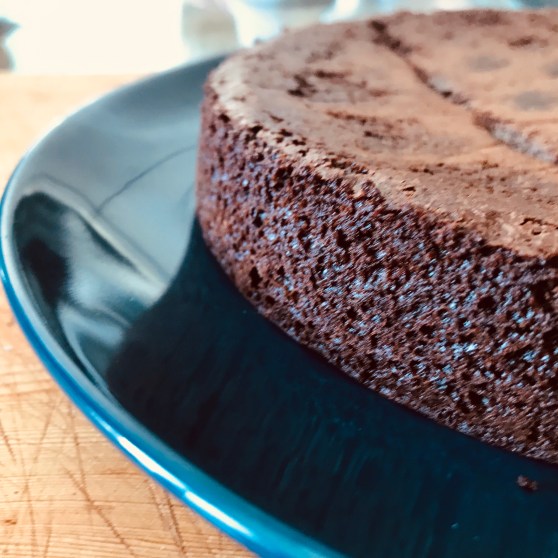
Flourless chocolate cake seems to be one of those things that always pops up on a menu, appealing to all and sundry. So it seemed a pretty perfect fix here. I’ve tried it a few times with varying results across the board from fudgey & brownie like to cakey (and to be honest pretty dry). The recipe here results in the former-  fudgey and reminiscent of the best brownie, just thick enough to whisper indulgence but thin enough not to push you over the edge of regret. A surprise addition of instant coffee granules helps amplify the chocolate flavour without pushing it in to the realms of mocha flavoring.

I tend to like the cake just as is, with a snowy dusting of icing sugar. But feel to dress it up anyway you like – a scoop of cool vanilla ice cream perhaps? or maybe a drizzle of booze-laden cream maybe? The rules are yours to make…or break.

img_5478

Ingredients

  • 1 cup semi-sweet chocolate chips
  • 1/2 cup salted butter
  • 3/4 sugar
  • 1/4 teaspoon kosher salt
  • 1 teaspoon vanilla extract
  • 3 large eggs, beaten
  • 1/2 cup cocoa powder
  • 1 teaspoon instant coffee granules
  • Icing sugar, to dust (optional)

Method

  1. Preheat your oven to 375 degrees F. Grease and line an 8″ cake pan. Set aside until needed later
  2. Combine the chocolate and butter in a large microwave-safe bowl, and heat for 30 seconds. Remove stir and heat again for another 30 seconds. Stir until the chocolate is melted and the mixture is smooth. (or you can melt them together in a heat-proof bowl over a double-boiler)
  3. Add the sugar, salt, vanilla extract and stir to combine well
  4. Add the beaten eggs and stir until smooth and uniform in color
  5. Finally add in the cocoa powder and instant coffee granules. Stir until just combined- be careful not to over-mix here
  6. Pour the batter into your prepared cake pan, gently smoothing the top. Bake at the preheated temperature for 25 minutes, or until the the top has a thin crust and the centre reads 200 degrees F on an instant read thermometer.
  7. Remove the cake from the oven and place on a cooling rack fro 10 minutes. After this time use an offset spatula (or butter knife) to run around the edges of the cake and loosen it from the pan.
  8. Place your serving plate on top of the cake in the pan and carefully turn it upside down to invert the cake out onto your serving plate. Let the cake cool completely, either at room temperature or in the fridge. If cooling in the fridge remove it at least 30 minutes prior to serving to allow it to come to best temperature.
  9. To serve dust the top of the cake liberally with icing sugar if desired.

926dfc67-3fc3-498e-9887-dc000dd1448b

Tahini Double Chocolate Cookies

Makes 18-20 apx

Ingredients

    • 1/2 cup salted butter (1 stick), room temperature
    • 1/2 cup white granulated sugar
    • 1/2 cup packed brown sugar
    • 1/2 cup tahini butter, well mixed
    • 1 large egg
    • 1 1/4 cups all purpose flour
    • 3/4 teaspoon baking soda
    • 1/2 teaspoon baking powder
    • 1/4 teaspoon kosher salt
    • 1 teaspoon vanilla extract
    • 2oz semi-sweet chocolate
    • 2oz white chocolate

Method

    1. Chop the chocolate in chunks. You don’t want too fine a piece- irregular and varied sizes look a lot better in the finished cookie. Set aside until needed
    2. Line a cookie sheet with baking parchment and set aside until needed
    3. In the bowl of a stand mixer beat the butter, brown sugar and white sugar until creamy (about 10 mins at medium speed)
    4. Mix in the egg, followed by the tahini butter and continue mixing until fully combined. Add in the egg and vanilla paste (or extract) and again mix to combine fully
    5. In a separate bowl, combine the flour, baking soda, baking powder, salt and whisk to combine.
    6. Gradually add the combined dry ingredients into the sugar/butter mixture. Mix on medium/low speed until fully incorporated
    7. Fold in the chocolate chunks. Mix until well mixed through the dough (I find here it easier to fold by hand rather than using a spatula or spoon. It just depends on what you’re more comfortable with)
    8. Cover the dough with cling wrap and refrigerate the dough for between 20- 30mins
    9. Preheat your oven to 325°F
    10. Using a medium cookie scoop (2 tbspn apx) shape the dough into 1 inch balls. Place the balls of dough about 2-3 inches apart on the pre-limed cookie sheet
    11. Bake at 325°F until light brown, about 15 to 17 minutes. Remove the cookies from the oven and let cool on their baking sheets for 5 minutes. After that, transfer the cookies to a rack to cool completely

*The baked cookies will keep for up to a week in an airtight container

Buttermilk & Cardamom Banana Bread w/ Whipped Peanut Butter Frosting

img_4944

Ingredients

Whipped Peanut Butter Frosting

  • 1 1/2 cups powdered sugar
  • 2 cups smooth peanut butter
  • 1 cup salted butter, room temperature, cut in to pieces
  • 1 teaspoon vanilla extract

Buttermilk & Cardamom Banana Bread

  • 2 1/2 cups All Purpose flour
  • 1 1/4 cup sugar
  • 2 large eggs
  • 2 cups mashed over-ripe bananas (about 4)
  • 1/2 cup buttermilk
  • 1/2 cup butter, room temperature
  • 1 teaspoon baking soda
  • 1 teaspoon kosher salt
  • 1 teaspoon ground cardamom
  • 1 teaspoon vanilla extract
  • 1/4 teaspoon ground cinnamon

Method

To make the Banana Loaves

  1. Preheat oven to 350°F
  2. Grease and line two 8.5″ x 4.5″ baking tins
  3. In a large bowl combine the flour, baking soda, salt, cinnamon and cardamom. Set aside until needed
  4. In bowl of stand mixer, with paddle attachment, cream the butter and sugar until pale and fluffy
  5. Add eggs one at a time, beating well after each, until fully incorporated
  6. In a separate jug whisk together the buttermilk, vanilla extract and bananas until combined
  7. Add the banana mixture to the dry flour mixture from earlier. Fold well together until just combined
  8. Divide and pour into the prepared loaf tins
  9. Bake in preheated oven for 45-40 minutes, or until an inserted skewer comes out clean, and the tops of the loaves are golden brown
  10. Remove from the oven and allow to cool on a rack for 15 minutes before running a spatula around the sides and turning the loaves out onto a cooling rack
  11. Leave the loaves to cool completely before topping with the Peanut Butter Frosting (see recipe below)

*These loaves can be stored in the freezer, without frosting topping, for up to 3 months. Wrap in cling wrap and then tightly in aluminium foil. To serve, remove and allow to defrost to room temperature before topping with whipped frosting

To make the frosting

  1. Combine all ingredients in the bowl of a stand mixer fitted with paddle attachment
  2. Beat on low/medium speed until all ingredients are combined
  3. Once combined increase to high speed and whip for 5 minutes until light and fluffy
  4. Use a spatula or spoon to spread on top of cooled banana bread loaves

*To store the frosting: Transfer to an airtight container. Will keep in the fridge for up to 5 days. To use remove from fridge and allow to soften to room temperature to become spreadable


Meyer Lemon Bars

So these were part of the “Citrus Binge” I went on recently (see my other post on Minneolas Tangelo & Cardamom Cheesecake). Meyer Lemons have an almost mystical place in my  mind. Living in the UK they were harder to get hold of than here in Canada, AND when they were available they certainly didn’t last long! Needless to say when I saw them whilst shopping of course I was itching to make something from them!

I was pleasantly surprised when I got my hands on them. Scent-wise yes they evoked sun-kissed, floral dense getaway images but there was also a heady herbaceousness to their smell. It instantly brought to mind citrus-scented herbs like lemon verbena and lemon thyme- bright, sunny grass-like. Taste-wise it’s easy to see why Meyer lemons capture the imagination and have such acclaim. Think of the best homemade lemonade- just the right side of tart with enough refreshing astringency to keep you coming back for more. Yup, I was hooked.

Bars/tray-bakes have never been top of my list for “GO TO” eats. Aside from two I always pass on them- the wonderful Canuck treat that is the nanaimo bar (of which I have a few posts on this site – check them out in “Categories”) and the quintessential classic that is the Lemon Bar. The contrast between the buttery, crumbly shortbread layer and the refreshingly pucker-inducing citrus custard thickness evokes images of languid, sun-drenched picnics for me. I don’t know about you but given that I’m writing this on Day 27 of self-isolation in the Time of Covid I could definitely do with images of unbridled expanse and carefree torpor. The confinement will pass in time I know but I’m of the opinion that no matter how frivolous or trivial a distraction if it helps with our current state of sanctioned ennui then all the better.

And so here we are…


Ingredients

  • 2 1/4 cups unbleached all-purpose flour
  • 3/4 cup icing sugar
  • 1 1/2 teaspoon kosher salt 
  • 1 cup (2 sticks) very cold unsalted butter, cut into small pieces
  • 1 to 2 teaspoons ice water
  • 5 large eggs, at room temperature
  • 1 1/2 cups granulated sugar
  • 1 tablespoon Meyer lemon zest
  • 3/4 cup fresh Meyer lemon juice

Method

  1. Preheat oven to 350°. Grease a 9″ x 13″ baking pan and line it with parchment paper, leaving 1″ of overhang on the two long sides.
  2. In a food processor, pulse 2 cups flour, 3/4 cup powdered sugar, and salt. Add butter and pulse until mixture resembles a coarse meal. Add ice water 1 tsp at a time if mixture is too dry. Press dough into bottom of prepared pan, pressing snugly against the inside edges.
  3. Bake crust for 20-25 minutes, or until golden. Set pan on a wire rack to cool slightly. Reduce oven temperature to 300°.
  4. Whisk together eggs and granulated sugar until well combined and pale in color. Stir in lemon zest, lemon juice, remaining 1/4 cup flour, and a pinch of salt. Pour topping over warm crust. Bake for 15-20 minutes, or until set.
  5. Set pan on a rack to cool. Remove squares by lifting parchment. Cut into bars. Dust liberally with icing sugar
  6. Bars are kept refrigerated and eaten within 24 hours

*If Meyer lemons are available this recipe works just as well with standard lemons. But admittedly Meyer lemons DO elevate them.

Soft Bread Pretzels

Makes: 8

Ingredients

Pretzel dough

  • 4 cups bread flour
  • 1 tablespoon kosher salt
  • 2 tablespoons soft brown sugar
  • 2 1/4 teaspoons Quick-rise yeast
  • 320ml warm water
  • 65ml olive oil

Soda Bath

  • 3 litres water, boiling
  • 1/2 cup bicarbonate of soda

To finish

  • 3 tablespoons salted butter, melted
  • Sea salt flakes

Method

  1. Lightly oil a large bowl and set aside for the dough later
  2. In the bowl of a stand mixer combine the flour, salt (to one side), yeast (to opposite side) and brown sugar
  3. Add in olive oil and 250ml warm water and mix on low setting to combine the ingredients. Add in remaining water, if needed, to achieve a soft, slightly sticky dough. Continue to knead in the machine for a total of 7 minutes. (if you’re mixing the traditional way, combine all the ingredients in a large bowl and stir using your  hand (in a claw shape) until the all come together. Tip out onto a lightly oiled surface and continue to knead for 10 mins until the dough is soft and slightly sticky)
  4. Tip the dough from the mixer bowl into the prepared oiled bowl, cover and set aside in a warm place to proof for at least 45 minutes, or until doubled in size
  5. Before you start working on the dough pieces, bring the 3 litres of water to a rolling boil in a large pot and add in the bicarbonate of soda
  6. Once the dough has finished proofing, tip out onto a lightly oiled surface. Divide the dough into 2 equal pieces and, in turn, divide each piece into 4 equal pieces. This will give you 8 equal pieces of dough to work with
  7. Roll each piece of dough into a long strand/rope approximately 30 inches in length. Take each end of the dough “rope” in the opposite hand and cross over simultaneously. Cross them over again to bring back the ends back to their original sides whilst bringing the tips down to the base of the loop. You should end up with a rough “heart” shape with the overlapping stands inside. Press the ends of the strands onto the loop so they stick
  8. Preheat your oven to 400°F
  9. This next bit is fiddly and a little patience & perseverance may be needed. Carefully pick up and drop the assembled pretzel to the pot of boiling soda solution (I use a slotted spatula) Take caution as there may be some splashing. Allow the pretzel to boil for 20 seconds (it should rise to the surface), the using a slotted spatula flip the pretzel on to it’s oppose side and continue to boil for another 20 seconds. Remove with the slotted spatula, drain and transfer to the prepared baking sheet. Repeat with remaining dough pretzels
  10. Brush each of the pretzels liberally with the melted butter and sprinkle with sea salt flakes to personal taste
  11. Bake in the your preheated oven for 10-12 minutes, until golden brown. Remove and brush with any remaining butter if desired. Transfer to a rack to cool slightly
  12. The pretzels are at their best enjoyed warm or fresh on the day of baking