In a large bowl, combine all the ingredients except the pepperoni slices and cheese slice, season with salt and pepper and stir together until fully combined
Line a chopping board with cling wrap and turn the cheese misxture out onto it. Using a offset spatula or spoons, smooth and form into an American football shape
Wrap with cling wrap and retin to the fridge for 30 minutes to firm up
After this time, finish the surface all over with a layer of pepperoni slices
Slice the processed cheese slice into strips and arrange in a “football lace” pattern on top of the cheese ball. You won’t need all the processed cheese slice
Cover with cling wrap and refrigerate for at least 2 hours to allow the flavor to develop
Remove the cheese ball from the refrigerator 30 minutes before serving, and serve with crackers, vegetable crudités or pretzels
The cheese ball can be stored in the fridge wrapped in parchment paper and cling wrap for up to 1 week
Brace yourselves- it’s that time of year again. No, I’m not talking about the impending rush of Valentine’s Day. I’m speaking of Super Bowl. That annual tradition of swole men fighting to deposit an inflatable pig skin at one end of a grass field, only to fish it out again and start over upon successful completion. You can tell I’m a fan right?
Well what I am a fan of is the Super Bowl halftime show (this year it’s Scarborough’s own The Weeknd); the cinematic advert premiers and of course….the FOOD! What’s a Super Bowl without the food you say? Possibly 4 hours of my life I’ll never get back I say. But an ample supply of snacks, and edible treats, provide not only fuel for the event but a distracting highlight.
My advice is to take a two-pronged approach. During the game you want something snackable, easy to handle with minimum effort (I’m talking no utensils here people) and that you can eat on auto-pilot. Whether it’s because you’re too focused on the defense strategy of the Buccaneers, or Kansas City’s Tight End’s…well…tight end, less fuss is more eating here. There’s the old classic chips ‘n’ dip – Guacamole; Salsa; Blue Cheese and Ranch are all solid favorites. Have on hand a selection of chips and crackers and you’re good to go.
Speaking of crackers, another firm favorite that no Super Bowl viewing is complete without is the Cheese Ball. An amalgamation of cheese in it’s many forms and seasoned however you like, it’s sure to be a touchdown success (see what I did there?) In fact why not get into the spirit of the event and mold it into football shape- themed eating at it’s best! If you’re feeling particular artistic you can complete the look with a layer of pepperoni for…ahem… “authenticity”- much as I have below.
Halftime is when you want to bring out the big guns. I’m talking food that needs a plate, possibly a knife and fork. Heck we want convivence here so get yourself a spork! Right up there with the cheese ball, Super Bowl means “wings” to me. Crispy, succulent, and packed full of flavor wings. It’s a matter of personal taste as to whether you want them dripping in sauce, there for the dunking or dry coated to retain their crispy goodness. I’m a fan of the latter so I’ve included my recipe for “Chicken Dust”. Now before you get to thinking it’s some sort of anti-mite treatment for foul stock, I discovered the term whilst researching fried chicken treatments. I don’t spend ALL my time eating you know. It’s a versatile little number in that you can use it as a dry rub or, as I have done, combine it with some oil to lend extra crispiness to the finished wings. I’ve left the actual cooking method up to you as everyone seems to have their own preference. I, myself, air-fried them for 15mins, tuning occasionally to ensure even golden, crispness.
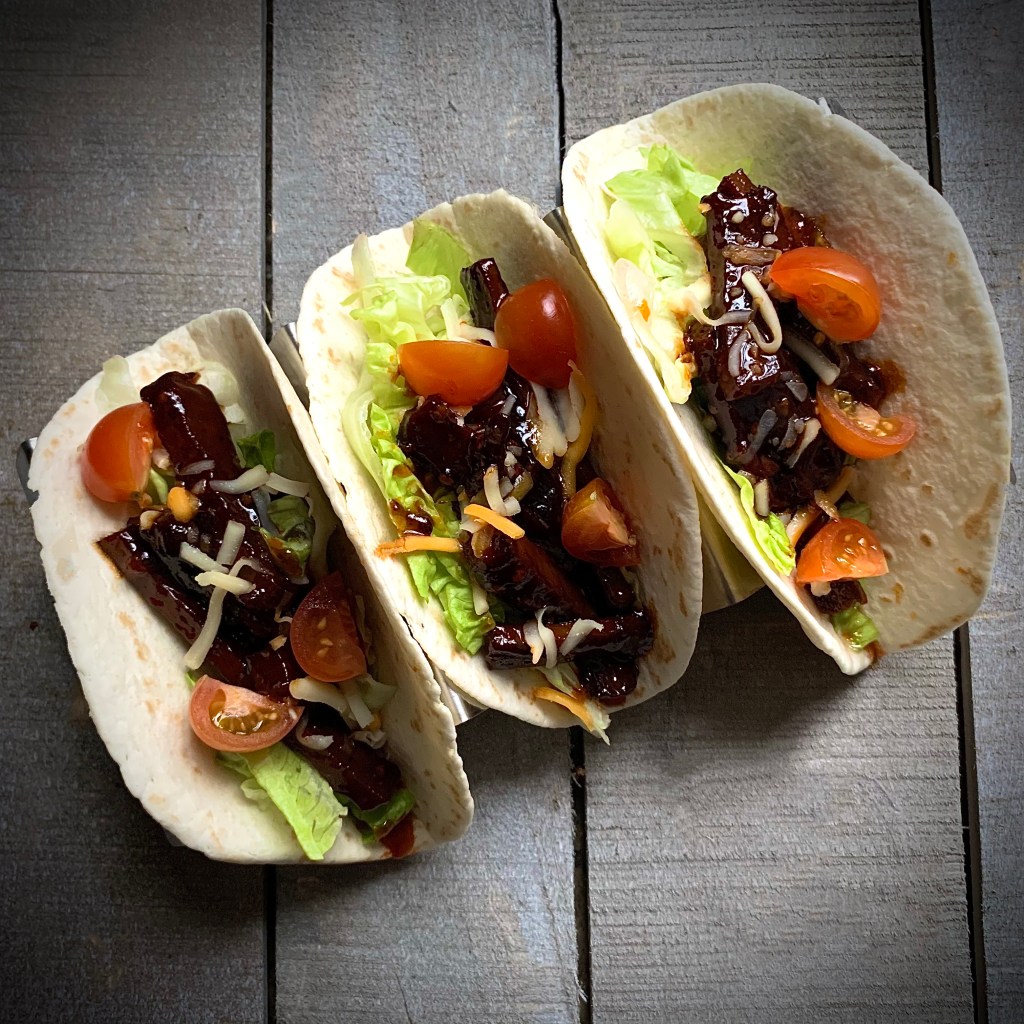
My last recipe is for that other feel-good favorite… tacos. I definitely do suggest you have a plate here, jam packing the tortilla with flavorsome fillings can often mean they’ll try to make a break for it! These tacos take advantage of one the prominent food trends emerging from this pandemic era…Plant-based alternatives to meat. Being confined indoors has brought about a dawn of a new age in the food world, the rise of the “Flexitarian”. Less strict than classic healthy diets it allows for the inclusion of occasional meat, with a prominence of plant based meat alternatives. Living in the time of Covid has people wanting a feeling of security and normalcy, often found in comfort food. But a deeper knowledge of associated health issues and ingredients has also meant a more health conscious approach. The abundance of plant based meat alternatives can now mean that people can enjoy their “meaty” experience and be content in the knowledge they’ve made a healthier, and at times more socially conscious, choice. The growth in the market means there are plenty of tasty varieties to try. Trust me- I love ribs and steak as much as your next carnivore so I was skeptical to say the least when plant based meat alternatives first arrived. But I have since been convinced (mainly due to Kristin & Justin at Guerilla Burger Co. ) and remain open to sampling the possibilities.
In this case with tacos. I’ve used ‘beef’ strips here coated in a sticky, glossy sweet ‘n’ spicy sauce with just the right amount of heat. The tacos themselves can be filled whatever way you like- be as restrained or as adventurous as you like. Just be plenty!
A parting word in the spirit of the weekend. Aside from food, the Super Bowl is also synonymous with gathering with friends at the likes of “tailgate parties”. However this year, like everything else since ‘Rona reared it’s head, we’re having to take a different approach to things. It’s definitely NOT a case of safety in numbers this time around. Think less Tailgating party and more ‘Homegating Huddle”. Let’s celebrate Super Bowl LV in fun way that’s still safe and socially responsible. Stay indoors, stick to your own family units, be adventurous and cook new things yourself. Celebrate separately this year, so that we can all celebrate together next year.
Enjoy the recipes, stay safe and mask up!
Superbowl Cheese Ball
Ingredients
16 oz cream cheese (2 x 8oz packs), room temperature
1 cup shredded mozzarella cheese blend
1 cup shredded sharp cheddar
1 cup finely grated parmesan
1 Tbsp Parsley
2 cloves Garlic, minced
1 tspn red pepper flakes
1 tspn Garlic powder
1 tspn Onion powder
1 tspn Hot sauce, or sriracha
1 tspn Worcestershire sauce
Kosher salt, to taste
Ground black pepper, to taste
2 cups Sliced pepperoni
1 slice Processed cheese
Method
In a large bowl, combine all the ingredients except the pepperoni slices and cheese slice, season with salt and pepper and stir together until fully combined
Gather the mixture into a rough ball shape and transfer to serving platter. Using a cranked spatula or spoons, smooth and form into a football shape
Finish the surface all over with a layer of pepperoni slices
Slice the processed cheese slice into strips and arrange in a “football lace” pattern on top of the cheese ball
Cover with cling wrap and refrigerate for at least 2 hours to allow the flavor to develop
Remove the cheese ball from the refrigerator 30 minutes before serving, and serve with crackers, vegetable crudités or pretzels
The cheese ball can be stored in the fridge wrapped in parchment paper and cling wrap for up to 1 week
Dusted Wings
Serves 1lb Chicken wings
Ingredients
For the Chicken Dust
2 Tbsp. Onion powder
2 Tbsp. Garlic powder
2 Tbsp. Brown sugar
1 Tbsp. Dried lemon peel
1 Tbsp. Dried oregano
1 Tbsp. Dried thyme
1 Tbsp. Dried parsley
1 Tbsp. White pepper
1 Tbsp. Szechuan peppercorns
1 Tbsp. Baking powder
1 tsp. Celery salt
1 tsp. Mace
1 tsp. Cayenne pepper
1 tsp. Mustard powder
1 tsp. Smoked paprika
1lb Chicken Wings
2 Tbsp Canola oil (if using)
Method
Place all the ingredients in a spice grinder, or clean coffee grinder. Blitz until a uniform powder, or dust, is formed
Transfer to an airtight plastic container for storage
The chicken dust can either be used in it’s own as a dry rub , or combined with the canola oil in a ziplock bag. Place the seasoning in a zip-lock bag, add in 1lb of prepared chicken wing pieces (drumettes and flats) and the tablespoons of canola oil. Shake and rub the bag contents together until the chicken pieces are fully coated
Cook by your preferred method – baking, air-frying
Remove and serve with preferred dip, or solo
Sit back and tuck in!
Sticky Beef-free Tacos
Makes 6 tacos
Ingredients
“Beef” Strip sticky glaze
2 Tbsp. Sesame oil
3 cloves Garlic, minced
1 Tbsp. fresh Ginger, minced
2 tsp. Rice wine vinegar (white vinegar also works here)
4 Tbsp. Honey (if vegan diet extends to honey, maple syrup can be used)
4 Tbsp. Sweet chili sauce
6 Tbsp. Vegan-friendly Tomato ketchup
4 Tbsp. Soy sauce
Taco Filling suggestions
500g Plant-based “Beef” (or “Chicken”) strips
6 medium (8″) soft flour tortillas
Shredded lettuce (I find Iceberg works best)
Sliced red onions
Shredded cheese, strength to preference
Soured cream
Guacamole, or sliced avocados
Method (for the sauce)
Combine all the sticky glaze ingredients in a medium pan
Heat over a high heat until boiling
Reduce heat to low/ medium and simmer until reduced by 1/3
Whilst the sticky glaze is reducing, prepare your protein in accordance with packet instructions
Toss the prepared/ cooked protein in the sticky glaze
Assembly tacos using additional ingredients to personal taste
Think of Brazil and no doubt the usual plethora of images will spring to mind- sundrenched beaches, feather-bedecked soca dancers and copious churrascaria. What doesn’t come to mind is a wealth, and often unexplored world, of baking. From breads to cakes to sweet treats there’s no shortage of tasty culinary treats to try.
So you may be asking yourself how does a Irish native, now resident in Canada, come to be waxing lyrical on all bakes Brazilian? I recently made the acquaintance of a native Brazilian via the wonders of a social media. A mutual bond over adoption matters, cultural appreciation (makes a change to hear those two words together huh?) and adventures in food was formed, and here we are! Insight from someone who grew up in a culture always trumps even the best research you can do. There is something satisfying about knowing that this is how “it” actually is, in everyday life, rather than some interpretation of “it” from the vaults of some Lonely Planet-esque archives.
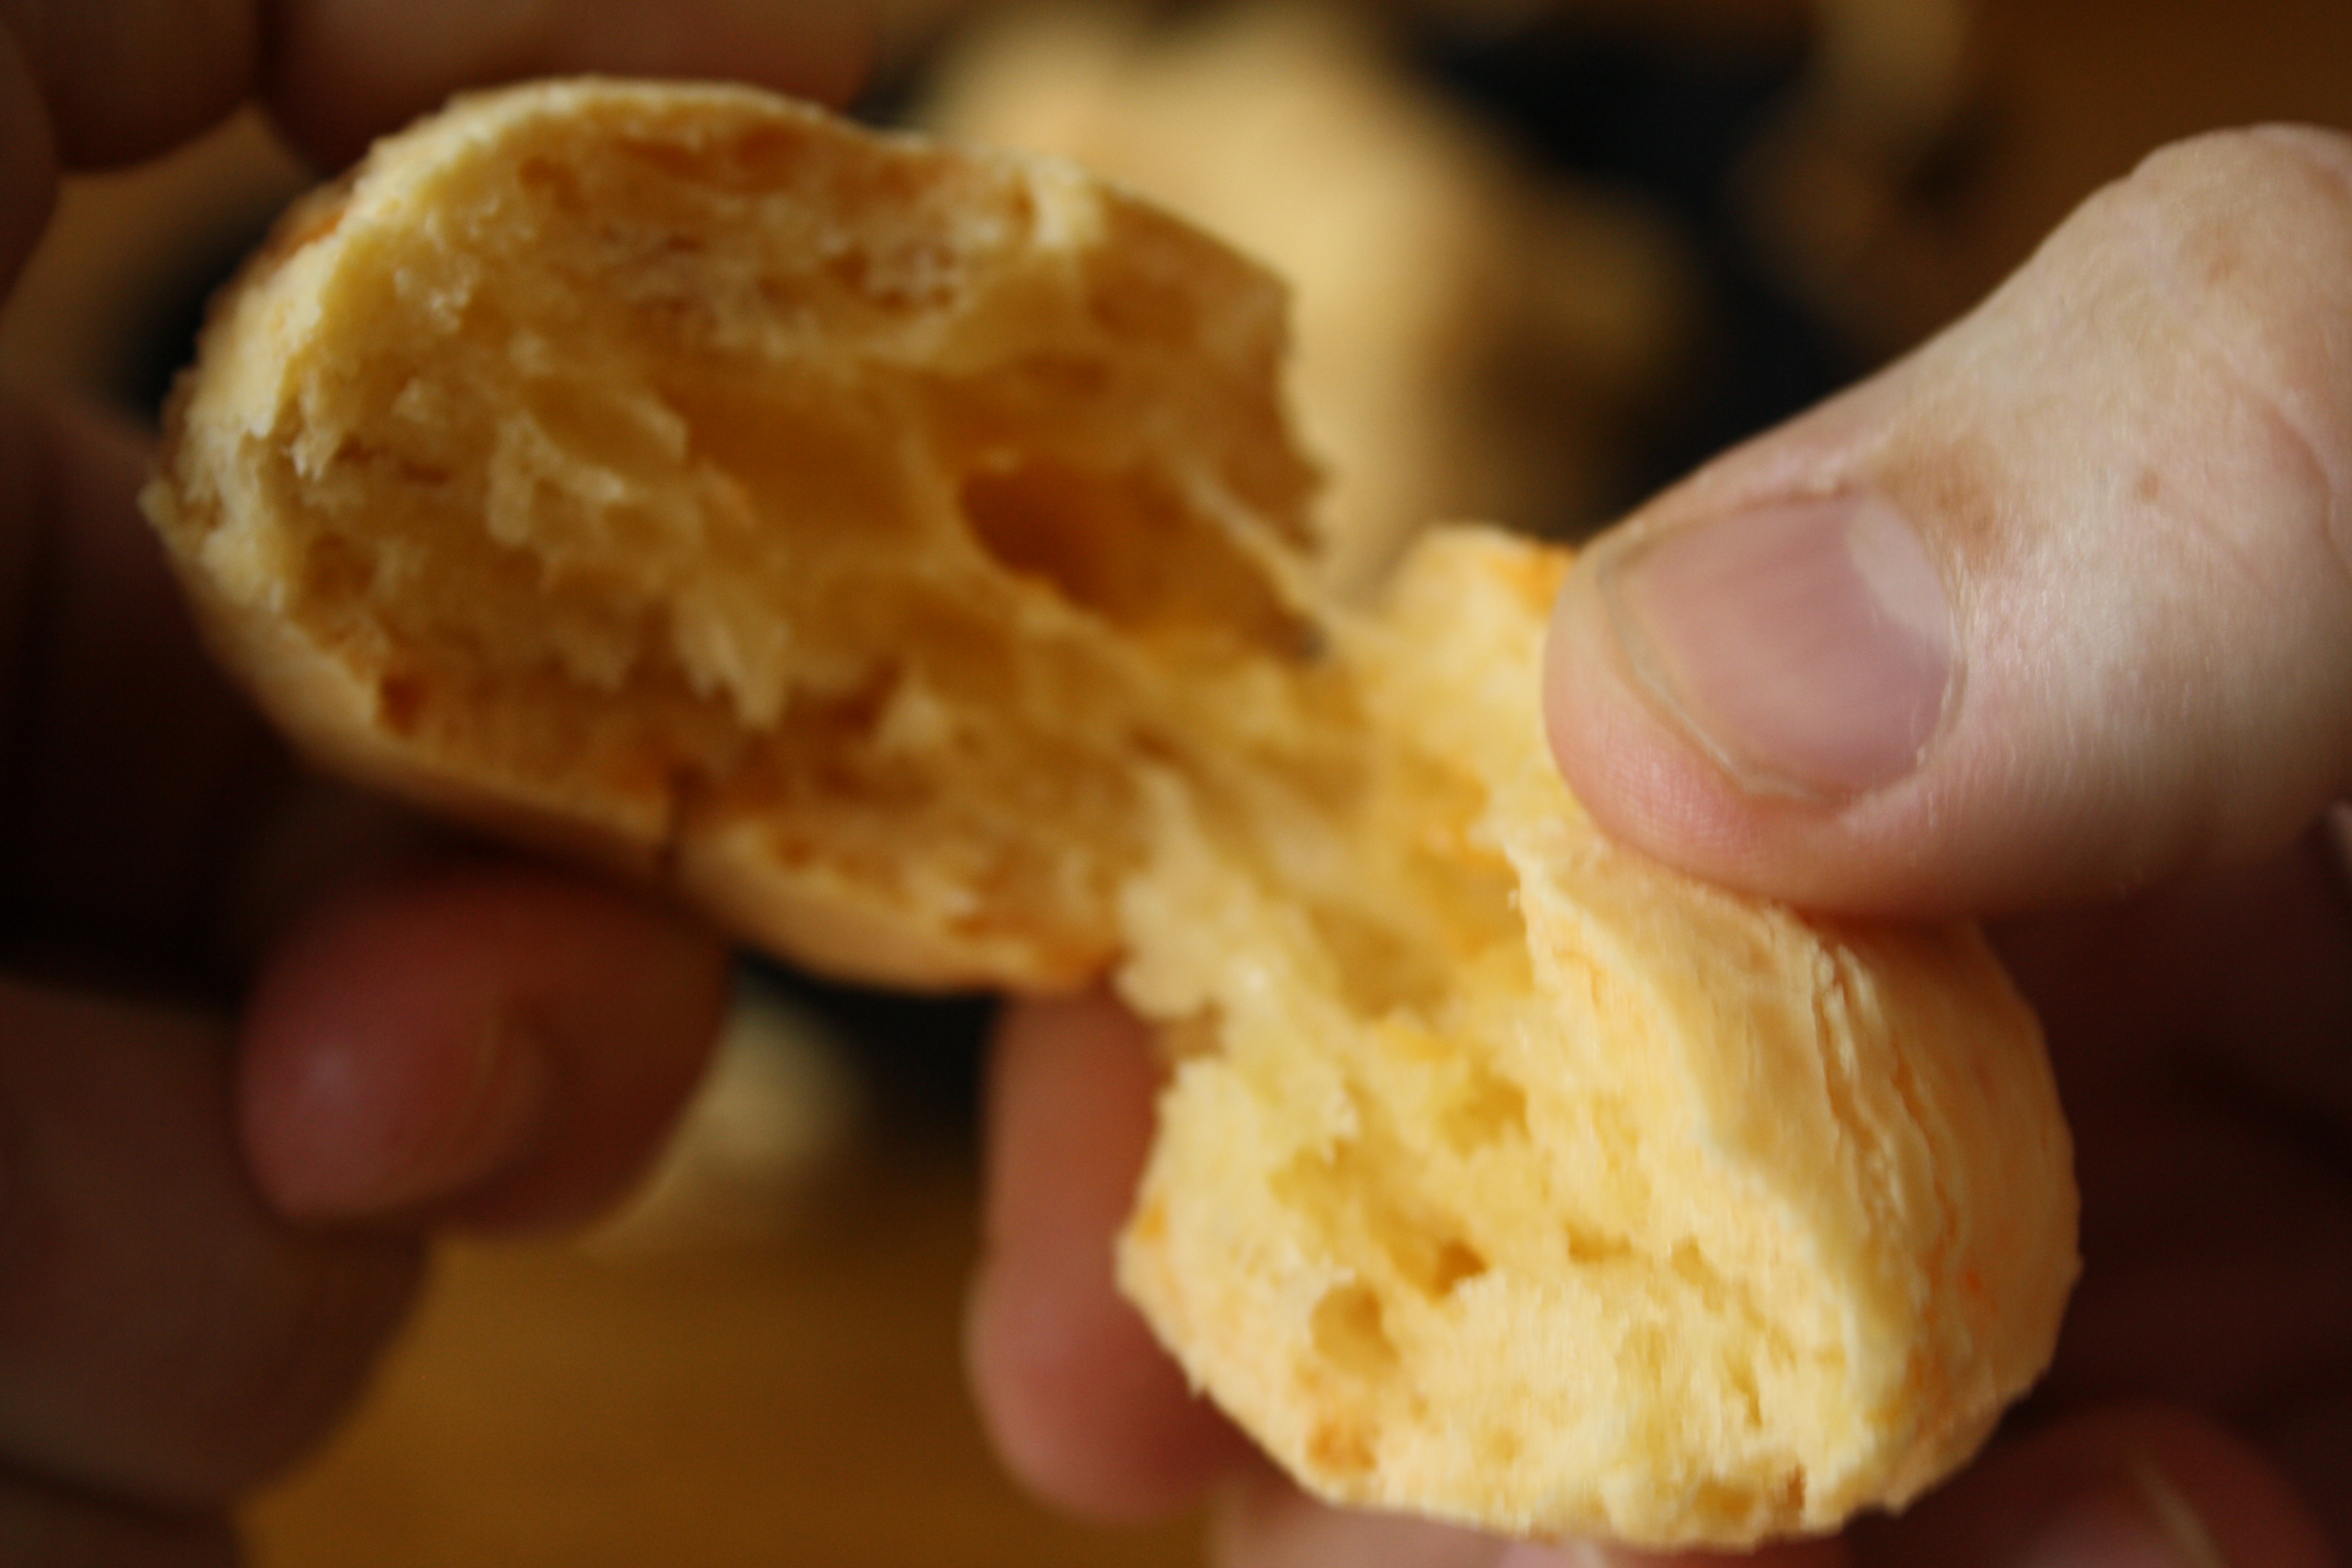
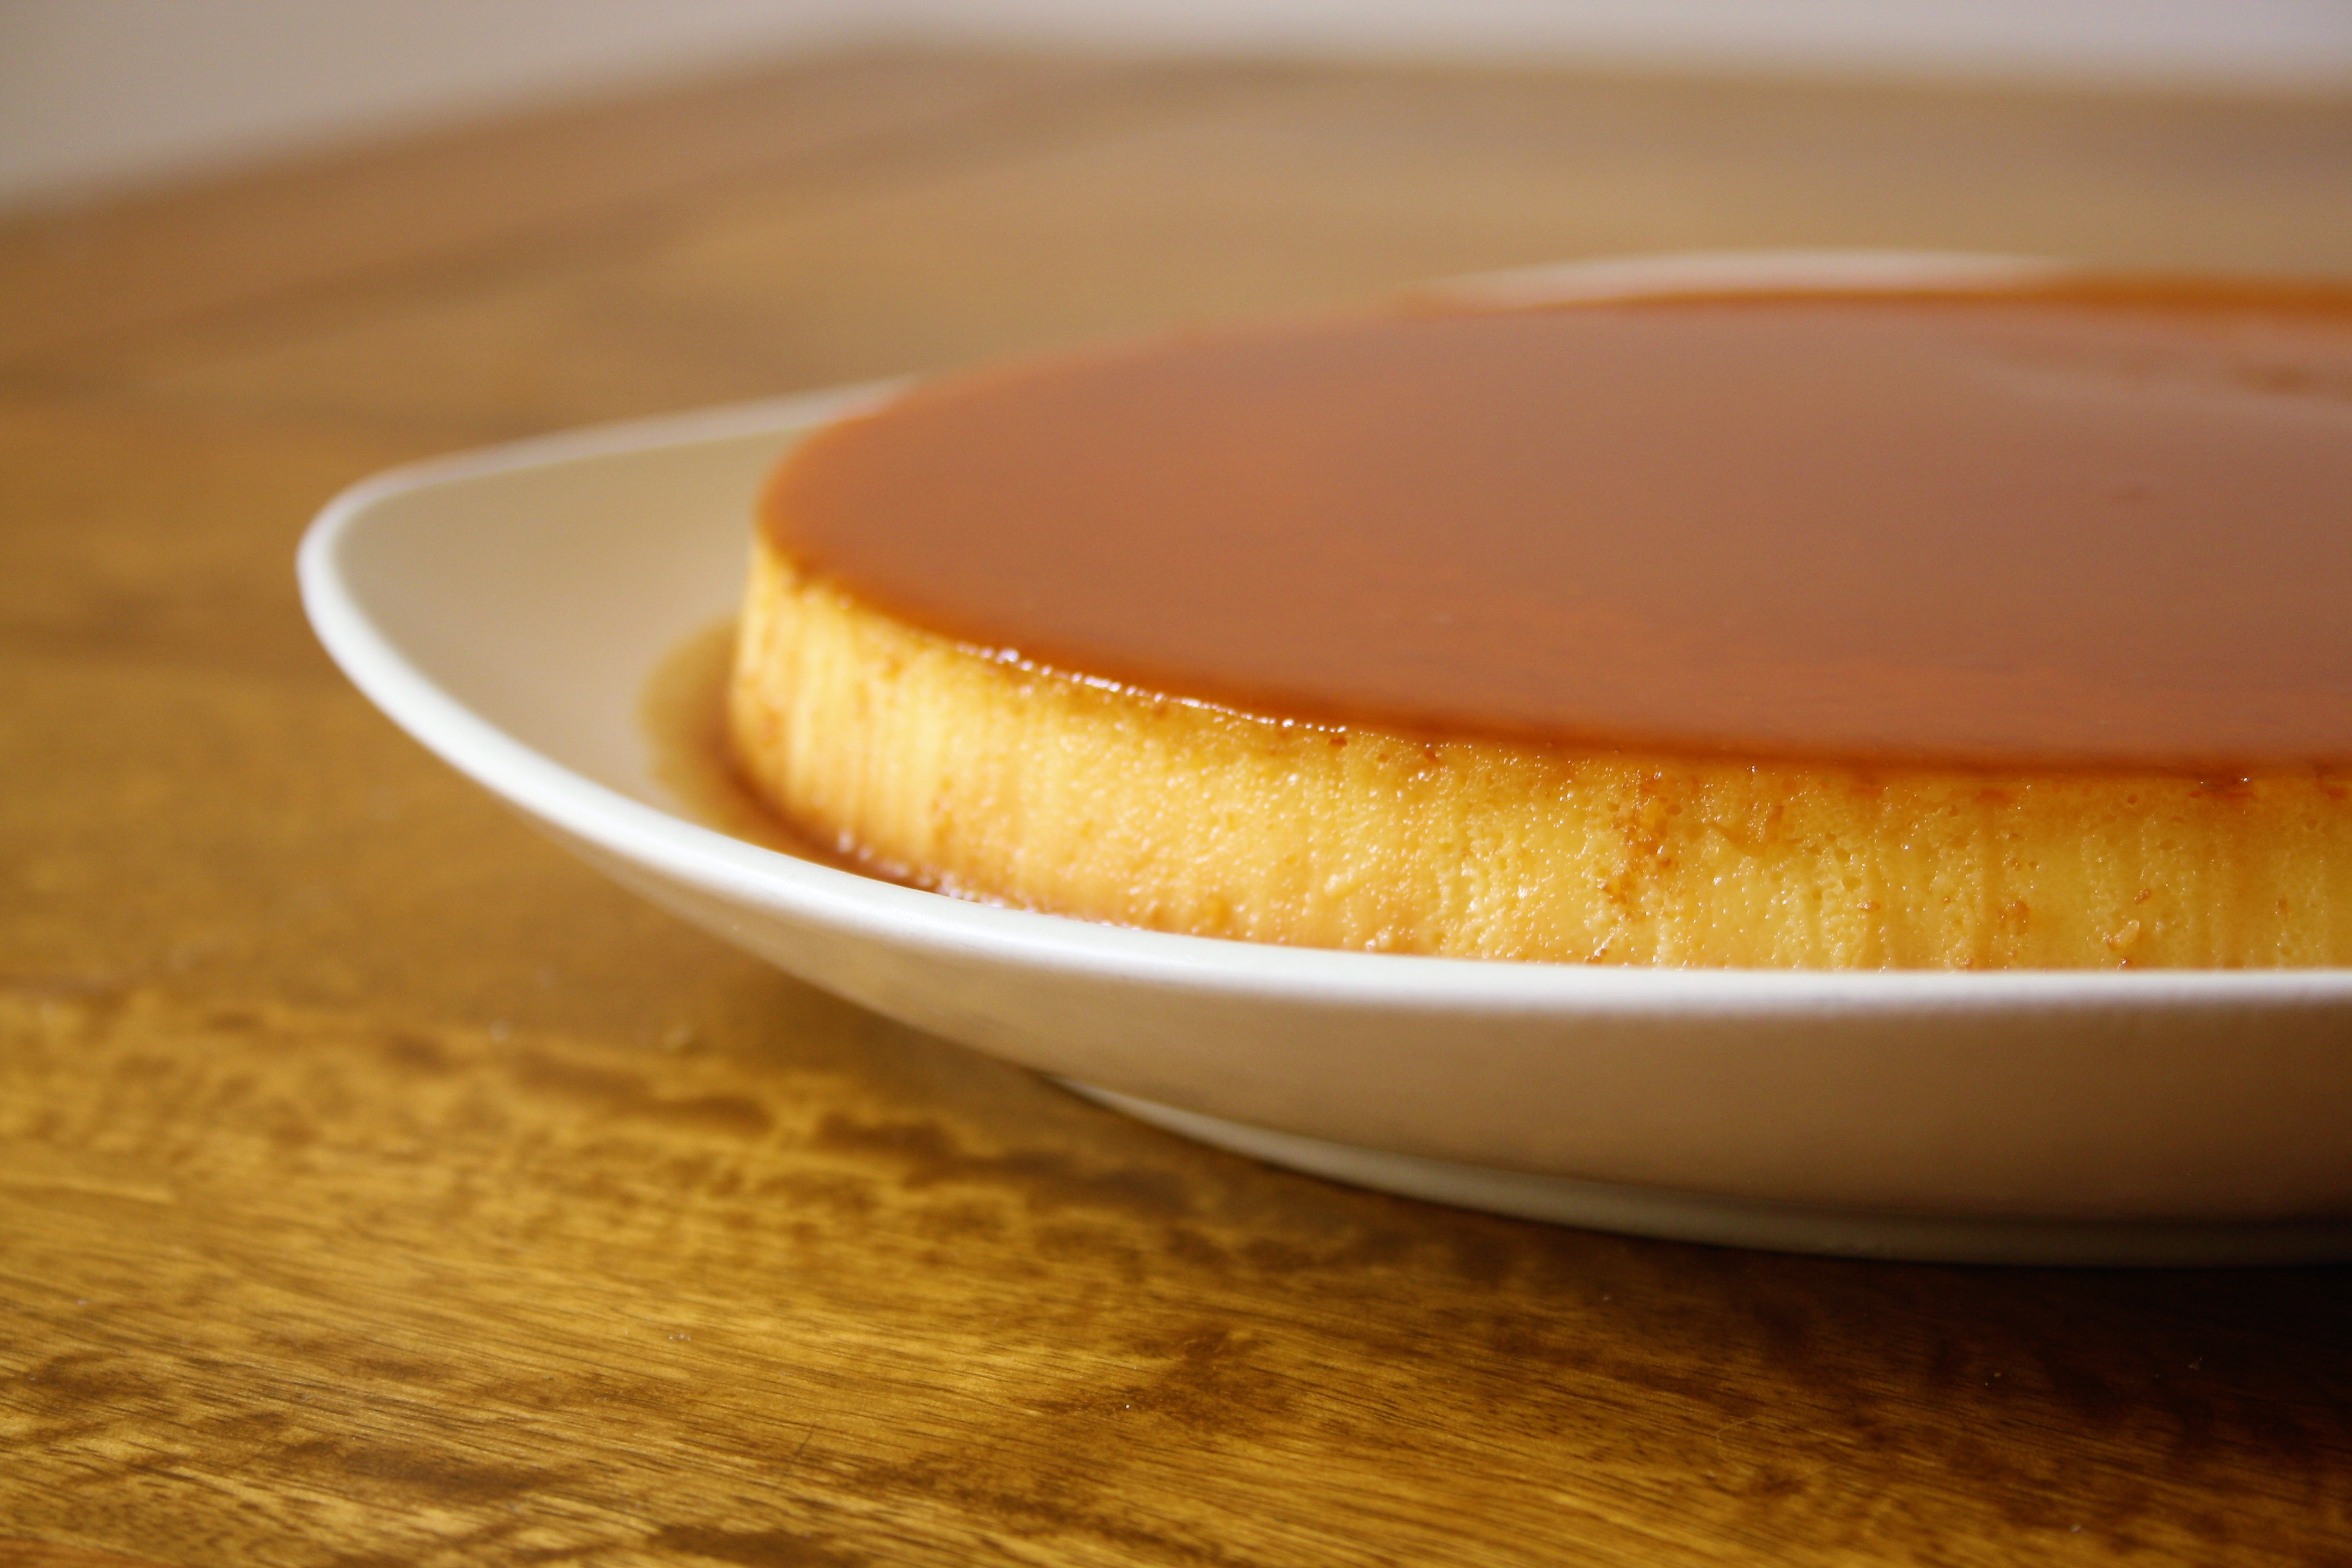
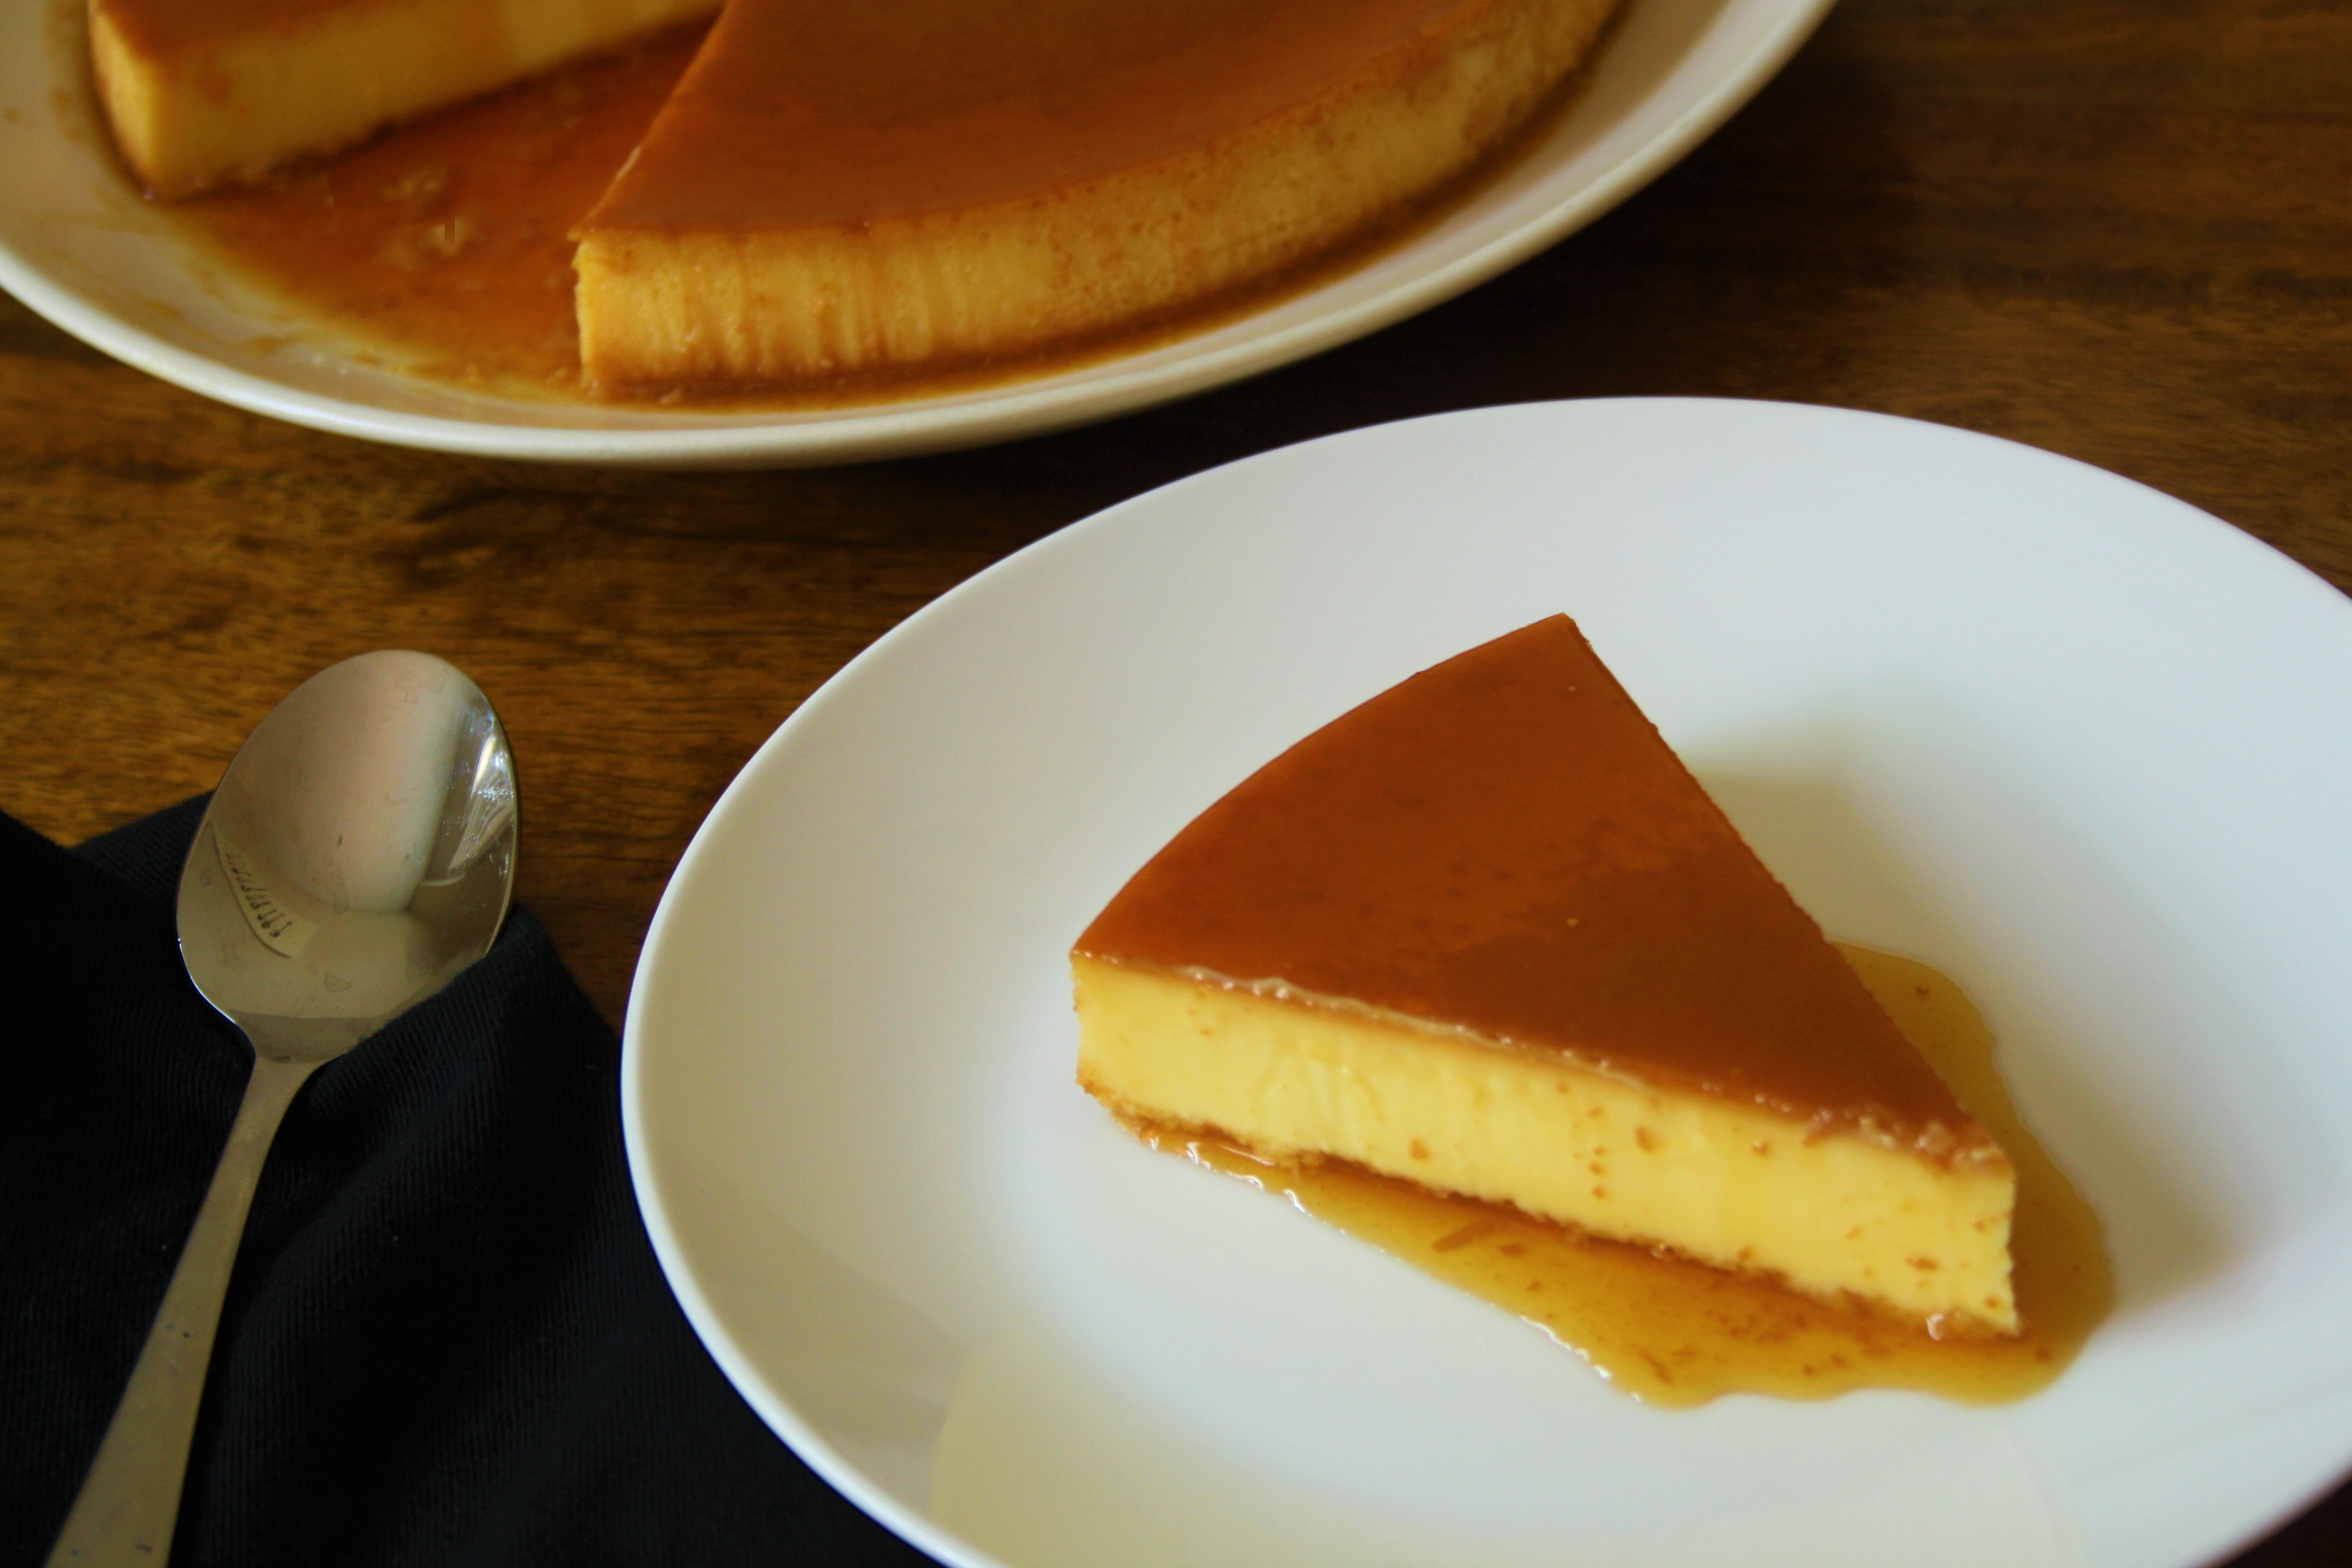
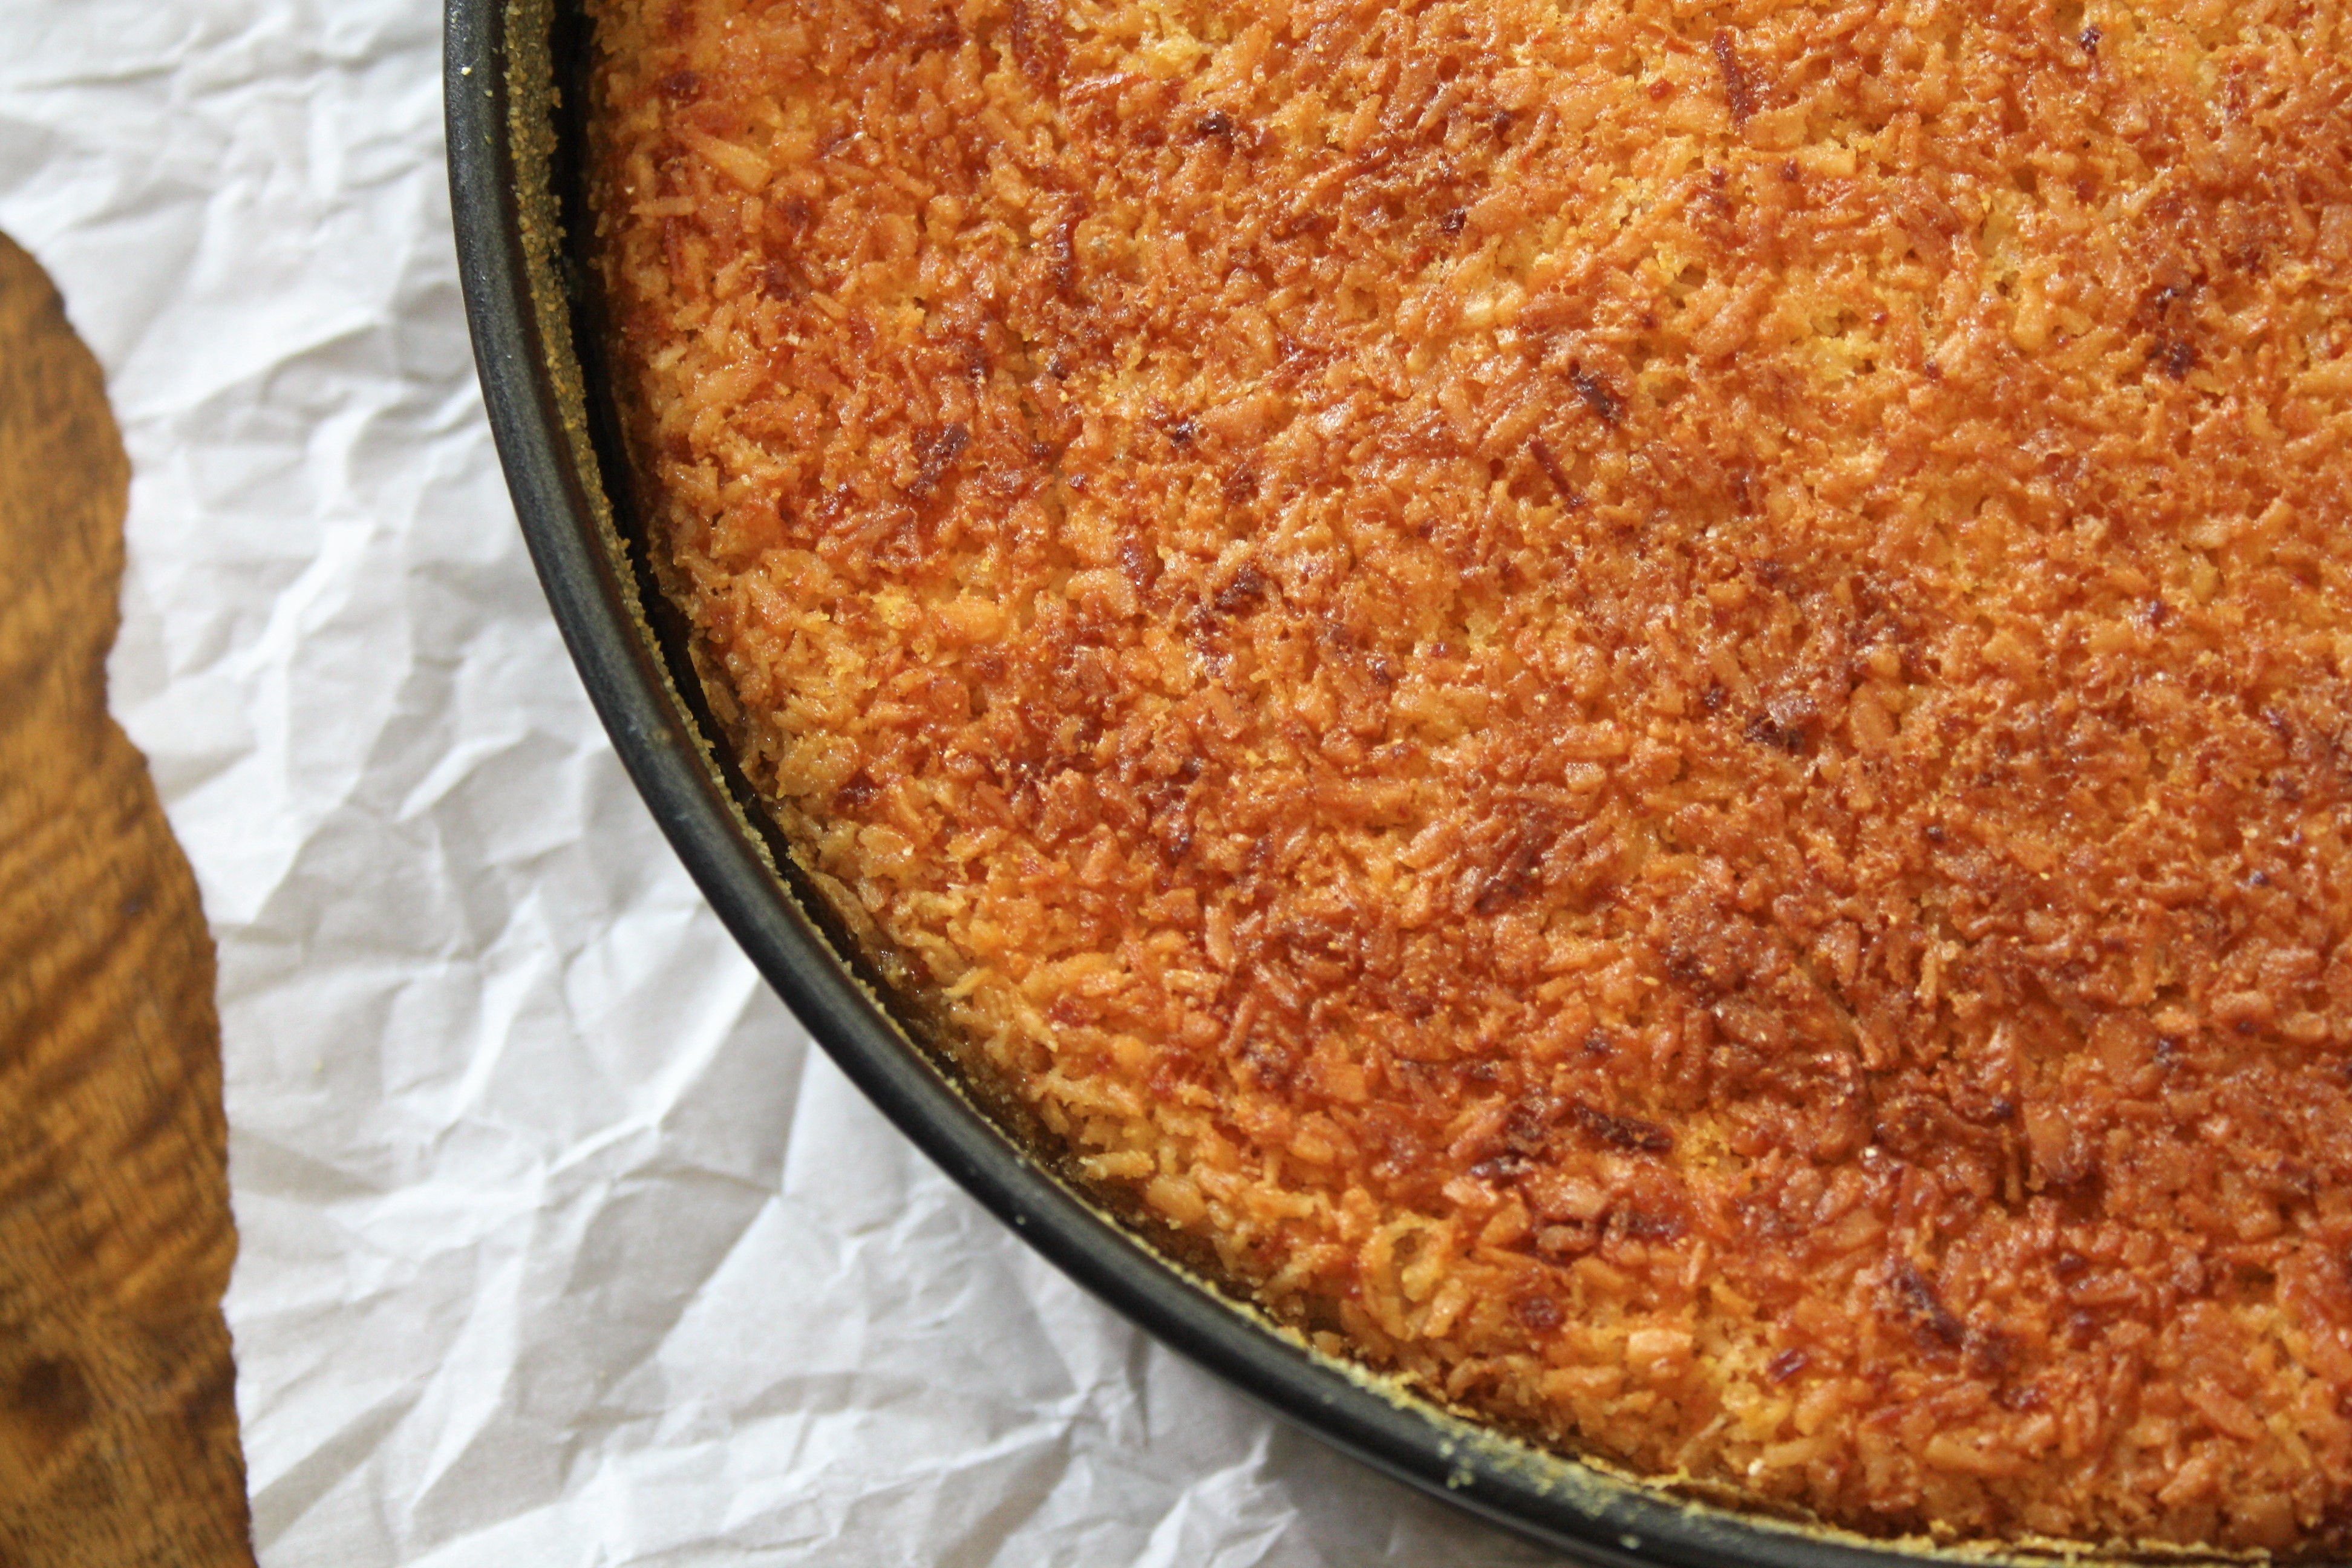
The recipes here are essentially in two parts- bakes and sweets. The Pao de Queijo (Brazilian Cheesebread) is definitely worth trying out. Served warm from the oven they are an ideal breakfast morsel, or even snack through the day. Freezer-friendly and gluten-free they are also a handy reserve should any gluten intolerant friends swing by. The Pudim de Queijo and Bolo de Fuba Cremoso share a common theme in that they are both prepared making use of a tall blender. Apparently this is a common feature in Brazilian baking as stand mixers are not that common. For the Pudim de Queijo think creme caramel and Catalan flan. To be honest though to hold it in comparison is to do the Pudim injustice. The addition of the cheese to the flan mixture rescues it from the overpowering (and somewhat cloying) sweetness to which it’s European counterparts often fall prey. Cheese also a feature in the recipe for Bolo de Fuba Cremoso. When baked the combination of cheese, cornmeal and coconut result in veritable kitchen alchemy that allows for a crispy topping, smooth interlayer and deliciously crumbly base. Believe me, once you try a slice of this alongside a strong coffee, breakfast will never be the same again!
The Dochinos de Leite Moca here are all variations on a theme of Brazilian candies. Made using boiled sweetened condensed milk they are sure to prove popular not only with the little ones in your life but all the grown-ups. The final sweets will usually keep for a week in a container in the refrigerator. These dainty mouthfuls of scrumptuous sweetness look (and taste) like they required hours of kitchen toil instead of the mere minutes needed in reality. The longest part is the cooling time! I cannot emphasis how much these candies are worth the minimal effort.
Pao de queijo
Makes approximately 40
Ingredients
500g cassava starch
1/2 cup water
1/4 cup vegetable oil
1/4 cup olive oil
4 large eggs
400g grated cheese (150g Gruyère; 150g mozzarella; 100g sharp red cheddar such as Red Leicester)
1 teaspoon salt
Method
Preheat oven to 400F and line 2 cookie baking trays with baking parchment
In a bowl mix the Gruyère and mozzarella cheeses, Set aside until needed
Combine the water & oil in a pan and bring to boil over heat
Place cassava starch in a bowl of a stand mixer
With the mixer running, carefully pour over boiling liquid in stages and mix to combine
Leave to cool, until you can touch the side of the bowl
With the mixer running, add in eggs one at a time
Add in the Gruyère/ mozzarella cheese mix in thirds and mix until combine.
Remove the dough from the bowl and fold/lightly knead in the sharp cheddar.
Roll dough into 3cm wide sausage shape
Cut into smaller 1 inch pieces and roll into balls using wet hands
Place the dough balls on lined baking trays, spacing about 2 inches between
Bake at 400F for 20mins until puffed and lightly golden
– The baked rolls/ puffs are best eaten straight away, after cooling slightly.
*Once the dough had been shaped into balls, they can be frozen in a bag or under cling wrap and baked from frozen. Bake in a 400F preheated oven for 30 mins until puffed and lightly golden
Pudim de queijo
Makes 1, serves 12
Ingredients
Caramel
1 cup fine sugar
1 cup of water
Pudding
4 eggs
1 can (300ml) sweetened condensed milk
1 can whole milk (use the same can as sweetened condensed milk to measure)
50g Parmesan cheese, grated
Method
Preheat oven to 350F
In a pan over a medium heat combine the water and fine sugar.
Increase heat and bring to the boil, without stirring, for about 10mins. The liquid should thicken and turn a deep amber color
When the liquid has turned deep amber, remove from heat and pour into an 8inch circular baking pan
In a blender mix the condescended milk and milk for 2 mins
Add in eggs and mix to blend again for 2 mins
Add the Parmesan cheese and mix for a further 2 mins
Pour into prepared caramel pan and place the filled baking pan in deep roasting tray large enough to take the pan
Cover the filled pan with aluminium foil, and fill the roasting tray with water to at least 3/4 level with the pan
Transfer to the preheated oven and bake for 50 mins
After the aluminium foil from the pan and continue to bake for a further 10 mins
Remove the baked pudding from the oven and the roasting tray. Leave to completely
Turn the cooked pudding out by placing a large plate on top of the pudding and quickly inverting. It may requirement a gentle shake for it to come out
Keep the turned out pudding refrigerated until serving
Bolo de fubá cremoso
Makes 1 , serves 12
Ingredients
3 eggs
2 tablespoons unsalted butter, melted
3 cups whole milk
2 cups fine sugar
1 cup of cornmeal
3 tablespoons all-purpose flour
1 cup unsweetened shredded coconut
50g Parmesan cheese, grated
1 tablespoon baking powder
Method
Preheat the oven to 350F
In a large bowl add the fine sugar, cornmeal, flour, shredded coconut and mix to combine
In a large blender combine the eggs, milk, melted butter, and baking powder, Parmesan cheese and mix until well combined
Pour the liquid mixture in to the bowl of dry ingredients and stir/whisk gently to combine well
Pour to cake batter (which will be quite running into a 9inch spring-form cake pan
Place in the preheated oven and bake for 35-40 mins until the top of the cake is golden brown and the sides pull away from the pan
Remove from oven and leave to cool completely in the pan before removing the pan collar
This cake goes particularly well with a strong, early morning coffee
Dochinos de Leite Moca
Each recipe makes between 15-20
This little sweet bites were traditionally served at children’s parties, are astoundingly easy to make and even better to eat!
Brigadeiro
Ingredients
300ml sweetened condensed milk
4 tablespoons cocoa powder
1 egg yolk
To finish
A selection of chocolate sprinkles, rainbow sprinkles to finish
Method
Combine all ingredients in a heavy bottomed saucepan and cook over medium-low heat, stirring constantly with a wooden spoon, until the mixture thickens and loosens from the pan. (It will take between 8-10 mins)
Pour the hot mixture into a heat-proof bowl and leave to cool to room temperature
When the mixture has cooled , grease your hands with oil and shape a teaspoon of the mixture into a round ball shape in your hands
Roll the ball of mixture in sprinkles of your choice to coat and place on a lined baking sheet
When all the brigadeiro have been rolled transfer the baking sheet to the fridge and allow the to chill and firm for at least 2 hours
Beijinho
Ingredients
300ml sweetened condensed milk
1egg yolk
To finish
100g unsweetened shredded coconut
Whole cloves (optional)
Method
Combine the milk and egg yolk in a heavy bottomed saucepan and cook over medium-low heat, stirring constantly with a wooden spoon, until the mixture thickens and loosens from the pan. (It will take between 8-10 mins)
Pour the hot mixture into a heat-proof bowl and leave to cool to room temperature
When the mixture has cooled , grease your hands with oil and shape a teaspoon of the mixture into a round ball shape in your hands
Roll the ball of mixture in the shredded coconut to coat and place on a lined baking sheet. Stud each beijinho with a whole clove
When all the beijinho have been rolled, transfer the baking sheet to the fridge and allow the to chill and firm for at least 2 hours
Cajuzinho
Ingredients
300ml sweetened condensed milk
5 tablespoons smooth peanut butter
1 tablespoon cocoa powder
30g unsweetened shredded coconut
To finish
Fine sugar
Roasted peanut halves
Method
Combine all ingredients in a heavy bottomed saucepan and cook over medium-low heat, stirring constantly with a wooden spoon, until the mixture thickens and loosens from the pan. (It will take between 8-10 mins)
Pour the hot mixture into a heat-proof bowl and leave to cool to room temperature
When the mixture has cooled , grease your hands with oil and shape a teaspoon of the mixture into a “horn” shape in your hands
Roll the cajuzinho in fine sugar to coat, stud the larger end with a peanut half and place on a lined baking sheet
When all the cajuzinho have been rolled, transfer the baking sheet to the fridge and allow the to chill and firm for at least 2 hours
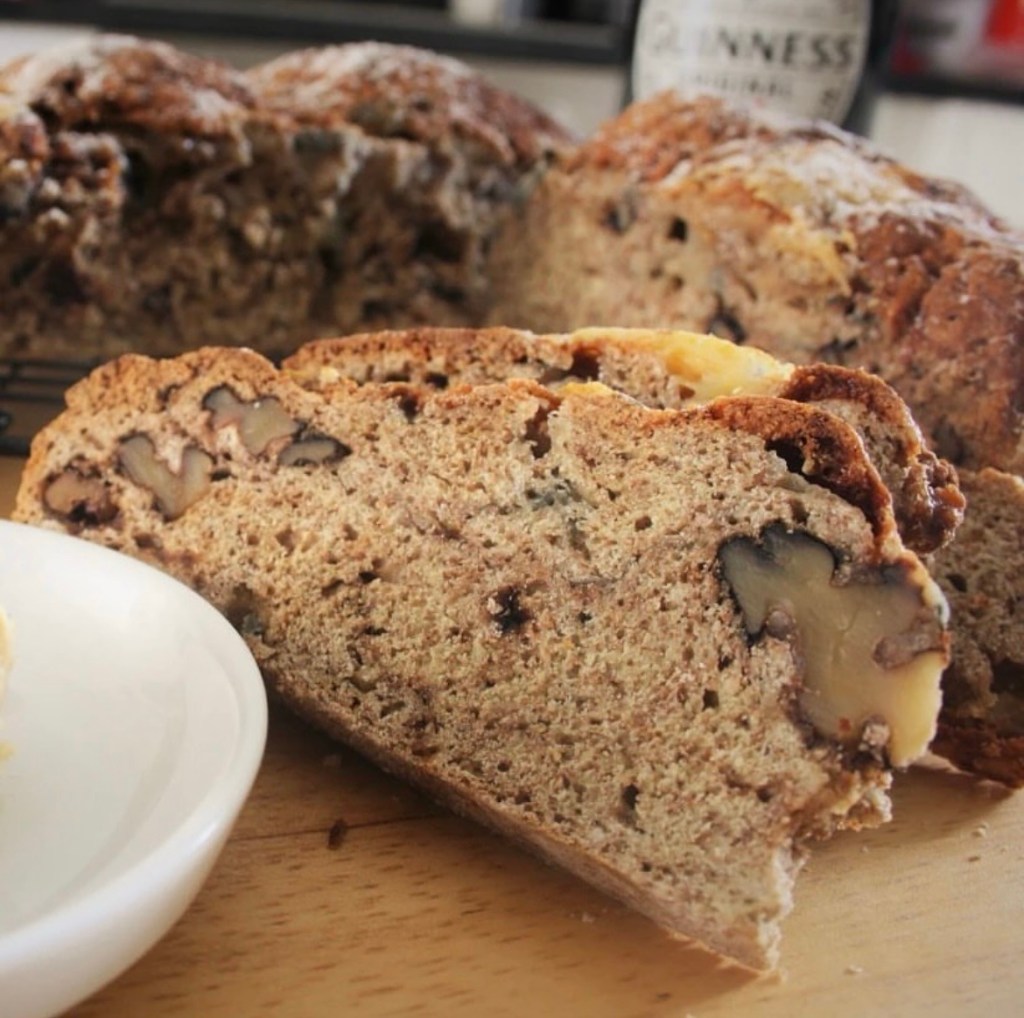
Soda bread was one of the first things I remember watching my mother make/bake in the kitchen. From my seat on the kitchen drainer I would watch how she’d mix and shape the dough into the thick, dense cakes and I’d hanker for a warm slice, the melted butter dripping down my greedy knuckles. Beats crumpets any day! With the minimum of ingredients it was her “go to” recipe when cupboards were getting bare- maximum flavour from minimum input. So often was it made in my childhood house that there was no need for her to weigh or measure quantities. It was an instinctual process, hands tracing what seemed like arcane patterns and motions, guided by numerous loaves that came before.
The lack of yeast in the mix makes it a particularly quick and easy loaf to knock together. No kneading is required and the mixing is minimal (to avoid an overly heavy dough). So it really is just a case of mix, shape and bake.
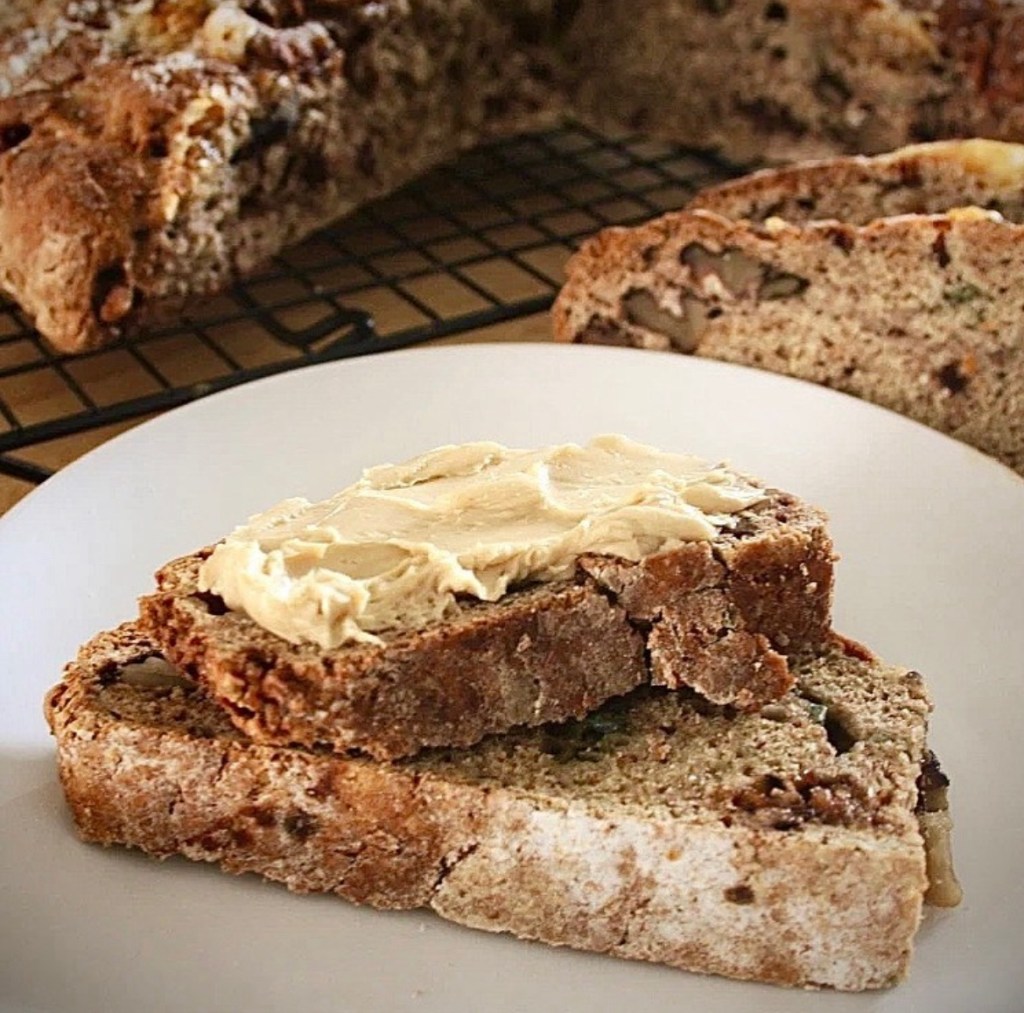
Whilst I have kept to the basic recipe as taught to me (flour, bread soda (bicarbonate of soda), buttermilk and salt, I have as usual added my Mr. Mom’s twist. The additional of the caramelised walnuts and blue cheese add wonderful pockets of sweetness and Unmami to the earthy wholemeal dough. I serve mine here with Guinness infused butter to make it just that little bit more indulgent for a St. Patrick’s Day treat.
450g wholemeal flour 175g plain flour 2 teaspoons bicarbonate of soda 1 teaspoons salt 475ml buttermilk (450ml milk with 1 tablespoon lemon juice stirred in) 100 g Cashel Blue cheese, plus extra for topping Caramelised walnuts (see above)
Guinness Butter
1 quantity of homemade butter (See the recipe here)
150ml Guinness Stout (not draught)
4 teaspoons Irish heather honey (If you can’t find this, ordinary honey will be fine)
Pinch of salt
Method
Caramelised walnuts
Set aside a non-stick baking tray. If you don’t have non-stick variety to hand, just line a standard tray with baking parchment.
Combine all the ingredients in a pan over a medium heat.
Stir to combine and to stop the mixture from catching.
Continue until the butter and sugar have melted. At this point you need to stir continuously until the syrup turns a deep shade of amber.
Immediately remove from the heat and tip the mixture onto the (lined) baking sheet. Using two forks separate the nuts individually so that they don’t clump together.
Allow the nuts to cool on the baking tray before use. (As a side note these make wonderfully tasty drinks snacks as they are like this. I often make a double batch!)
To make the soda bread
Preheat your oven to 180C/gas mark 4.
In a large bowl combine the dry ingredients (including the candied walnuts and cheese) and mix well.
Make a well in the center, and add in roughly 1/3 of the milk. Mix lightly.
Add in the second 1/3 of the milk and again mix until just combined.
Add in the final amount of milk and mix until a dough is formed and there is no dry flour remaining in the bowl.
Tip the dough out onto a lightly floured surface and lightly knead.
Form into a round about 1 1/2 inch thick transfer to your baking sheet.
Stud the top of the loaf with a few chunks of blue cheese (to taste) and dust with flour. Score the top of the loaf in half with a floured, sharp knife. Turn the loaf 90 degrees and score again so that you have a cross shape dividing the top of the loaf into quarters, then prick each of the four quarters**
Bake the loaf in your preheated oven for about 45mins. Test by tapping the bottom of the loaf- it should sound hallow. (If the top of the loaf starts to brown too quickly, loosely drap some foil over it). Once baked remove from the oven, transfer to a wire rack and allow to cool.
Serve with Guinness Butter (see recipe below) or for a traditional Irish after-school treat slathered in butter and jam!
To make the Guinness Butter
Heat the Guinness in a pan over a high heat and reduce down to 1/3 volume. You should have a denser syrup. Remove from heat and allow to cool fully.
Place the butter in a bowl of stand mixer, add in the cooled Guinness syrup, honey and salt.
Beat on medium until combined then increase the speed to high and “whip” for about 5-7 minutes until all the ingredients are fully combined and mixture is fluffy in texture.
Remove the butter from the mixing bowl, transfer to a dish and serve alongside the prepared soda bread.
**Although these two actions have a practical use in the making of this bread, the traditional meaning lends a much more romantic slant to them as only the Irish can. Cutting the loaf into quarters is said to be “Blessing the bread” so that it the house making it may never run out of it. Pricking each of the quarters is “to let the Sidhe (fairies) escape” in order to avoid any havoc they make reek if kept trapped in the bread. Quite how they got in there in the first place is beyond me by who am I to argue with centuries of tradition!
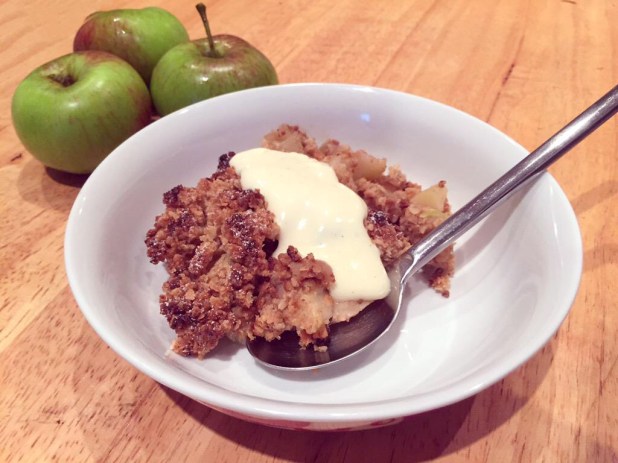
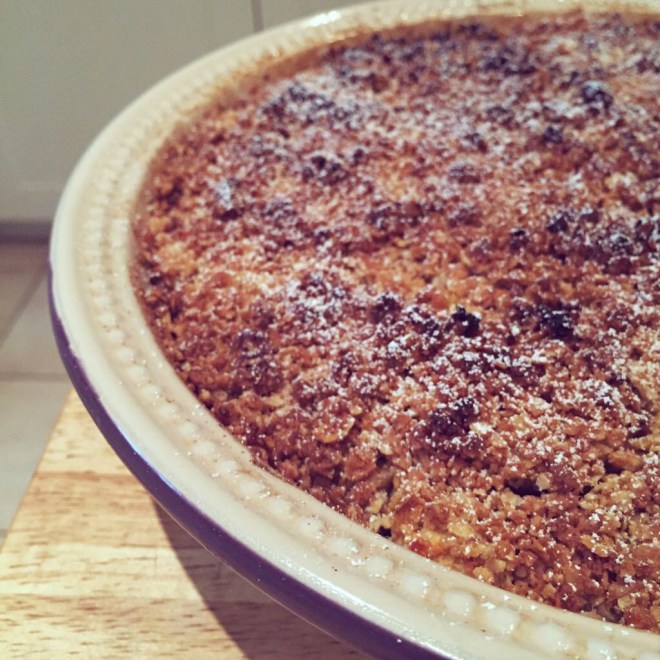
This recipe provided an ideal use for some apples from our back garden. Quick and easy it’s an ideal comfort food for this time of year when the temperature takes a turn. Warming and comforting with the right amout of spice it’s fantastic with custrd or cream alike. The addition of both the rosewater and parmesan may seem a bit strange but bear with me. You won’t regret it! The rose water lifts flavour of the apple filling while the parmesan in the crumb topping adds a savory note. Just think of a cheeseboard with fruit on it!
Spiced Apple Crumble with parmesan and rosewater
Filling
1 kg apples, peeled, cored and sliced
1 tablespoon lemon juice
3 tablespoon rosewater eg Saveur de Maroc
1 tablespoon mixed spice
50g light brown sugar
Crumble topping
150g plain flour
100g light brown sugar
90g cold butter, cubed
25g rolled oats
2 tablespoons parmesan cheese, finely grated
Method
To make the filling
– Preheat the oven to 190C/170 fan/gas 5.
– Toss the apple pieces in the lemon juice, rosewater, mixed spice and light brown sugar until evenly coated.
– Transfer to a 10inch by 2 inch deep pie dish.
To make the topping
– In a large bowl combine the flour, light brown sugar, oats, parmesan and butter. Rub in with your finger tips until the mixture resmebles breadcrumbs.
– Sprinkle the crumb mixtureover the apple filling, gently pressing down where needed. Take care not to press it too tight as this will just make the crumble a solid topping- you dont wantthis.
– Bake in your preheated oven for 30-25 mins until the topping is golden. When you slide in a knife the apple should have softened and you should feel some give. If you prefer your filling softer, you can bake for another 5 to 10 minutes.
– Remove from the oven and allow to cool for 15 minutes before serving.
– Serve with custard, cream or ice cream and enjoy!