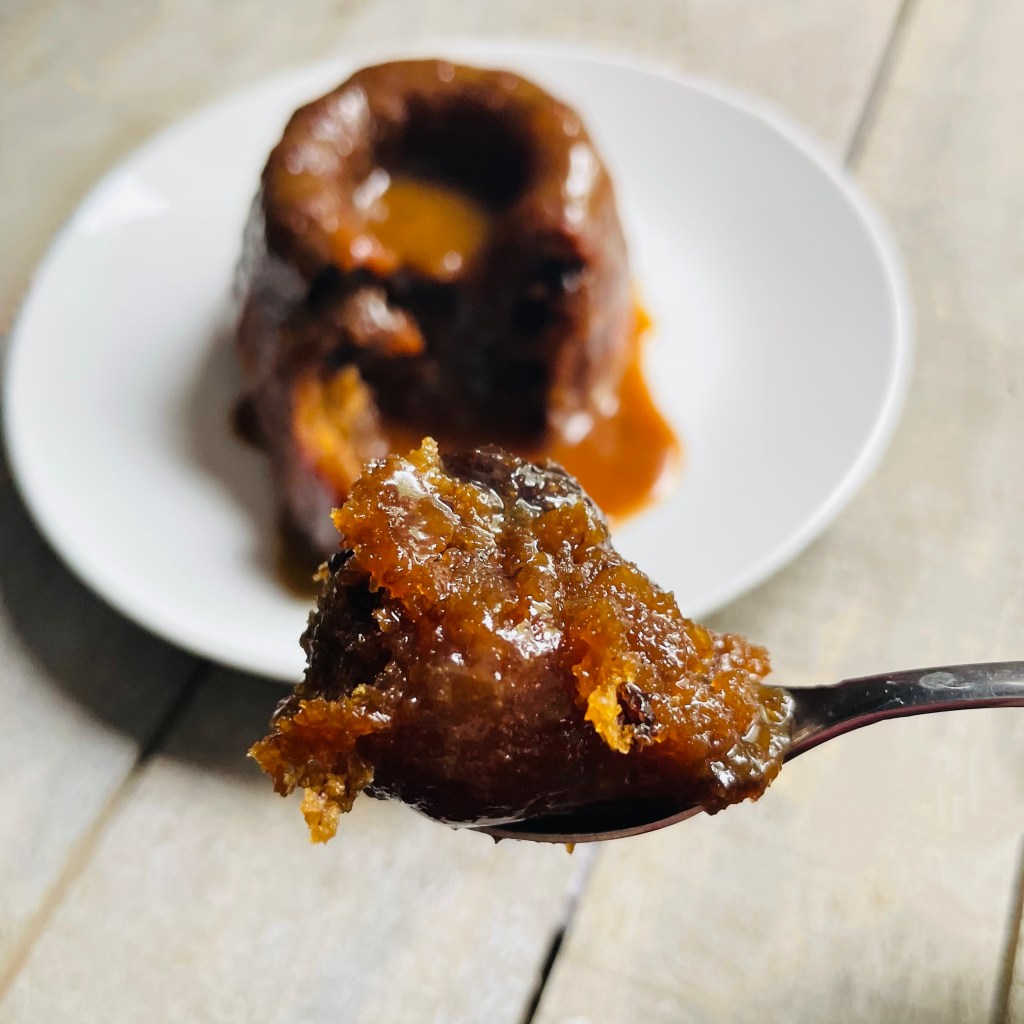
Makes 6
Ingredients
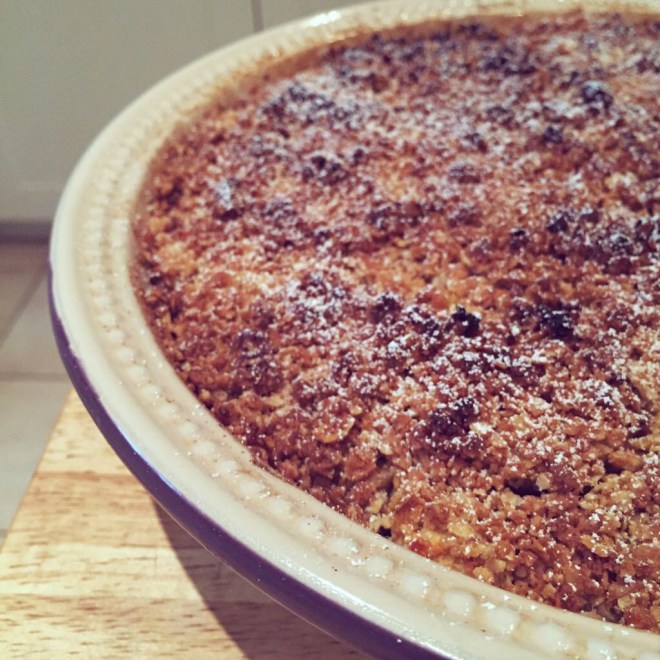
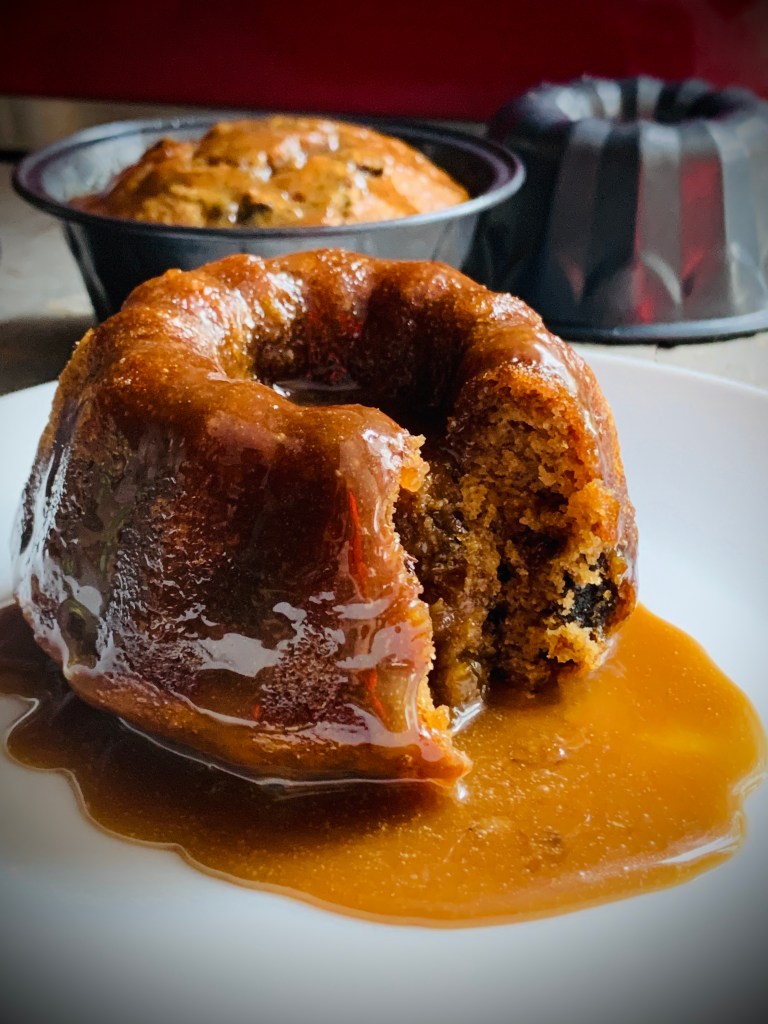
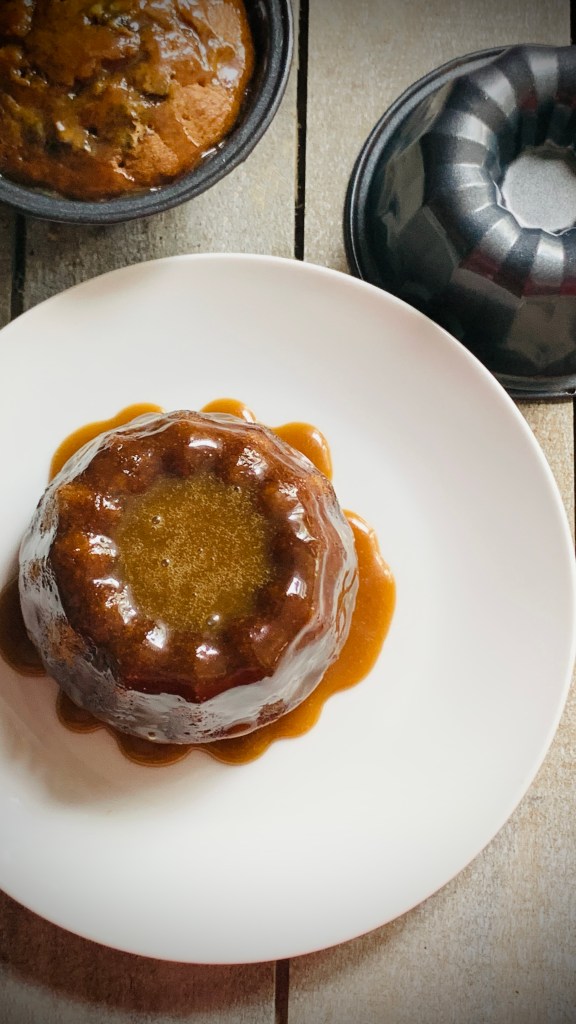
Banana & Prune Cakes
- 1/4 cup orange juice
- 1/2 cup boiling water
- 1 cup pitted prunes, chopped
- 1 teaspoon baking soda
- 1 1/2 cups all-purpose flour
- 1 teaspoon baking powder
- 1 teaspoon ground cinnamon
- 1/2 teaspoon kosher salt
- 1/4 cup unsalted butter, at room temperature
- 3/4 cups light brown sugar
- 2 large eggs
- 1 Tablespoon honey
- 3 medium-size overripe bananas, mashed (1 cup)
Rum Toffee Sauce
- 1/2 cup heavy cream
- 1 cup light brown sugar
- 1/4 cup unsalted butter
- 2 teaspoons Rum (or omit for a kiddy-friendly version)
Method
Banana & Prune Cakes
- Preheat oven to 350°. Grease, or spray with baking spray, 6 mini-savarin or Bundt tins
- In a small heatproof bowl, pour orange juice followed by the boiling water over the chopped prunes; stir in the baking soda. Stir together to combine and set aside to soak for about 15-2 0minutes
- In a medium bowl, whisk together the flour, baking powder, ground cinnamon and salt. Set aside until needed
- In the bowl of a stand mixer fitted with the paddle, beat the butter with the brown sugar at medium speed until light and fluffy, about 9-10 minutes
- Beat in the eggs, one at a time until combined, followed by the honey
- Reduce speed to low, beat in the flour mixture until just combined
- Add the date mixture (including liquid) and bananas, and beat at low speed until just combined
- Divide the batter into the prepared mini-pans, and bake until a toothpick inserted in the center comes out clean, about 25 minutes
Rum Toffee Sauce
- With about 10 minutes left on the pudding baking time, in a small saucepan, combine the heavy cream, the butter, the brown sugar, and the rum.
- Bring to a gentle boil over moderate heat, stirring to melt the butter and sugar, cooking until slightly thickened and deep golden, about 3 minutes.
- Keep warm until serving
To finish
- Once you remove the cakes from the oven, using a skewer or toothpick, poke holes all over the exposed surface
- Spoon 4-5 teaspoons of the warm sauce over the cakes, and let stand until absorbed, about 10 minutes
- Serve warm*, turned out onto plates (they may take some gentle persuasion!) with the remaining sauce spooned over
*If your sauce sets or becomes too thick to pour, gently warm over a low heat until pourable and warm again.