Smokin’ Pig Licker Brownies

Happy World Chocolate Day! Yes the food calendar which so often celebrates obscure treats and foods has of course a day designated to everyone’s favorite sweet treat. In whatever form- be it dark, milk, white, ruby or golden, nearly everyone I know has a soft spot for the timeless treat that is chocolate. In fact so much so in my case I ended up competing on a reality baking show about it. But I won’t bore you with those details.

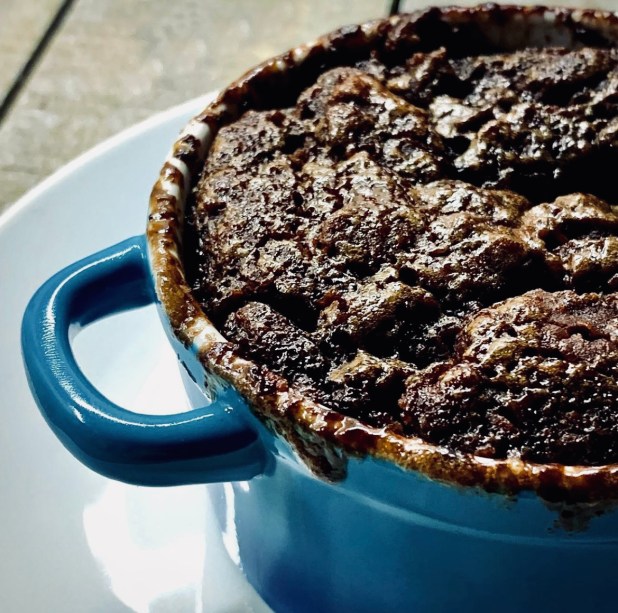
It only seemed fitting given the day that it is that I highlight one of the keystones of my baking journey thus far- my Smokin’ Pig Licker Brownies. Bear with me and see past the name- by know you know I do like to create a talking point! Originally conceived from an idea combining two stalwart (yet polar opposite) favorites in the food world – chocolate (sweet) and bacon (savory) I will forever be indebted to these tasty morsels for earning me the “award winning” in my press kit bio title.

Wanting to pair chocolate and bacon led me to research whether this combination was a historic one, steeped in the recipes of olde, or a more recent affair. It proved to be a little of both. I mean think of the “mole sauces” of Mexican cuisine- pairing sweet and savory was indeed nothing new. But how about actual bacon? It was through this that I stumbled upon “Pig Lickers” and what they involved. A treat hailing from Southern US state fairs, Pig Lickers as such are “treats made by coating cooked bacon in chocolate, and then garnishing with chunks of sea salt”. Are we feeling it yet? The name alone had me hooked let alone that fact that it combined my two holy grail ingredients.

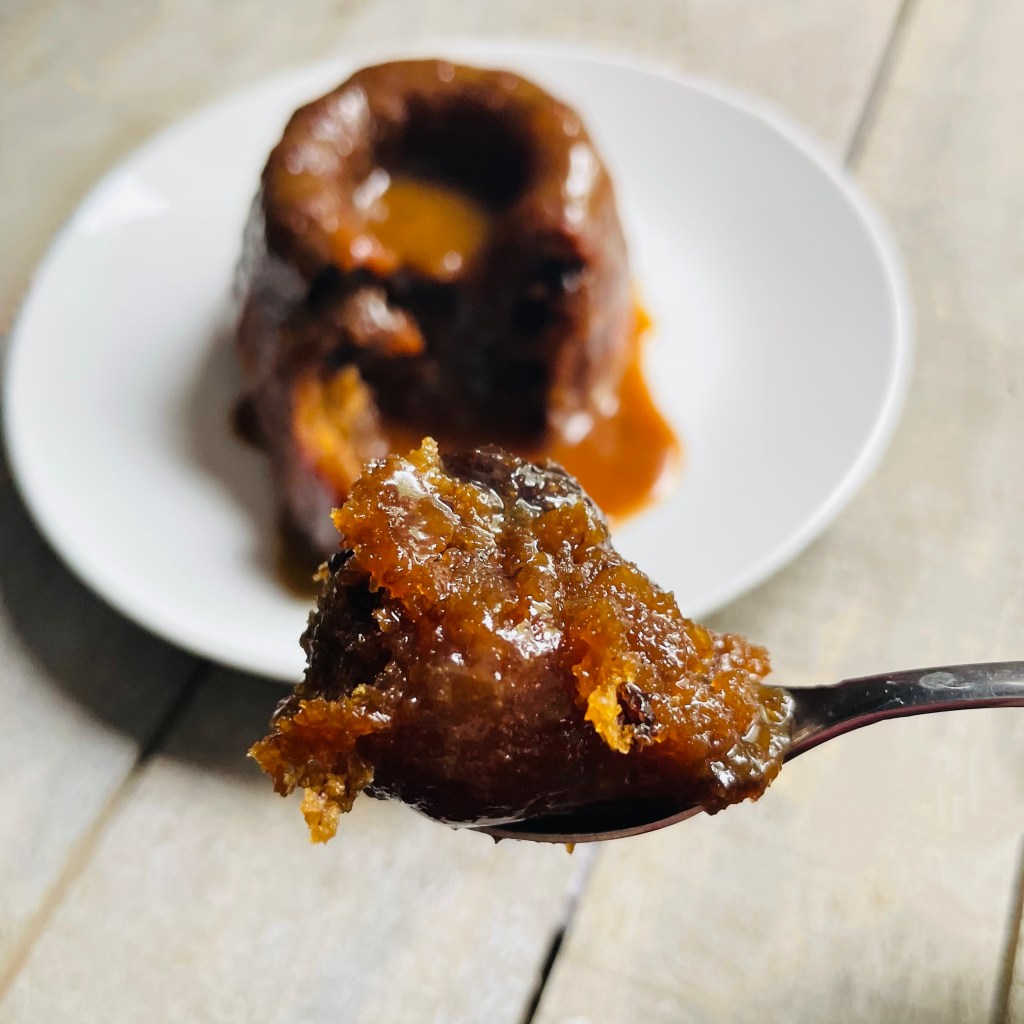
But I wanted to push it a little further. State fairs to me always bring that cliched image of candy floss, hot dogs, and chilli dogs. Wait! Chilli dogs?…chilli? Chilli and chocolate! There you have it! My end result- these brownies would be a classic combination of chilli and chocolate, with a thumbing of the culinary nose addition of bacon- in not one but two forms! The smoky, heat of the decadent brownies would be studded with crispy, sweet bacon pieces and then topped off with the aforementioned Pig Licker- a sliver of crispy bacon enrobed in chocolate, sprinkled with shards of sea-salt. Bet you’re on board NOW?

Before I depart to smother my bacon (!) a couple of words of advice. Don’t be tempted to use thick cut, or peameal, bacon here. The fat-to-meat ration is off and doesn’t work. Instead of crispy morsels of Umami goodness playing with luxurious chocolate, you get chunks of meat which just doesn’t sit right- taste or texture wise. Also don’t stress about tempering the chocolate. I mean you can if you want to go for the whole professional “snap” (*triggered*) finish if that’s your jam but at the end of the day these are rustic, wholesome, come-as-you are treats. Which I hope you enjoy!

Makes 12

Ingredients

  • 1 cup bacon, finely chopped
  • 2 teaspoons maple syrup
  • ¾ cup unsalted butter, cubed
  • 6oz semi-sweet chocolate, broken into pieces
  • 3 eggs
  • 1 cup sugar
  • ¾ cup plain flour
  • ½ cup cocoa powder
  • 1 teaspoon smoked paprika
  • ½ teaspoon mild chilli powder
  • 2oz dark chocolate chunks

To decorate

  • 3 full pieces of bacon 3 rashers, each cut into 4
  • 4oz semi-sweet chocolate, melted
  • Sea salt flakes

Method

  1. Set your oven to 350°F and line a deep 12″x9″ baking tray with baking parchment leaving an overhang each side
  2. Fry the bacon in a pan until just starting to crisp. Add the maple syrup and fry until a shade browner and crisper. Remove from the heat and leave to cool on a plate
  3. Melt the butter and chocolate in a bowl over a saucepan of simmering water (or bain-marie), stirring occasionally. Once melted, remove from the heat, and allow to cool
  4. In the bowl of a stand mixer, beat the eggs and sugar until the mixture is thickened and fluffy, then, in a separate bowl, combine the flour, cocoa powder, smoked paprika and chilli powder.
  5. Fold the cooled chocolate mixture into the egg mixture. Sieve in the dry ingredients, and fold together until uniform in color
  6. Fold in the chocolate chunks and bacon pieces. You may need to break up the bacon pieces as they may have stuck together while cooling
  7. Pour your mixture into the lined tray and gently spread to level the surface. Place in the oven for 20-25 minutes, then leave to cool completely in the tin before cutting into squares
  8. To decorate, place the larger bacon pieces in the frying pan and cook until crisp. Remove and leave to cool. Melt the remaining in a bowl over a saucepan of simmering water (or bain-marie), or in a microwave on short bursts, until fully melted
  9. Coat the bacon pieces one at a time in the melted chocolate. Place a bacon piece on top of each brownie and sprinkle with sea salt
  10. Leave to set, serve and enjoy!
Image credit Romas Foord

Quick Individual Cherry Cobbler

So I’m a sucker for cravings. Once I get something in my mind that’s it- I won’t rest until I’ve tasted it. That was that was the case with this cherry cobbler. Sure it’s a cheat’s version- using canned pin filling. But I craved it and the quicker I got it the better. Also lets face it- using canned filling cuts down on the stove-time involved in the making off this. If you feel so inclined, go right ahead with your favorite mix of cherries that you might use for your fillings. I’m definitely not one to dictate how you should run your kitchen.

The topping here is an adaption of a regular biscuit dough that I use to biscuit top stews and casseroles. Here I’ve slightly upped the sugar for a sweeter finish, adding in some cinnamon and oats for a more rustic dessert finish.

I love the flavor combination of cherries and almonds, thinking that it’s one of the best out there. Food trivia moment- both are linked by the compound Benzaldehyde, which is the second most popular flavor and fragrance after vanillin. Baking- educational too! (Darn! now I’m thinking I need to make a Cherry Bakewell…curse you infernal cravings!

With the use of pie filling these are so quick and easy that even making them in the current warmer weather can be justified. Plus adding a scoop of your favorite ice cream on top even more so!

Makes 4

Ingredients

  • 1 can 540ml (20 oz) cherry pie filling
  • 1/4 teaspoon almond extract
  • 1/4 cup toasted, flaked almonds
  • 1 cup all-purpose flour
  • 1/2 cup Jumbo rolled oats
  • 3 teaspoons granulated sugar
  • 1 1/2 teaspoons baking powder
  • 1/4 teaspoon cream of tartar
  • 1/2 teaspoon ground cinnamon
  • Pinch teaspoon salt
  • 4 tablespoons melted butter
  • 1/2 cup milk
  • 4 Tablespoon Turbinado sugar

Method

  1. Butter four 0.25L ramekins
  2. In a bowl mix the pie filling and the almond extract. Divide the pie filling equally among the ramekins
  3. Sprinkle the tops of the pie filling with the toasted almond flakes. Set them aside on a foil-lined baking sheet until later
  4. Preheat oven to 375 F
  5. In a medium bowl, combine flour, oats, sugar, baking powder, cream of tartar, ground cinnamon and salt. Whisk to combine
  6. Add the melted butter and milk, stirring just until moistened. The biscuit batter will be quite thick and lumpy. Drop batter by heaping scoopfuls onto the filling
  7. Sprinkle the turbinado sugar over the biscuit dough
  8. Bake for about 20 minutes, or until biscuits are browned and filling is hot and bubbly
  9. Leave to cool for about 5 minutes. Serve and enjoy!

Chocolate Pouding Chomeur

Ingredients

Cake

  • 1 ½ cups all-purpose flour
  • 2 Tablespoons unsweetened cocoa powder
  • ½ cup granulated sugar
  • 1 ½ tsp baking powder
  • 1 pinch salt
  • ½ cup cold unsalted butter, cut into pieces
  • ½ cup chocolate milk
  • 2oz semi-sweet chocolate (I use bars with 1/4 oz square so I can put 2 in each dish)

Sauce

  • 1 cup maple syrup
  • 1 cup packed light brown sugar
  • ½ cup water
  • ¼ cup unsalted butter
  • 1 tsp vanilla extract

Method

Cake

  1. Preheat the oven to 350ºF (180ºC). Lightly grease 4 individual (0.25L) mini-cocottes, ramekins or other ovenproof dishes and place them onto a baking tray
  2. Sift the flour, cocoa powder, sugar, baking powder and salt into a large mixing bowl. Add the butter and use a pastry cutter or your fingertips to work the butter into the flour until a rough, crumbly mixture – similar to thick breadcrumbs or damp sand is achieved
  3. Add the milk, chocolate milk and stir just until the mixture comes together
  4. Spoon this into the prepared smaller baking dishes. Push 2 x 1/4 oz square of chocolate into the middle of each pudding. Set aside while you prepare the sauce

Sauce

  1. Combine the maple syrup, brown sugar, water, butter and vanilla in a pan and bring to a boil over high heat, stirring occasionally.
  2. Once it reaches a rolling boil, remove it from the heat and ladle this over the cake in the ramekins.
  3. Bake the puddings for about 30 minutes, until a tester inserted into the centre of a pudding comes out clean.
  4. Remove from the oven and let the puddings cool for about 15 minutes before serving (be careful syrup is hot!)

Banana & Prune Sticky Toffee Cakes

Makes 6

Ingredients

Banana & Prune Cakes

  • 1/4 cup orange juice
  • 1/2 cup boiling water
  • 1 cup pitted prunes, chopped
  • 1 teaspoon baking soda
  • 1 1/2 cups all-purpose flour
  • 1 teaspoon baking powder
  • 1 teaspoon ground cinnamon
  • 1/2 teaspoon kosher salt
  • 1/4 cup unsalted butter, at room temperature
  • 3/4 cups light brown sugar
  • 2 large eggs
  • 1 Tablespoon honey
  • 3 medium-size overripe bananas, mashed (1 cup)

Rum Toffee Sauce

  • 1/2 cup heavy cream
  • 1 cup light brown sugar
  • 1/4 cup unsalted butter
  • 2 teaspoons Rum (or omit for a kiddy-friendly version)

Method

Banana & Prune Cakes

  1. Preheat oven to 350°. Grease, or spray with baking spray, 6 mini-savarin or Bundt tins
  2. In a small heatproof bowl, pour orange juice followed by the boiling water over the chopped prunes; stir in the baking soda. Stir together to combine and set aside to soak for about 15-2 0minutes
  3. In a medium bowl, whisk together the flour, baking powder, ground cinnamon and salt. Set aside until needed
  4. In the bowl of a stand mixer fitted with the paddle, beat the butter with the brown sugar at medium speed until light and fluffy, about 9-10 minutes
  5. Beat in the eggs, one at a time until combined, followed by the honey
  6. Reduce speed to low, beat in the flour mixture until just combined
  7. Add the date mixture (including liquid) and bananas, and beat at low speed until just combined
  8. Divide the batter into the prepared mini-pans, and bake until a toothpick inserted in the center comes out clean, about 25 minutes

Rum Toffee Sauce

  1. With about 10 minutes left on the pudding baking time, in a small saucepan, combine the heavy cream, the butter, the brown sugar, and the rum.
  2. Bring to a gentle boil over moderate heat, stirring to melt the butter and sugar, cooking until slightly thickened and deep golden, about 3 minutes.
  3. Keep warm until serving

To finish

  1. Once you remove the cakes from the oven, using a skewer or toothpick, poke holes all over the exposed surface
  2. Spoon 4-5 teaspoons of the warm sauce over the cakes, and let stand until absorbed, about 10 minutes
  3. Serve warm*, turned out onto plates (they may take some gentle persuasion!) with the remaining sauce spooned over

*If your sauce sets or becomes too thick to pour, gently warm over a low heat until pourable and warm again.

Flourless Chocolate Cake

img_5483

Okay this was a surprise hit which a lot of you have been asking about. I made it as I was itching to bake but given current times I’m having to be somewhat frugal with particular ingredients, namely flour and yeast. My yeast problem I appear to have solved (there’s a post coming on that) but flour is still a questionable item, which appears to elude me.

Flourless chocolate cake seems to be one of those things that always pops up on a menu, appealing to all and sundry. So it seemed a pretty perfect fix here. I’ve tried it a few times with varying results across the board from fudgey & brownie like to cakey (and to be honest pretty dry). The recipe here results in the former-  fudgey and reminiscent of the best brownie, just thick enough to whisper indulgence but thin enough not to push you over the edge of regret. A surprise addition of instant coffee granules helps amplify the chocolate flavour without pushing it in to the realms of mocha flavoring.

I tend to like the cake just as is, with a snowy dusting of icing sugar. But feel to dress it up anyway you like – a scoop of cool vanilla ice cream perhaps? or maybe a drizzle of booze-laden cream maybe? The rules are yours to make…or break.

img_5478

Ingredients

  • 1 cup semi-sweet chocolate chips
  • 1/2 cup salted butter
  • 3/4 sugar
  • 1/4 teaspoon kosher salt
  • 1 teaspoon vanilla extract
  • 3 large eggs, beaten
  • 1/2 cup cocoa powder
  • 1 teaspoon instant coffee granules
  • Icing sugar, to dust (optional)

Method

  1. Preheat your oven to 375 degrees F. Grease and line an 8″ cake pan. Set aside until needed later
  2. Combine the chocolate and butter in a large microwave-safe bowl, and heat for 30 seconds. Remove stir and heat again for another 30 seconds. Stir until the chocolate is melted and the mixture is smooth. (or you can melt them together in a heat-proof bowl over a double-boiler)
  3. Add the sugar, salt, vanilla extract and stir to combine well
  4. Add the beaten eggs and stir until smooth and uniform in color
  5. Finally add in the cocoa powder and instant coffee granules. Stir until just combined- be careful not to over-mix here
  6. Pour the batter into your prepared cake pan, gently smoothing the top. Bake at the preheated temperature for 25 minutes, or until the the top has a thin crust and the centre reads 200 degrees F on an instant read thermometer.
  7. Remove the cake from the oven and place on a cooling rack fro 10 minutes. After this time use an offset spatula (or butter knife) to run around the edges of the cake and loosen it from the pan.
  8. Place your serving plate on top of the cake in the pan and carefully turn it upside down to invert the cake out onto your serving plate. Let the cake cool completely, either at room temperature or in the fridge. If cooling in the fridge remove it at least 30 minutes prior to serving to allow it to come to best temperature.
  9. To serve dust the top of the cake liberally with icing sugar if desired.

926dfc67-3fc3-498e-9887-dc000dd1448b