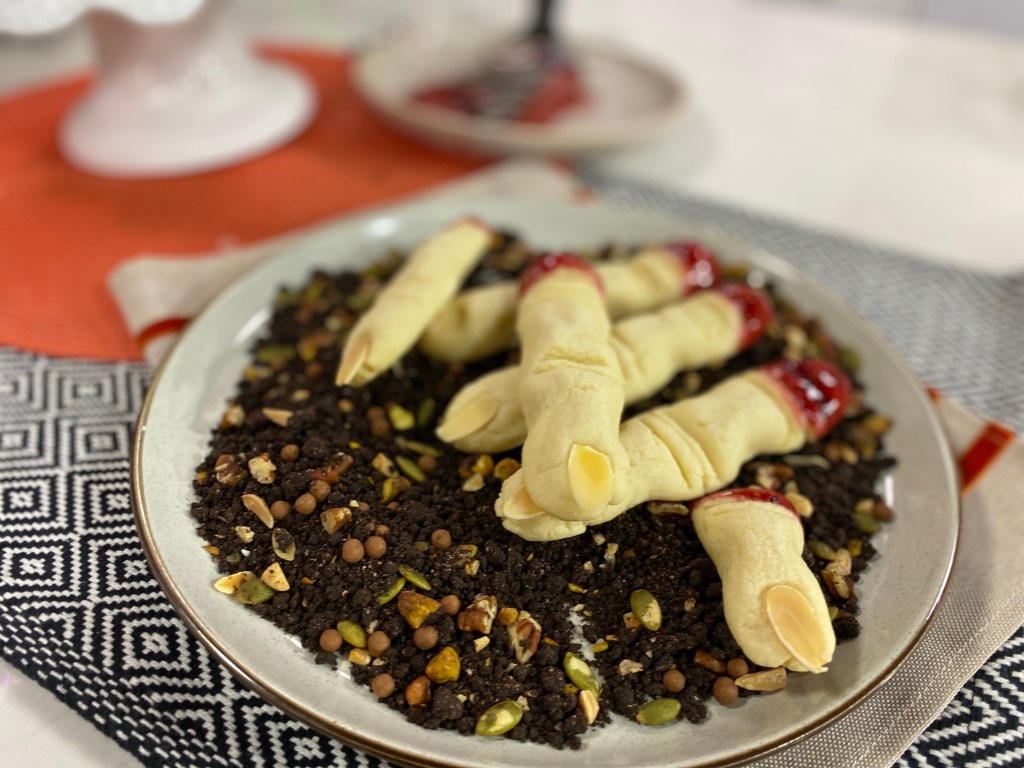
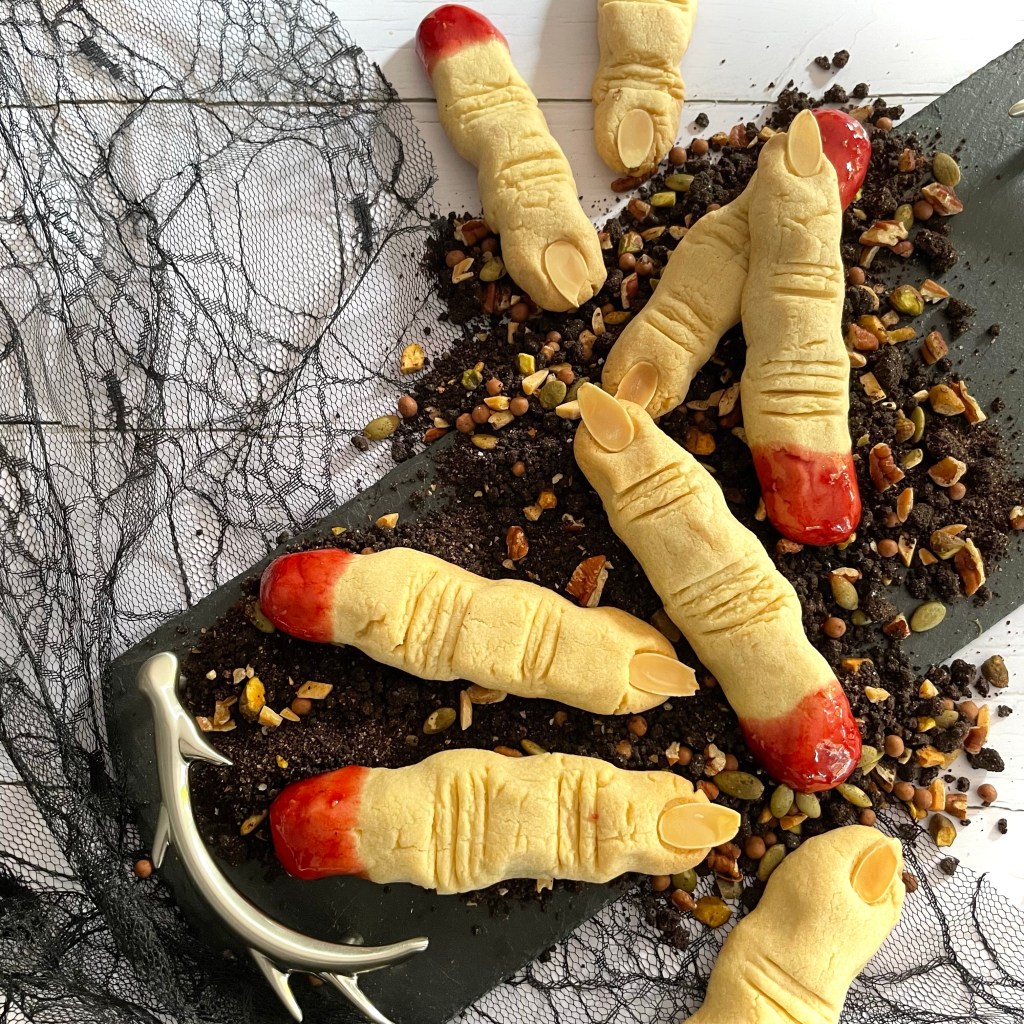
What’s Halloween without a little treat from the Other World, huh? These delightfully dreadful cookies are a wonderful treat to have lying around at any festively freakish gathering. A spin on traditional sugar cookies, they really do look more than the sum of their parts. They’re also easy enough that you can rope in some ghoulish little helpers for the fun.
A point to note that like all sugar cookies, you want to avoid baking them to the usual cookie state of “golden brown”- this will result in them being a tad too hard for enjoyment. Bake them for the time required below, or until hte edges are just starting to turn a light golden brown. The cookies may look under-baked but trust me here- they will taste so much better!
Makes apx 24 (depending on size)
Ingredients
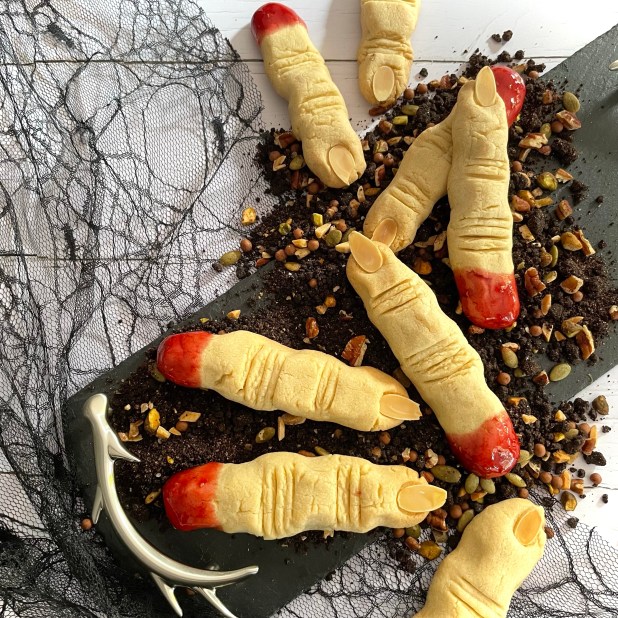
Graveyard Dirt
- ¼ cup butter; melted
- 1 Cup granulated sugar
- 1 Cup cocoa powder
- ½ pinch salt
- slivered almonds; chopped walnut; shaved dark chocolate; shaved milk chocolate (Optional)
Fingers Cookies
- 2 cups All Purpose Flour
- ½ teaspoon baking powder
- ¼ teaspoon fine salt
- ½ cup (1 stick) unsalted butter, at room temperature
- 1 cup sugar
- 1 large egg, at room temperature
- 1 teaspoon pure vanilla extract
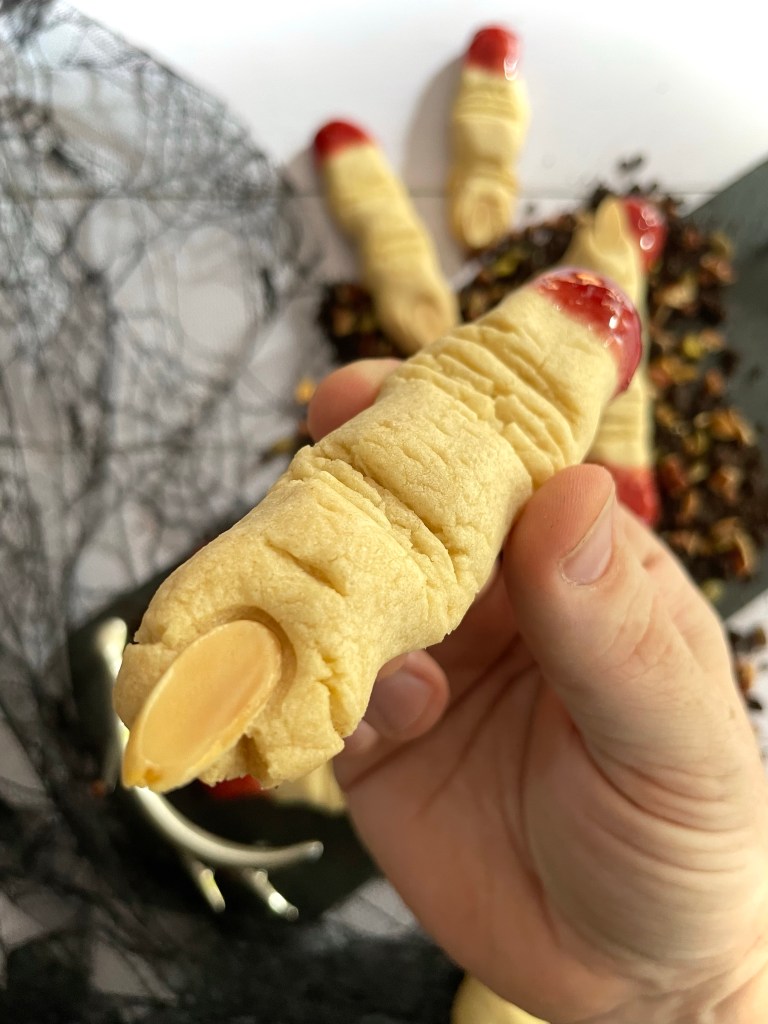
- 28 large, flaked almonds
- ½ cup smooth, raspberry jam
- 1 Tablespoon light corn syrup
Method
Graveyard Dirt
- Melt butter in the microwave in a small glass or ceramic bowl (microwave safe) and allow to cool to room temperature
- In a large mixing bowl, blend the sugar, salt, and cocoa powder until thoroughly mixed
- While whisking, slowly add the melted butter and continue mixing gently until blended, but dry
- Using a fork, continue mixing until it looks like dark soil
- At this stage mix in the chopped nuts to give the soil texture
- Spoon the “dirt” on to your serving plate or tray, ready for your finger cookies
Fingers Cookies
- Preheat the oven to 325 degrees F. Prepare a cookie sheet with baking spray or line with a silicone mat, or baking parchment. Set aside until needed
- In a medium bowl, whisk together the flour, baking powder and salt. Set aside until needed
- In the bowl of a stand mixer fitted with the paddle attachment, beat the butter and sugar together until light and fluffy, scraping down the sides of the bowl with a spatula as needed, about 10 minutes
- Add in the egg, vanilla and mix until well combined and smooth.
- Gradually beat in the dry flour mixture, ¼ cup at a time until a dough forms
- Remove the bowl and using about 1 1/2 tablespoons of dough at a time, roll the dough between your palms into 5-inch-long fingers about 1/2-inch thick. Firmly press a sliced almond into the end of each finger to make fingernails
- Make several horizontal cuts, about 1/4 inch deep, in the center of each finger to make mimic skin folds at the knuckles. Gently press the dough on either side of the cuts to shape the knuckles
- Arrange the fingers on the prepared baking sheet and bake until light golden, 16 to 18 minutes
- Transfer the fingers to a wire rack and cool completely
- While the cookies cool, in a small saucepan, combine the jam, corn syrup and heat over low heat until warm, about 2 minutes, stirring gently
- Dip the blunt ends of the fingers in the warm jam and arrange on a plate of the graveyard dirt for serving