Snickers style peanut butter cookies

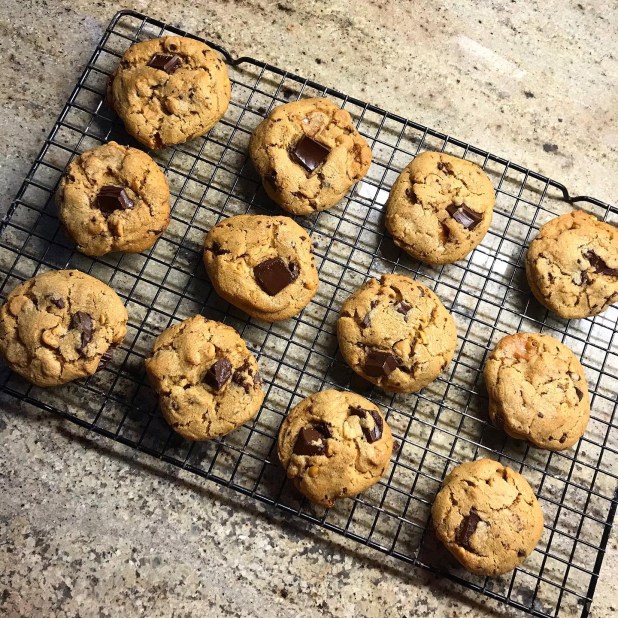
Well these seemed to go down pretty well when I posted about them on my social media feeds. For a while I’ve been trying out recipes looking for a good reliable peanut butter cookie, something classic and tasty that wasn’t too crispy. However- me being me I wanted to add layers of flavour. Before I knew it I had ended up with a cookie reminiscent of one of my favourite candy bars – Snickers.

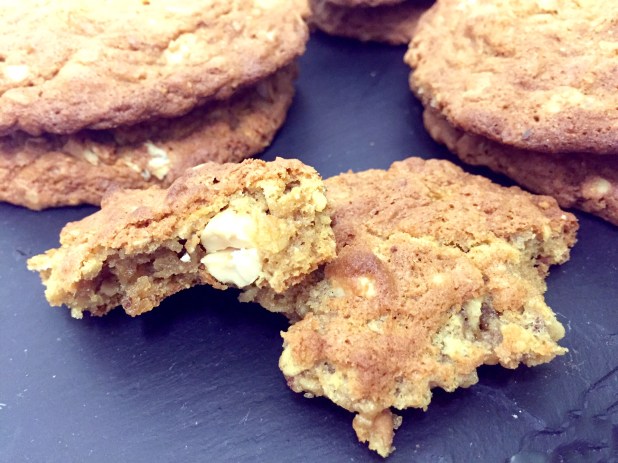
A handy hint here is that dependant on the baking time a different texture of cookie will be achieved. Longer and lower for a chewier cookie. The time I give in the recipe below is for my personal preference, feel free to play around with it. If all else fails and the finished cookies are too crisp on their own you can always crumble and use as a tasty ice cream topping.

You can use either smooth or crunchy peanut butter based on your personal taste. As expected smooth peanut butter will yield a smoother cookie. I personally prefer to use the crunchy butter variety as it gives a rather nice smattering of nutty pieces through the finished cookie.

Makes 24

Ingredients

  • 1/2 cup salted butter (1 stick), room temperature
  • 1/2 cup white granulated sugar
  • 1/2 cup packed brown sugar
  • 1/2 cup peanut butter, smooth or crunchy to personal taste
  • 1 large egg
  • 1 1/4 cups all purpose flour
  • 3/4 teaspoon baking soda
  • 1/2 teaspoon baking powder
  • 1/4 teaspoon salt
  • 12 Caramel candies, cut into pieces
  • 4oz semi sweet chocolate, cut into chunks
  • 1/2 cup peanut butter chips

Method

  1. Chop the chocolate in chunks. You don’t want too fine a piece- irregular and varied sizes look a lot better in the finished cookie. Set aside until needed
  2. Using a scissors, carefully cut the candy pieces into 3 or 4 pieces each and set aside until needed as well
  3. Line a cookie tray with baking parchment and set aside until neeeded
  4. Beat the butter, brown sugar and white sugar until creamy (about 10 mins)
  5. Mix in the peanut butter, followed by the egg until fully combined
  6. In a separate bowl, whisk together the flour, baking soda, baking powder and salt. Gradually add the combined dry ingredients into the sugar/butter mixture. Mix until fully incorporated
  7. Fold in the chocolate chunks, the caramel pieces and peanut butter chips. Mix until thoroughly mixed through the dough (I find here it easier to fold by hand rather than using a spatula or spoon. It just depends on what you’re comfortable with)
  8. Cover the dough with cling wrap and refrigerate the dough for between 20- 30mins
  9. Preheat your oven to 325°F
  10. Using a medium cookie scoop (2 tbspn apx) shape the dough into 1 inch balls. Place the balls of dough about 2 inches apart on pre-lined  cookie sheet
  11. Bake at 325°F until light brown, about 15 to 17 minutes. Remove the cookies from the oven and let cool in their baking sheets for 5 minutes. After a minute, transfer the cookies to a rack to cool completely

*For chewier cookies, bake at 300°F for additional 5 to 10 minutes.

The baked cookies will keep for up to a week in an airtight container

Enjoy!

#Recipe Peanut Butter Cream Pie

If you’ve read my previous post on Toronto you may remember me mentioning a favourite restaurant there – The Gabardine. (If you haven’t you can read it here). One of the desserts I had the pleasure of trying was a Peanut Butter Cream Pie. I had never had it before and had no idea what it was but it sure sounded good. And boy, I was not disappointed! I can only describe it as a lighter version of a cheesecake with moreish peanut buttery goodness abound. Ever since then I haven’t been able to get it out of my mind and so set about trying to receate it. Not to detract from chef Graham Pratt’s original of course- the best form of flattery is, afterall, imitation.

For me this is one of those dishes that is truly evocative of a time in my life. One bite and I’m instantly back in the bright buttermilk interior of The Gabrdine, smelling herby puff pastry and smoked ham, cheeks gently puckering from a chilled Sauvignon, all the while watching the Torontonian business clique milling back to their desks. Typing this oddly stirs subtle pangs almost of homesickness. I hope to get back there some day- and hopfully try another slice of pie!

So with it being Peanut Butter Lovers Day today (seriously who decides these things?) it’s the perfect time for posting the recipe for my version of it.

Peanutbutter Cream Pie- Recipe Image

For the Pie

250g Digestive biscuits
5 tablespoons Melted butter
50g Demerara sugar
75g Salted peanuts
160g Icing suga
280g Cream cheese
230g Smooth peanut butter
230ml Double cream, lighlty whipped

To finish

150ml Double cream, whipped

You’ll also need a 9″ x 1″ or 1.5″ deep circular pie dish

  • In a food processor blend the digestive biscuits, Demerara sugar and salted peanuts.
  • Whilst blitzing drizzle in the melted butter. Blitz to rough breadcrumbs stage.
  • Pour into a pie dish and press into the base and sides using a metal spoon.
  • Place the crumb lined pie dish into the refrigerator to set at least 3 hours, preferably overnight.
  • In a stand mixer blend the icing sugar and cream cream until smooth.
  • Add in the smooth peanut butter and mix again to combine.
  • Gently fold in the whipped cream. Don’t stir too much as this will whip the cream even more and make the filling “heavy”.
  • When the whipped cream is fully folded in, pour/ spoon the filling into the set crumb base, and smooth the top.Refrigerate for 2-3 hours.
  • When ready to serve remove from the fridge and top with the remaining whipped cream.
  • Slice, and serve (with additional whipped cream if you really want to treat yoursefl!)

Recipe- Chilled Chocolate, Peanut Butter & Caramel Cheesecake

2015-08-28 17.53.15

Cheesecake- the dessert that can divide a nation. “Should it be chilled or baked?” is a question that could have come from the lips of Hamlet himself. After watching the “Desserts” episode of The Great British Bake Off I was throughly enthussed to try baked cheesecake. To be honest there has always been something about baked cheesecake that never hit the spot for me. Maybe I just never had a good one – they’ve ranged from custard tart-like to downright chalky and as a result my allegience and affections have always belonged to it’s cooler, and in my opinion, more sublime counter part- the chilled cheesecake. And here’s the result with my signature ubiquitious twist. Rich and chocolatey with a hint of peanut this is a thoroughly grow-up dessert. Little and often is the way ahead…little and often!

Chilled Chocolate, Peanut Butter & Caramel Cheesecake

200g digestive biscuits

90g  butter, cubed

110g caster sugar

150ml double cream

150g  dark chocolate, melted and cooled

3 tablespoons cocoa powder

560g cream cheese

4 tablespoons smooth peanut butter

200g Carnation tinned caramel

75g cocoa nibs

Chocolate curls, optional

2015-08-28 17.53.20

Method

– To make the base, blitz the biscuits in a food processor to make rough crumbs and then add the butter and 1 tablespoon of cocoa. Blitz again until it clumps together  and then spread them into a 23cm springform tin. Press the biscuit crumbs into the bottom of the tin to make an even base and refrigerate while you carry on making the filling.

– Carefully melt the chocolate in a bowl over hot water. Make sure the base of the bowl doesn’t touch the hot water. When melted, remove and leave to cool slightly.

– Whip cream until soft peak stage. Add cooled melted chocolate, then the cocoa powder. Mix well and set aside.

– In a stand mixer beat the cream cheese and sugar together for about 10 mins. Continue beating until there ae no sugar grains. Add in the peanut butter and mix until well combined.

– Fold in cream/chocolate mixture and mix thoroughly.

– Spread half the cheese filling on top of crushed biscuit base.

– Dot tablespoon size blobs of the caramel over the cheesecake filling. Once all the caramel has been used, spread the remaining cheese mix over this so the caramel it is completely covered.

– Decorate the top of the cheesecake with the cocoa nibs and the chocolate curls, if using.

– Place in refrigerate for minimum 3 hours, or overnight.

– Slice, serve and enjoy!

Recipe Alert…Peanut Butter Oattie cookies

2015-04-22 13.13.58

My Peanut Butter Oattie cookies are packed full of oats giving them a soft, chewy texture with whole peanuts adding pleasing crunchiness. Make sure you use salted peanuts as they add wonderful pockets of tangy saltiness contrasting the sweet oats.

Sweet, salty, chewy and incredibly moresish- you need to try these beauties! They’re proving incredibly  popular in my household at the moment- I’ve already lost count of the times I’ve been asked to make them. A fantastic treat to have in stock when the kids bundle home from school- a hard days “Rock; Paper; Scissors” having depleted their energy levels! Partnered with a glass of cold milk it’s indeed a marriage made in heaven. But it’s not just my children who can be found pilfering the cookie jar when these are about. My husband’s preference for the savory means he’s oftened to be found checking emails with cookie in hand!

I call them cookies as opposed to biscuits as a personal preference. For me biscuits represent something more uniform and structured- exact bites of crumbly sweetness. The cookie on the other hand is something more rustic. A ballsier rebel of the Baking World conforming less to the rules of appearence and plunging headfirst into the realm of flavours. Cookies don’t care how you think they look- they prefer to let their flavours make an impression. These cookies are not your small, danity bite size treats. They are large handfuls of tastiness- not meant to be nibbled on but greedily chomped at. Partnered with a glass of cold milk your satifaction is sure to be sealed with dripping, grinning milky moustache.

2015-04-22 12.41.18

Peanut Butter Oattie Cookies

Makes between 24-30 (depending on size)

175g Unsalted butter

225g Crunchy peanut butter

4 tablespoons Maple syrup

150g Caster sugar

150g Light brown sugar

2 large Eggs

1 tablespoon Vanilla extract

225g Plain flour

2 teaspoons Bicarb of soda

1/2 teaspoon Salt

250g Jumbo porridge oats

100g Salted peanuts


Method

  • In the bowl of a stand mixer combine the butter, peanut butter, maple syrup, vanilla extract and both of the sugars. Set to beat on medium speed. Beat for about 10 mins.
  • Whilst the butter mixing is beating you can get on the the other parts of the recipe. Preheat your oven to 170 degrees C and line two baking sheets with baking parchment.
  • In a separate large bowl combine the flour, bicarb of soda, and salt.
  • Add the porridge oats and peanuts and mix throughly.
  • To the butter mixture add 1 egg and beat to evenly incorporate. Add the remaining egg and once again beat to evenly incorporate.
  • Remove the bowl from the mixer and slowly add half of the dry ingredients, mixing only until just incorporated. Add in the remainder of the dry ingredients and once again mix until just combined. The batter will be quite stiff and lumpy. Don’t worry- this is exactly what you want.
  • Using two dessert spoons or an icecream scoop, place plarge balls (slightly larger than golf-ball shapes) onto the lined baking trays. Leave apx 2 inches between each cookie ball as they will spread whilst cooking they will spread. (I’m never too fussed about having them an even size as I think having them varying shapes and textures adds to their charm and  tastiness).
  • Place the cookie trays into the preheated oven and bake for 10-12 minutes, until they spread and are golden brown.
  • Remove from the oven and allow the baked cookies to rest on the trays for about 8-10mins. They will still be a bit soft at this point so remove from the trays with a fish-slice or flat spatula and leave to cool fully on wire racks. During cooling they will frim up some more giving a soft cookie texture.
  • Once fully cooled, remove from the rack and enjoy.


In the meantime,

“Remember Mom’s the word- that’s Mr. Mom’s!”