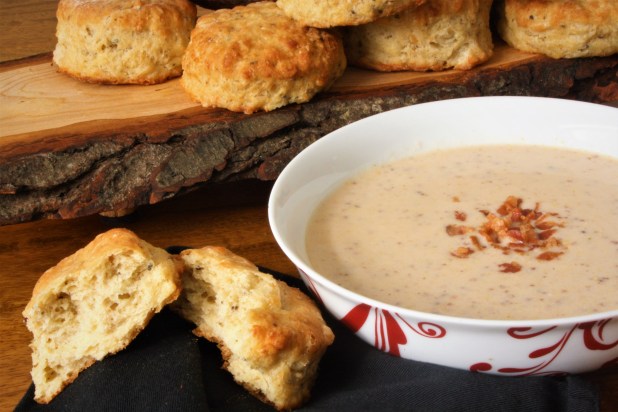
Before moving to Canada I’d never really heard of cold brew coffee. I guess it was something that maybe slipped under the radar of my London life in the deluge of Hoxton Hipsters, deconstructed menus and “free-from” frenzies. But here in Toronto it’s huge. In fact “huge” is too small a word to relay how prominent it is. Now that the “Unicorn” and “Fraken-Frappe” craze has passed, “Cold Brew Coffee” is THE thing- each and every coffee shop having their own take on it.
I’ve tried (quite) a few and hand on heart, whilst the other one is holding my coffee, the best one I’ve tried is by the team at Station Cold Brew Coffee. Available in a variety of formats from the travel-friendly stubby to their innovative “Nitro Can” to the customisable concentrate (and so much more) there’s something to suit coffee-lovers galore. You can find out more about them here. You can also catch the team on Dragon’s Den airing September 28th at 8.00pm EST/PST on CBC.
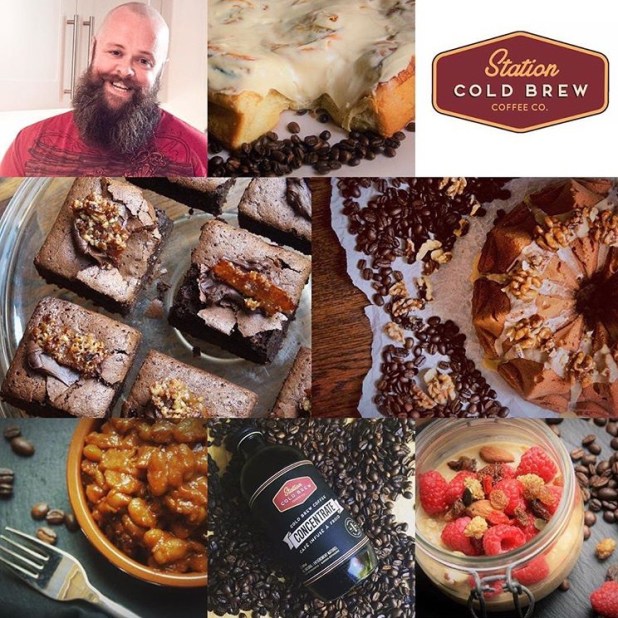
I have already mentioned that I think Station Cold Brew Coffee is the best and since I only work with the best, we teamed up to do a collaboration. You’ll find here a collection recipes showcasing their wonderful caffeine-laced beverage. All of the Station Cold Brew Coffee products used here have been supplied by Station Cold Brew Coffee company free of charge and as part of a mutually agreed collaboration project.
Ranging from sweet to savory the recipes feature Station Cold Brew Coffee in unexpected, but always delicious, ways. I do hope you enjoy!
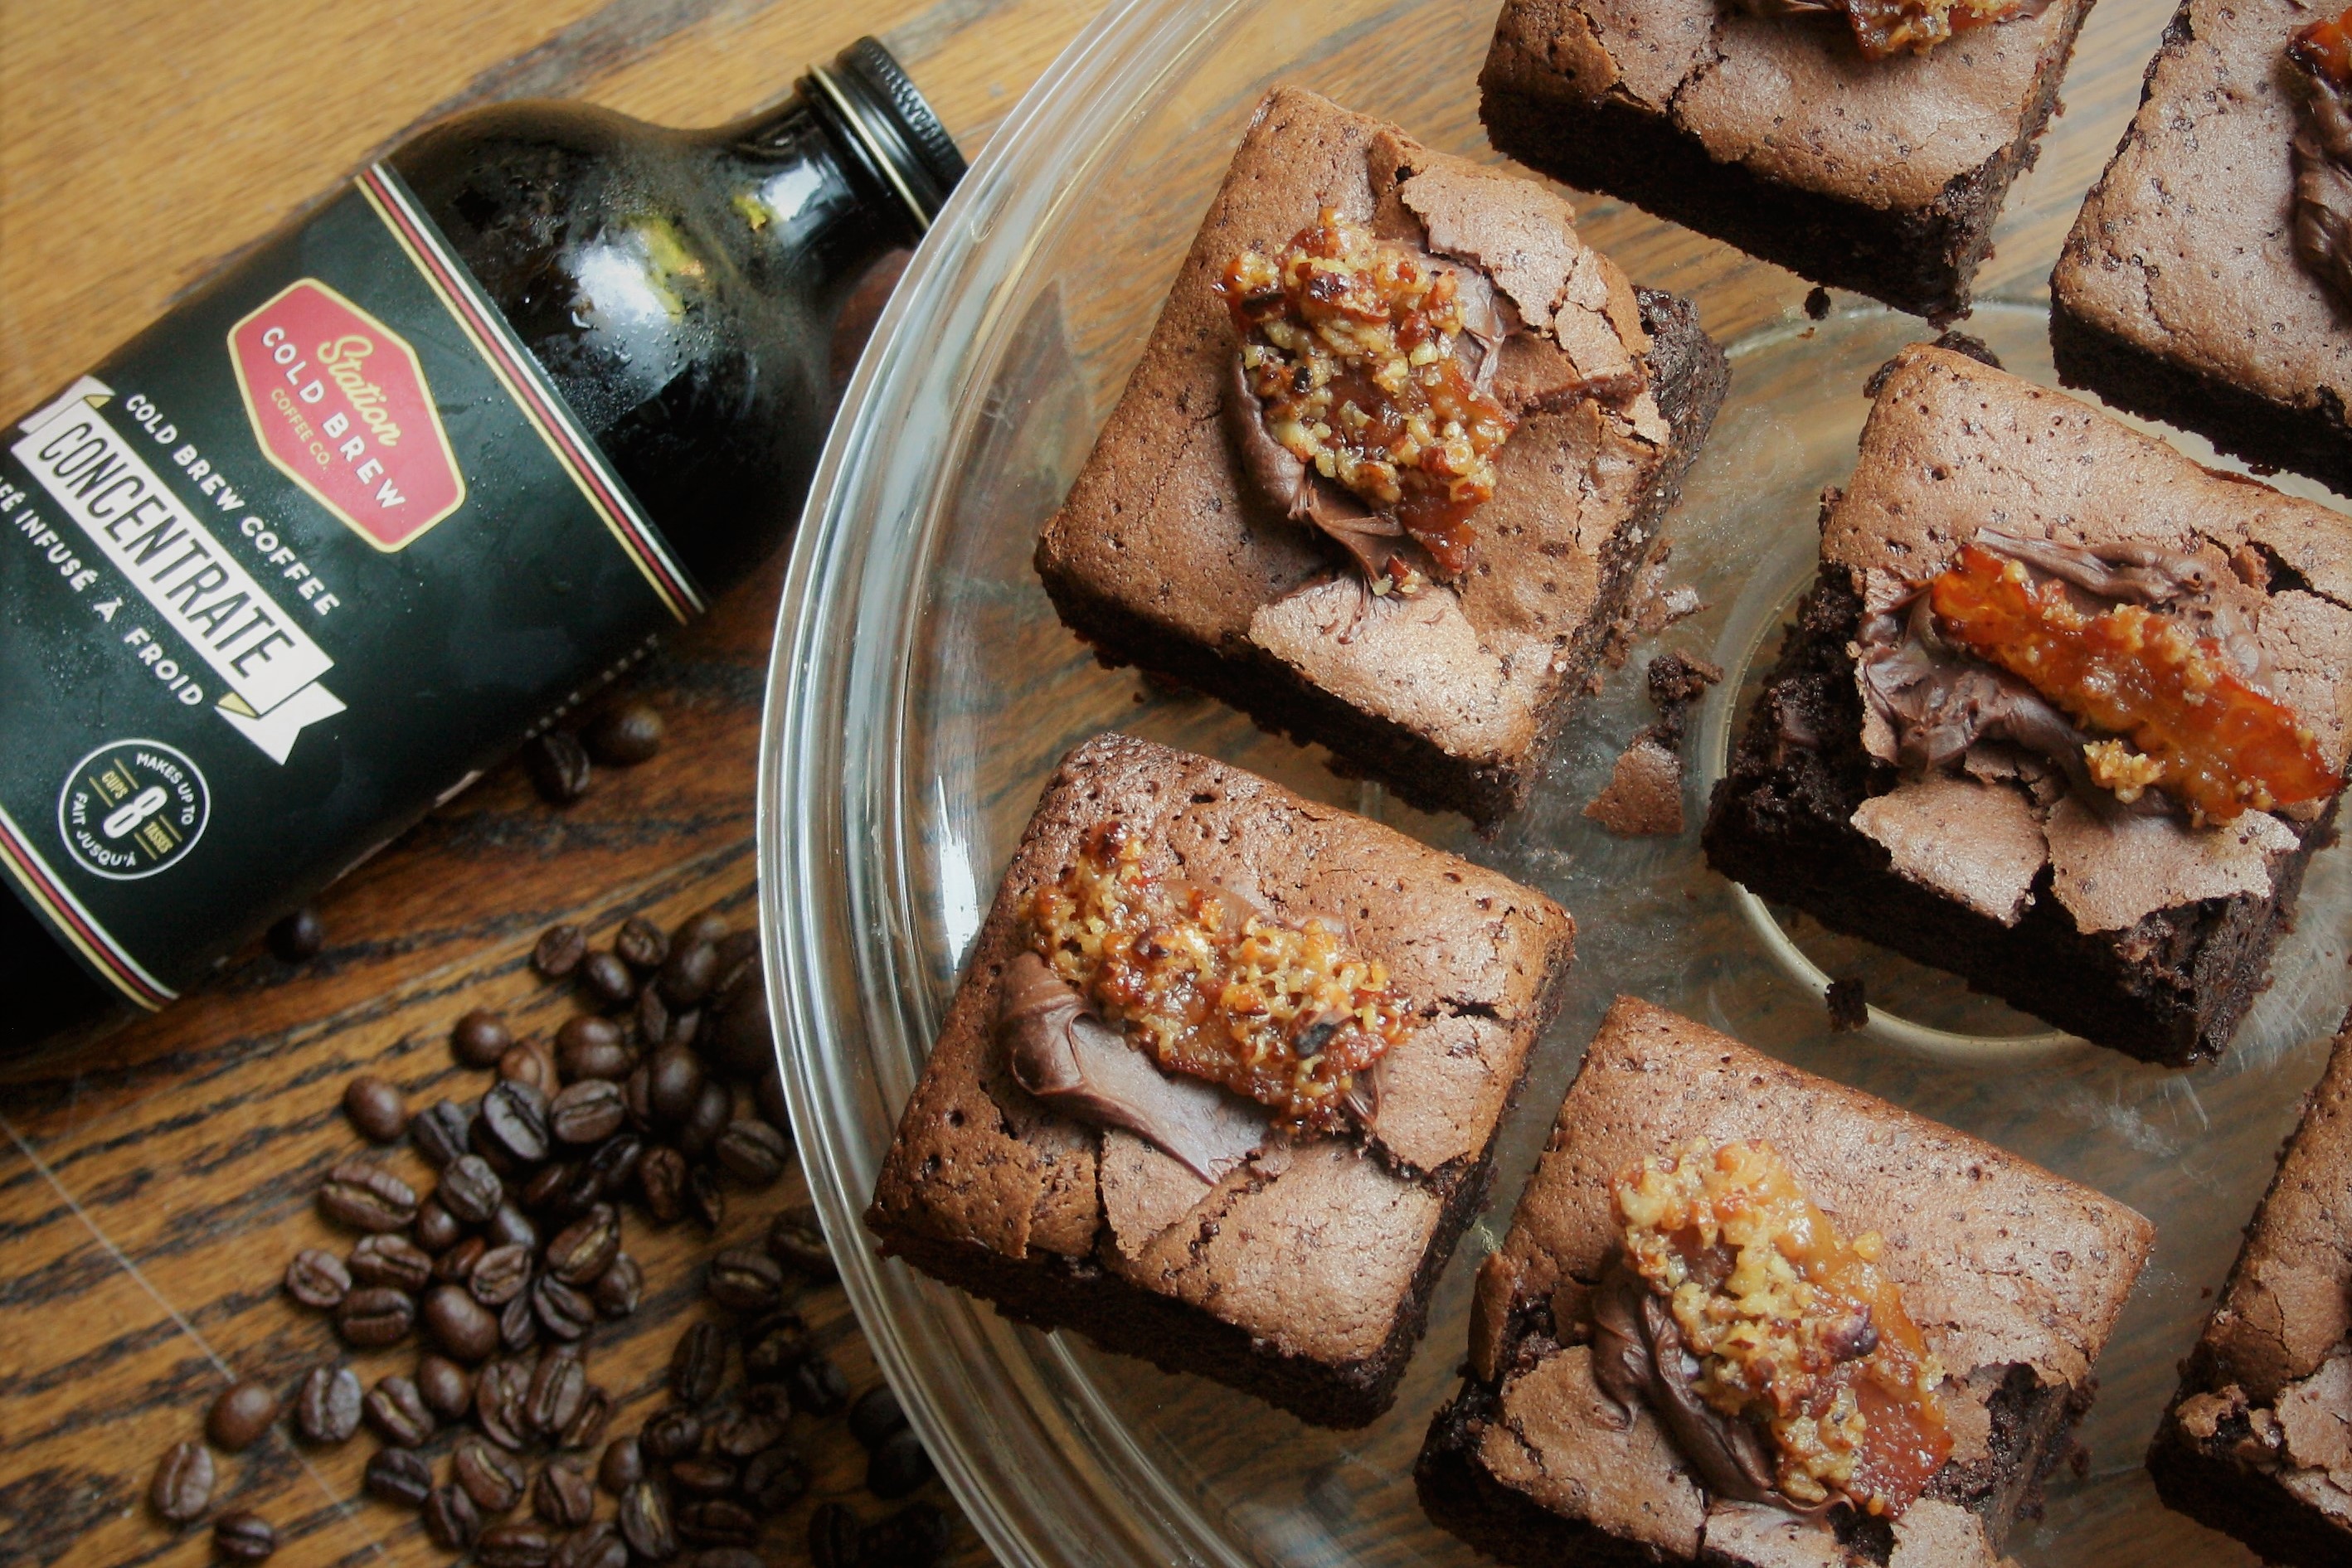
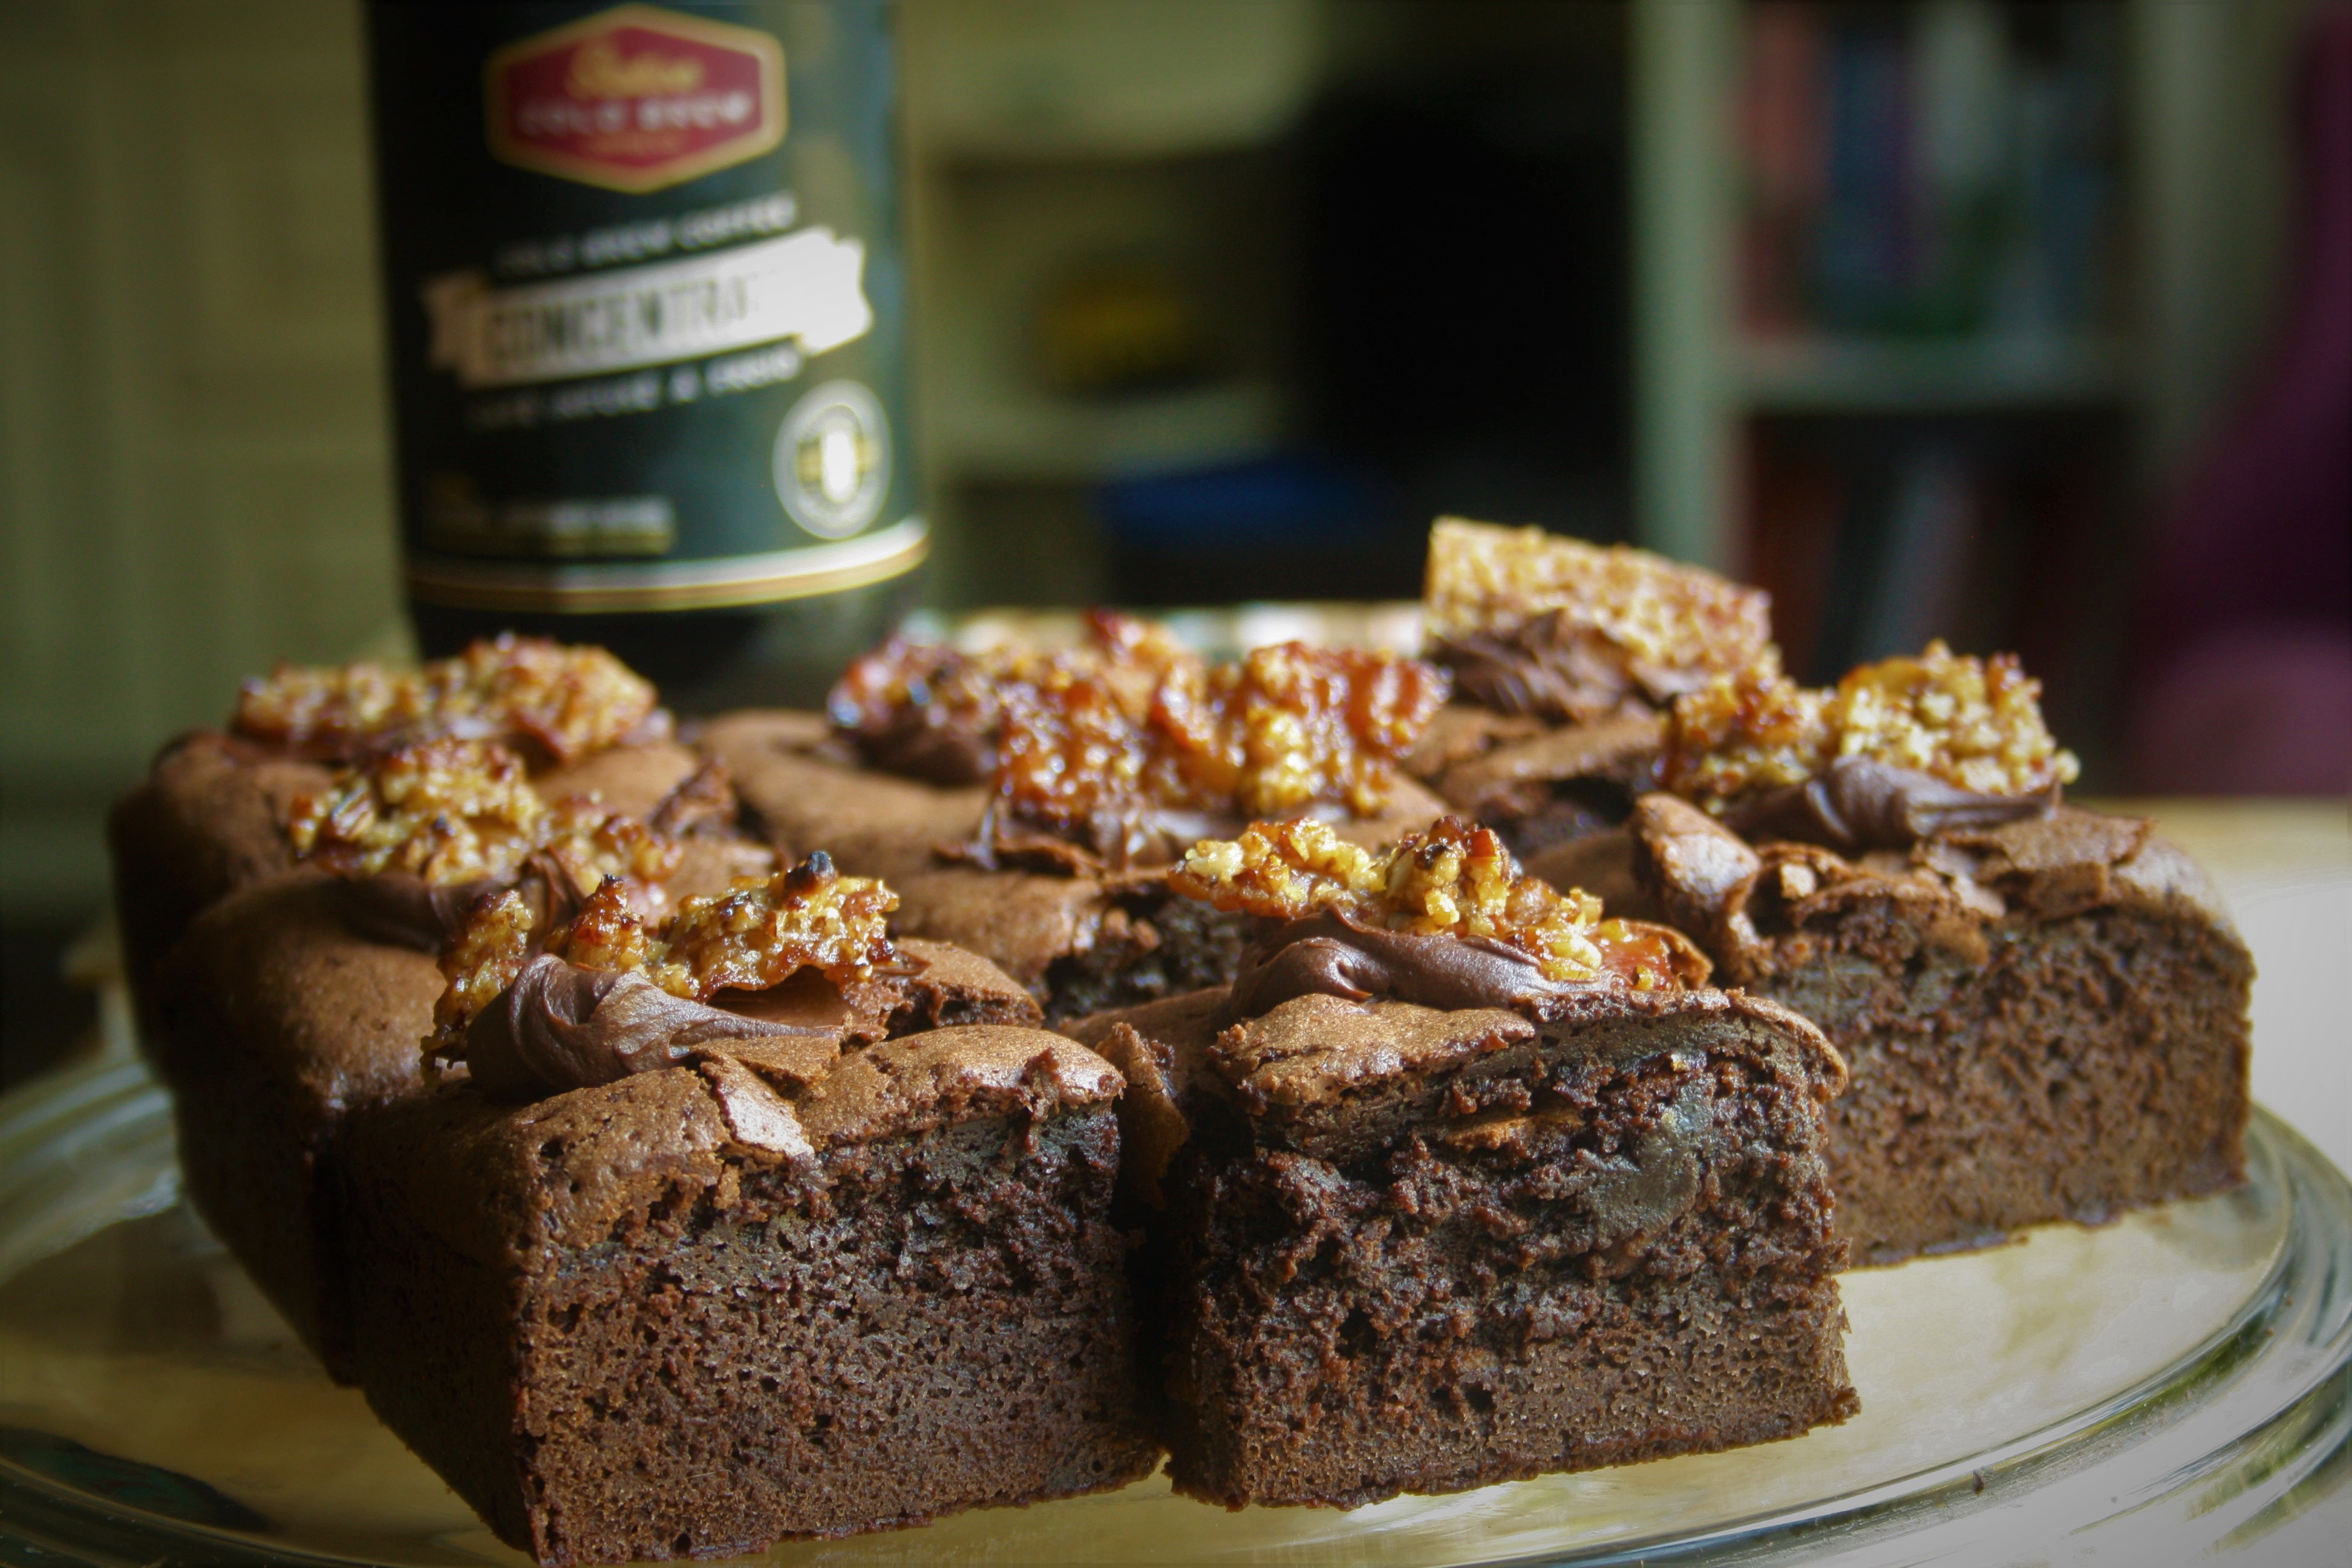
Station BREWnies
A few years ago one of my brownie recipes picked up an Observer Food Monthly award for Best Readers Recipe. The recipe combined chocolate, chilli…oh, and crispy bacon! It’s a pretty good example of my recipe development ethos- think outside the box! This recipe for Station BREWnies is kind of a redux, a 2.0 version combining chocolate, crispy bacon, and this time, coffee. I hope you enjoy!
Makes 9 or 12, dependent on selected baking tin
Ingredients
Brewnies
- ¾ cup (1½ sticks) unsalted butter, cubed
- 6 ½ oz dark chocolate, broken into pieces
- 1/3 cup Station Cold Brew Concentrate
- 3 eggs
- 1 ½ cups packed, golden yellow sugar
- 2/3 cups all purpose flour
- ½ cup 100% unsweetened cocoa powder
- 1 teaspoon salt
- 1 cup dark chocolate chips
- ½ cup pecan pieces
Ganache
- 2 oz semi-sweetened chocolate, broken into pieces
- ¼ cup heavy cream
Bacon shards
- 3 strips of unsmoked bacon (or 4 if making 12 brewnies)
- 2 tablespoons pecan pieces
- 2 tablespoons golden yellow sugar
- 1 tablespoon Station Cold Brew Concentrate
*Equipment note:
This mix will yield 9 Brewnies if made in an 8”x8”x1.5” deep proprietary silicone brownie pan, or 12 brewnies if made in a standard 12”x9”x1”deep baking pan
Method
- Preheat your oven to 350F/180C and grease, or line, the baking pan if using. If you are using a proprietary silicone brownie pan there is no need to prep it (see Equipment note above)
- Melt the butter and chocolate in a bowl over a saucepan of simmering water (or bain-marie), stirring occasionally. Once melted, remove from the heat and allow to cool
- Beat the eggs and sugar until the mixture is thickened, fluffy and increased in volume
- In a separate bowl, combine the flour, cocoa powder and salt
- Add the cold brew concentrate to the cooled chocolate/butter mixture, and stir to combine
- Fold the cooled chocolate mixture into the egg mixture.
- Sift in the dry ingredients, and fold together.
- Fold in the chocolate chips and pecan pieces until well combined.
- Pour your mixture into your chosen pan and gently spread to level the surface.
- Place in the oven and bake for 35-40 mins if using deeper proprietary brownie pan, or for 20-25 minutes if using shallower baking pan
- When done remove from oven and leave to cool completely in the pan before removing or cutting into squares
Bacon (Step 1)
- Chop each bacon strip into 3. You should end up with 9 or 12 pieces (depending on your final number of brewnies) and place in a bowl
- Add the cold brew concentrate and mix with the bacon pieces. Set aside and leave to soak
- Chop the pecan pieces until fine. Add to a bowl with the sugar and mix. Set aside until needed
Ganache
- Gently heat the heavy cream in a in a bowl over a saucepan of simmering water (or bain-marie), stirring occasionally. Don’t let it boil- you want it just hot enough to bare putting a finger in. When ready, remove it from the heat, add the chocolate pieces and stir to melt
- Continue stirring until the mixture is well combined and glossy. It will look a little separated and mottled at first but if you keep stirring it will come together in a uniform mixture. Set aside to cool and thicken
Bacon (Step 2)
- Set your oven to medium high broil
- Remove the bacon pieces from the cold brew concentrate and dredge in the pecan/ sugar mixture. Press so the mixture sticks
- Place on a foil lined baking tray, top each piece with any additional pecan/ sugar mixture and place until the broiler grill under they start to crisp and bubble. DO NOT leave unattended as they won’t take long and you don’t want them to catch!
- Remove when done and leave to cool
To finish
- Once all components have cooled you are ready to assemble
- Smear the top of each brewnie with some ganache and top with a bacon piece
- Serve and enjoy. They go particularly well with an ice-cold Station Cold Brew!
**The “done-ness” of the brewnies can be checked by inserting a skewer, cocktail stick or toothpick into the mixture about 1” from the edge. It should come out with a little mixture/ crumbs attached.

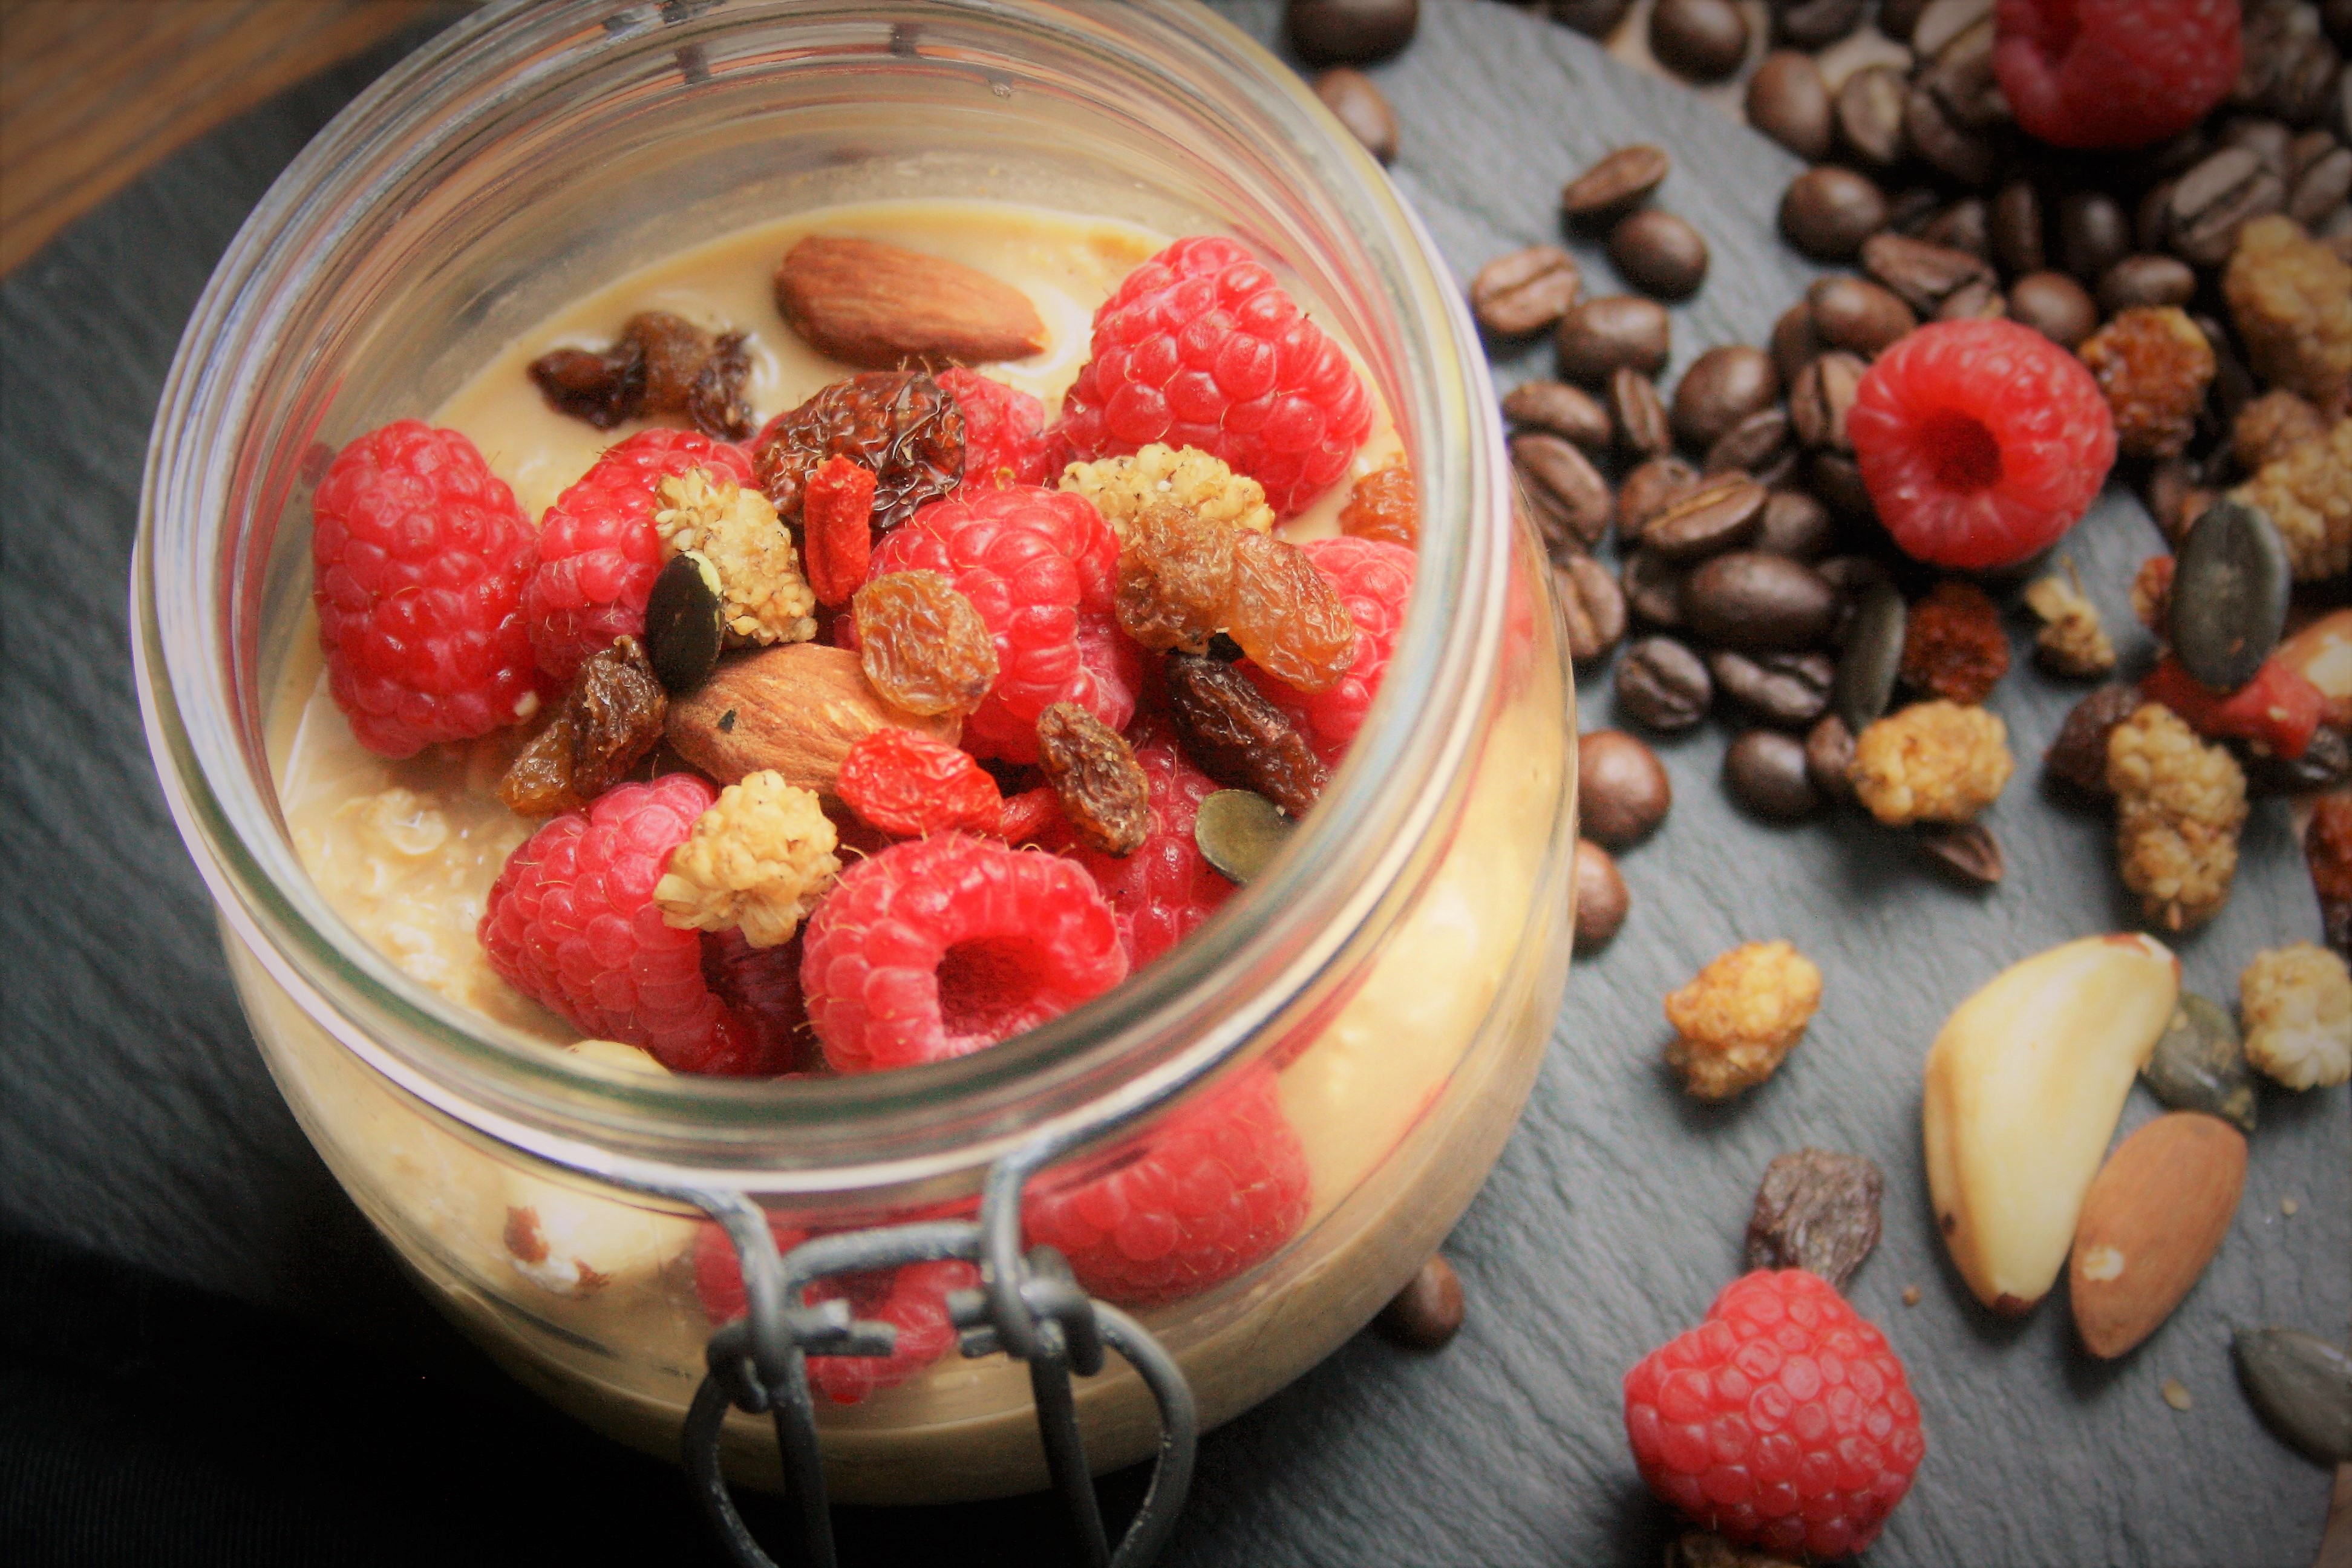
Kickstarter Overnight Oats
We’ve all been there. You’ve hit the snooze button too many times so now you’re rushing around in a manic frenzy. One sock on whilst you jam a slice of toast in your mouth and running out the door is never a good way to start the day! These overnight oats massively cut corners and give you a filling and satisfying breakfast. Combining a hearty helping of oats and fruit with your (much needed) cup of coffee you’ll be making those meetings in no time at all!
Serves 1
Ingredients
- ¼ cup Quick Oats
- ½ cup Jumbo Oats
- ½ cup unsweetened almond milk
- ¼ cup Station Cold Brew concentrate
- 1 tablespoon maple syrup
- 1 teaspoon good quality vanilla extract
- Berries, to taste
- Nut and seed mix, to taste
Equipment
1 medium Kilner jar or Mason jar
Method
- Place the quick oats and jumbo oats in a Kilner jar or Mason jar and stir to mix
- Add in the almond milk, cold brew concentrate, maple syrup and vanilla extract. Stir well until all ingredients are well mixed
- Close the jar and place in the refrigerator overnight or for 7 hours minimum
- When ready to serve, remove from the refrigerator and stir. Add the berries, nuts and seeds to top
- Serve and enjoy a tasty kickstart to your morning routine!
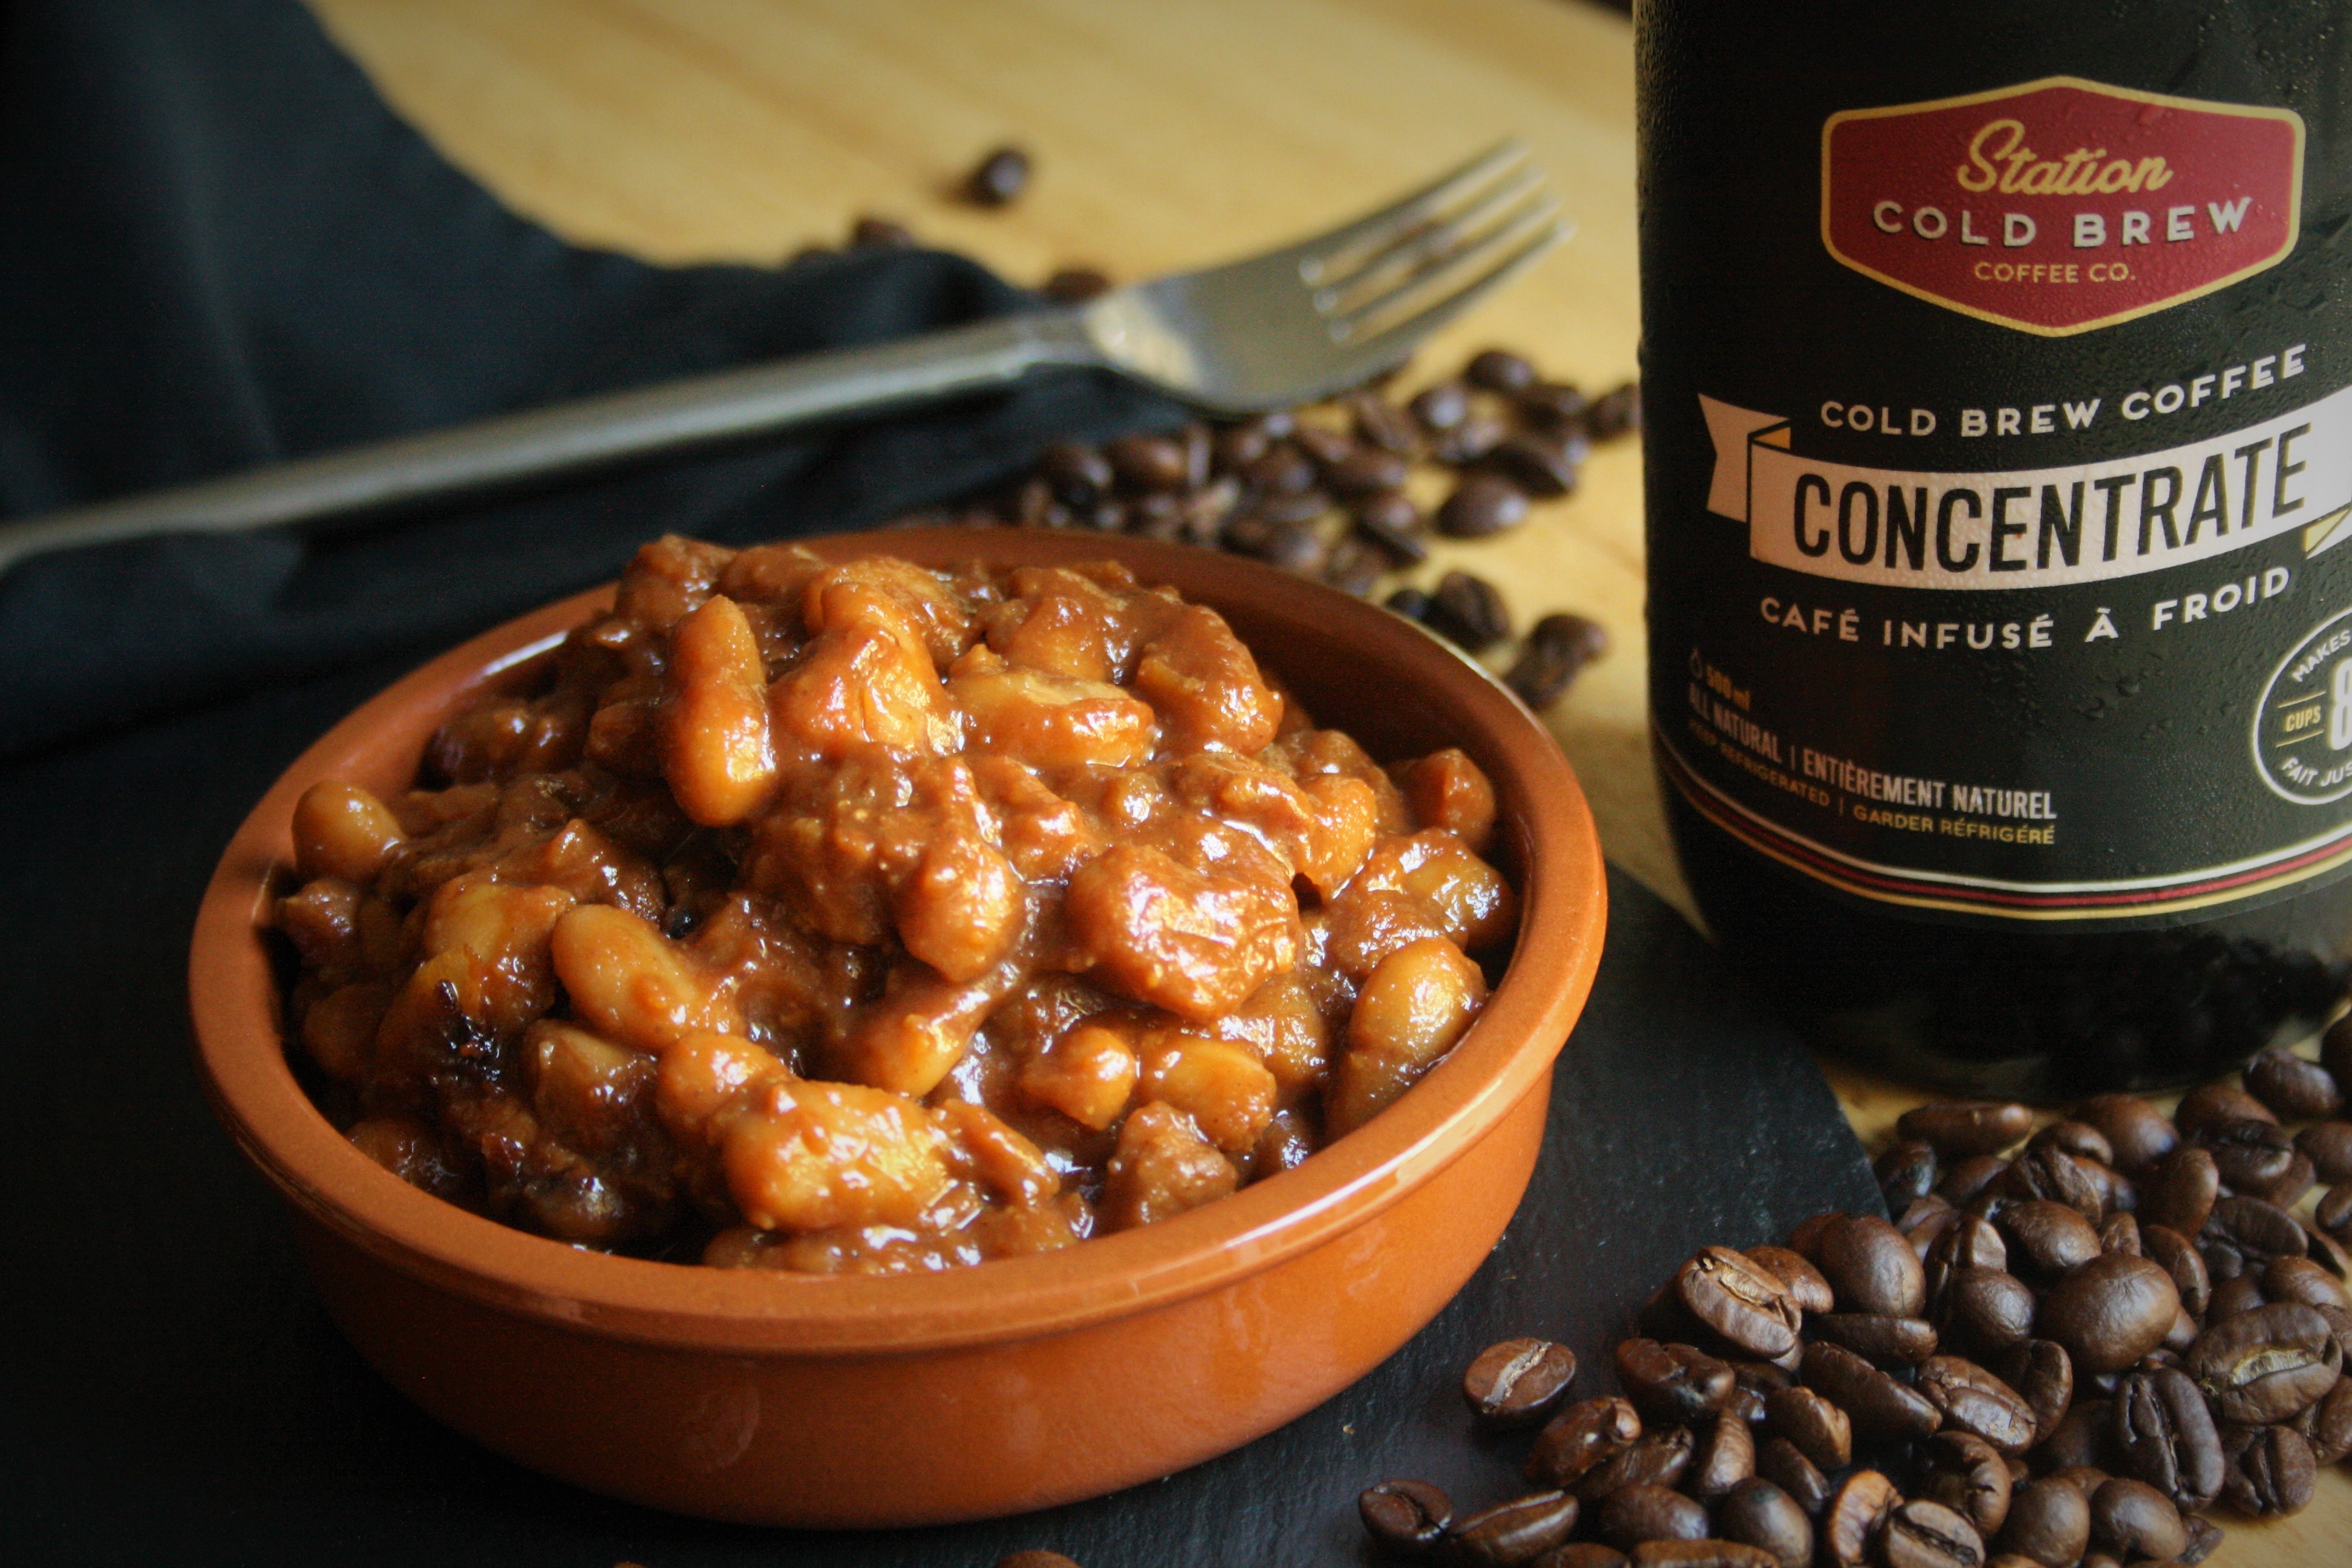
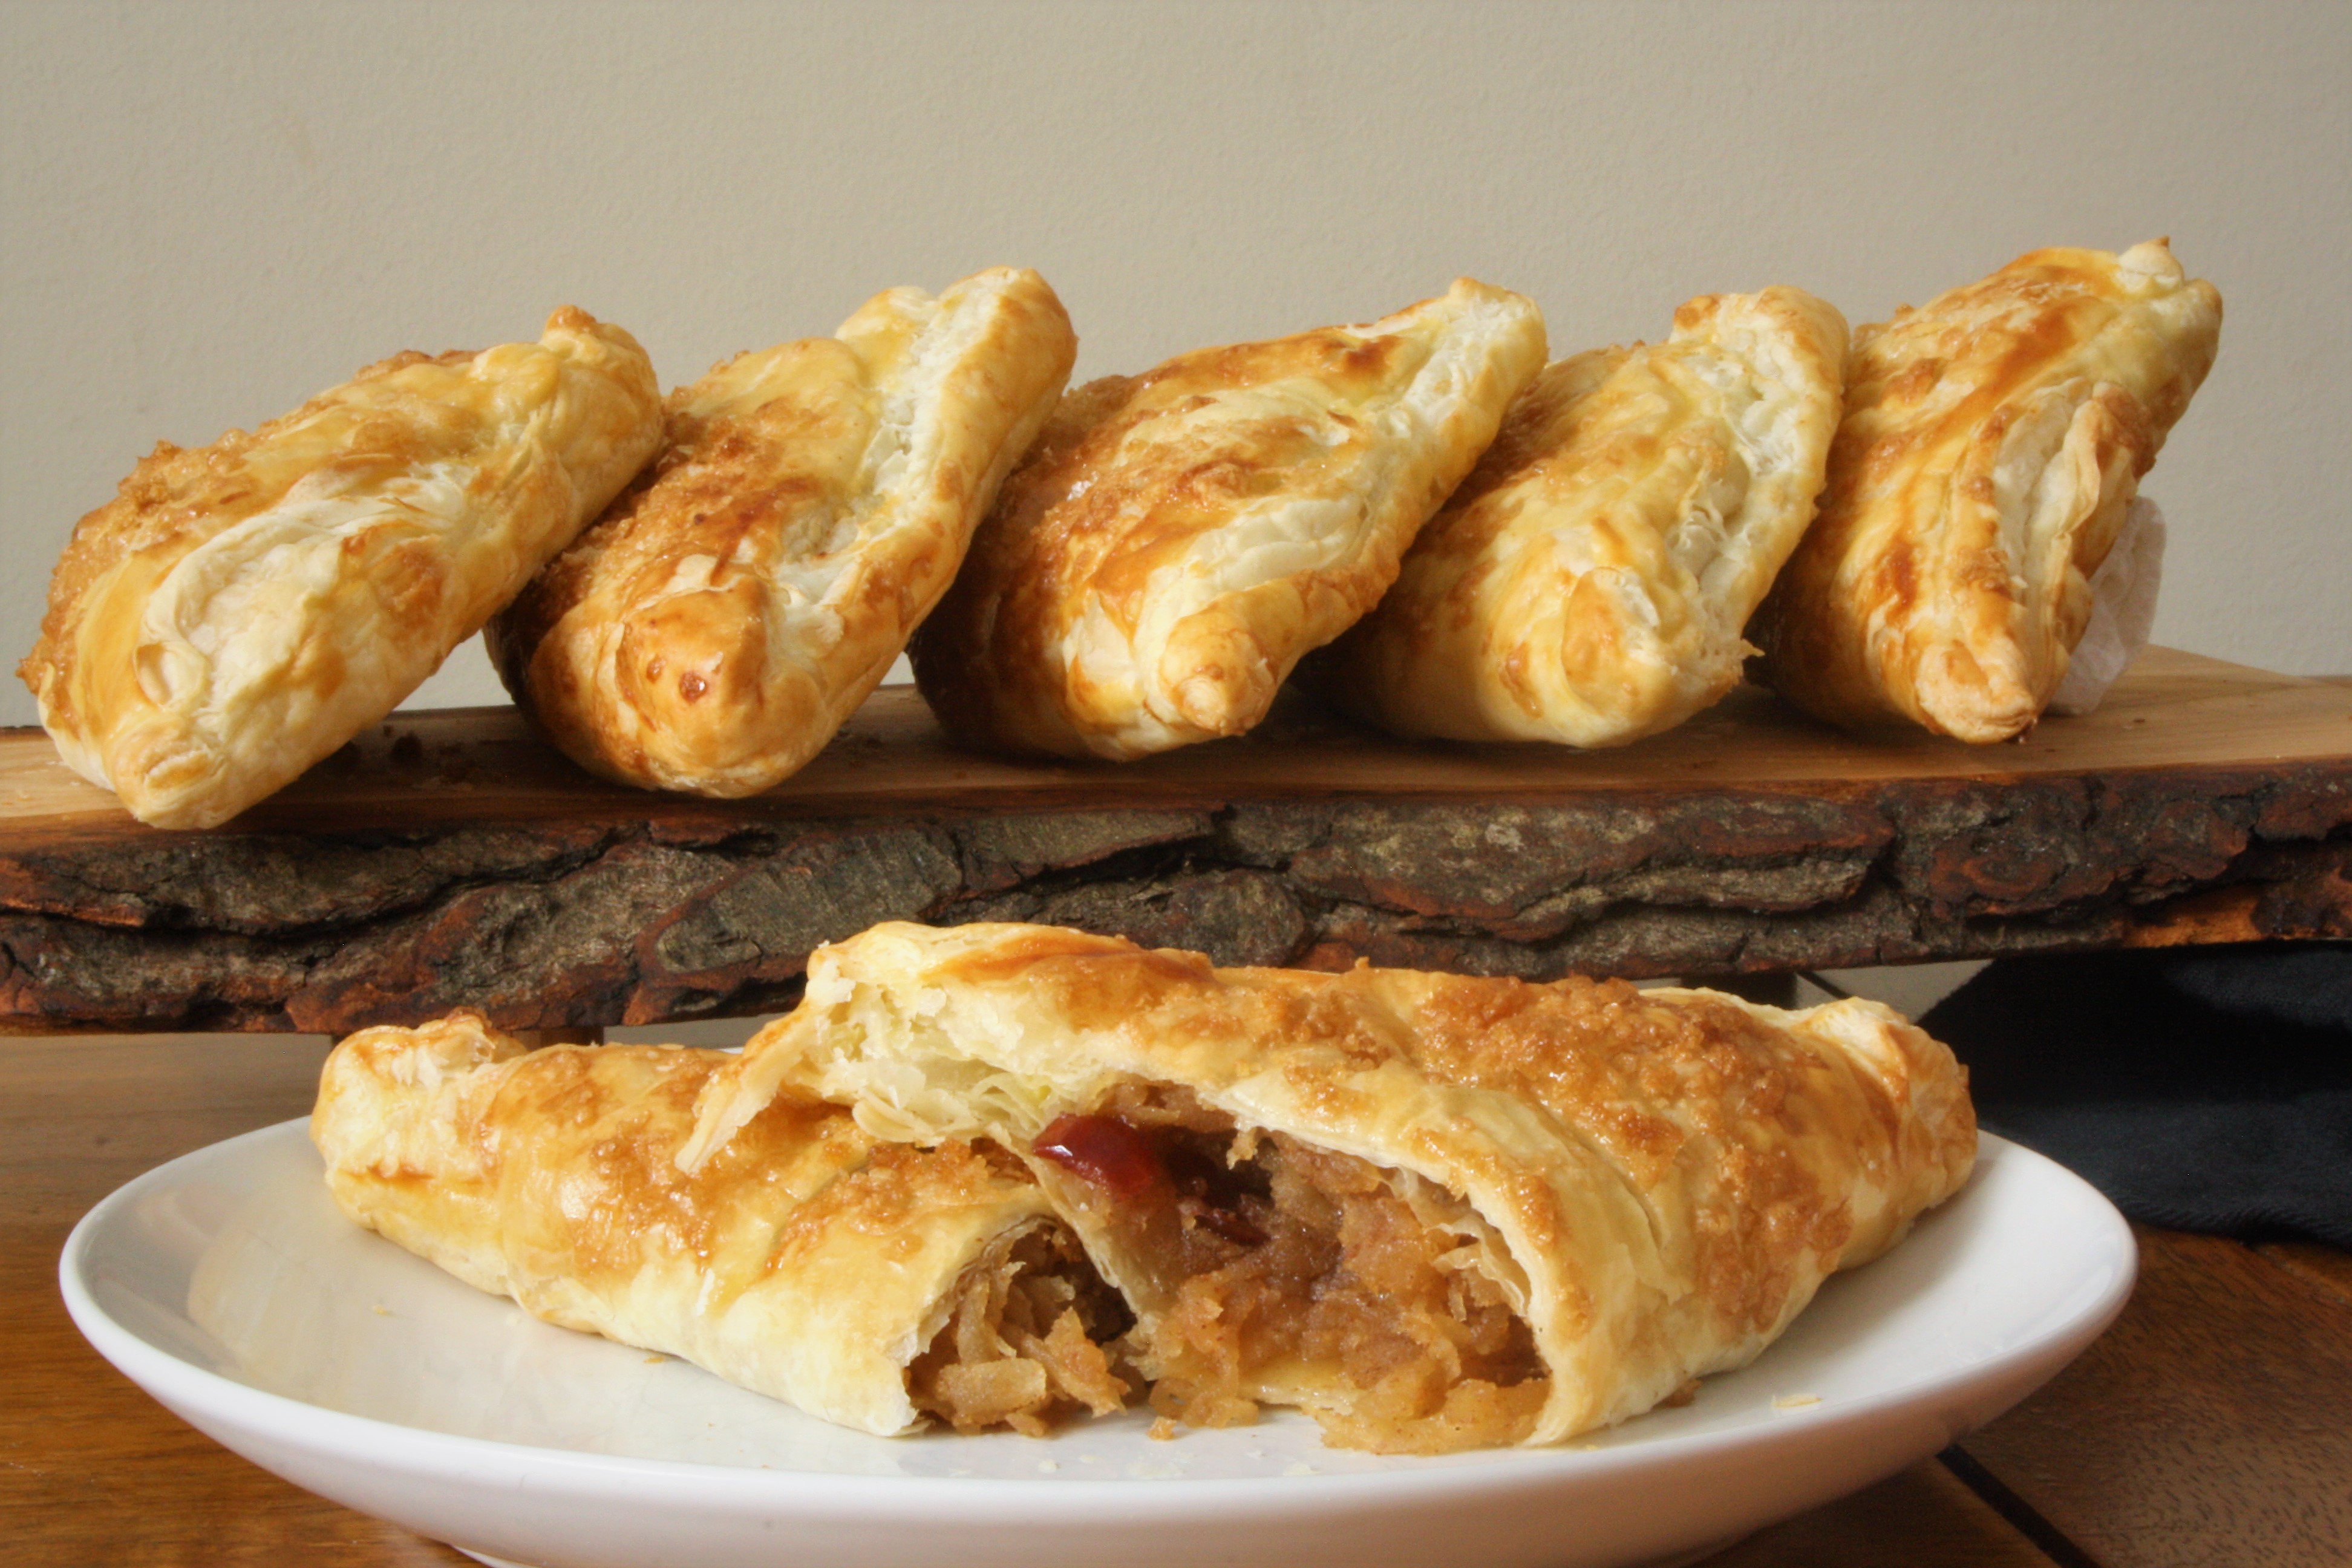
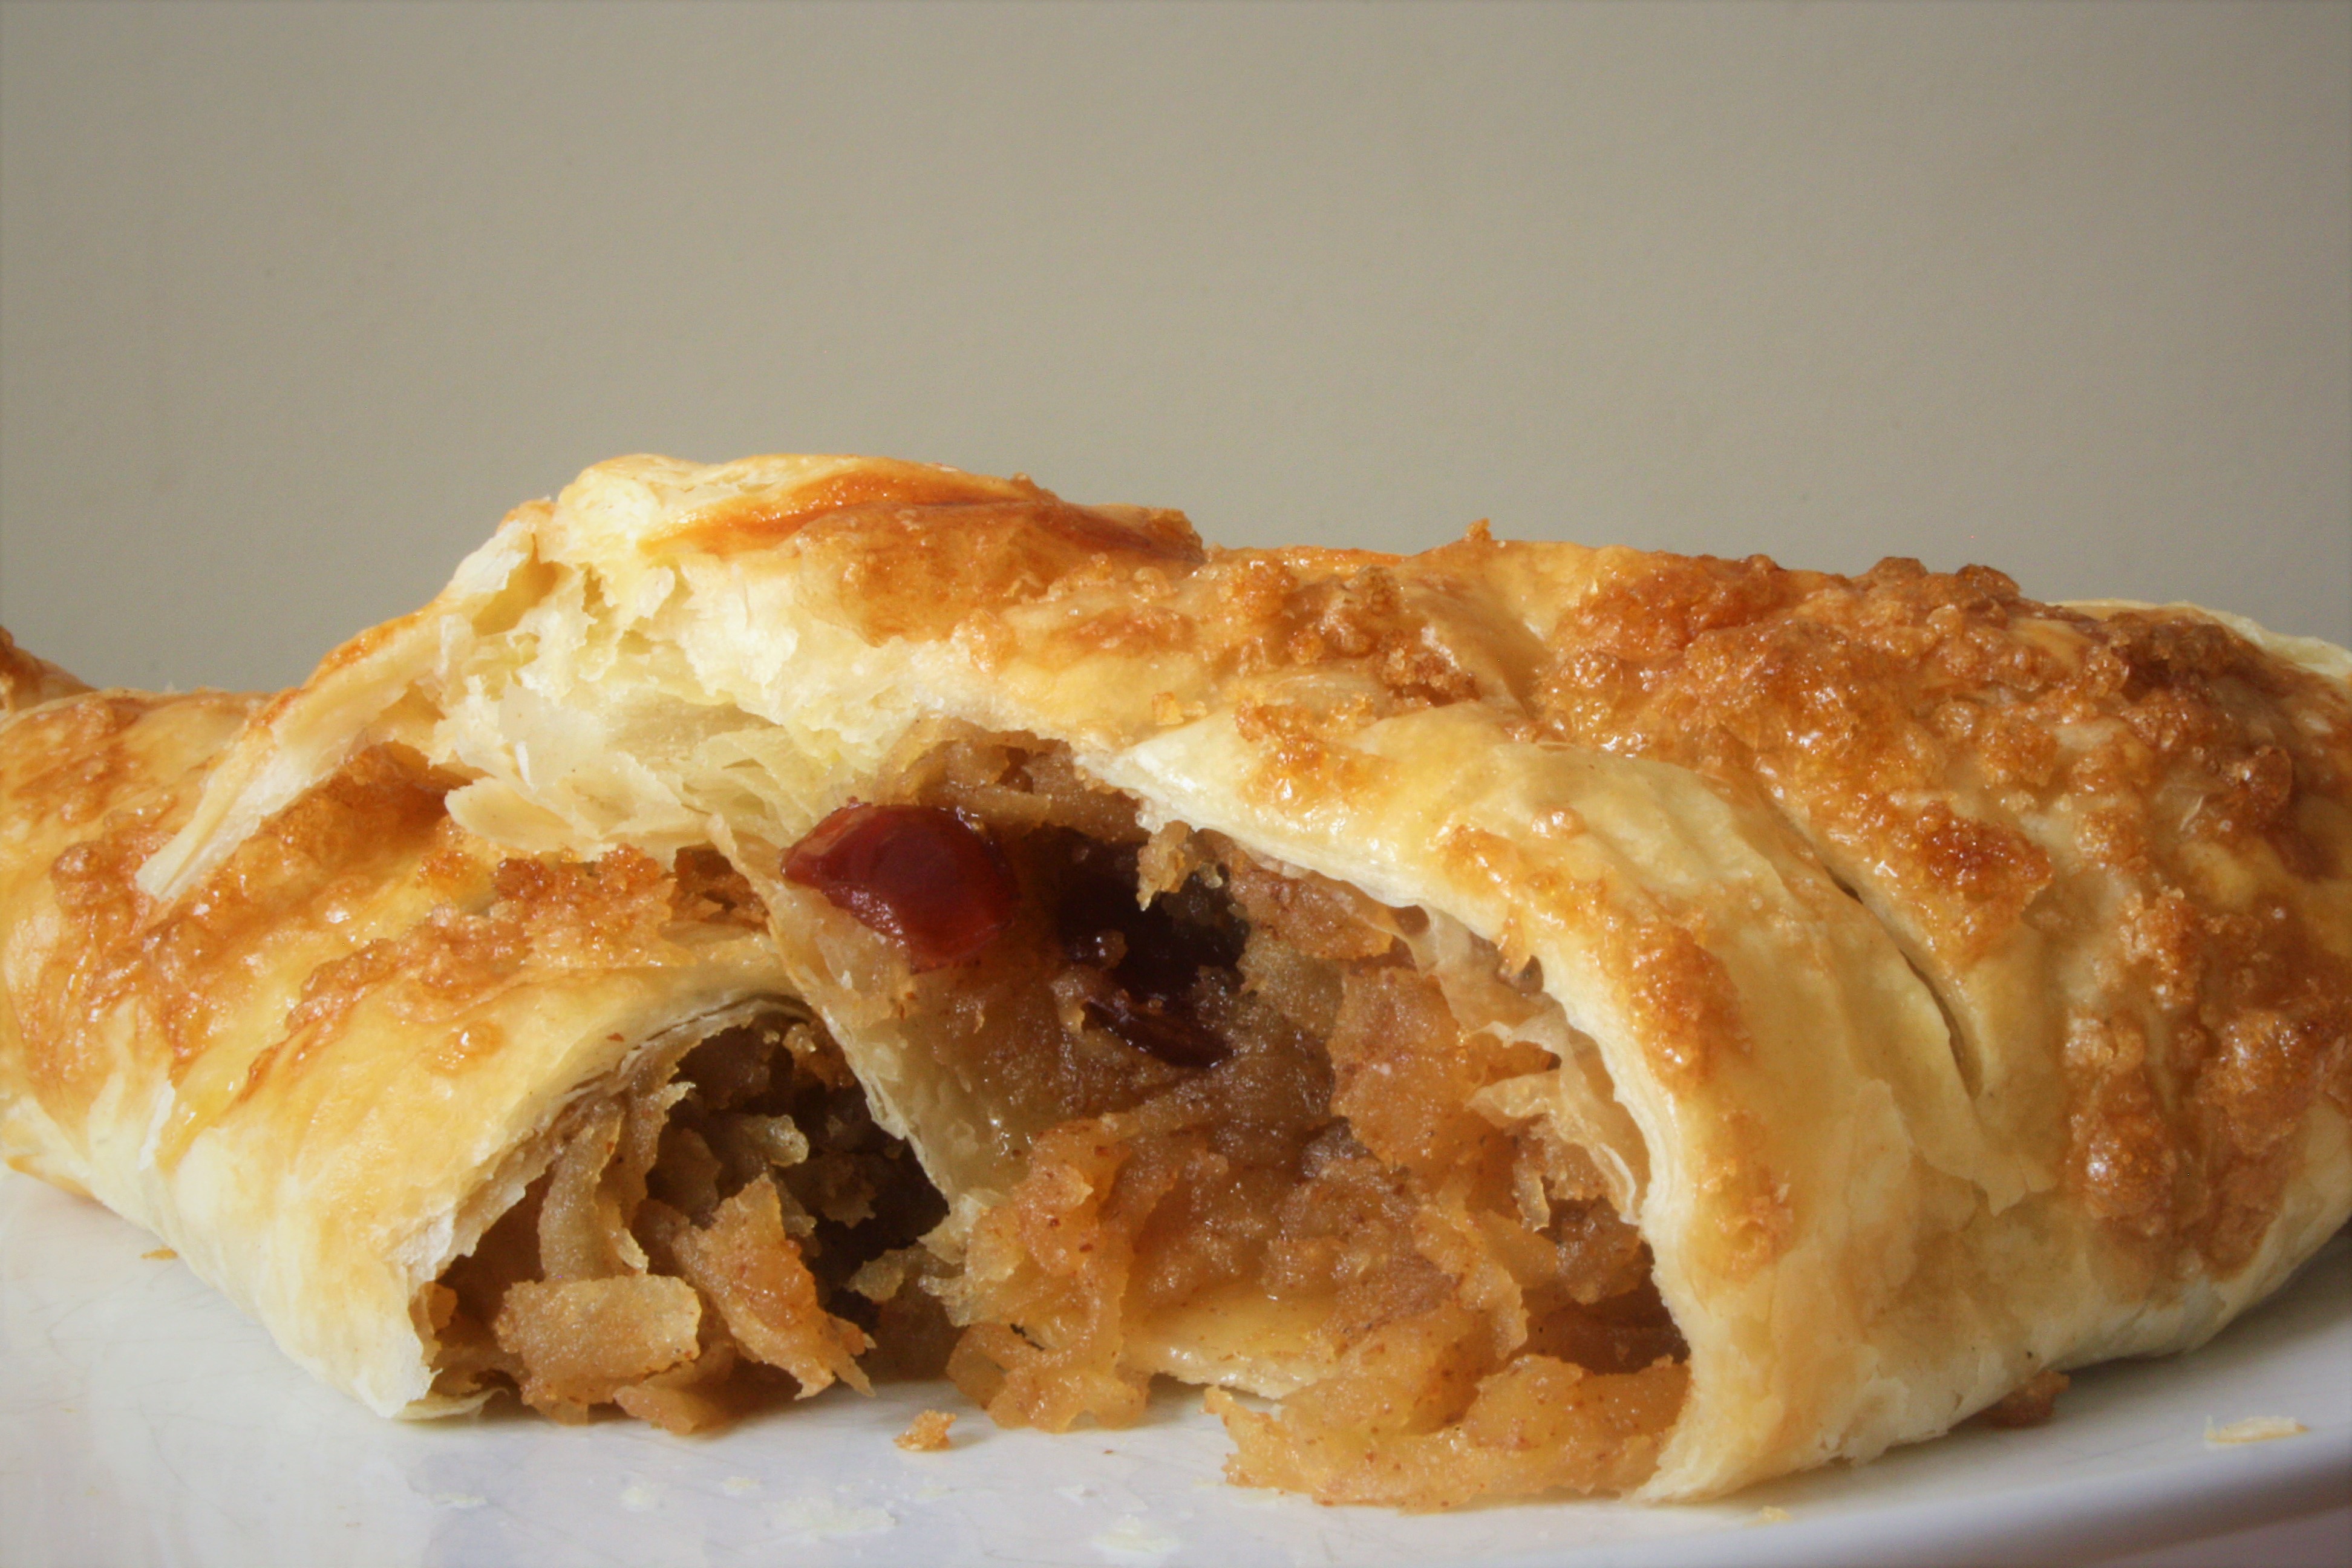
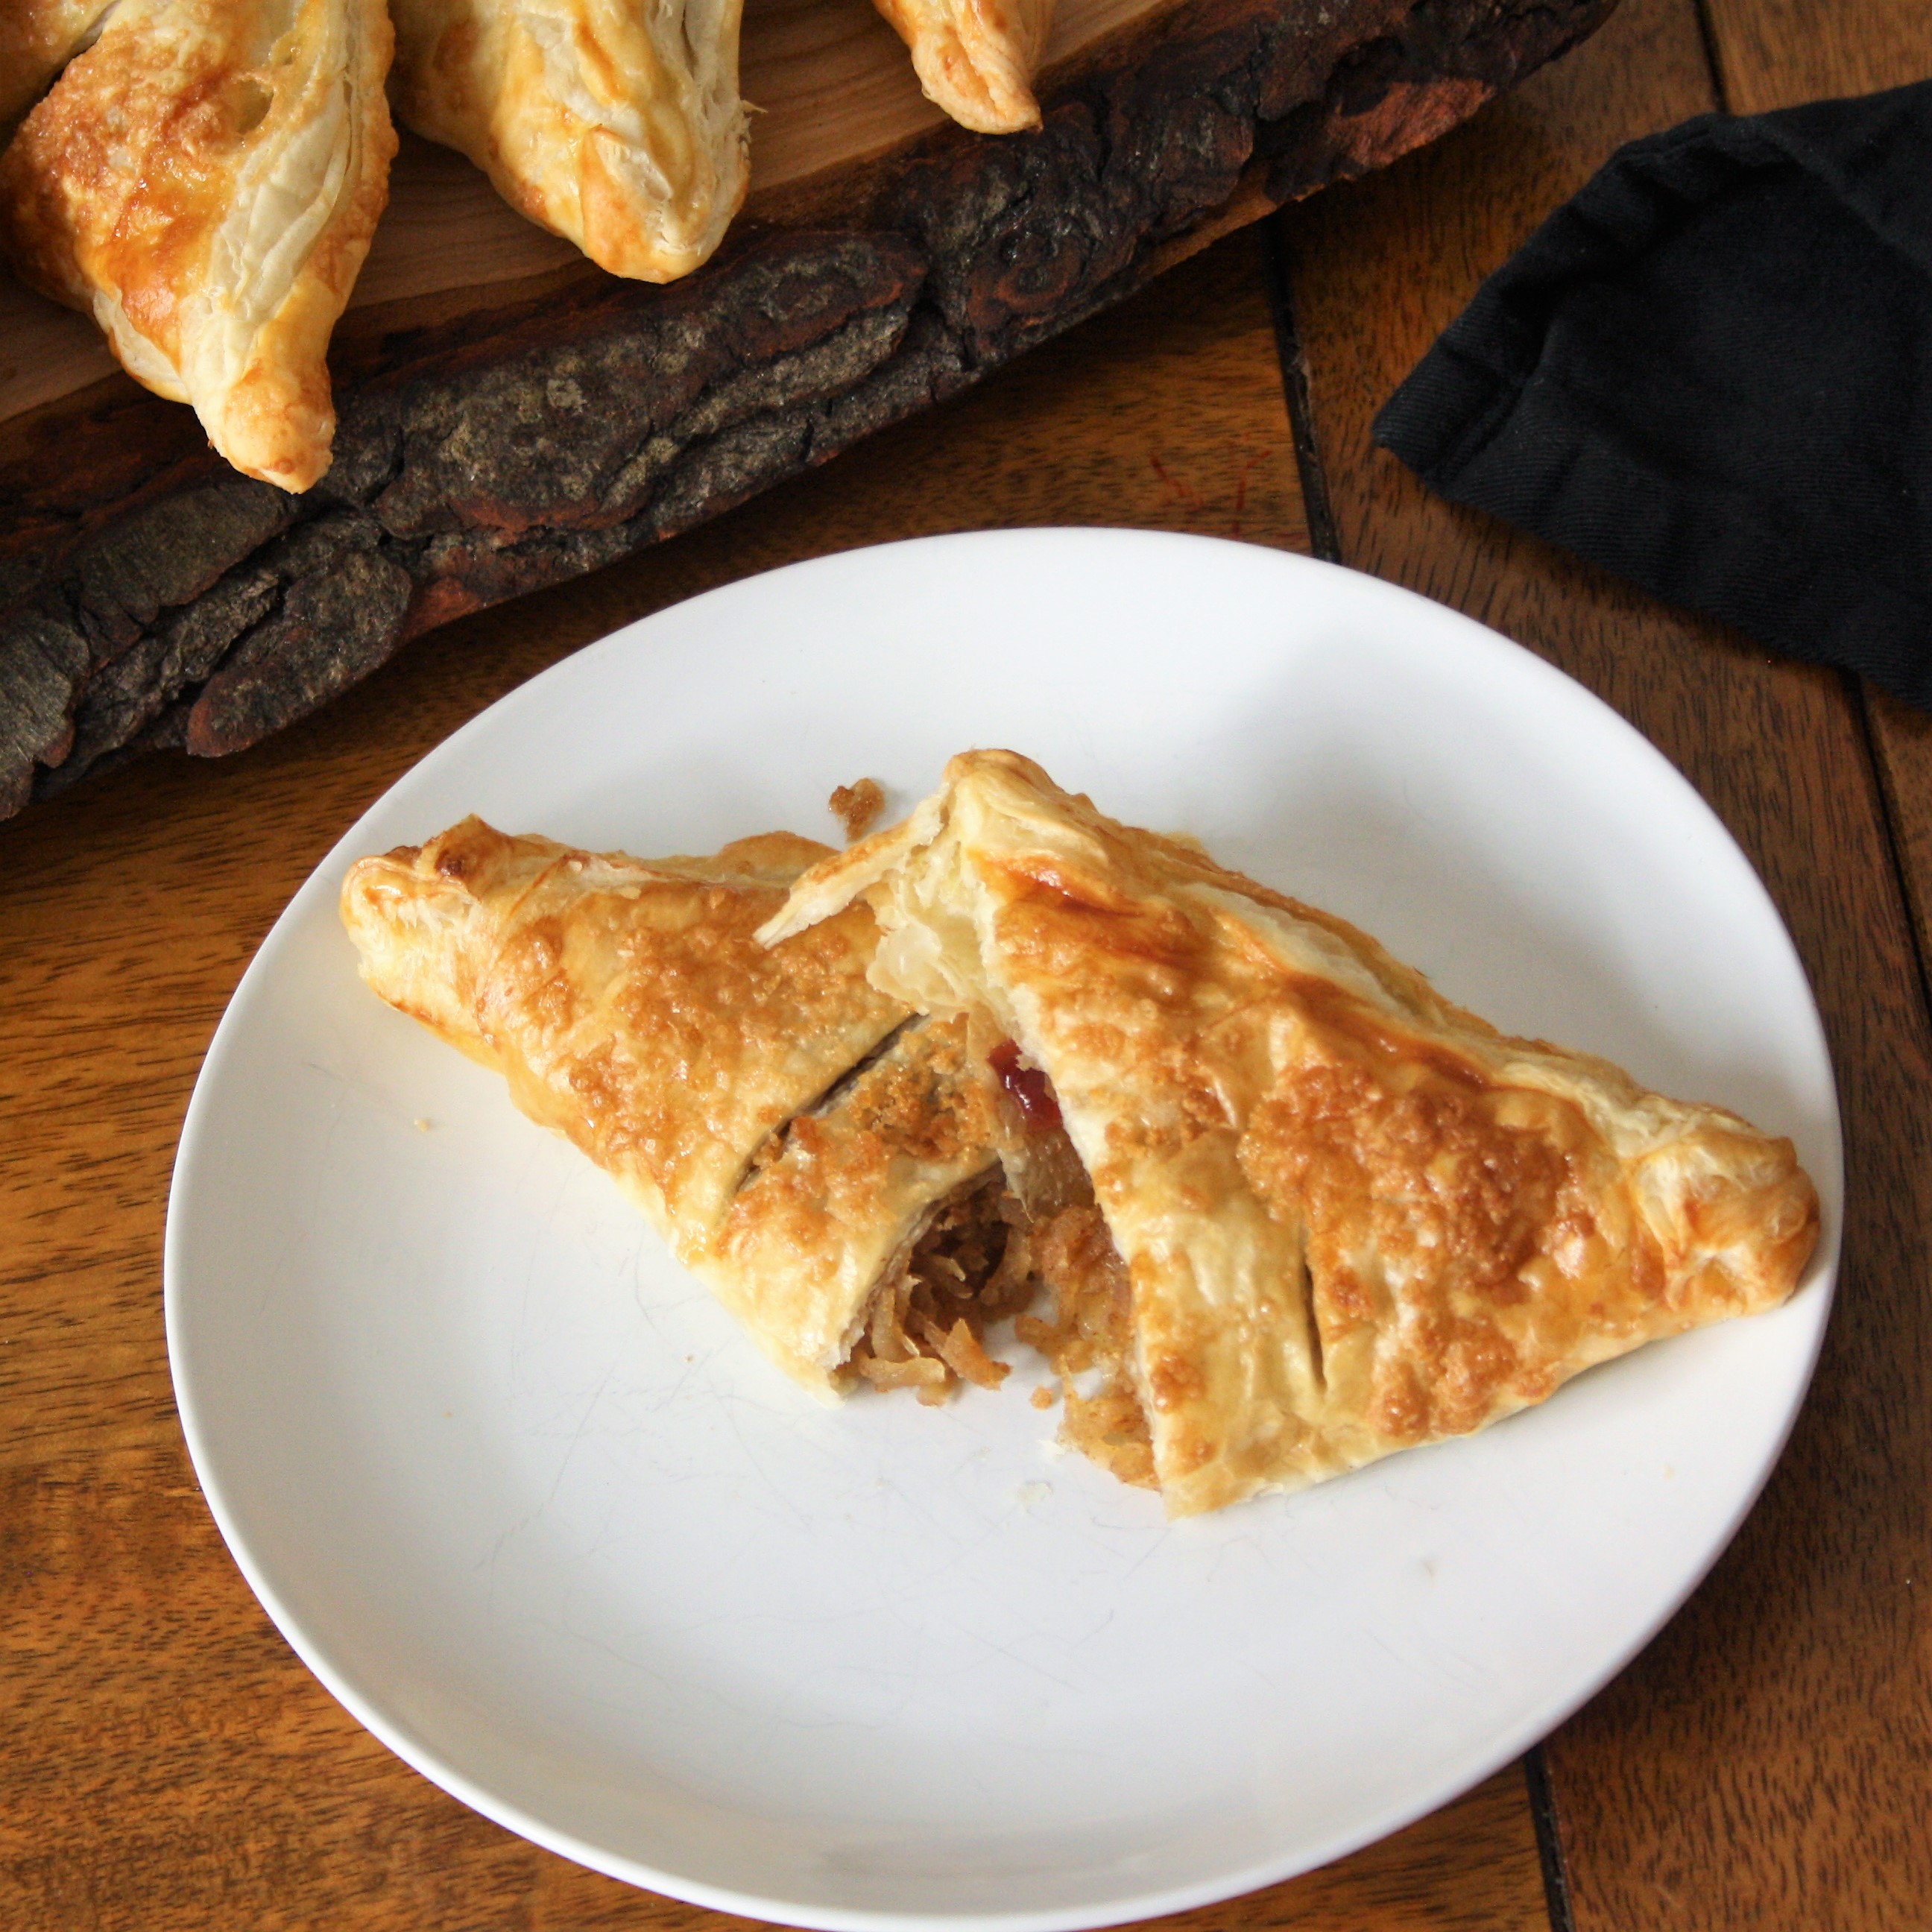
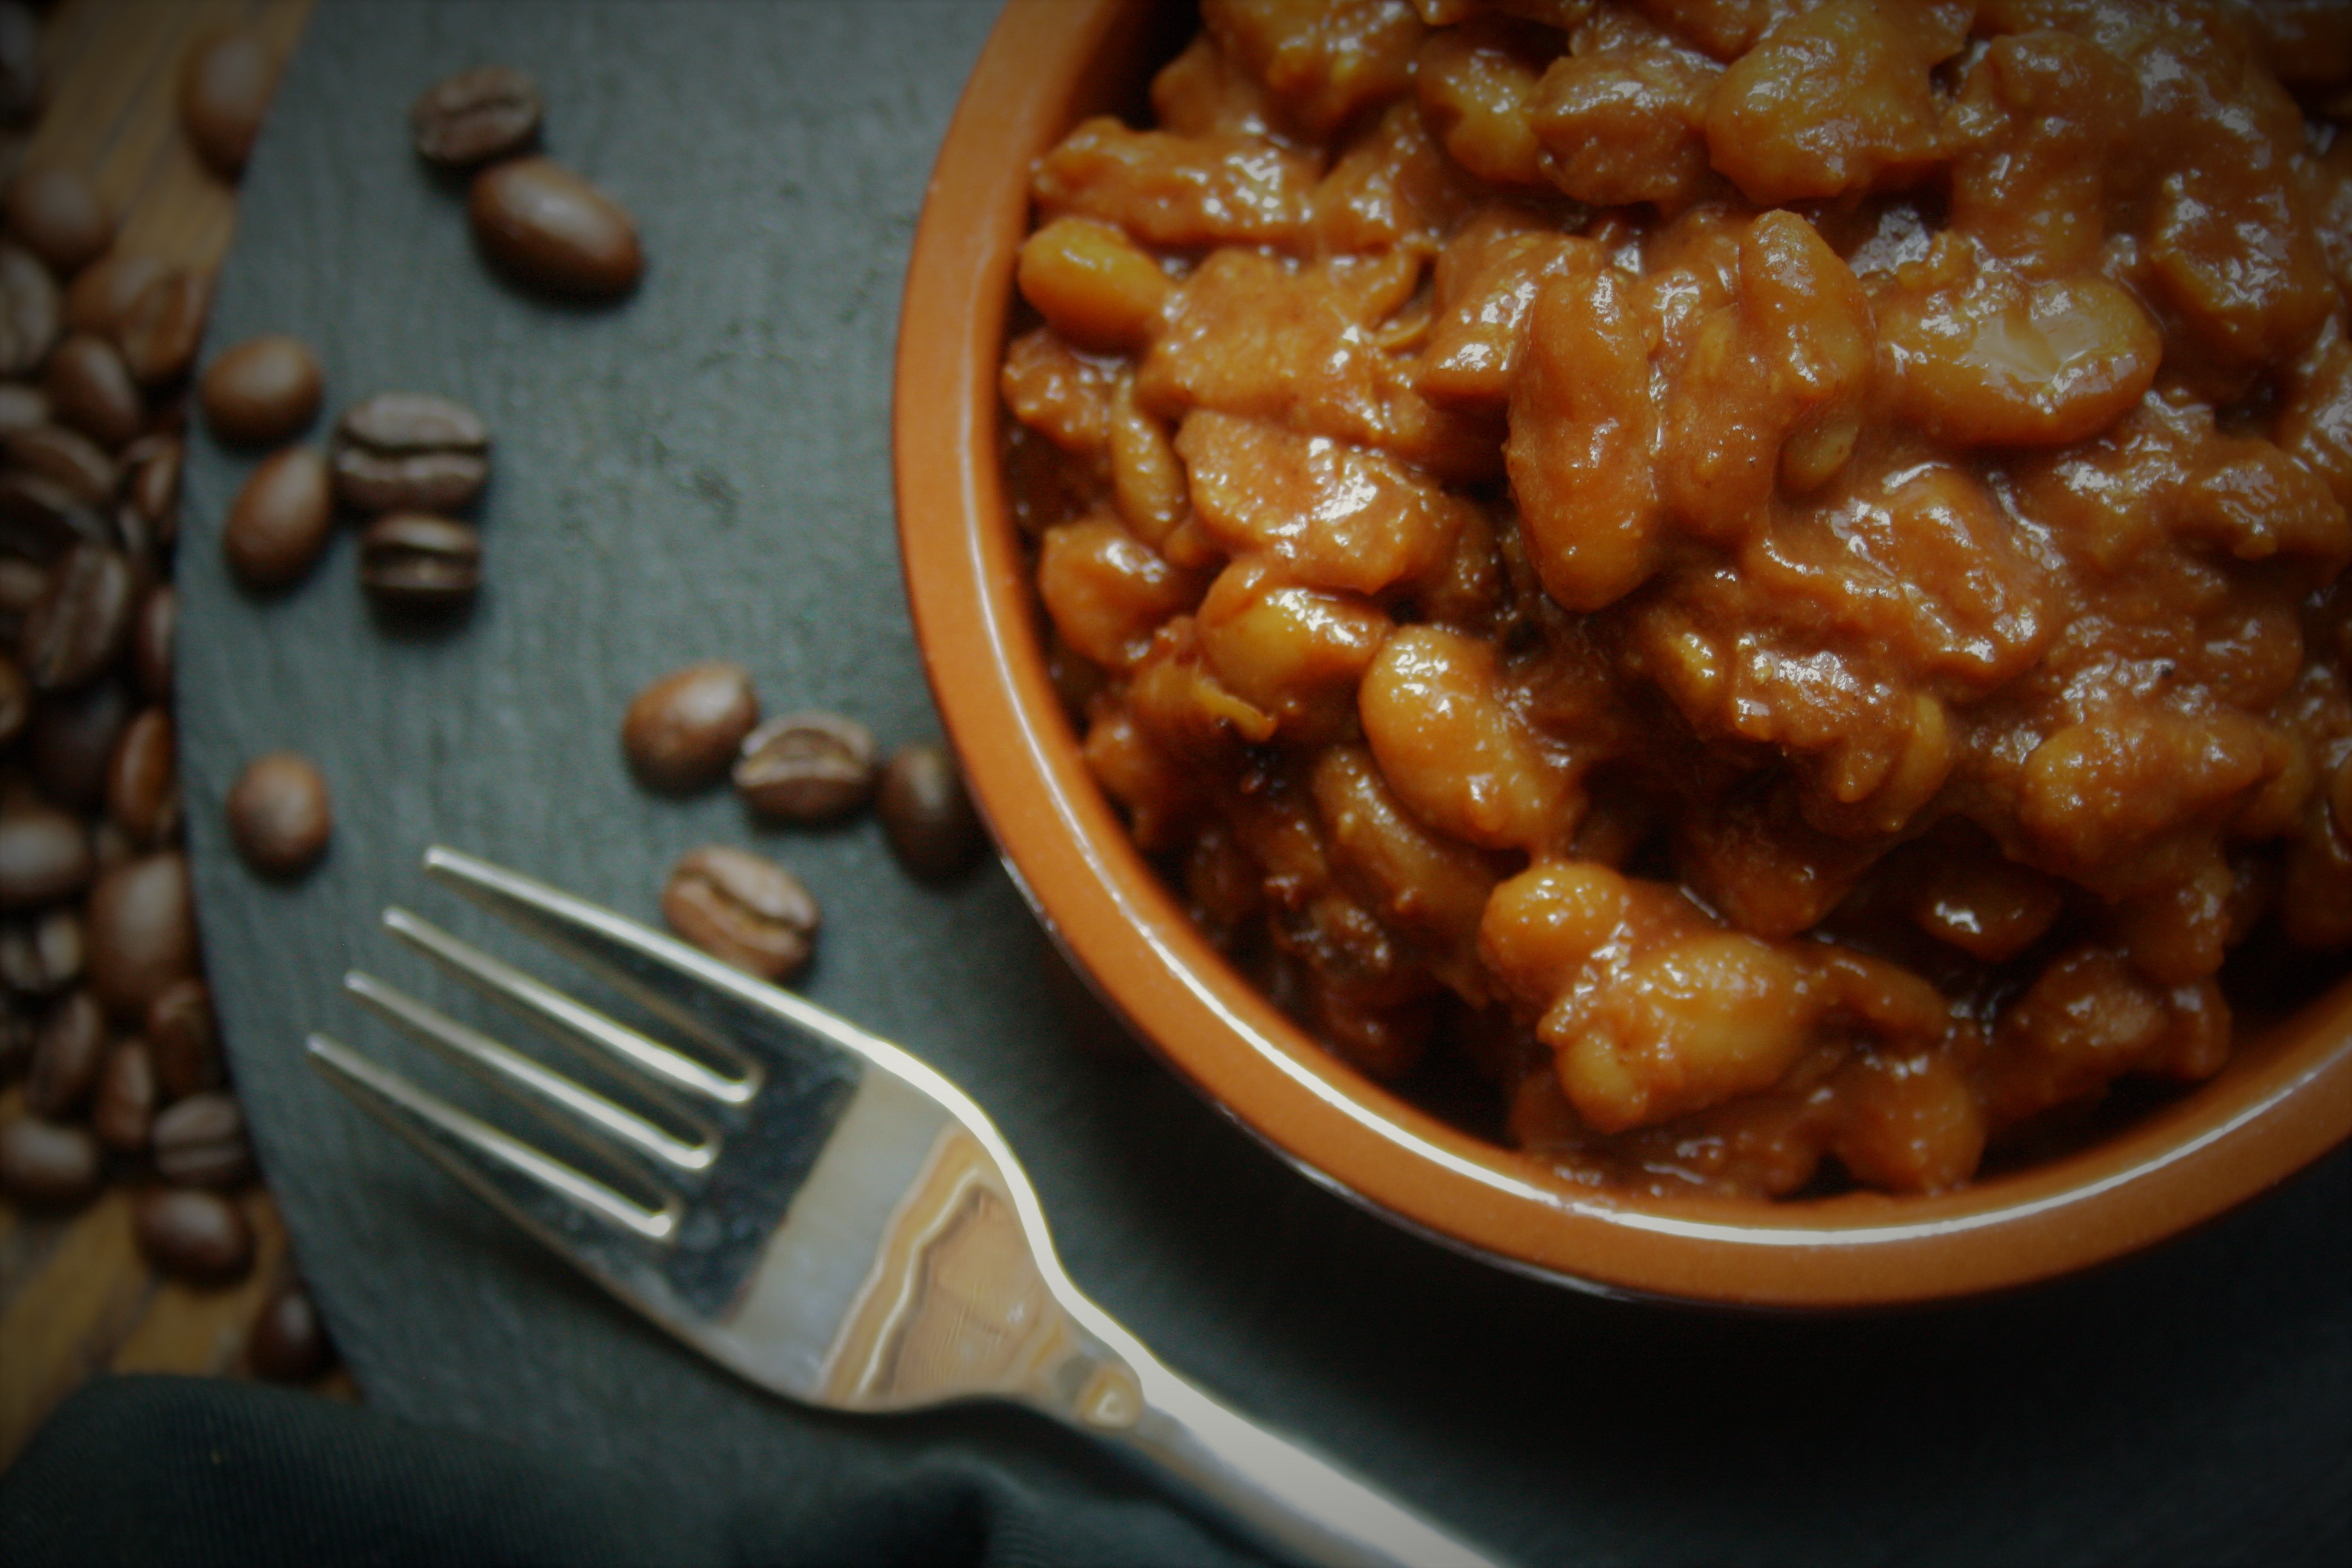
Pork n Beans n Joe
Pork and beans is one of my all time favourite recipes. Comforting, filling and so tasty it begs to be on everyone’s “Know How” list. This recipe came from the mental image of a Wild West campfire. The cowboys surrounding it comparing stories and scars whilst filling their hungry bellies. And what better way to wash it down? A cup of joe!
Dependent on serving portions, usually a good serving of 4
Ingredients
- ¼ cup shallots, chopped finely
- 3 cloves garlic, minced or chopped finely
- 4 slices thick cut peameal bacon, or pork loin, chopped into pieces
- 1 tin (540ml) tin white kidney beans or haricot beans
- ½ cup tomato sauce (pasatta)
- ¼ cup molasses
- 1 tablespoon tomato concentrate
- 2 tablespoons muscovado sugar
- 1 tablespoon mustard (I use maple mustard)
- ½ cup Station Cold Brew concentrate
- Salt and Pepper, to season
Method
- Preheat your oven to 350F/180C
- Lightly fry the garlic and shallots in a tablespoon oil in a skillet.
- Add the bacon pieces and continue to fry until browned. Remove from heat and leave to cool until needed
- Empty the contents of the beans tin (incl water) into a bowl and add the remaining ingredients
- Stir well to combine
- Add the bacon/shallots/garlic mixture, season with salt and pepper stir well again
- Transfer to complete bean mixture to a baking dish (mine is 9 ½” diameter x 1.5” deep) and place in preheated oven
- Bake for 50-60mins, stirring occasionally
- The liquid will reduce and the overall mixture thicken. Remove from heat, serve and enjoy! Try topping with cheese shreds, and serving alongside crusty loaf
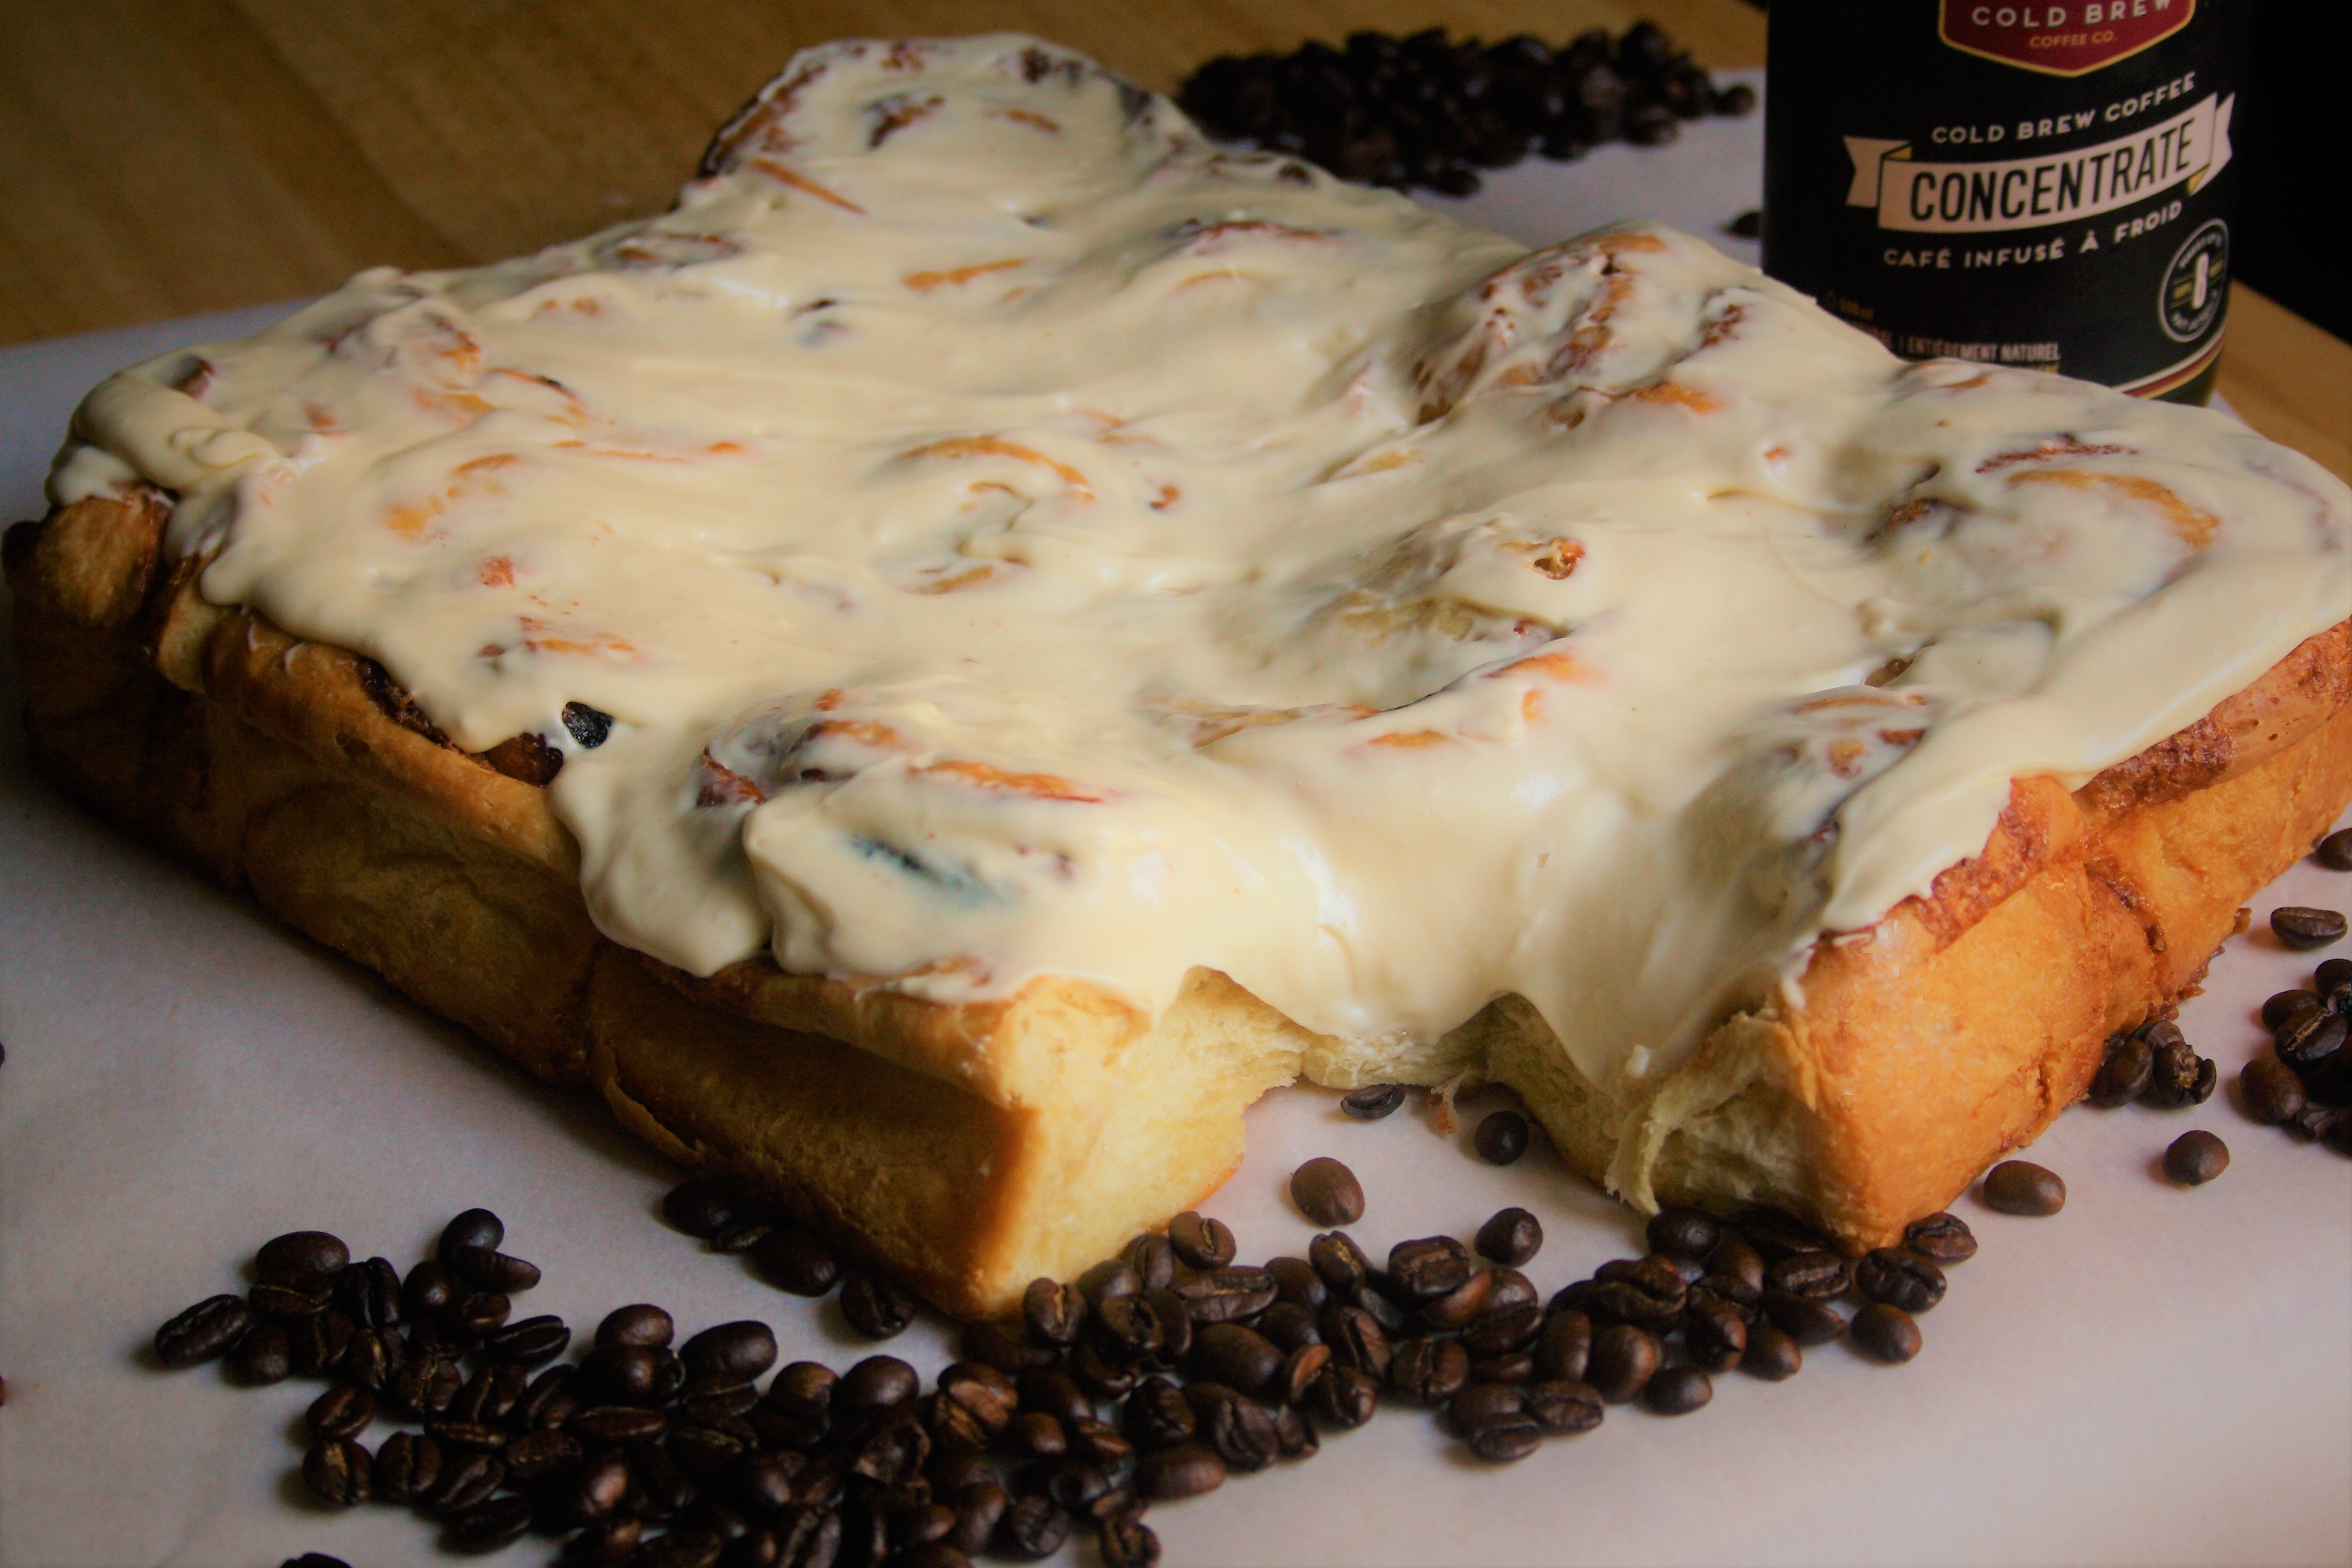
Earlybird Cinnamon Rolls
Saturday mornings mean cinnamon rolls in my house. I guess you could say it’s become somewhat of a tradition since my family and I moved here to Canada. Mornings (in general!) also mean something else to me – coffee. In the words of wise Chief Hopper (Stranger Things) “Mornings are for coffee and contemplation”. The recipe for these rolls combines my favourite things of a weekend morning- cinnamon rolls slathered in cream cheese frosting and coffee. Definitely cause for contemplation.
Makes 12
Ingredients
Roll dough
- 3 cups all purpose flour
- 2 ½ teaspoons quick rise yeast
- 2 teaspoons salt
- 1 cup 2% milk
- ½ stick unsalted butter
- ¼ cup Station Cold Brew concentrate
- ¼ cup olive oil
- 1 egg
- 1/8 cup fine sugar
Filling
- 2 teaspoons fresh cardamom seeds, crushed finely
- 3 teaspoons ground cinnamon
- 1 ½ sticks unsalted butter, cut into pieces and softened
- 1 cup dark brown sugar
Glaze
- 1 cup (8 oz block) cream cheese
- ¼ stick unsalted butter
- 2 cups icing (confectioners) sugar
- 3 tablespoons Station Cold Brew Concentrate
- Zest 1 orange
Equipment
12”x9”x1”deep baking pan
Method
- Gently heat the milk and butter over a medium heat, stirring until the butter is melted. Remove and leave to cool.
- When cooled, add in the cold brew concentrate and olive oil, stir to combine and set aside until needed
- In a bowl of a stand mixer (with dough hook attachment in place) combine the flour, yeast (to one side) and salt (to opposite side)
- Add the egg and start the mixer on a low setting
- Pour the liquid mixture into flour mixture in a steady stream
- When all the liquid has been added increase the setting to medium and mix for 8 minutes, until all the mixture comes together into a dough ball and the bowl sides are clean
- While the dough is mixing lightly oil a large bowl
- After 8 minutes of mixing remove the dough from tip the dough from the mixer bowl into the pre-oiled bowl, cover with oiled cling wrap. Leave to rise until doubled in size
- While the dough is rising, make the filling
- In a bowl combine the butter, brown sugar, cardamom seeds and cinnamon
- Beat (either by hand or electric beater) until fully combined and fluffy. Set aside until needed
- When dough has doubled in size, tip out onto a lightly oiled surface
- Punch and knead the dough, for about 5 mins, until all the air has been expelled from it (called “Knocking Back”)
- Stretch and shape with your hands into a long rectangular shape, approximately 16” x20”
- Spread the butter mixture over the dough, covering the entire surface
- Starting from the long edge, roll the dough into a tight log shape
- Trim off the uneven ends and then slice the remainder into 12 equal slices
- Place the roll slices into your prepared tin, cut side up, in a 3 x 4 arrangement
- Cover with oiled cling wrap and allow to rise until double in size again, about 45- 60 minutes
- Preheat your oven to 350F/180C
- Bake the risen roll sin your preheated oven for 25- 30 mins, until golden. (If the rolls start to brown too quickly at the edges, cover with foil and continue to bake until all are baked)
- Remove from the oven when baked and set aside to cool while you make the glaze
- In the bowl of a stand mixer combine whip the cream cheese and butter until fluffy
- Add in the cold brew concentrate, orange zest, 1 cup of icing sugar and whip until well combined
- Add in the second cup of icing sugar and whip until smooth and well combined
- Spread the cream cheese topping over the warm rolls to your preferred thickness
- Serve warm and oozing the topping!
*Breakfast Make Ahead
If you want to start your day in a tasty Station Cold Brew way, these can be made up to step 19. Place the cling wrap covered rolls in the refrigerator and let them have their second rise overnight. In the morning, remove the rolls and allow to come to room temperature for about 30 minutes before final baking. You can also make the cream cheese topping the night before, cover with cling wrap and have it ready for spreading on the baked rolls.

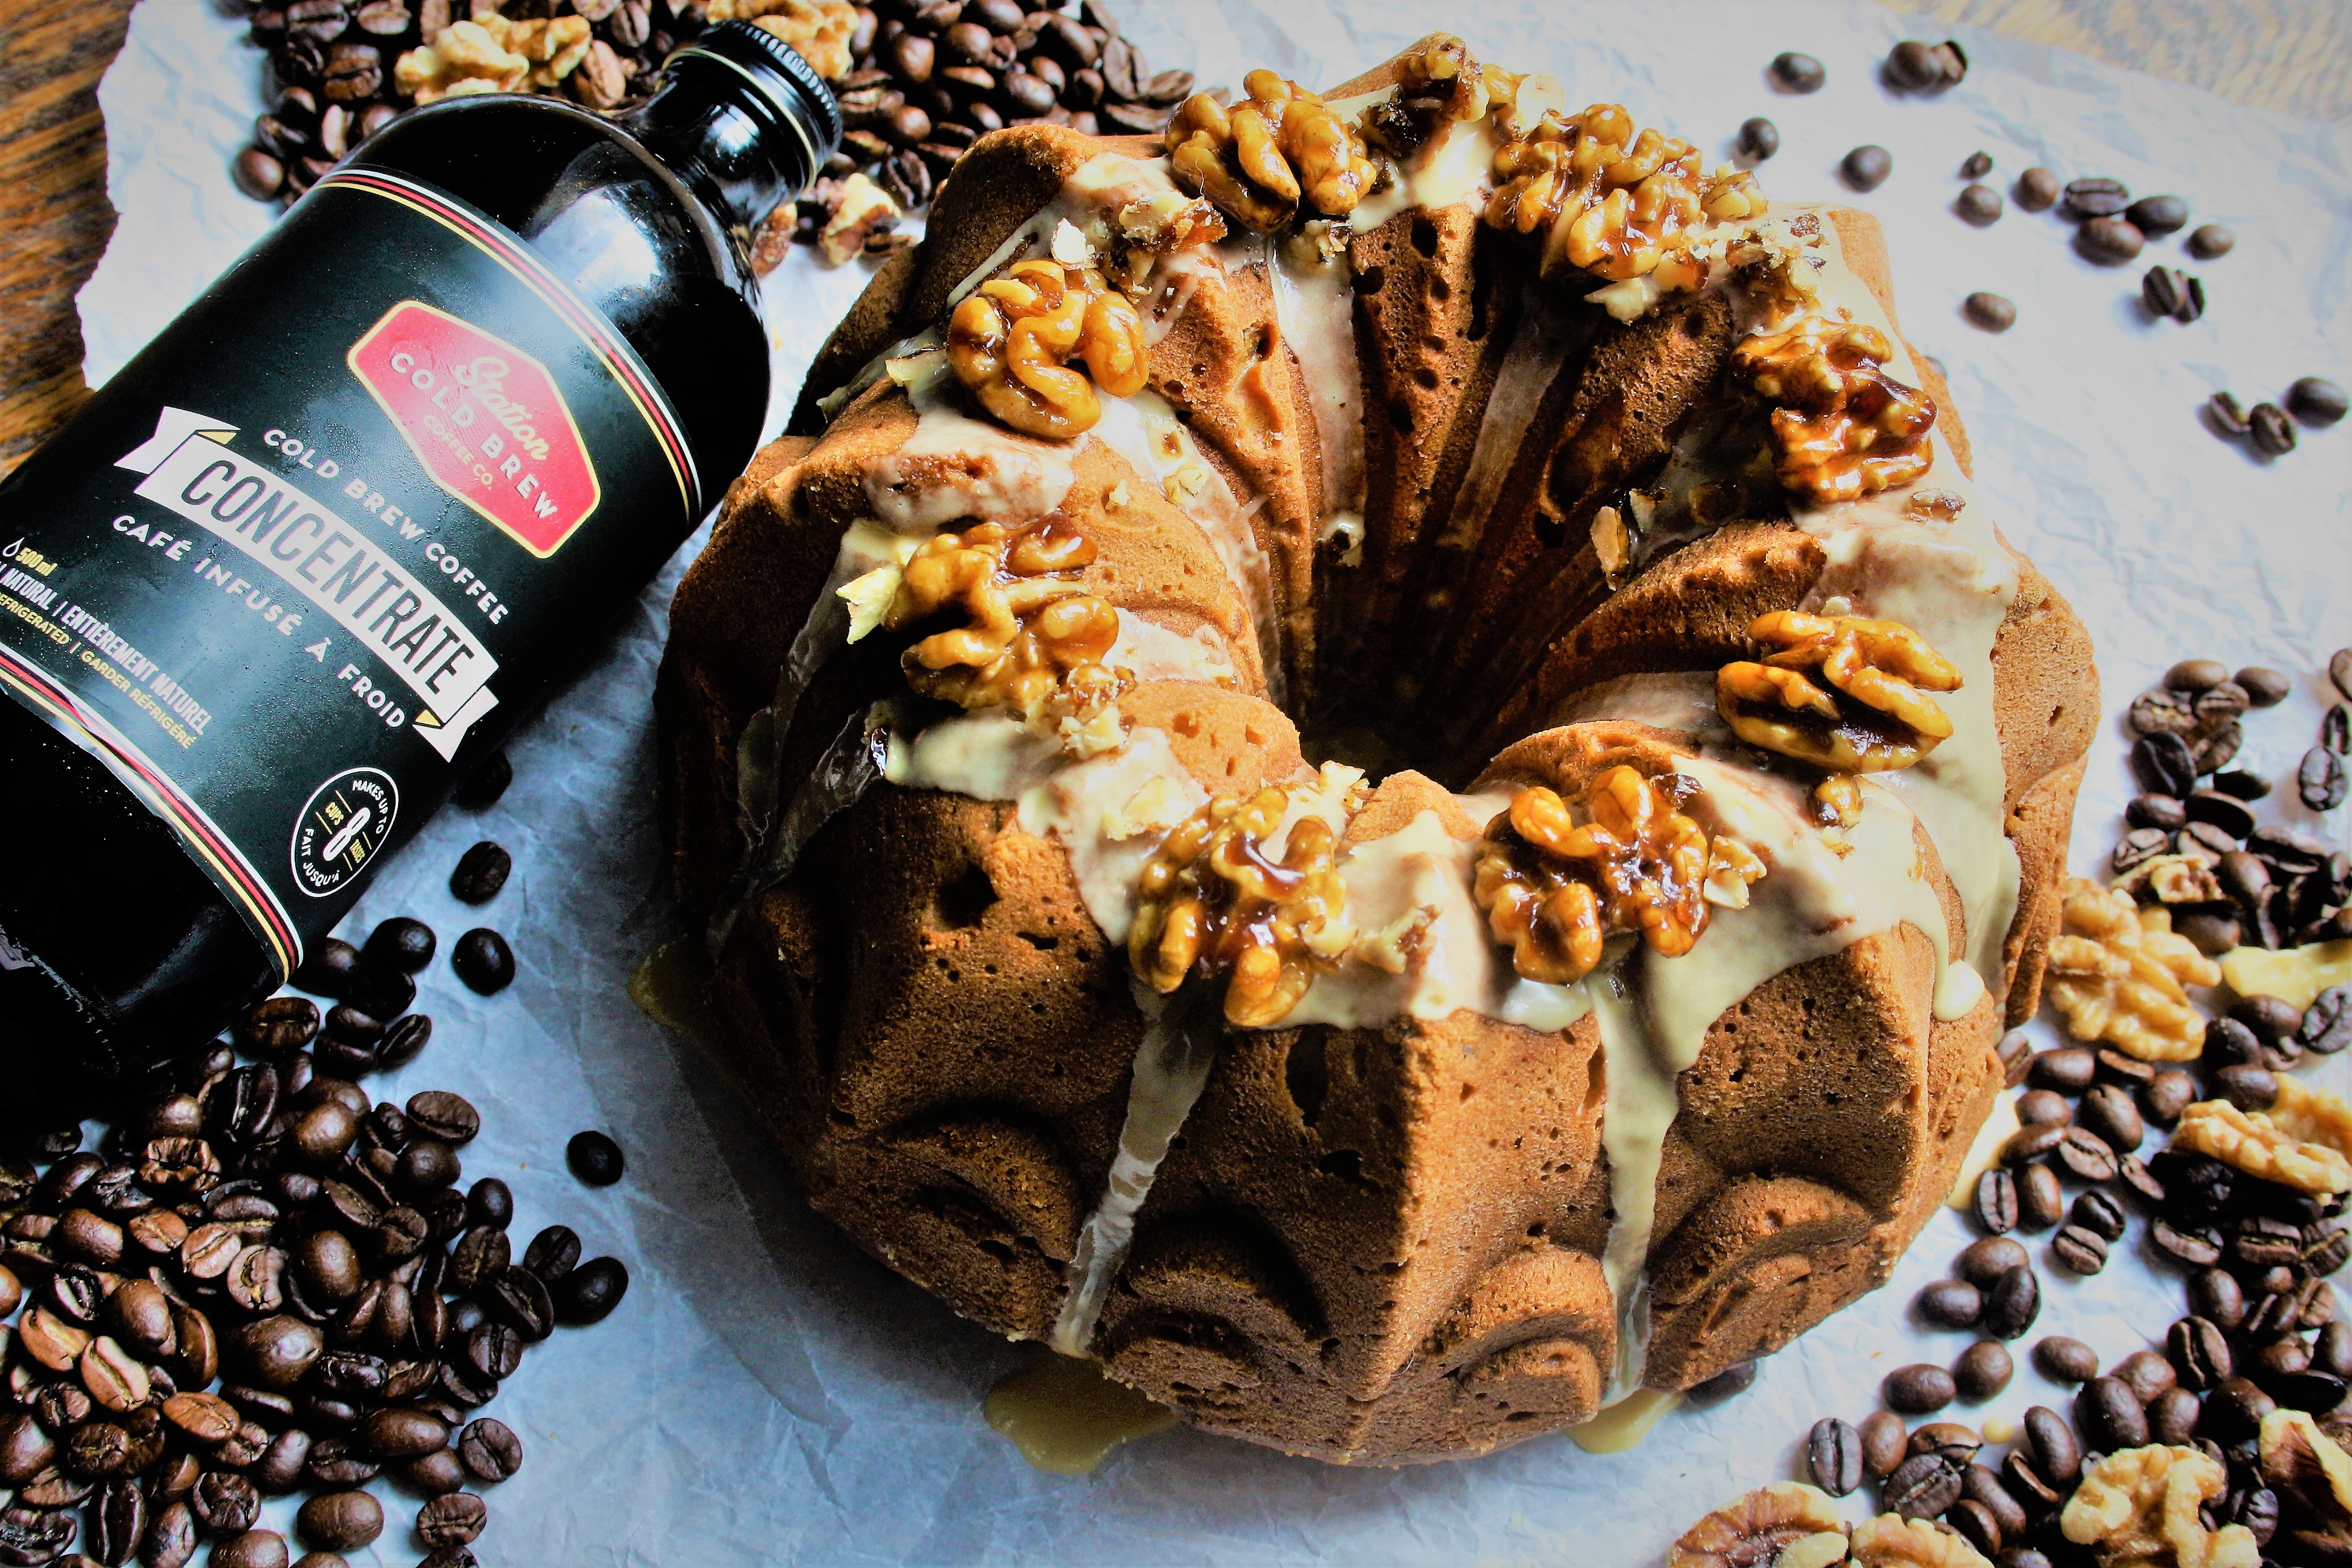
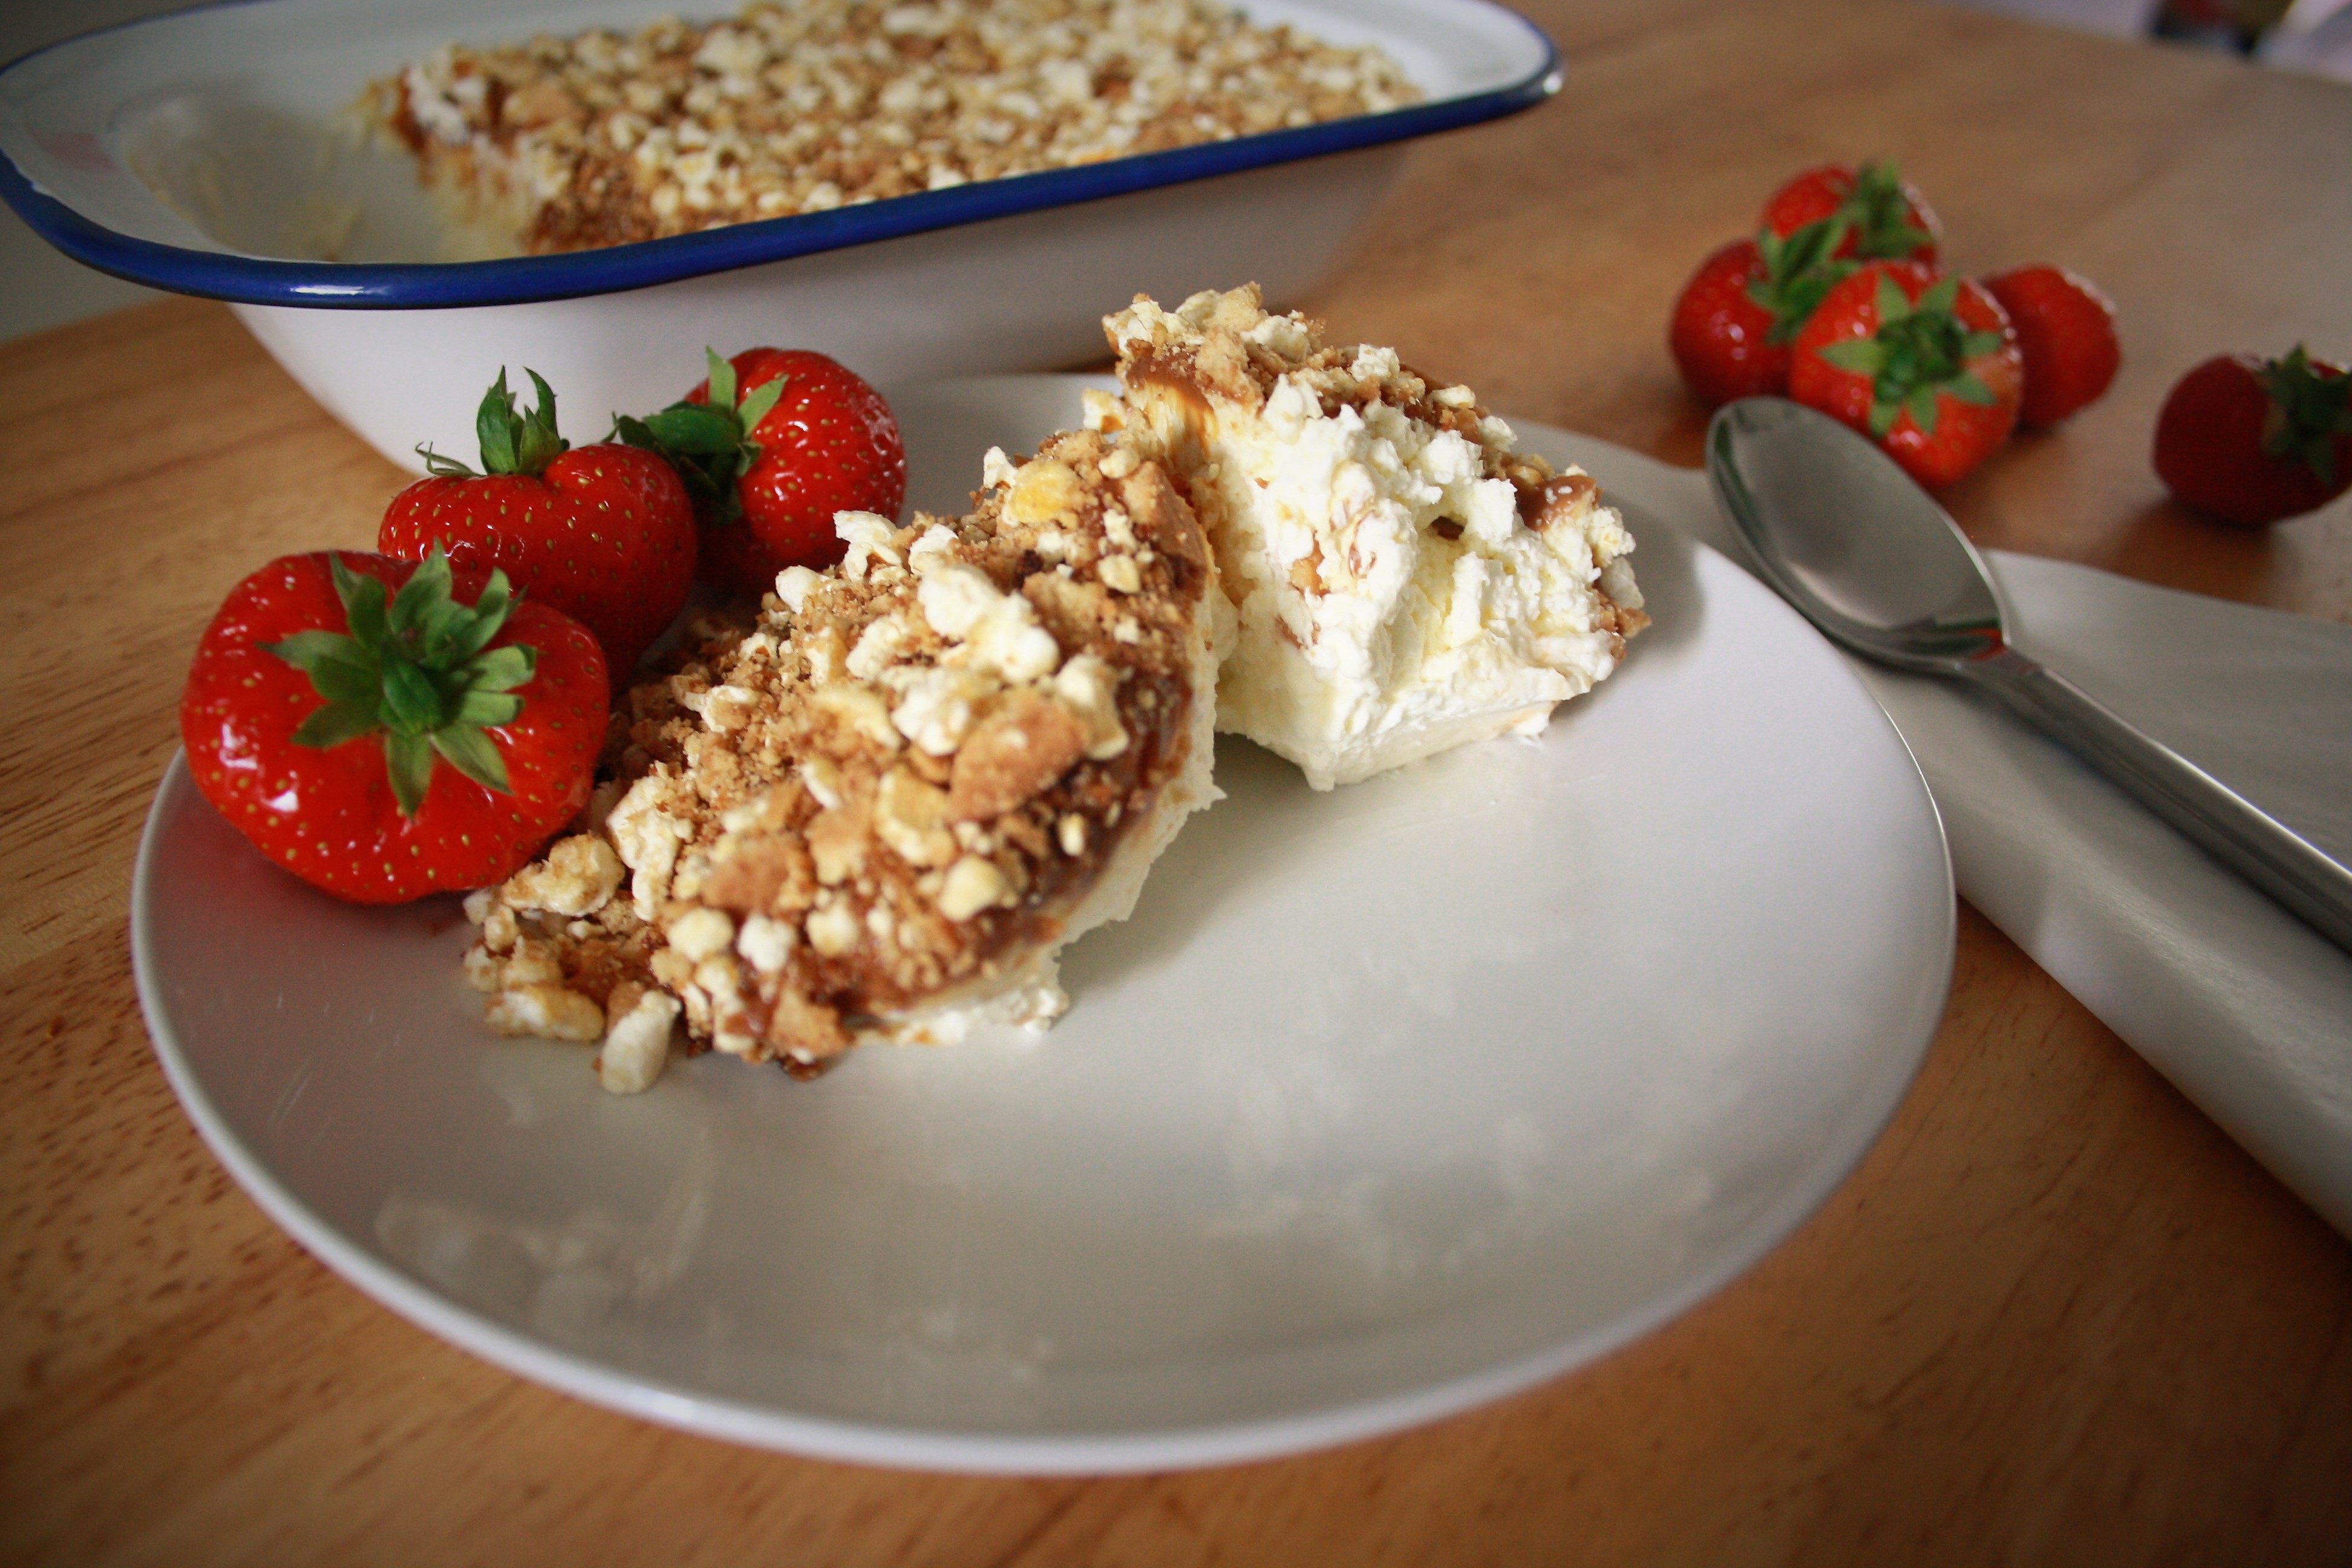
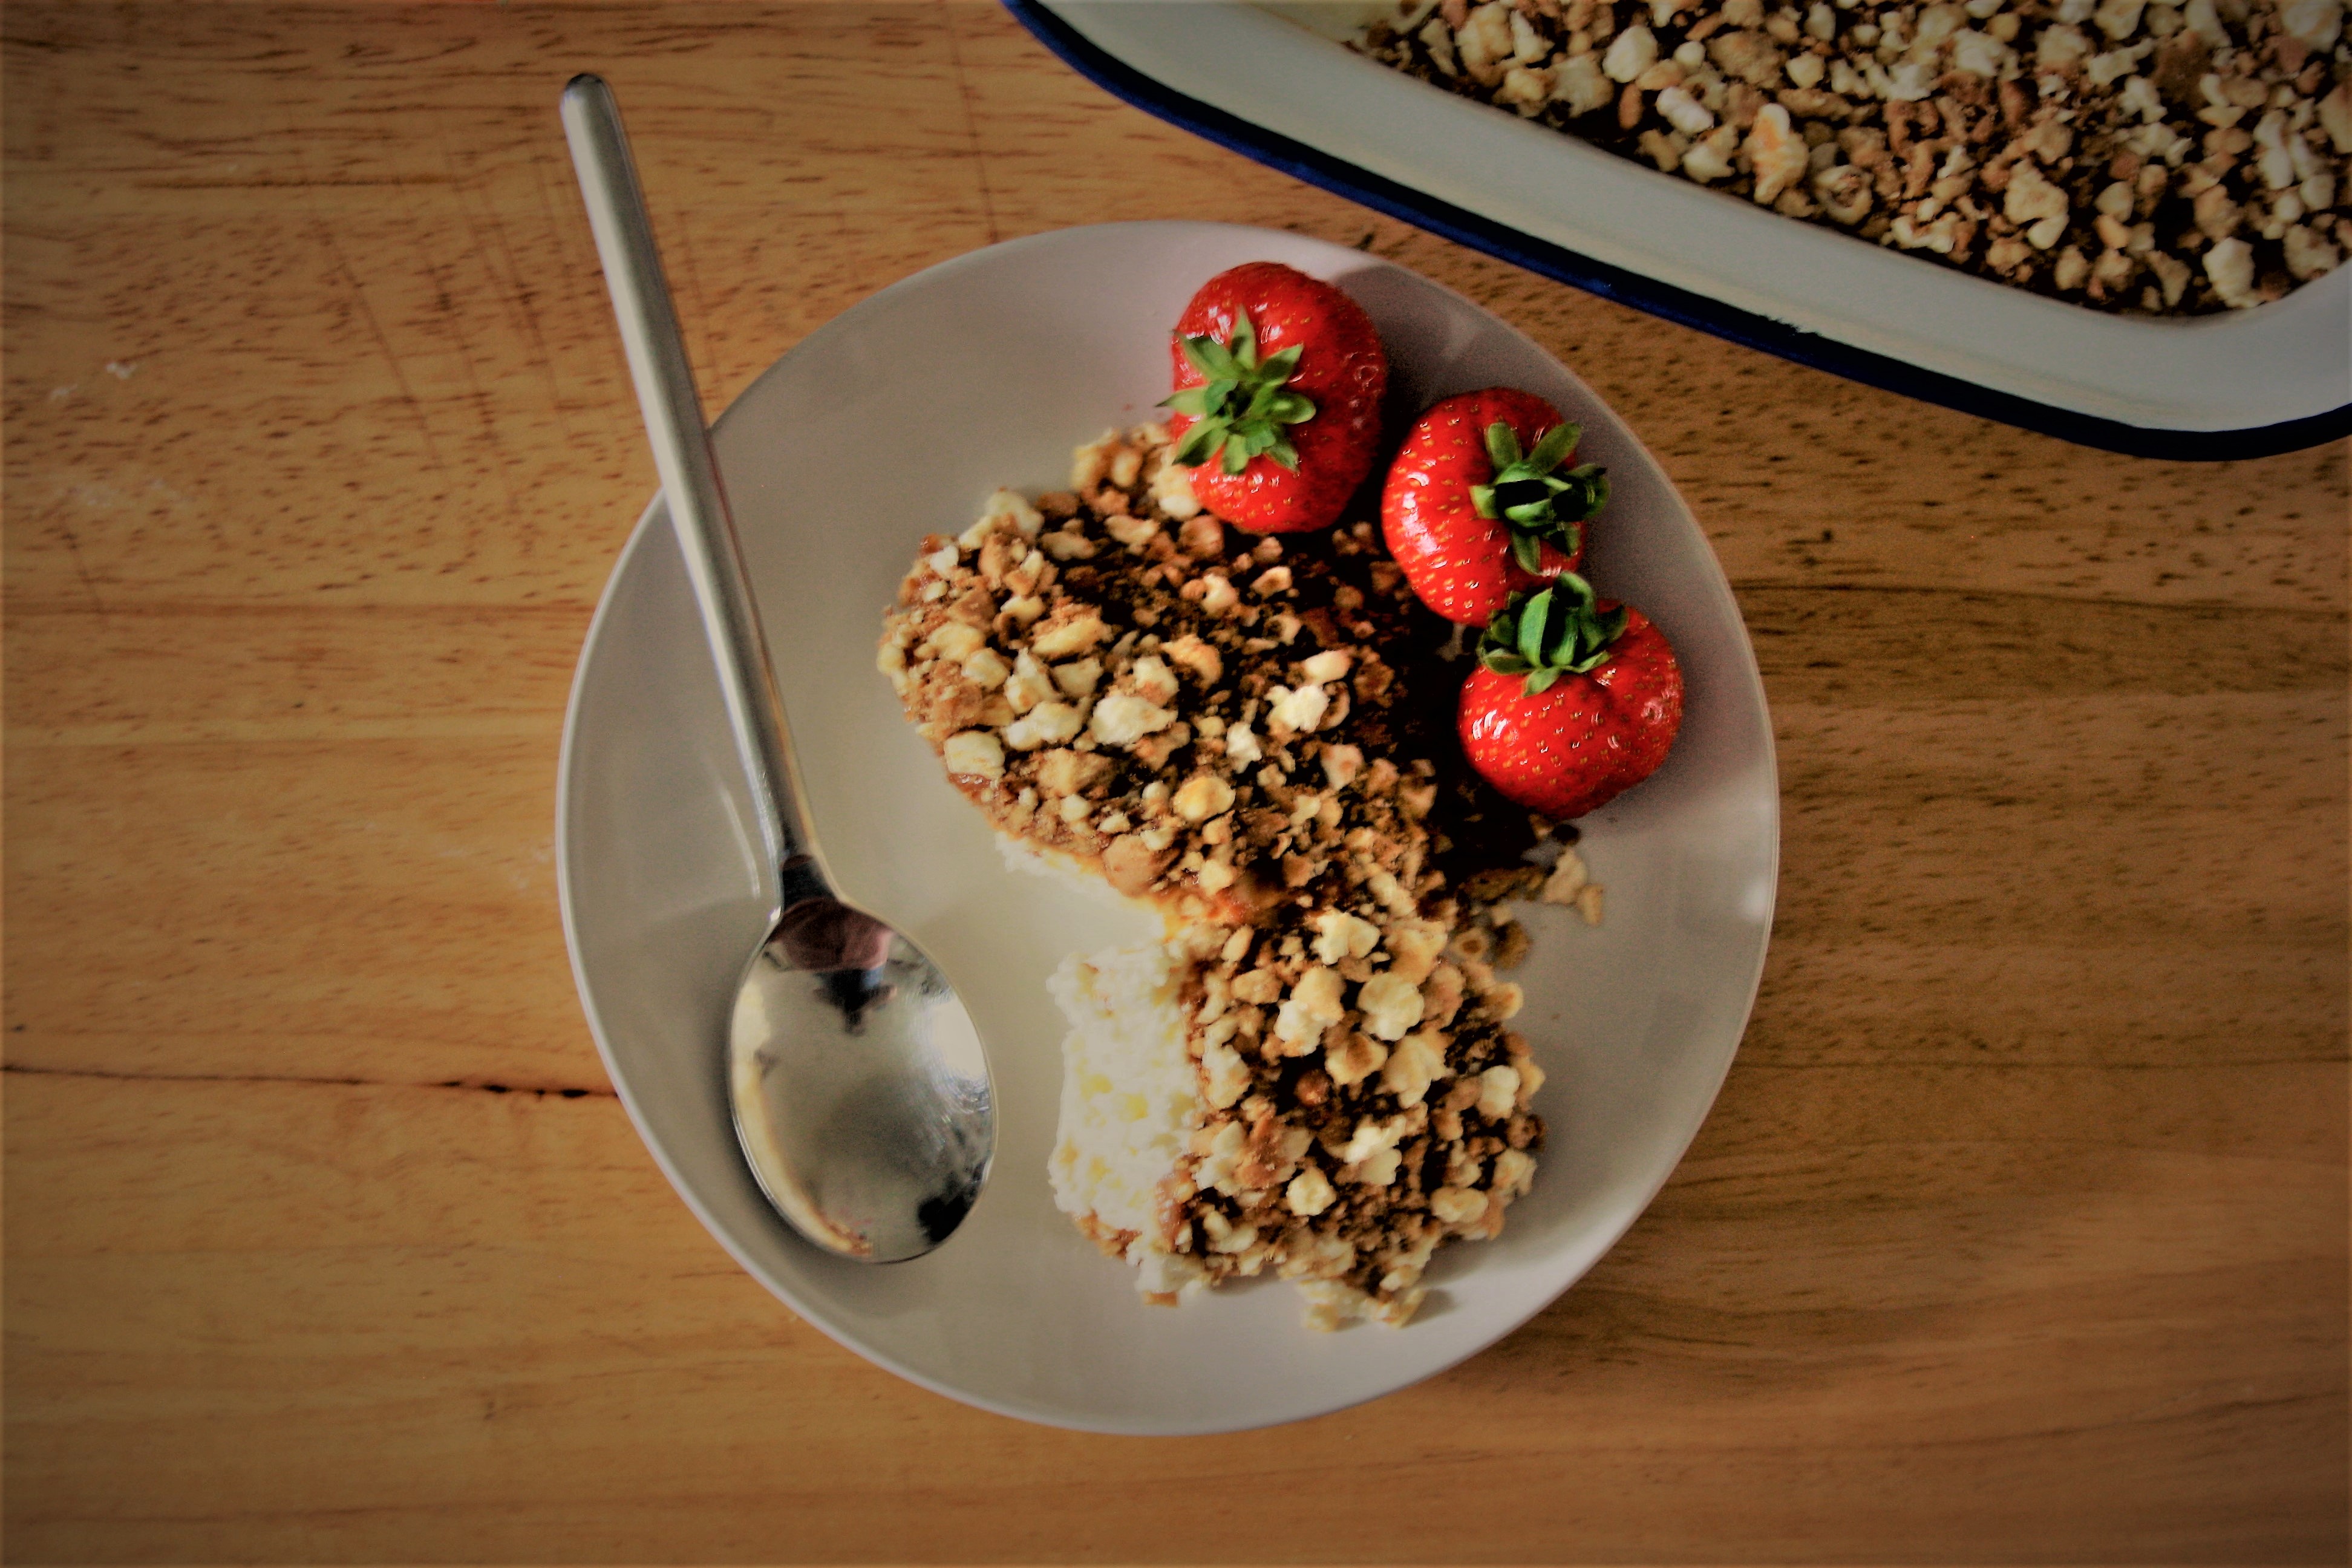
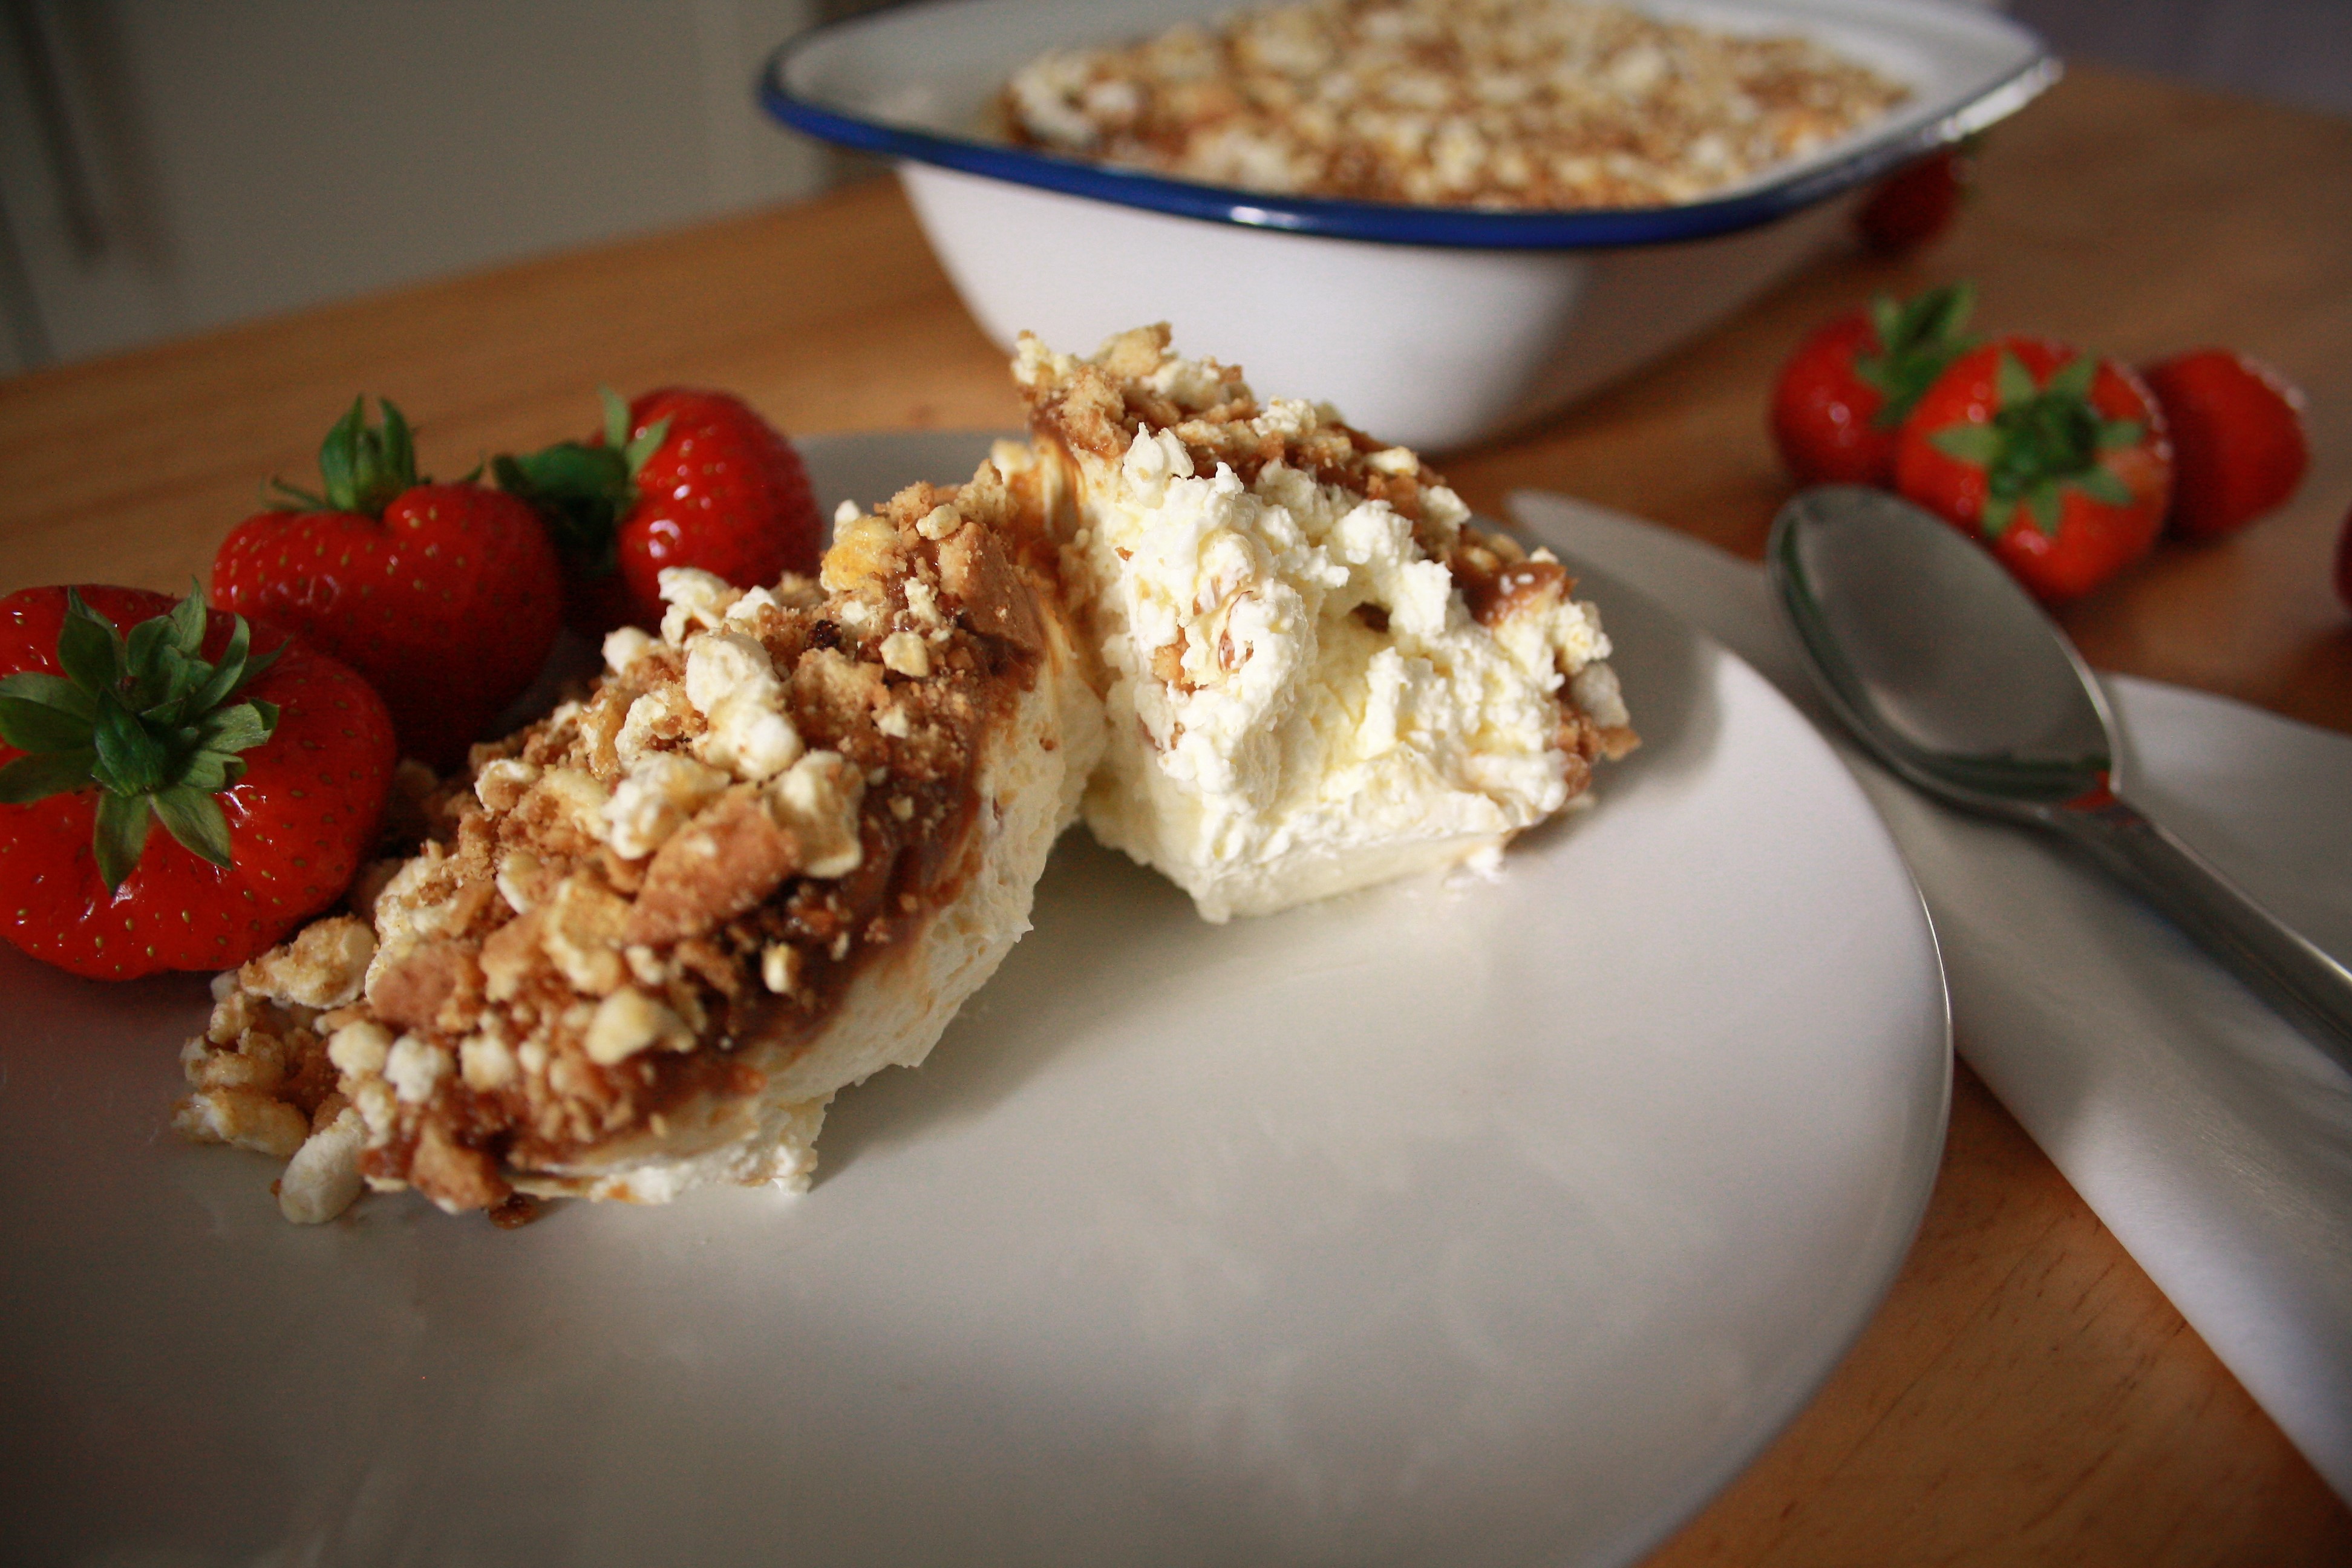
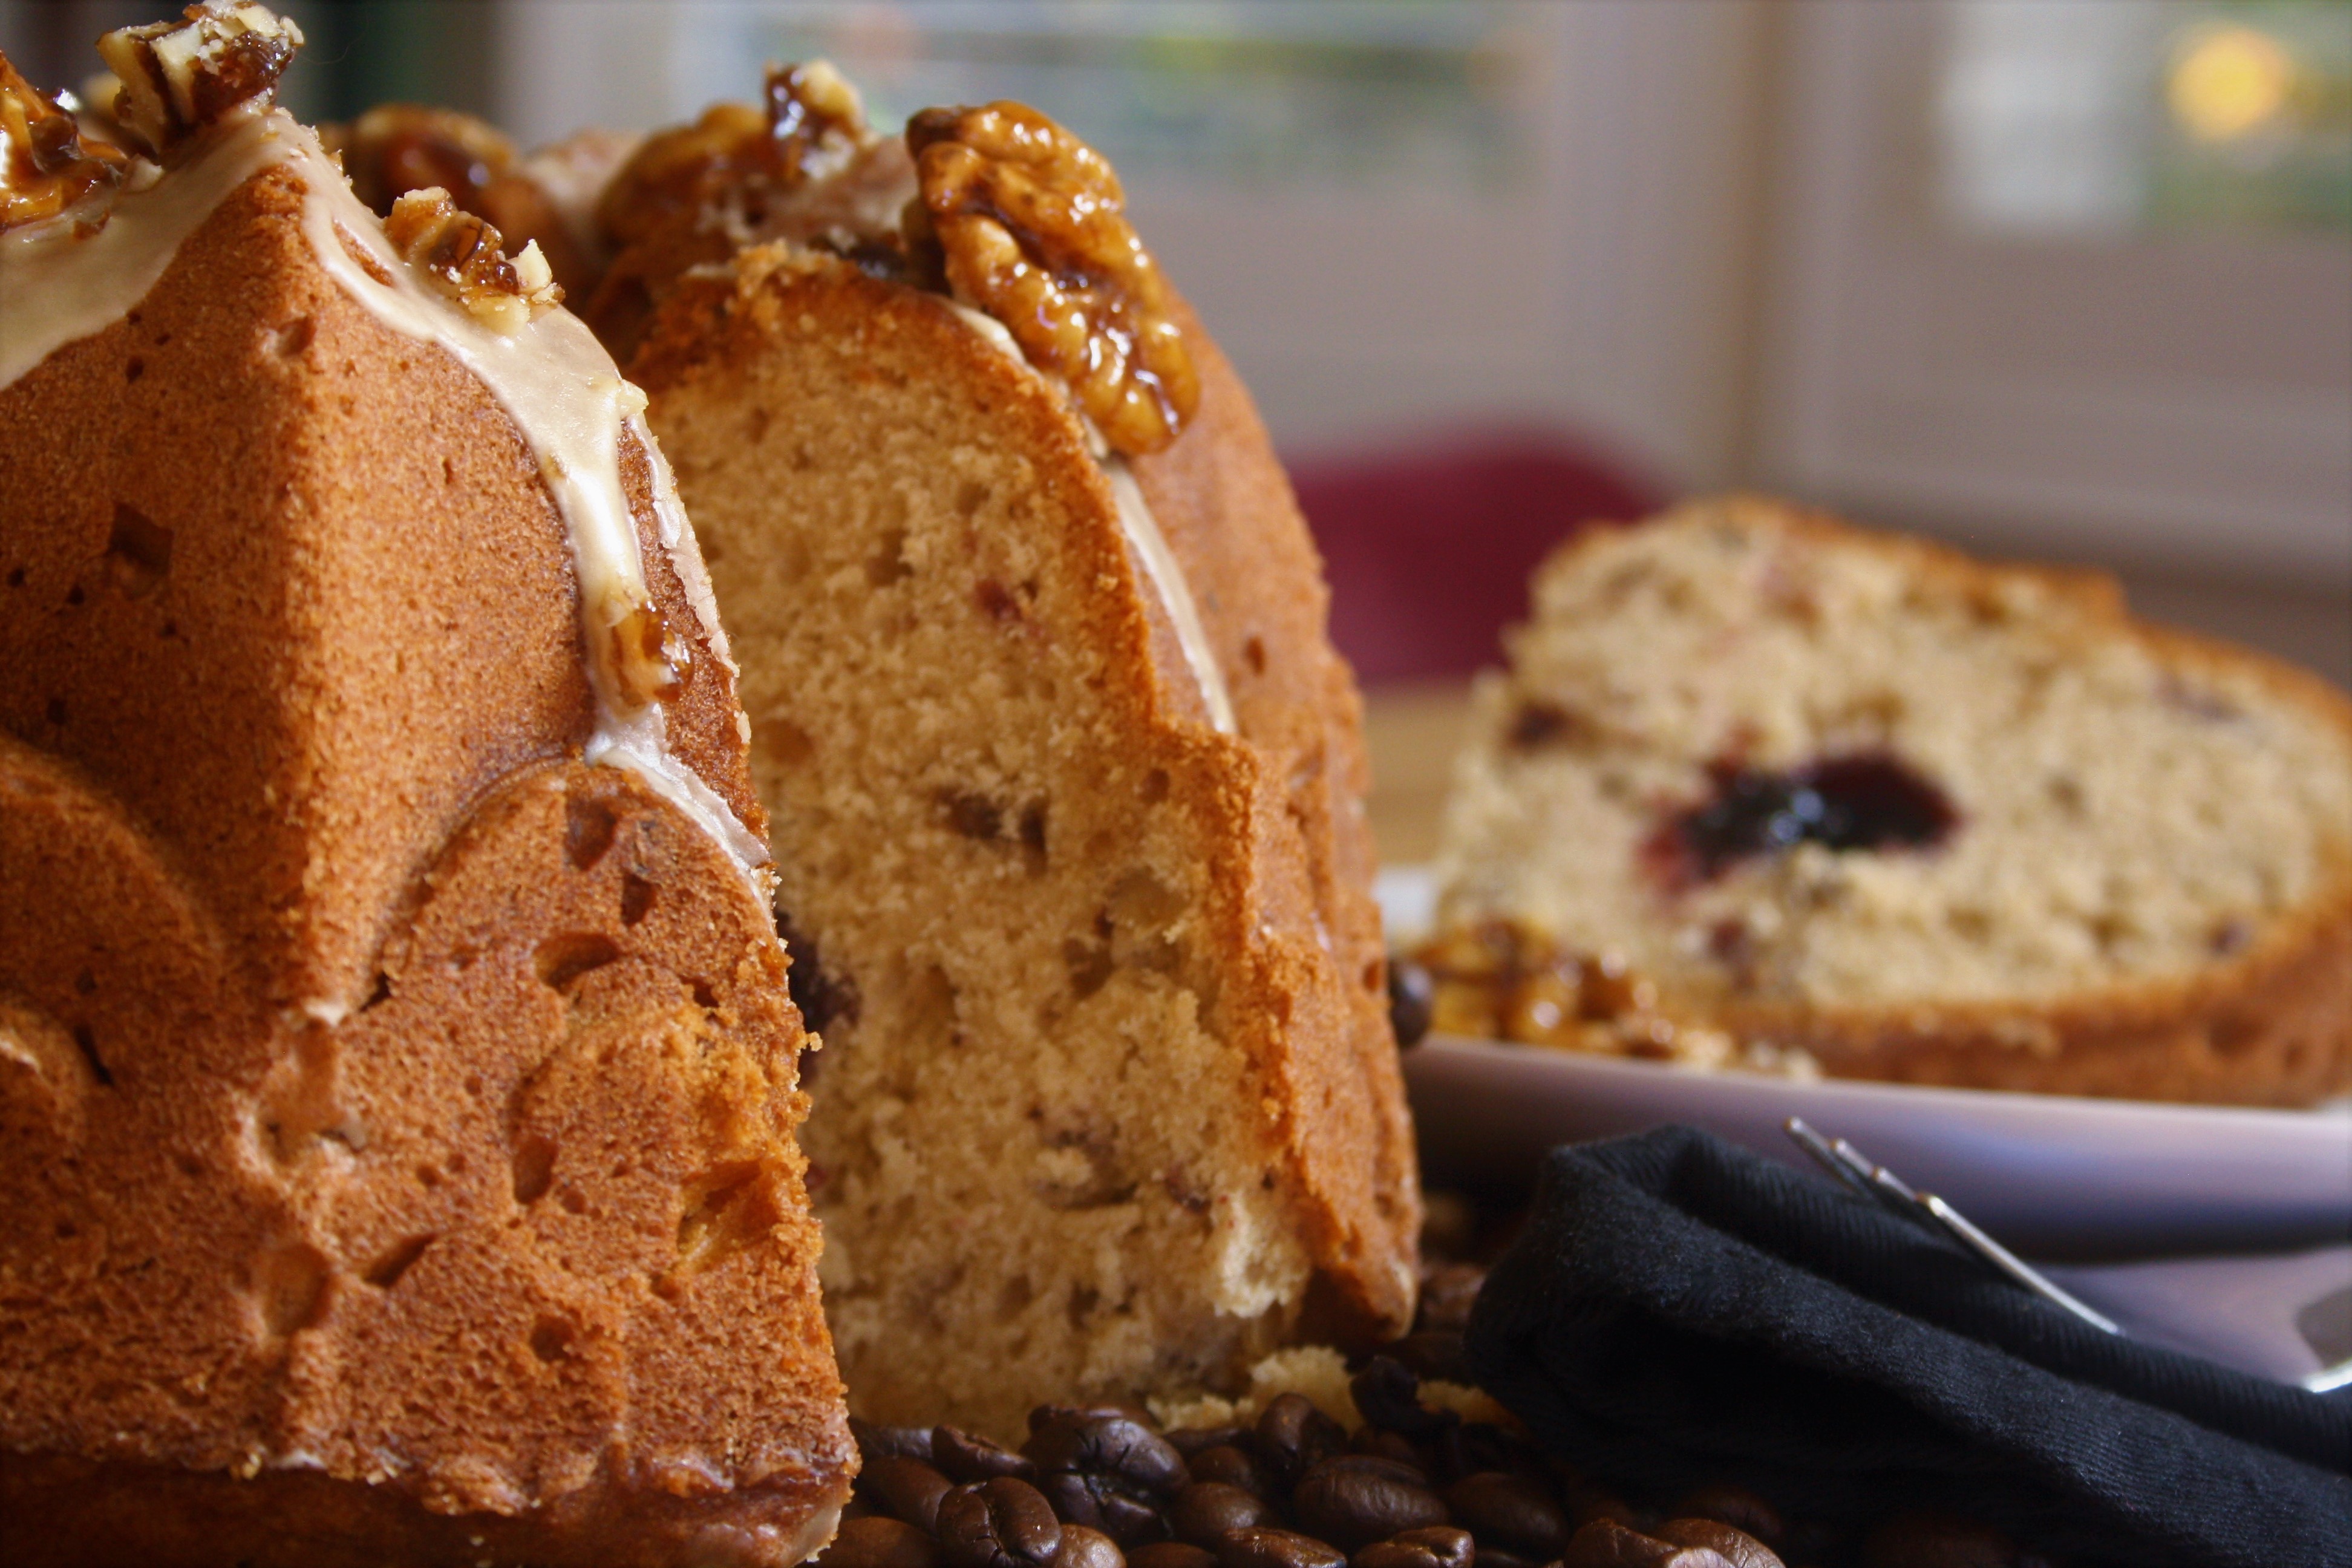
Coffee & Walnut Bundt Cake
Here is a revamp on that classic British baked staple- the Coffee & Walnut cake. I’m sure Mary Berry would spit out her battenburg at the thought of tampering which such a classic (if she were ever to read this?) but irreverence can sometimes taste oh so delicious! Spiking the cake with blackcurrant provides a pleasing tangy contrast to the delicious sponge. The glaze and nuts are just an excuse to add more of that wonderful coffee flavour. If you like Coffee and Walnut cake, I’m sure you’ll love this.
Makes 1 large bundt cake
Ingredients
Bundt Cake
- 3 ¼ cups cake & pastry flour
- 1 teaspoon baking powder
- ½ teaspoon bicarbonate of soda
- 2 sticks butter, softened and cubed
- 1 cup light brown sugar, packed
- 4 eggs
- 2/3 cup sour cream
- 1 teaspoon vanilla extract
- ½ Station Cold Brew Concentrate
- 1 cup walnuts
- ¾ cup blackcurrant conserve
Syrup
- ¼ cup Station Cold Brew Concentrate
- 1/8 cup maple syrup
Glaze
- 1 cup icing (confectioners) sugar
- 3 tablespoons Station Cold Brew Concentrate
Candied Walnuts
- 14 walnut halves, lightly toasted
- ¼ cup dark brown sugar, packed
- 1/8 cup Station Cold Brew Concentrate
Equipment

Method
Bundt Cake
- Preheat your oven to 350/180
- Prepare your bundt tin by coating either liberally with softened butter and flour, or cake release spray. Ensure every crevice receives ample coating
- In the bowl of a stand mixer, cream the butter and sugar together for approximately 10 minutes.
- In a separate bowl mix together the flour, baking powder and bicarbonate of soda. Sift into a different bowl. Set aside until needed
- In a skillet over a medium height, lightly toast the walnuts. Stir them frequently to make sure they don’t catch and burn. Remove from the heat an skillet, leave to cool for a few minutes, then roughly chop. Set aside until needed
- In a jug combine the sour cream, coffee concentrate and vanilla extract. Set aside until needed
- Fill a piping bag with the blackcurrant jam. Tie and set aside until needed
- After 10 minutes of creaming the butter/sugar, reduce the beater speed to slow and add the eggs one at a time, alternating with 2 tablespoons of the flour mixture
- Increase the beater speed to medium and continue to add the flour mixture 2-3 tablespoons at a time, mixing well in between. The mixture will get quite thick and stiff
- Once all the flour mixture has been added, add in the liquid coffee mixture, pouring in a steady stream. Continue to mix until well combined
- Remove the bowl from the mixer and fold in the cooled, chopped walnut pieces
- Fill the bundt tine with half the cake batter. Using a teaspoon or small spatula knife create a shallow trough in the middle of the batter, all the way around the tin
- Pipe the jam into the trough all the way around the tin
- Add the remaining cake batter ensuring that the jam ring is completely covered. Gently level the surface of the batter
- Bake in the preheated oven for 55 mins. You can test with a skewer but be aware that you may hit the jam ring so some jam may come out on the skewer. You just don’t want any cake batter
- When baked remove from oven and set aside to cool on a rack
Syrup
- While the baked cake is cooling prepare the syrup. In a jug add the coffee concentrate and maple syrup, and whisk well to combine
- After 10 mins of the cake cooling use a skewer or cocktail stick to make random holes over the surface of the cake
- Drizzle it over the cake 1 tablespoon at a time until it has all been added
- Allow the cake to cool fully
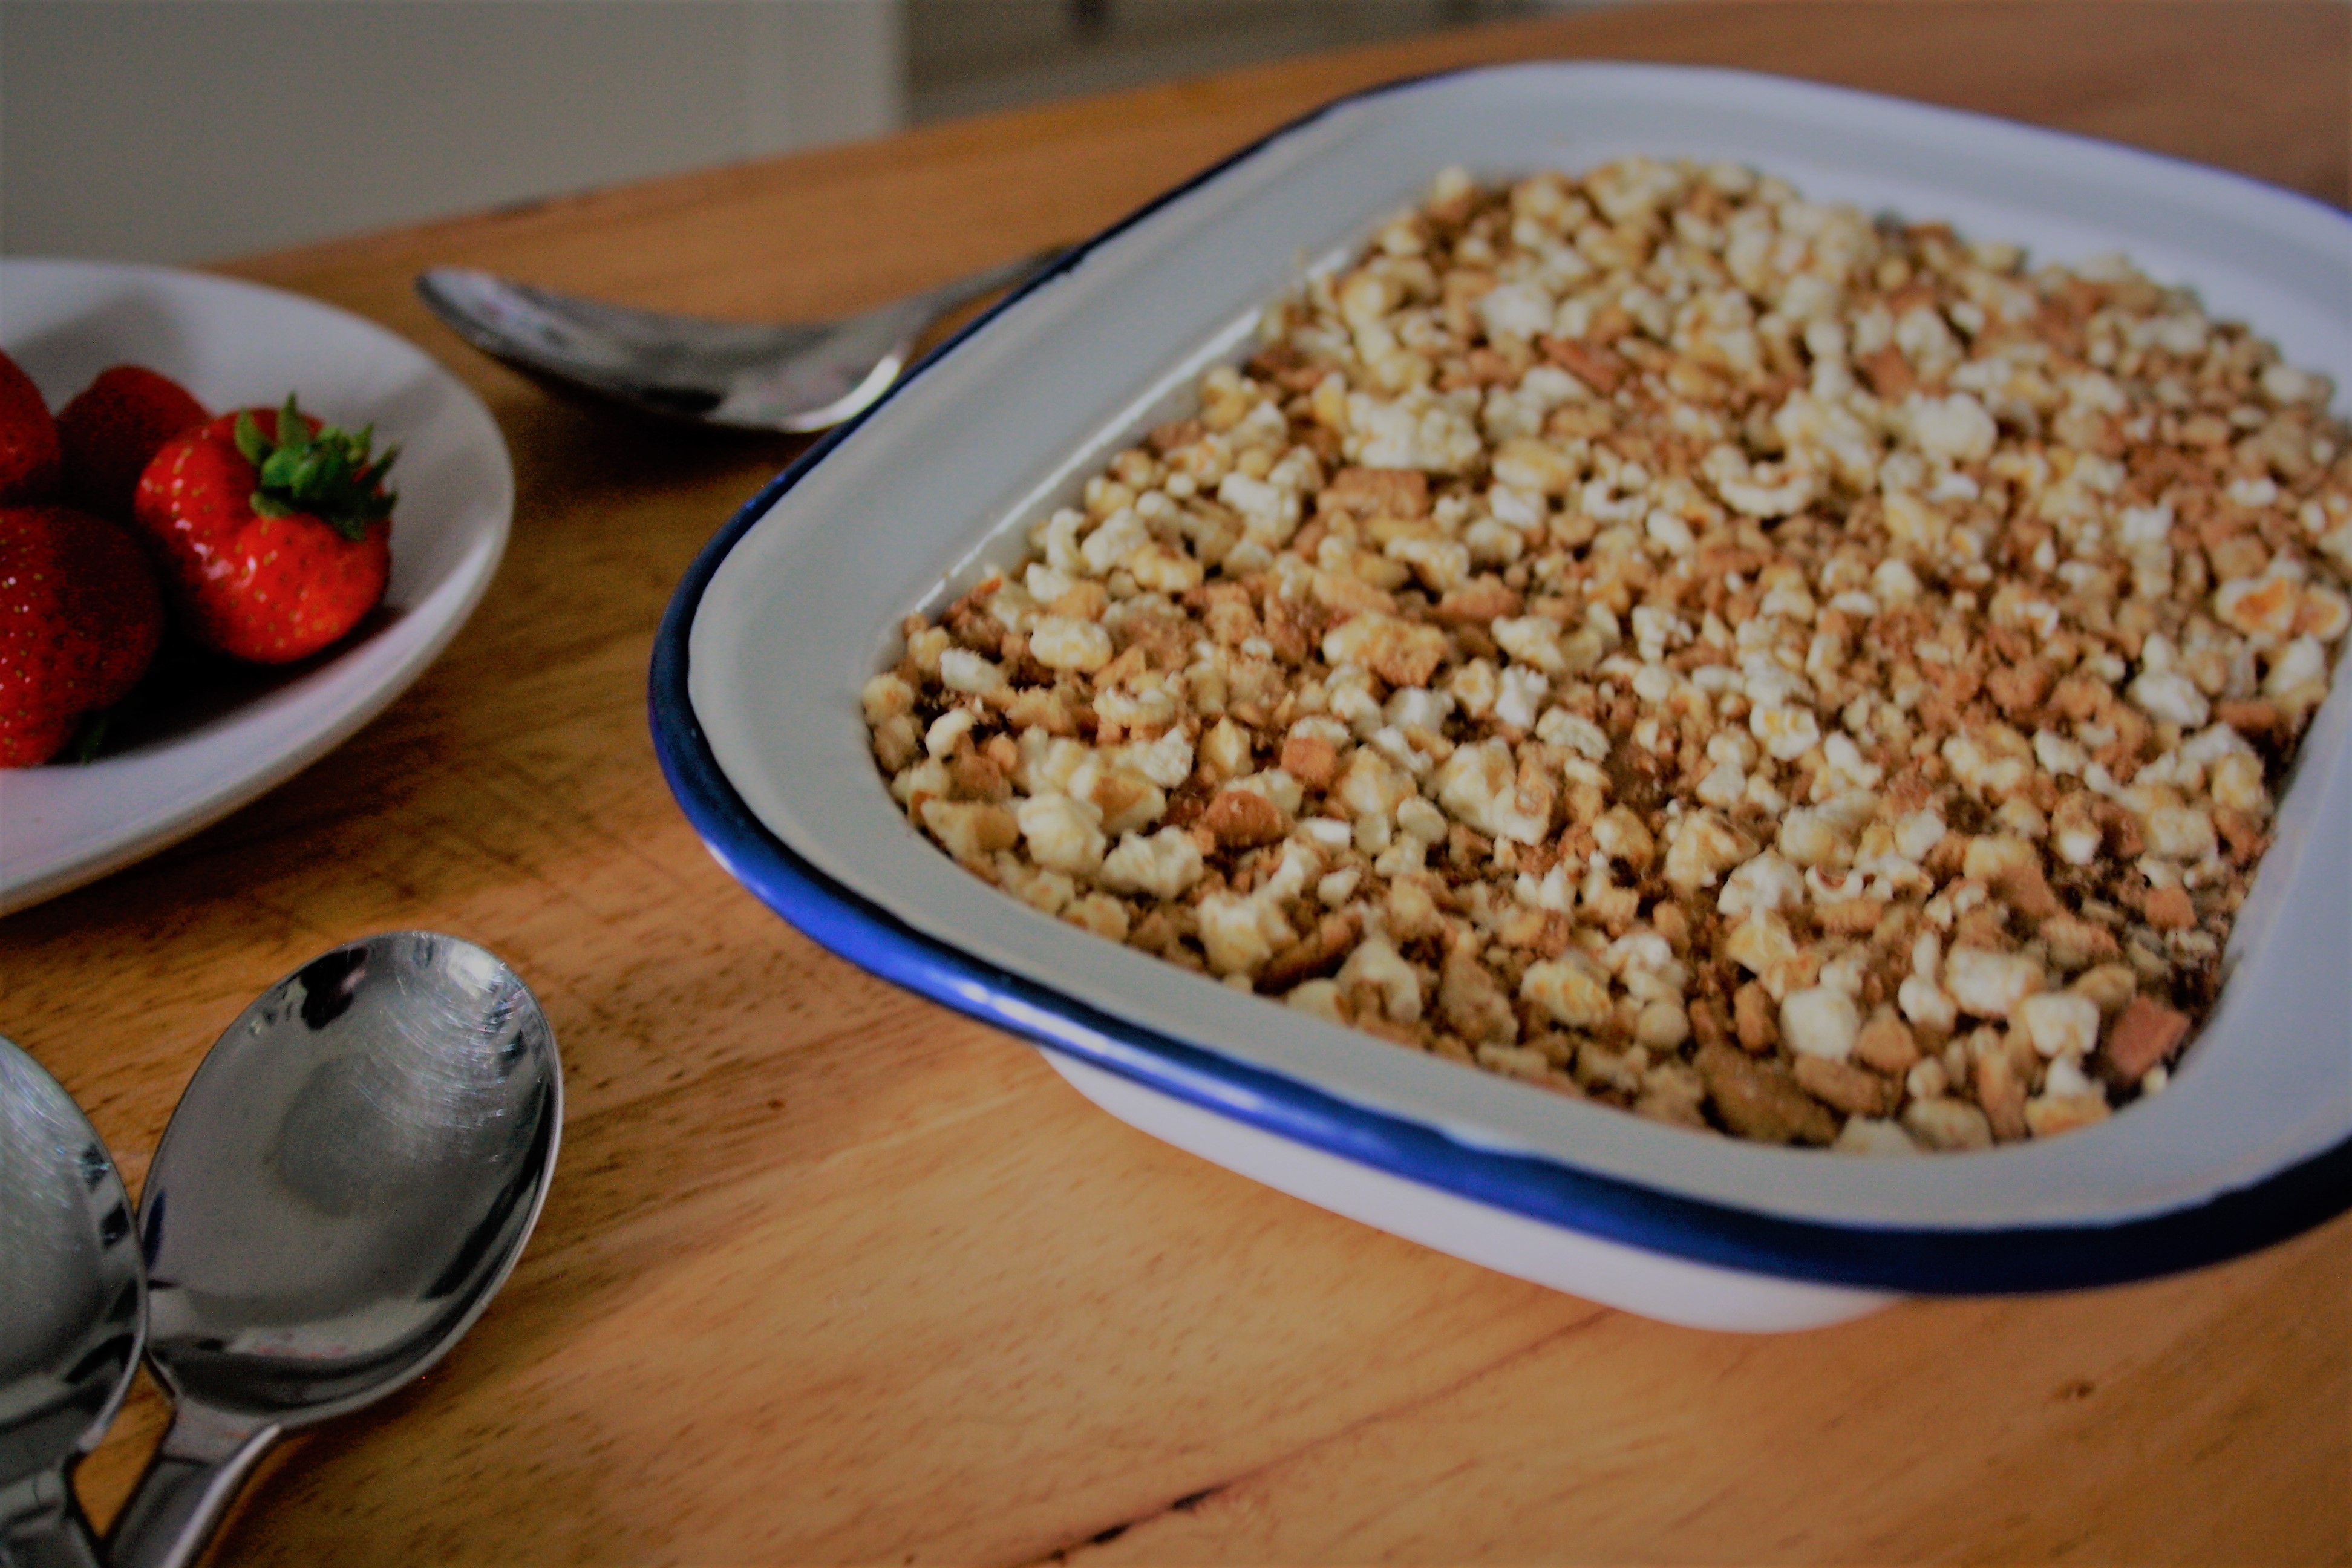
Candied Walnuts
- While your cake continues to cool, make the candied walnuts to top the finished cake
- In a saucepan add the dark brown sugar, coffee concentrate, walnuts and heat over a medium heat until the sugar has dissolved
- Once the sugar has dissolved, increase the heat to high and continue to heat for 5-8 minutes – stirring frequently to ensure the walnut laves are coated in the sugar mixture
- Remove from the heat and carefully place the mixture on a lined parchment tray. Using the forks separate each of the nuts, allow to cool and set. *Please be extremely careful here as the molten sugar mixture can burn. DO NOT attempt to separate the nuts using your fingers!
To finish the cake
- When the cake has fully cooled, invert and remove it from the tin
- In a large jug combine the icing (confectioners) sugar and coffee concentrate. Whisk until you have a smooth, viscous liquid.
- Drizzle the glaze over the bundt cake in a desired pattern. You can cover the cake surface completely or drizzle in strands. Using a spoon may help you here.
- When the glaze has been added, place the candied walnuts on the surface in a pattern to your liking
- Serve and enjoy!
*The cold brew coffee concentrate used in the recipes in this post was supplied free of charge by Station Cold Brew Coffee Company.
For further disclaimer information please see here