2oz semi-sweet chocolate (I use bars with 1/4 oz square so I can put 2 in each dish)
Sauce
1 cup maple syrup
1 cup packed light brown sugar
½ cup water
¼ cup unsalted butter
1 tsp vanilla extract
Method
Cake
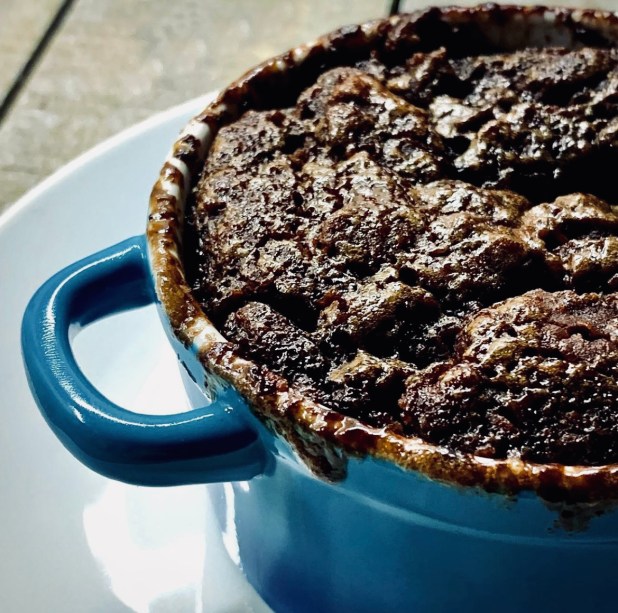
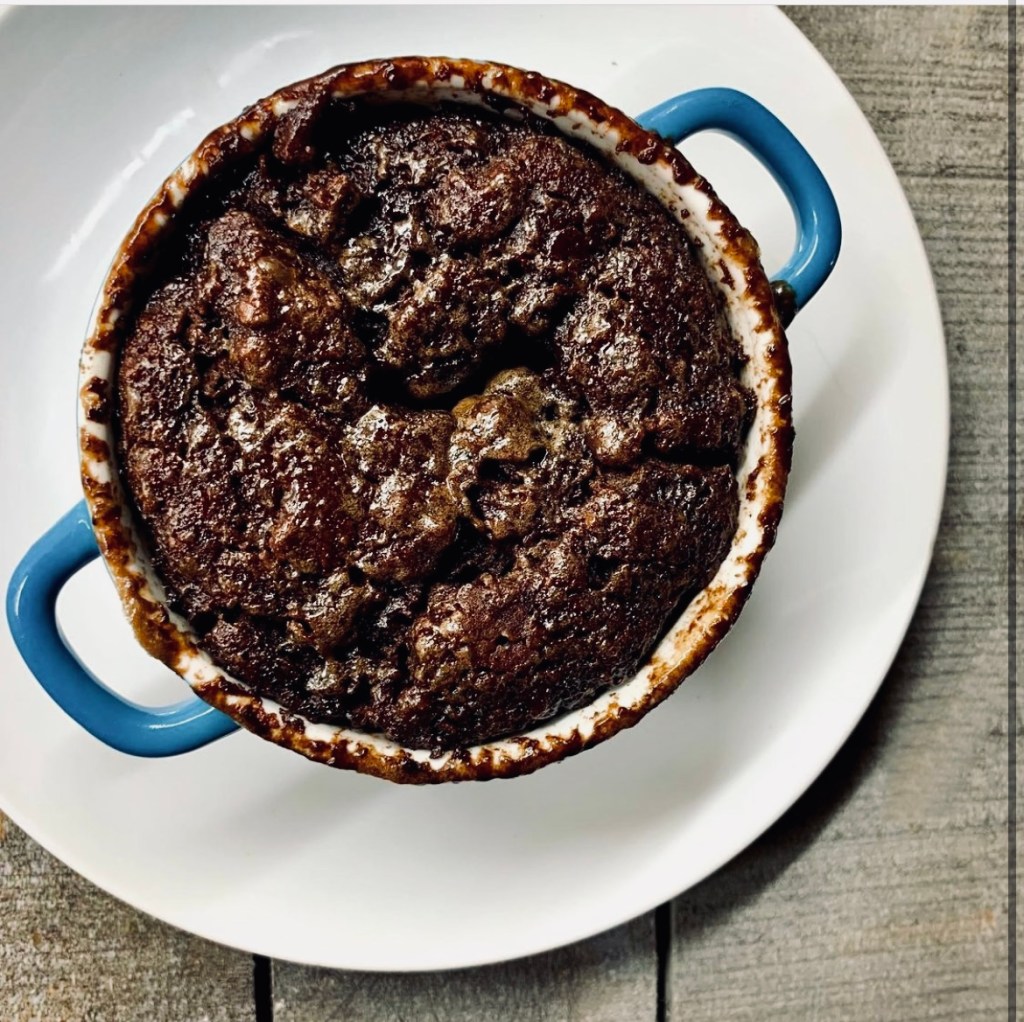
Preheat the oven to 350ºF (180ºC). Lightly grease 4 individual (0.25L) mini-cocottes, ramekins or other ovenproof dishes and place them onto a baking tray
Sift the flour, cocoa powder, sugar, baking powder and salt into a large mixing bowl. Add the butter and use a pastry cutter or your fingertips to work the butter into the flour until a rough, crumbly mixture – similar to thick breadcrumbs or damp sand is achieved
Add the milk, chocolate milk and stir just until the mixture comes together
Spoon this into the prepared smaller baking dishes. Push 2 x 1/4 oz square of chocolate into the middle of each pudding. Set aside while you prepare the sauce
Sauce
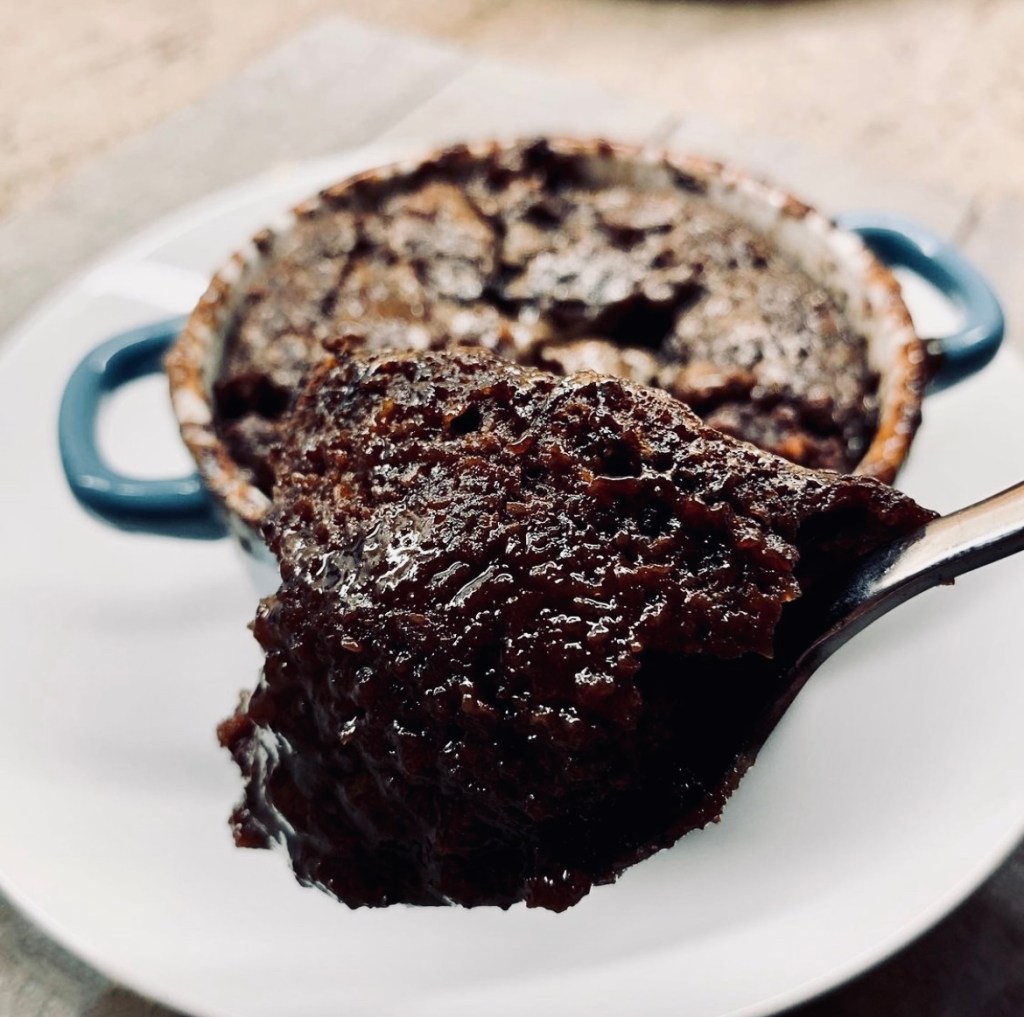
Combine the maple syrup, brown sugar, water, butter and vanilla in a pan and bring to a boil over high heat, stirring occasionally.
Once it reaches a rolling boil, remove it from the heat and ladle this over the cake in the ramekins.
Bake the puddings for about 30 minutes, until a tester inserted into the centre of a pudding comes out clean.
Remove from the oven and let the puddings cool for about 15 minutes before serving (be careful syrup is hot!)
MACARONS! The very word alone is enough to induce a nervous twitch in most bakers. These deliciously delicate Franco delights are notoriously tricky to make and master. Requiring high maintenance and careful handling I think of them as the Madonna of the cookie world. However fickle they are, they are NOT impossible to make though. Slow, steady precision is the key here. I’ll be perfectly honest and say this is not recipe to attempt whilst young kids are running around your legs in the kitchen!
There are a few keys things I would advise-
The recipe for the macarons themselves is in metric. A more precise way of measuring this helps with achieving a better result
Let your egg whites “mature” overnight at room temperature. This helps increase their elasticity which yields a better whipped meringue
Sift your almond mix. You want to avoid knobby almond bits!
Add your sugar slowly and in stages
Work out any frustration- make sure you bang them on the counter, and leave to rest afterwards
As disheartening as it may be- if at first you don’t succeed, try again. You’re not the only person who may have a bake fail- macarons have a tricky reputation for a reason. Take courage!
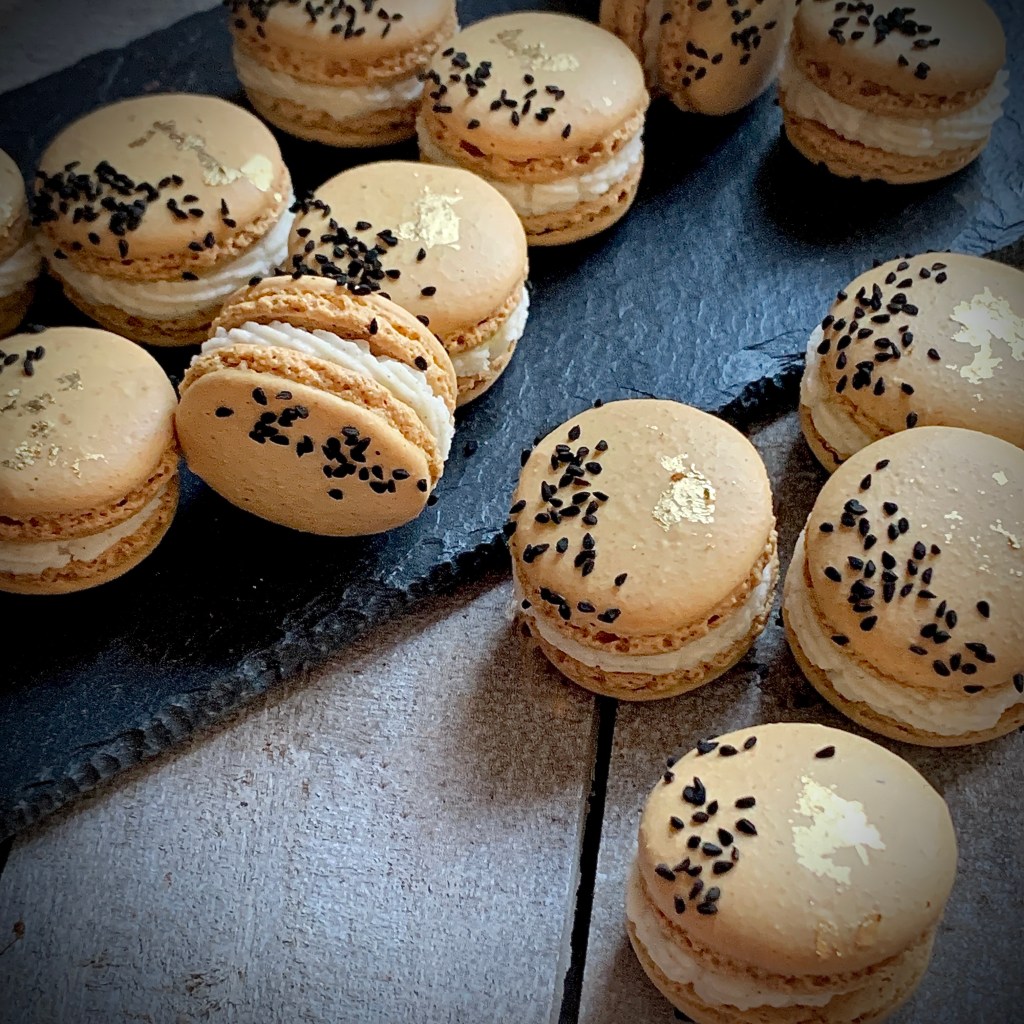
I wanted to create something a little different here – surprise! A few years ago, I had tried a “macaron burger” at a food event. This was exactly as it sounds- a miniature beef patty sandwiched between two macaron shells and finished with a bun-mimicking sprinkle of seeds. Did it work? For me, no. There was something jarring about the chargrilled beef flavour against the sweet almond macaron. It didn’t manage to hit the mark of that pleasing interplay of sweet and savoury.
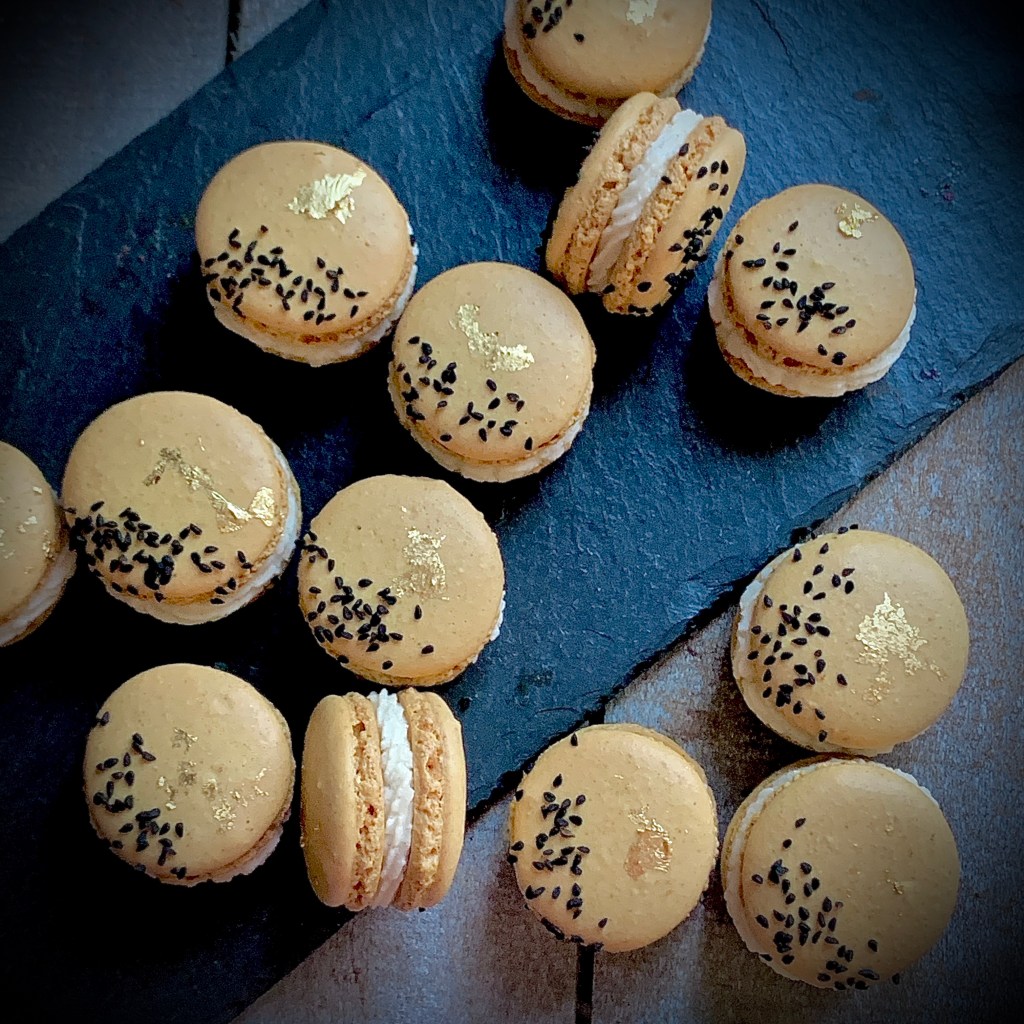
With this idea as a springboard, I started thinking that the sweet/ savoury interplay was the route I wanted to take. Could I improve on a “macaron burger”? Maybe but I also thought it was visually predictable. What else could work with an almond rich flavour? The next stop on my train of thought was of course…curry. There’s an abundance of curry dishes which use almond as a base in their gravies. And so, development began! Research led to a dish called “Badami Curry”, from Mughlai cuisine of Northern India. Using a creamy almond soup made with finely ground almonds I decided this would be the main inspiration for this macaron recipe. For the filling elements, I wanted to keep flavours that worked with the concept of Badami- a centre of mango & ginger curd nestled inside a rim of rich cardamom buttercream- all ingredients often featured in Mughlai cooking. Topping of with a sprinkling of Nigella seeds gives a pleasing gentle mustardy hit to cut through the almond sweetness.
Please don’t be daunted by these. Yes, they are a project requiring some planning but trust me they are well worth it. You and anyone who tries them will be talking about them for a long time afterwards.
Makes 28 macarons
*For best results start this recipe 2 days before you want to serve the macarons
100g egg whites (usually between 3–4 large egg whites)
¼ teaspoon cream of tartar
80g fine sugar
1–2 drops yellow gel food
125g ground almonds (make sure it’s made with blanched almonds)
125g powdered sugar
3 teaspoons good quality curry powder
Cardamom Buttercream
¼ cup unsalted butter, softened to room temperature
1 ½ cups powdered sugar
1-2 Tablespoons heavy cream, or whipping cream, at room temperature
¼ teaspoon vanilla extract
2 ½ teaspoons ground cardamom
salt, to taste
Mango & Ginger Curd
1 cup fresh mango, chopped
1 inch piece fresh ginger
½ cup sugar
2 ½ Tablespoons fresh lemon juice
2 large whole eggs
2 egg yolks, from large eggs
1 stick unsalted butter, cubed and cold
Decoration to finish
1 Tablespoon Nigella seeds
Gold leaf (optional)
Method
48 HOURS BEFORE
Add egg whites to a dry, clean bowl. Cover with cling wrap and set aside on your counter for 24 hours
To make Mango & Cardamom Curd
Puree the mango pieces and ginger together in a blender
Whisk together the mango/ ginger puree, sugar, lemon juice, eggs, and egg yolks in a heavy based saucepan over low heat. Stir over low-medium heat until the sugar has dissolved and it’s just starting to bubble
Add the cold butter 3-4 pieces at a time, stirring until each addition is melted and incorporated
Turn the heat to low and continue stirring and cooking the mixture for 2-3 minutes until it is thickened and coats the back of a spoon. (Test by drawing a line through the curd on the back of the spoon and the line should not drip)
Pour into a clean bowl. Cover the surface with cling warp to prevent a skin forming and store in the fridge until needed
*This recipe makes more than needed, the curd can be kept in the fridge in and used for a range of things from drizzling over pavlovas, to spreading on toast, to swirling in homemade ice-cream.
To make macarons
In the bowl of a food processor, combine the ground almonds, powdered sugar, and curry powder. Pulse 4-5 times making sure that all the ingredients are blitzed. Line your counter with baking paper and using a large sieve, sift the mixture from the food processor to remove any large almond husks pieces, onto the baking paper. You can use a spoon to work through any large lumps as you don’t want to discard a lot of the dry mix because then you won’t have enough dry ingredients in the batter. Transfer this almond mixture to a large dry, clean bowl. Set aside until later
To the bowl of a stand mixer add the eggs whites (prepared from the day before) and cream of tartar. With the whisk attachment fitted. beat together on medium speed until very soft peaks form. Once the egg whites begin leaving tracks, you have soft peaks. Stop beating.
Add about 1/3 of the sugar. Beat on medium-high speed for about 10 seconds, then with the mixer continuing to run, add another 1/3 of the sugar. Beat for 10 seconds, then with the mixer continuing to run, add the remaining sugar. Beat on medium-high speed until stiff glossy peaks form. Using a rubber spatula, slowly and gently fold the food colouring into the egg whites
This is the tricky bit! Slowly fold the beaten egg whites into the almond mixture in 3 separate additions, folding until combined before adding the next addition. After you add all the egg whites, pay very close attention to the consistency of your macaron batter. Continue folding the batter until it thins out into the consistency of a thick syrup. A more helpful cue is the “V-test”. Drop the macaron batter off your spatula back into the bowl. The batter mixture should fall off the spatula in semi-fluid globs, leaving a “V-shaped” trail of batter hanging from the spatula It’s best to go very slow so you don’t accidentally overmix and damage the batter consistency
Spoon the macaron batter into a piping bag fitted with a medium round piping tip. This may be somewhat messy as the macaron batter is very drippy
Holding the piping bag at a 90-degree angle over the baking sheet, pipe batter in 1.5 – 2 inch rounds about 1-2 inches apart on prepared baking sheets. The piped macaron batter flattens out. Bang the pan a couple times on the counter to pop any air bubbles, then use a toothpick to pop any further remaining air bubbles. If using, sprinkle the tops of the flattened macarons with a few Nigella seeds to your liking
Let the piped macarons sit out until they are dry and no longer tacky on top, usually 30-60 minutes dependant on your kitchen humidity. This time allows the top to firm up and form a skin. Do not let them sit out for longer than they need to because they could begin to deflate
Meanwhile, preheat the oven to 325°F
Bake for 15-20 minutes. Note: as the macaron shells bake, they should form feet. To test for doneness, lightly touch the top of a macaron your finger. If the macaron seems wobbly, it’s not done and needs another few minutes. If it seems set, remove them from the oven
Let the shells cool on the baking sheet for 15 minutes, then transfer to a cooling rack to continue cooling. (The macaron shells may stick to the parchment paper/baking sheet if you try to remove them too early. If this is happening, let them cool on the baking sheet a little longer before removing. Nonetheless I’ve found they sometimes need some gentle persuasion)
While the shells are cooling you can prepare your buttercream filling
To make Cardamom Buttercream
Make sure your butter is softened to room temperature before beginning. In the bowl of a stand mixer, beat butter until creamy.
Add powdered sugar, cream, and ground cardamom. Beat on low speed until these ingredients are incorporated, then increase to medium-high speed. At this point, you can add more powdered sugar if the frosting is too thin or a splash of heavy cream if it’s too thick
Add salt to taste. This helps the filling from being overly sweet. Transfer to a piping bag with a small round piping tip. Set aside until needed
To finish
Once your macarons shells have fully cooled, pair up together with those of a same size
Transfer your chilled cured into a piping bag, with no nozzle fitted. Set aside until needed
Using your prepared bagged buttercream, pipe a ring of buttercream around the edge on the flat side of half of the macaron shells. This will form a barrier for your curd filling
Snip the end from your bagged cured (you want an opening about 3-4mm wide), and pipe a dollop of curd into the void inside your buttercream ring
Using another macaron shell of similar size, sandwich together, giving a slight twist to trap the curd and buttercream inside
Repeat until all shells have been filled and paired up. The finished macarons can be further decorated with gold leaf if using
Refrigerate the 24 hours so the macarons and flavours can mature. Bring to room temperature before serving for best taste
Cover leftover macarons and refrigerate for up to 5 days
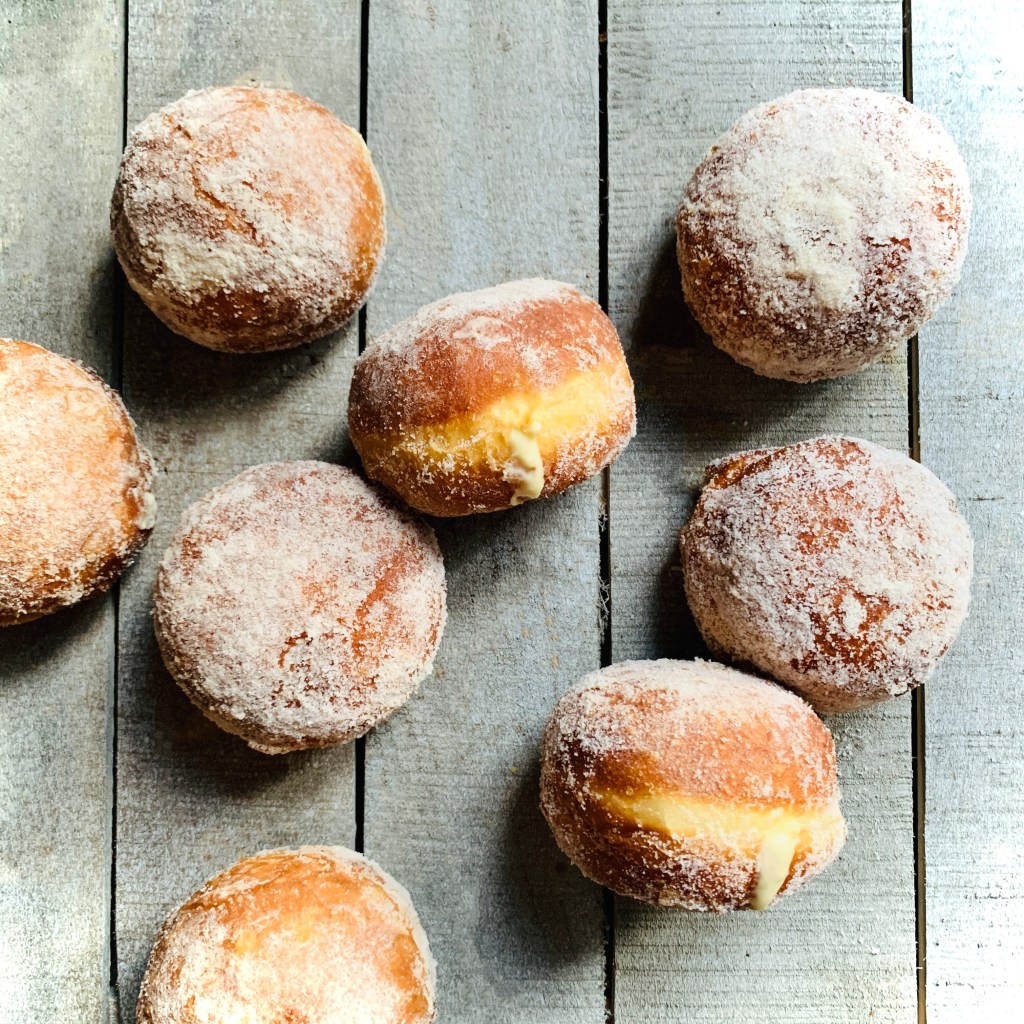
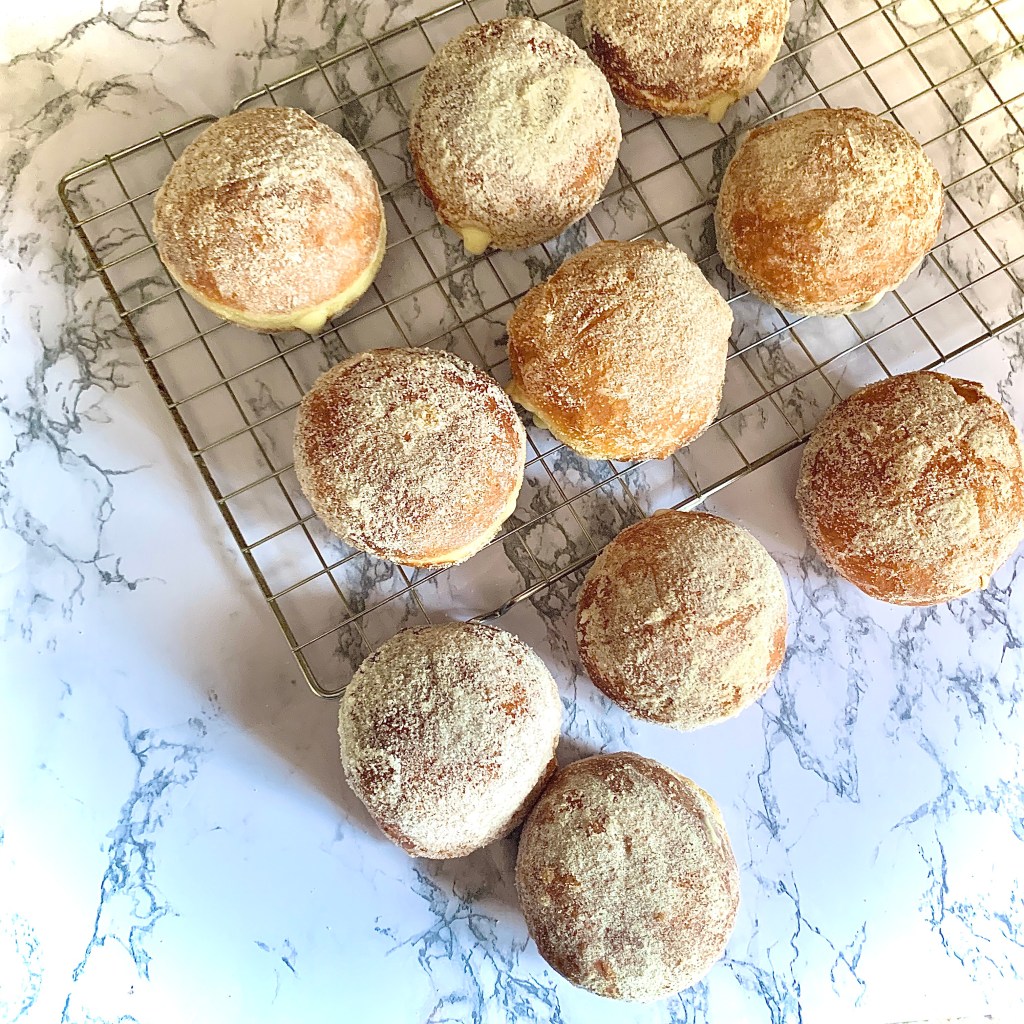
Doughnuts are one of my favourite things EVER! At the mention of them I turn into a giddy, shameless juvenile eager to partake of the deep-fried dough morsels. So yes- Doughnut Day is right up there with my favourite days of course. One aspect of my love for them is the fact that their flavours can range from the oh so classic jam-filled to the more extravagant where the sightless toothsome, fried dough acts as a vehicle for all sorts of wonderfully unexpected flavours- you’re seeing the appeal huh?
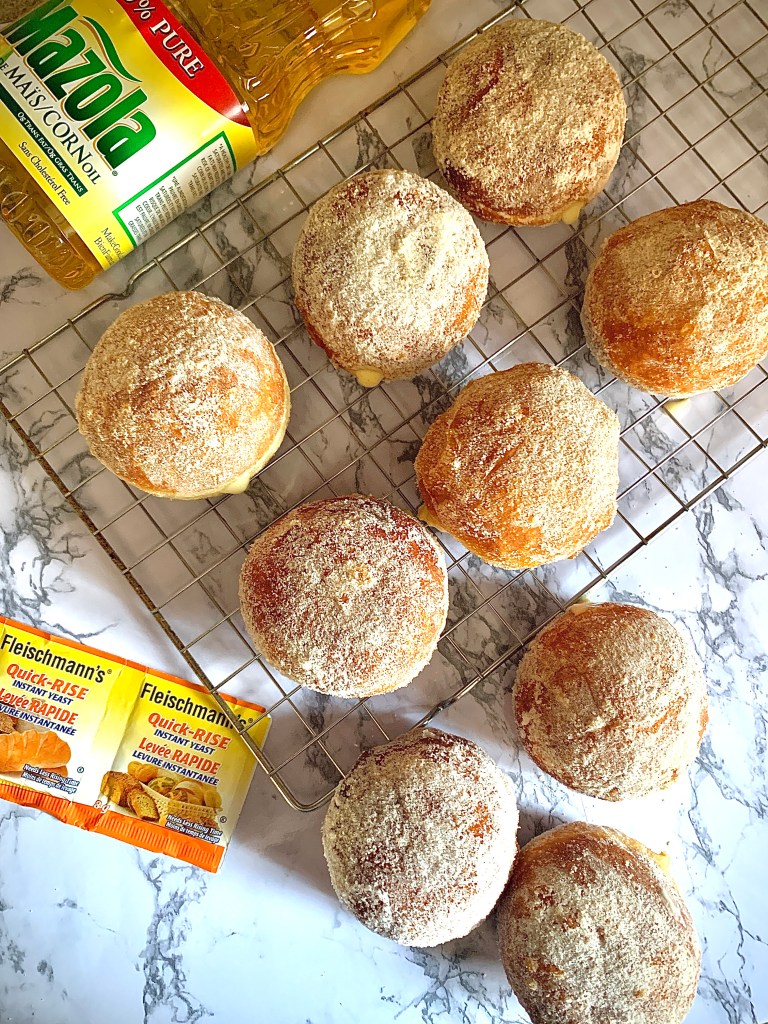
This collaboration for these doughnuts was so exciting for me. I’ve used Fleischmann’s baking ingredients since I moved here to Canada, and they have never let me down There’s a certain comfort for a baker knowing that you’re in safe hands when you find a reliable baking ingredient. It takes a load off your mind, freeing you up to focus on other areas of your bake. For me- the flavours and ingredients. Frying doughnuts is quintessentially part of the attraction of them. We’re told fried goods aren’t good for you, so treating yourself to a freshly fried, warm doughnut instantly evokes that “naughty but nice” feeling. Being such an important factor in the final doughnut, your frying oil is a key component. You want something that will give you reliable, good frying without imparting a residual taste that can affect your final flavours. This is where Mazola Corn Oil is a perfect go to for me. Wonderful frying result, with a clean finish that doesn’t hamper my choice of flavours.
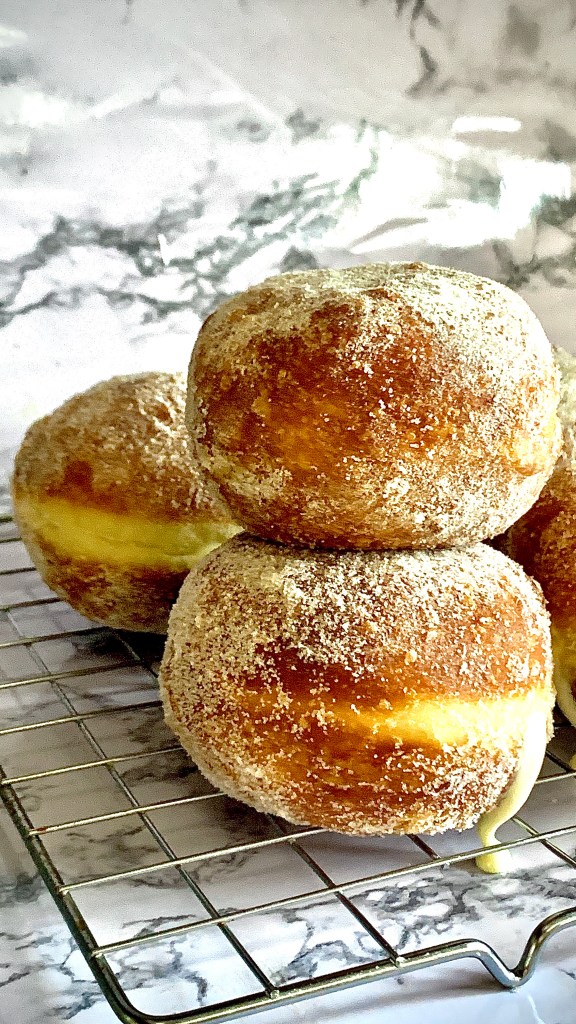
So how did I settle on these flavours of Tonka Bean and Baobab Fruit here? Well, I guess it was a case of opposites attract for me. Yeast in bread-making is a very traditional ingredient and frying a traditional method for making doughnuts. So, what if I took flavours that weren’t so traditional and see how they “played together”? Filling doughnut with vanilla pastry cream is like “Doughnuts 1.01”. So using Tonka Bean, with its amplified vanilla flavour and heady exotic fragrance fits this juxtaposition theme perfectly. Given how the Tonka Bean filling would taste I wanted something that would provide delicious tartness to cut through this. Baobab fruit powder is a wonderfully versatile superfruit powder that can be consumed in countless ways, from bakes, to smoothies to ice cream, to…. well…doughnuts! Mixing it into the final dusting sugar coating imparts a deliciously light and zesty flavour to the doughnut exterior. Think of it as wrapping these decadent doughnuts in a little sunshine.
Makes 12
Ingredients
For the Doughnuts
4 cups strong Bread Flour
4 Tablespoons fine sugar
1 ½ teaspoons salt
1 pack, or 2 ¼ teaspoons, Fleischmann’s® Quick Rise Yeast
4 eggs, room temperature
Zest ½ lemon
¾ cup warm water
½ cup (1 stick) butter, softened
For Frying
Approximately 2-2.5 litres Mazola® Corn Oil
For Baobab Sugar
1 cup fine sugar
3 Tablespoons Baobab fruit powder
For Tonka Bean Filling
1 whole Tonka bean
2 cups whole milk
6 egg yolks
½ cup fine sugar, plus 2 additional Tablespoons
2/3 cup All Purpose flour
1 cup whipping cream
Method
To make the Baobab Sugar
In a large shallow dish (ideally something like a lasagne pan) mix the fine sugar and the Baobab fruit powder together
Set aside until ready to coat the fried doughnuts
To make the Tonka bean cream filling
In a heavy-based saucepan, with a microplane grate the Tonka bean into the milk and bring slowly just to the boil. Remove from heat and leave to infuse for 5 minutes
Separately place the egg yolks and the ½ cup of sugar in a bowl and mix for a few seconds, then sift in the flour and mix again until combined
Pour 3 Tablespoon of the just-boiling Tonka bean milk over the yolk mixture, whisking constantly to prevent curdling. Add this egg yolk mixture back to the saucepan with the remainder of the Tonka bean milk and whisk well to combine. Cook over a medium heat, whisking constantly for about 5 minutes, until very thick
Once the mixture has thickened up, remove from the heat, and pass through a fine sieve into a clean bowl, discarding any debris
Place some clingwrap on the surface of the custard to prevent a skin forming. Leave to cool to room temperature, then refrigerate. The custard will thicken as it cools
Whip the cream with the remaining 2 tablespoons of sugar together until thick but not over-whipped and gently fold into the chilled Tonka bean custard
Set aside in the refrigerator until needed for filling
For the Doughnuts
In the bowl of a stand mixer, with a dough hook attached, combine all the dough ingredients.
Mix on a medium speed for 7 minutes, or until the dough starts cleaning the sides of the bowl and forms a ball
Stop the mixer and let the dough rest of one minute
Start the mixer again on a medium speed and slowly add the butter to the dough – about Tablespoon at a time.
When fully incorporated, increase speed to medium/ high and mix for 5 minutes, until the dough is smooth and very elastic when pulled
Transfer to dough to a large lightly oiled bowl, cover with clingwrap and leave to prove until it has doubled in size. Once this stage is reached knock back the dough in the bowl
Cover the dough again and leave to rise for a further 45 minutes (or overnight in the fridge)
After this period, remove from your fridge and cut the dough in 12 equal sized amounts (mine were approximately 80g each)
On a lightly floured counter, roll them into smooth, tight buns and place them on a lightly floured baking tray. Be mindful to leave plenty of room between them so they don’t stick together while they prove. Cover lightly with oiled clingwrap and leave for 50mins, or until about doubled in size
Get your deep-fat fryer ready to a temperature of heat the oil to 357° F
When the oil is at temperature, carefully remove the doughnuts from the tray by sliding a bench scraper underneath them, use a floured bench scraper to remove the doughnuts one at a time by sliding underneath them (taking care not to deflate them) and put them into the oil. Do not overcrowd the fryer – do 2-3 per batch, depending on the size of your pan
Fry for 2 minutes on each side until golden brown. They may puff up and float, so you may need to gently push them down after about a minute to help them colour evenly
Remove from the fryer oil, leave drain for a few seconds then toss them in a bowl of Baobab sugar while still warm. Repeat until all are fried, and sugar coated. Please see note*
To Fill the Doughnuts
To fill the doughnuts, make a hole in the seam of each one (the white line between the fried top and bottom).
Fill a piping bag** with your Tonka bean cream filling and pipe into the doughnut until slightly swollen. It may take a little practice on the first one- but don’t be discouraged! Some may very well ooze filling when you withdraw the piping bag. A quick wipe will sort that out!
For best results the doughnuts are best eaten straight away or soon after making
*NOTE: Make sure the oil temperature is correct from each time you fry – if it is too high, they will colour too quickly and burn, and will be raw in the middle, and if it is too low the oil will be absorbed into the doughnut and it will become greasy, Set aside to cool before filling.
** A “Bismark” tip works a treat here. If you don’t have one don’t worry- you can just use a narrow, pain round tip, or even snip the end of the piping bag, after poking a hole in the doughnut with the narrow end of a chopstick.
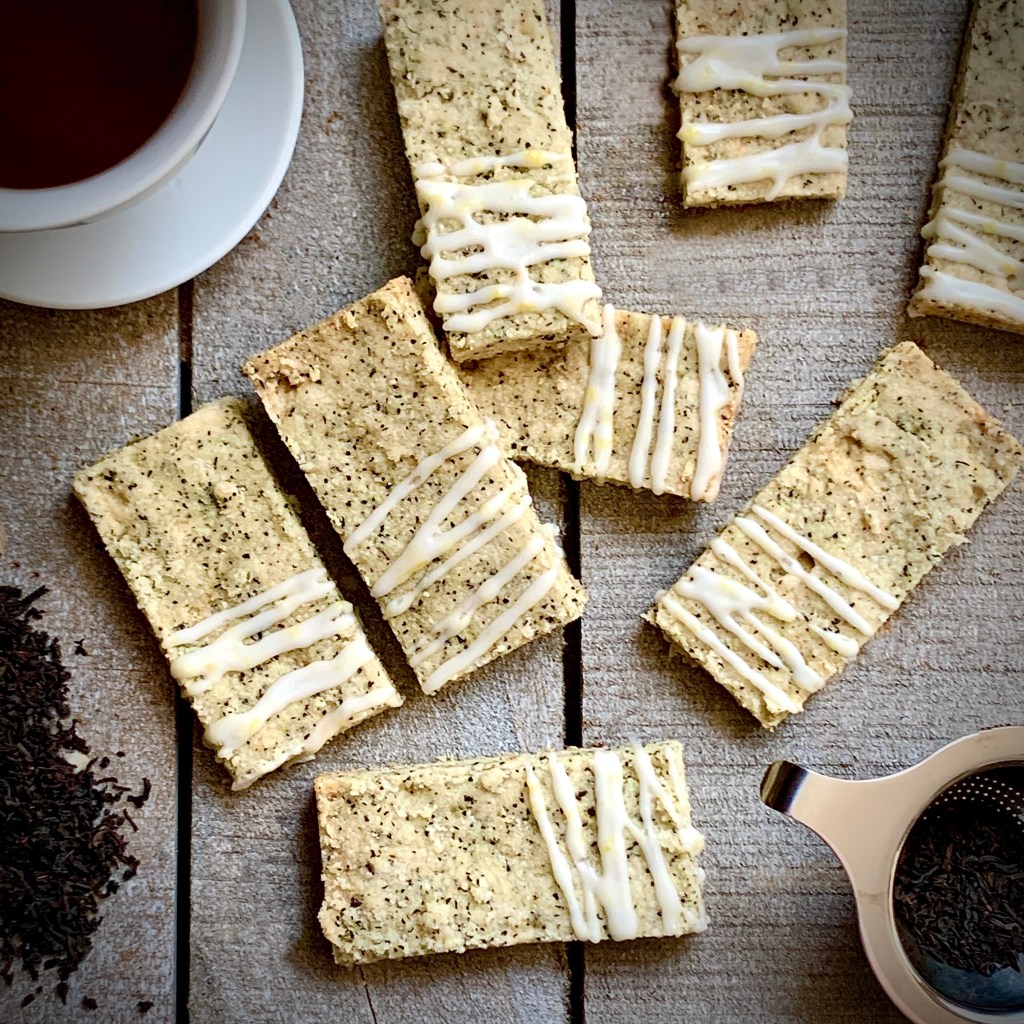
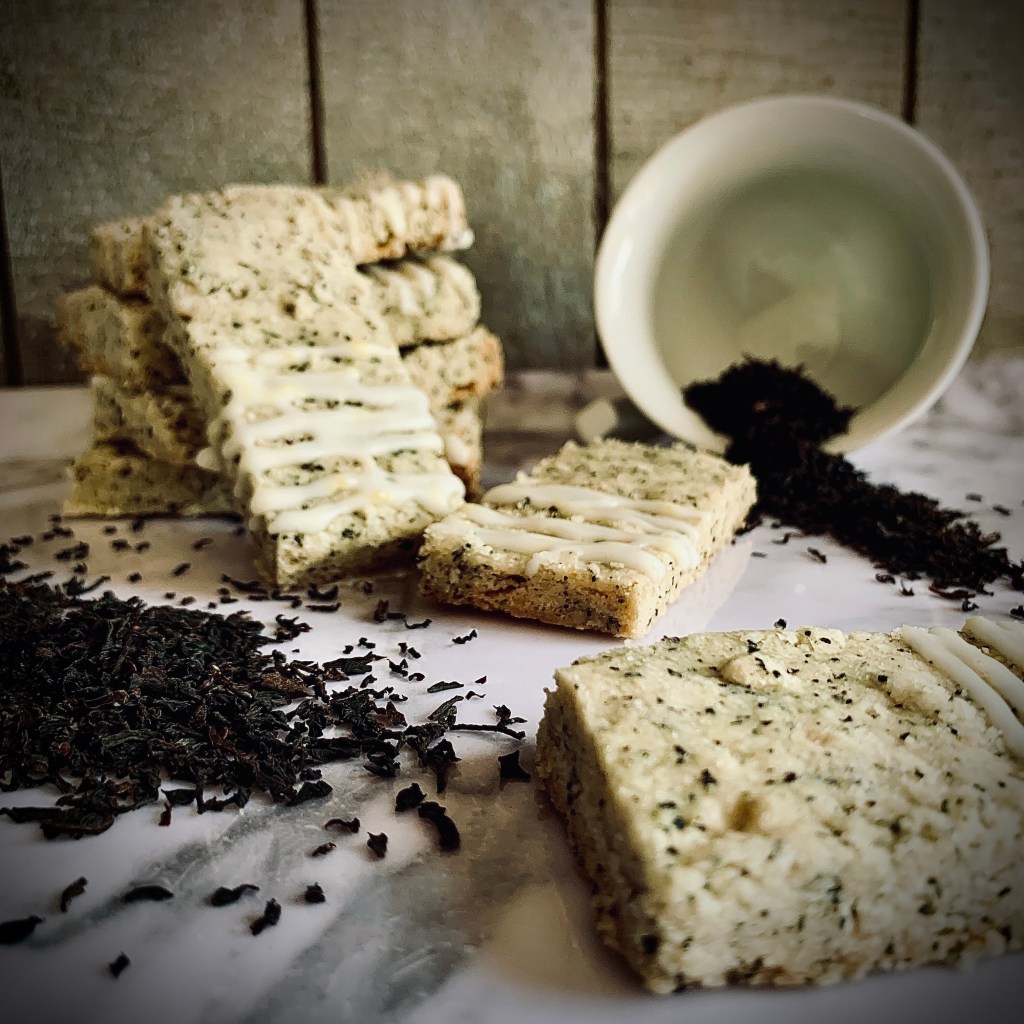
These are a perfect bite for afternoon tea. Buttery, deliciously crumbly shortbread laced with floral Earl Grey and spiked with the zesty burst of sunshine from a lemon glaze- they are practically perfect for an al fresco tea break in the sunshine.
This is my tried, tested recipe as approved by my Scottish husband! Whilst traditional shortbread is a straightforward (and tasty!) mix of three simple ingredients – butter; flour and sugar, here I’ve added ingredients that I’ve found amplify a shortbread’s more desirable properties. The combination of semolina, rice flour and cornstarch elevate it’s crumbly moreishness while at the same time preventing it from becoming a chalky, dry shard.
I usually cut mine into the no-fuss finger shapes – easy to handle whilst sipping, whilst maximizing the dough amount. Using a cookie cutter is possible but may result in some surplus offcuts. If you choose this route a handy hint is to stir the offcuts into ice-cream. Even more to enjoy!
Check out this #recipe for Earl Grey & Lemon Shortbread
In a food processor, combine the floor and the loose tea leaves. Pulse 4-5 times until leaves are mixed finer into the floor
In a large bowl combine the flour/ tea mixture, semolina, rice flour, cornstarch, sugar and salt. Whisk together to further combine
Add in the cubed butter and rub together with your fingertips until the mixture is just beginning to bind together. Every so often do a quarter turn of the bowl to make sure you’re using all the dry mixture. You’ll want a texture somewhere between breadcrumbs and damp sand before you stop. Be wary of overworking the butter into the mixture – you want to avoid a dough that feels slimy from the butter melting too much into the dry ingredients
Tip the crumb mixture into your prepared tin and press the dough so that it forms a solid layer. Level the surface with the back of a spoon or measuring cup, making sure the mixture is evenly spread and uniform. Prick all over with a fork
With a knife or pizza cutter score the shortbread into 24 rectangular pieces (2 cuts by 7 cuts) taking care not to cut the full way through the compressed crumb
Refrigerate for 30 mins minimum
Preheat your oven to 325°F
Remove the shortbread from the fridge and bake for about 35 minutes or until a very pale golden brown.
Remove from the oven and after 5 minutes rest in the tin, cut fully through the baked shortbread with a knife or pizza cutter at the score lines you previously made
Leave to cool in the tin for 15 minutes. Carefully lift the fingers out of the tin with a palette knife or the parchment paper overhang and finish cooling on a wire rack
While the shortbread cools, prepare the lemon glaze
To make the Lemon Glaze
In a bowl or jug combine the powdered sugar and lemon zest. Add the fresh lemon juice to your personal taste (2 -3 teaspoons)
Make sure the shortbread pieces are fully cooled before glazing. Dip or pipe the glaze onto the shortbread pieces to your personal preference. (I usually transfer mine to a piping bag and drizzle lightly over the shortbread)
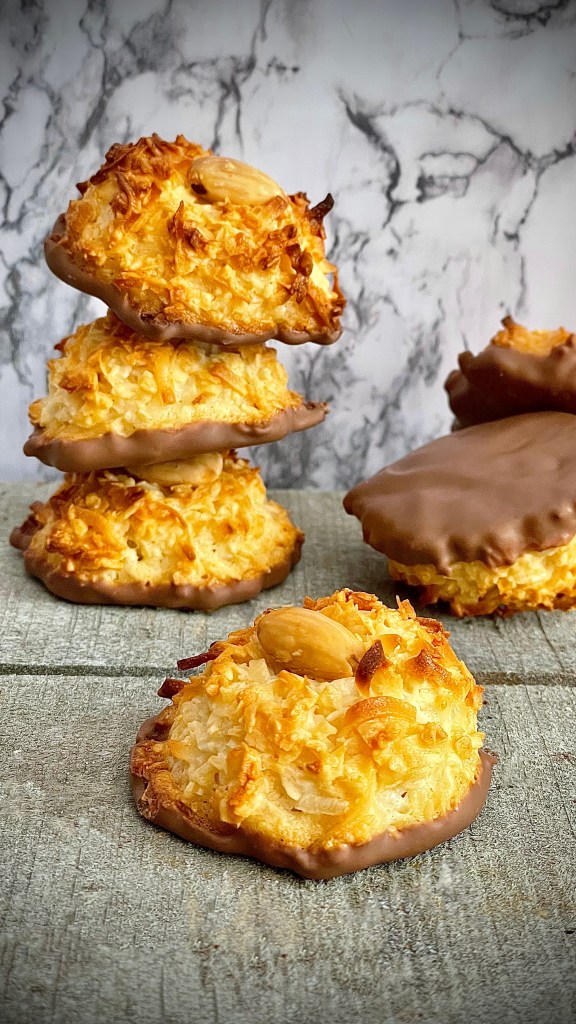
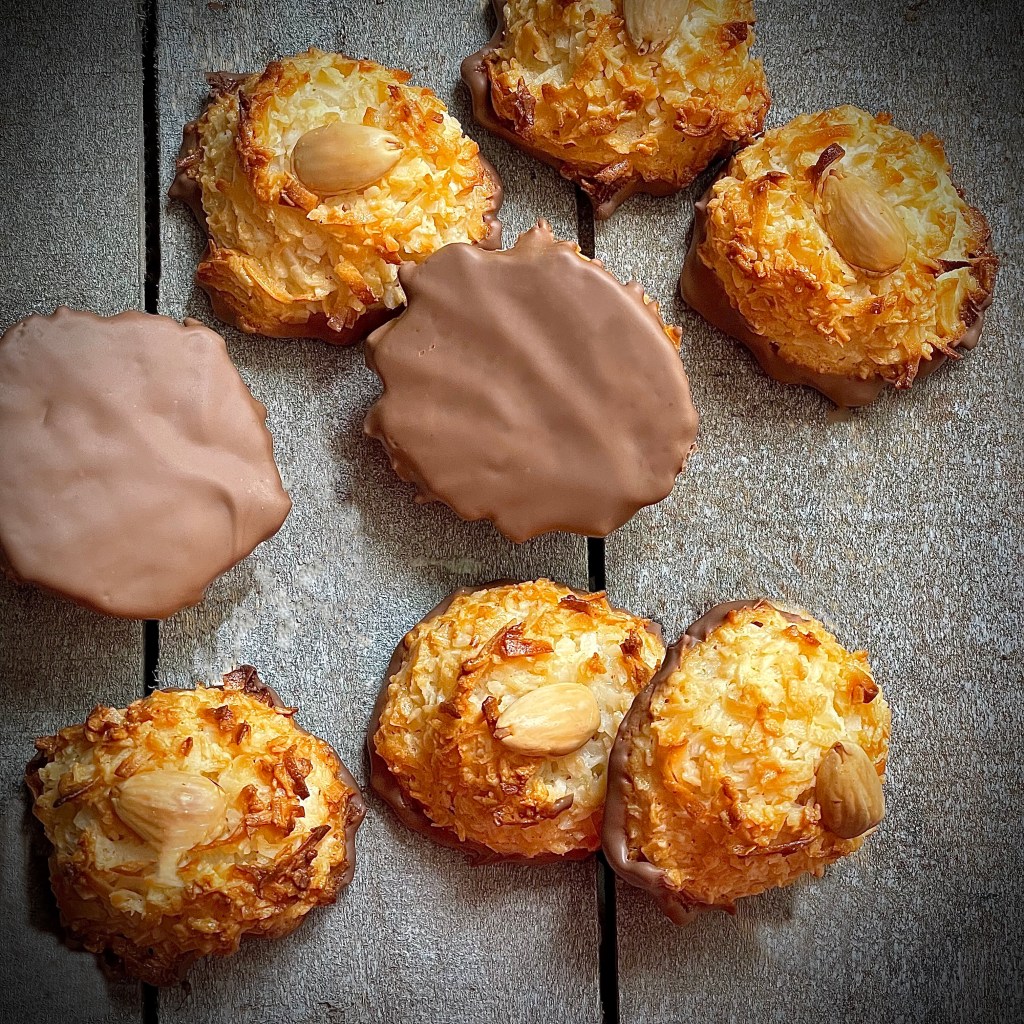
It’s National Macaroon Day! So let’s celebrate these li’l nuggets of sweet coconutty goodness in all their chewy, toasty glory! These are fantastic treats which can have a universal appeal since they are in effect gluten-free. Any leavening required is done via the addition of whipped egg whites.
Speaking of additions in this recipe I’ve included a gentle tipple of almond liqueur in a reference to the cookies almond based begins. I also find that the combination of coconut and almond works really well. Think of these as a pimped up version of the fondly loved Almond Joy or Bounty bars for the grown-ups!
Don’t get me wrong – these also taste great without the addition of the alcohol. The added benefit being you can get the kids involved in the making of and then reward them for their efforts. It’s smiles all round!
Combine the coconut, condensed milk, vanilla and almond liqueur a large bowl. Mix well
Whip the egg whites and cream of tartar on high speed in the bowl of an electric mixer fitted with the whisk attachment until they make medium-firm peaks
Carefully fold the egg whites into the coconut mixture
Drop the batter onto sheet pans lined with parchment paper using either a 1 3/4-inch cookie scoop, or 2 teaspoons
Press an almond into the top of each macaroon mound
Bake for 25, until golden brown. Remove from the oven and leave to cool on tray for 5 minutes before peeling to remove. Place on a rack and leave to cool fully
When fully cooled dip the base of each macaroon into the melted chocolate. Leave to set, upside down (chocolate side up) on a cooling rack