Easy Pantry Recipes


I struggled for what to write here as anything I first attempted sounded flippant and vapid, making light of the situation and circumstances that each and every one of us are living through at the moment. What I wanted to do was…well to do “something“. I firmly believe in the calming and therapeutic powers of being in the kitchen. At the best of times baking for me offers a respite from daily chores and frantic everyday life, a place to get my headspace and mentally “breathe”.

My baking activity has definitely had an upsurge of late. In the uncertain circumstances of the world today I find there is a calming certainty in knowing that if I mix a certain bundle of ingredients together a known result will be achieved. Focusing on the task at hand helps to redirect my attention and anxiety away from the unnerving headlines and statistics we’re being bombarded with- a calm in the eye of the storm, no matter how briefly. I guess that’s what I’m trying to do here-  pass on these moments of calm to you in some small way. 

The recipes here offer little moments of indulgence and respite with minimal ingredients and skill needed. Hopefully most of the ingredients called for are already staples in your pantry or, failing that, will prove easy to get hold of. I hope you enjoy taking some time out and baking them.

Stay safe out there folks, see you on the other side.

You can find some further information on mental health considerations during COVID-19 Outbreak here

img_3281

Shown here served with crème anglaise

Chocolate Soufflé

Serves 4

Ingredients

• 2 cups chocolate hazelnut spread (I use Nutella – surprise!)

• 5 eggs

Method


  1. Preheat the oven to 375˚F (190˚C).
  2. Separate the egg yolks from the egg whites and place into two separate bowls
  3.  
  4. Mix the chocolate hazelnut spread into the bowl with the egg yolks
  5. In the second bowl, whisk the egg whites until stiff peaks form
  6.  
  7. Fold 1/3 of the whipped egg whites into the chocolate/egg yolk mixture until fully incorporated. Add the remaining egg whites to the mixture and fold gently, but thoroughly, until the mixture is smooth
  8. Pour the mixture into the greased ramekins and bake for 15-17 minutes until risen
  9. Serve immediately
img_3278

Shown here served with crème anglaise


img_3571

Shown here served w/ Blueberry, Rosemary & Juniper berry conserve

Soda Bread

Ingredients

  • 3 1/2 cups All Purpose flour
  • 1 teaspoon bicarbonate of soda
  • 1 teaspoon kosher salt
  • 1 1/2 cups buttermilk*

Method

  1. Preheat oven to 450°F
  2. Line a tray with baking parchment and dust lightly with flour. Set aside until needed
  3. In a large bowl combine the flour, bicarbonate of soda and salt. Whisk to combine and break down lumps. Make a well in the centre
  4. Pour in most of the buttermilk
  5. Using one hand stir the flour into the liquid from the outside of the bowl, turning the bowl as you do. Continue until the mixture comes together in a soft dough that is not too wet or sticky (you may need the remainder of the buttermilk here)
  6. Turn the dough out into a lightly floured surface and knead lightly for a few seconds. Don’t over-knead here- you just want to do it enough so that it holds it shape. Don’t do it to the extent that you would with standard bread dough!
  7. Using your hands, lightly floured, pat the dough into a round shape about 2 inches thick. Transfer to the floured baking sheet
  8. With a knife (I use a bench scraper) score a cross into the top of the loaf, so that it goes almost all the way through the thickness and over the sides of the loaf
  9. Bake in the preheated oven for 15mins then reduce the heat to 400°F and continue baking for an additional 20mins until cooked. The baked loaf will be deep golden in color and sound hollow when the bottom of it is tapped
  10. Remove and cool on a wire rack
  11. This type of loaf will cool with a hard, crispy crust. If a softer crust is desired wrap a clean kitchen towel around the hot loaf and allow it to cool

*If you don’t have buttermilk to hand you can make your own by combining 1 cup milk with 1 tablespoon squeezed lemon juice or distilled white vinegar in a jug. Stir to combine and leave to sit for 15 mins. After 15 mins the liquid will have thickened slightly and small curds can be seen. Use in the recipe as required. Any remaining milk can be stored in the fridge.
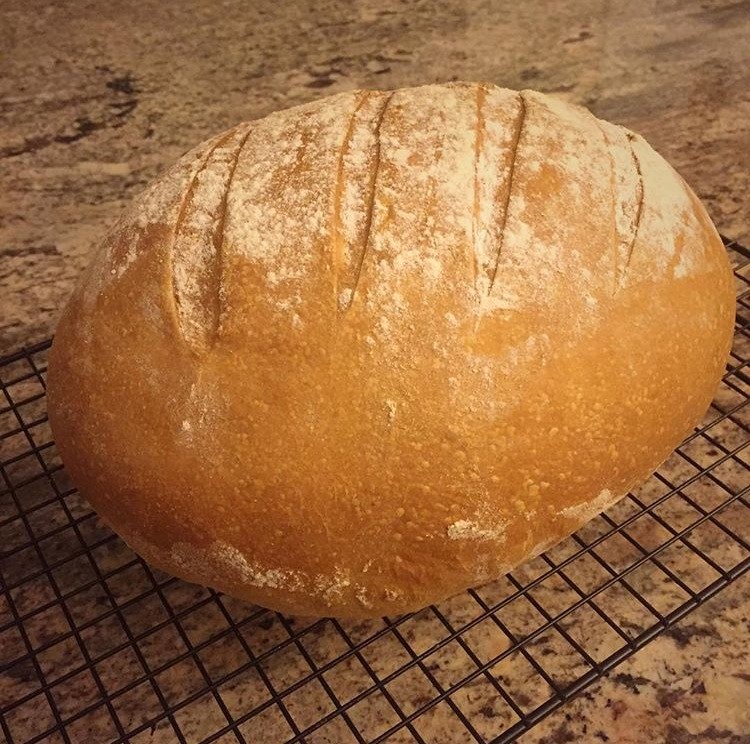
img_3568


img_3962

White Bread Bloomer

  • 4 cups bread flour
  • 2 1/2 teaspoons quick action yeast
  • 2 1/2 teaspoons kosher salt
  • 2 tablespoons granulated sugar
  • 1/4 Olive oil
  • 1 1/4cups warm water

Method

  1. Lightly oil a large bowl and set aside for the dough later
  2. In the bowl of a stand mixer combine the flour, salt (to one side), yeast (to opposite side) and brown sugar
  3. Add in olive oil and 250ml warm water and mix on low setting to combine the ingredients. Add in remaining water, if needed, to achieve a soft, slightly sticky dough. Continue to knead in the machine for a total of 7 minutes. Proceed to Step 4.(If you’re mixing the traditional way, combine all the ingredients in a large bowl and shaping you hand into a “claw shape”, with fingers slightly spaced, mix by hand until all the ingredients come together in a ball. Tip out onto a lightly oiled surface and continue to knead for 10 mins until the dough is soft and slightly sticky)
  4. Tip the dough from the mixer bowl into the prepared oiled bowl, cover with lightly oiled cling-wrap and set aside to proof for at least 45 minutes, or until doubled in size
  5. Once the dough has finished proofing, tip out onto a lightly oiled surface. Punch down the dough to knock bar the air and reduce it in size
  6. You can either leave it as one large load or divide into two for 2 smaller standard sized loafs
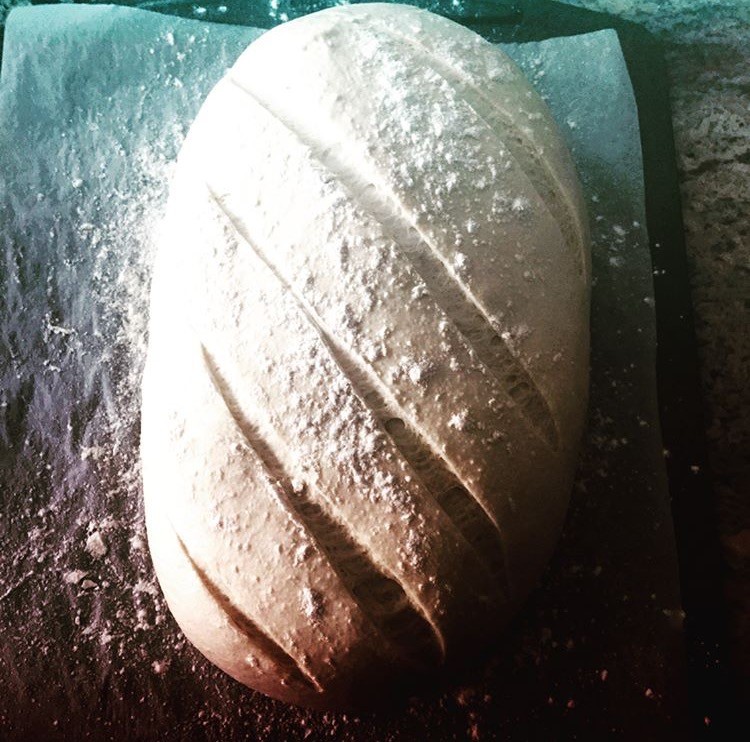
  7. Once the dough has been knocked back use oiled hands to shape into an oval shape and transfer to a large flour dusted baking sheet
  8. Cover with oiled cling wrap, set aside and leave to double inside for apx 30-40mins
  9. Whilst the dough is having it second proof, preheat your oven to 425°F
  10. Once the dough has proofed and risen, bake in the preheated oven for 15mins, after which reduce the temperature to 390°F and bake for further 10-15mins until deep golden in color and the base of the loaves sound hollow when tapped
  11. Remove from the oven, and allow to cool on a rack
  12. Baked loaves can easily be frozen and saved for later. Wrap in cling wrap, place in plastic bag, seal and place in freezer. Defrost for a few hours when needed

PB & J Oat Bars

Ingredients

  • 5 tablespoons salted butter, plus extra for the tin
  • 1 cup crunchy peanut butter
  • 8 tablespoons grape jelly (or favourite fruit flavour)
  • 1/2cup light brown soft sugar, packed
  • 2 cups rolled oats

Method


  1. Heat the oven to 350°F . Butter and line the base and sides of a 9” square cake tin with baking parchment
  2. Set aside 3 tablespoons each of the peanut butter and jam in separate bowls for later. Combine the remaining peanut butter, jam, butter and sugar into a pan over a medium heat and stir until everything has melted together. Quickly stir in the rolled oats, then leave to cool for 5 mins
  3. Spoon the mixture into the prepared cake tin and gently press down with a small measuring cup
  4. Dot over the reserved peanut butter and jam, then bake for 20-25 mins or until golden brown. Leave to cool completely in the tin, then turn out onto a board and cut into bars (2 x6)
  5. Bars are best kept refrigerated in a sealed container for 2-3 days


img_3992

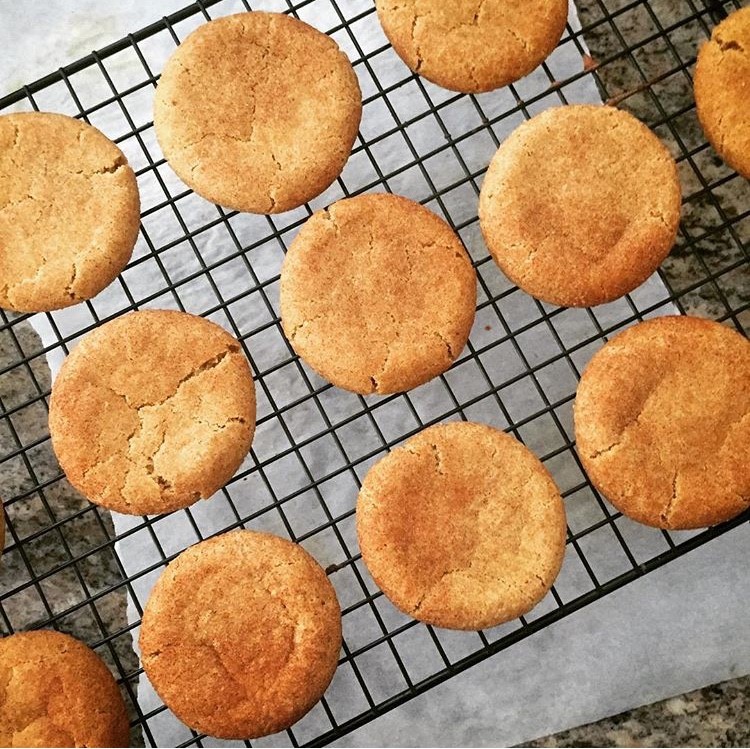
Easy Shortbread Cookies


  • 1 cup salted butter
  • 1/2 cup icing sugar
  • 1 1/2 cups All Purpose Flour

Method

  1. Preheat oven to 275 degree
  2. In the bowl of a stand mixer (with paddle attachment) oe using an electric hand-mixer beat the butter and icing sugar together well.
  3. Slowly add in the flour (I use 1/4 cup increments) until it has all been added in. Once it all in, crank up the speed on you machine and whip it for 6 minutes. The mixture will become light and exceptionally fluffy
  4. Using a small cookie scoop (size about 1- 1/2 tablespoon) scoop the dough out onto the prepared  baking sheets
  5. Bake in the preheated oven for about 30-35 minutes until bottoms of the cookies are browned.
  6. Remove from the oven and leave to cool for a few minutes on the trays. Transfer to a rack to cool complely
  7. Baked cookies can be kept in an airtight container at room temperature for up to a week 

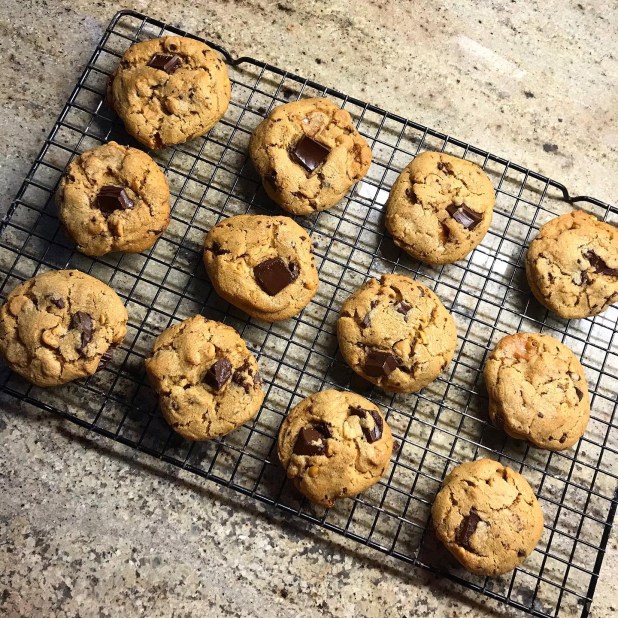
In the photographs shown I put a cherry on top of each prior to baking. The pre-baked cookies can be left plain or topped with whatever you like from your pantry such as chocolate chunks; nuts; candy pieces…whatever you have to hand in your pantry.

img_3993


img_3970

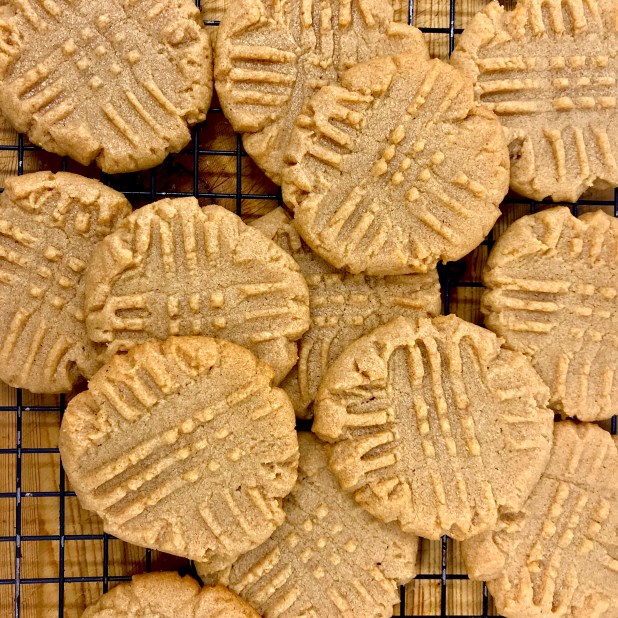
Peanut Butter Cookies

Makes 18-20

Ingredients

  • 1 cup Sugar
  • 1 cup Peanut Butter
  • 1 Egg


Method


  1. Preheat the oven to 350 degree. Line 2 cookie sheets with baking parchment
  2. In the bowl of a stand mixer, or a hand-held electric mixer, mix the ingredients together until well blended
  3. Using a small cookie scoop (about 1-1/2 tablespoon size) scoop doughballs on to ungreased cookie sheet
  4. Using a fork press down in one direction and then press again from the other side to form a criss-cross pattern on top
  5. Bake for 12 minutes
  6. Allow them cool on the cookie sheet for a couple of minutes before transferring to a wire rack to cool completely
  7. Baked cookies will keep for 3-4 days at room temperature in a sealed container

img_3964


Homemade Butter

I posted the recipe for this a couple of years ago. It such an easy thing to do but a lot of people think of it as a daunting task. You can find the recipe/method here

Snickers style peanut butter cookies

Well these seemed to go down pretty well when I posted about them on my social media feeds. For a while I’ve been trying out recipes looking for a good reliable peanut butter cookie, something classic and tasty that wasn’t too crispy. However- me being me I wanted to add layers of flavour. Before I knew it I had ended up with a cookie reminiscent of one of my favourite candy bars – Snickers.

A handy hint here is that dependant on the baking time a different texture of cookie will be achieved. Longer and lower for a chewier cookie. The time I give in the recipe below is for my personal preference, feel free to play around with it. If all else fails and the finished cookies are too crisp on their own you can always crumble and use as a tasty ice cream topping.

You can use either smooth or crunchy peanut butter based on your personal taste. As expected smooth peanut butter will yield a smoother cookie. I personally prefer to use the crunchy butter variety as it gives a rather nice smattering of nutty pieces through the finished cookie.

Makes 24

Ingredients

  • 1/2 cup salted butter (1 stick), room temperature
  • 1/2 cup white granulated sugar
  • 1/2 cup packed brown sugar
  • 1/2 cup peanut butter, smooth or crunchy to personal taste
  • 1 large egg
  • 1 1/4 cups all purpose flour
  • 3/4 teaspoon baking soda
  • 1/2 teaspoon baking powder
  • 1/4 teaspoon salt
  • 12 Caramel candies, cut into pieces
  • 4oz semi sweet chocolate, cut into chunks
  • 1/2 cup peanut butter chips

Method

  1. Chop the chocolate in chunks. You don’t want too fine a piece- irregular and varied sizes look a lot better in the finished cookie. Set aside until needed
  2. Using a scissors, carefully cut the candy pieces into 3 or 4 pieces each and set aside until needed as well
  3. Line a cookie tray with baking parchment and set aside until neeeded
  4. Beat the butter, brown sugar and white sugar until creamy (about 10 mins)
  5. Mix in the peanut butter, followed by the egg until fully combined
  6. In a separate bowl, whisk together the flour, baking soda, baking powder and salt. Gradually add the combined dry ingredients into the sugar/butter mixture. Mix until fully incorporated
  7. Fold in the chocolate chunks, the caramel pieces and peanut butter chips. Mix until thoroughly mixed through the dough (I find here it easier to fold by hand rather than using a spatula or spoon. It just depends on what you’re comfortable with)
  8. Cover the dough with cling wrap and refrigerate the dough for between 20- 30mins
  9. Preheat your oven to 325°F
  10. Using a medium cookie scoop (2 tbspn apx) shape the dough into 1 inch balls. Place the balls of dough about 2 inches apart on pre-lined  cookie sheet
  11. Bake at 325°F until light brown, about 15 to 17 minutes. Remove the cookies from the oven and let cool in their baking sheets for 5 minutes. After a minute, transfer the cookies to a rack to cool completely

*For chewier cookies, bake at 300°F for additional 5 to 10 minutes.

The baked cookies will keep for up to a week in an airtight container

Enjoy!

#Recipe #Pumpkin Patch Cookies

Following up on my previous post with three delicious ways to use this season’s favourite, the pumpkin, here a couple of other recipes in the form of the humble “cookie”. Snickerdoodles are everyone’s favourite. The addition of pumpkin elevates them to another level of seasonal Fall goodness.  Autumn in a cookie! With the oatmeal cookies you a a much more rustic baked treat. These are a handful (literally!) and you’ll be all the better for it! The combination of soft-baked oats, pumpkin and Autumnal spices just begs for a tall glass of milk!

The recipes are ideal for baking with the little ones, however as always leave the oven work to the grown-ups. Get them rolling, scooping, drizzling and in no time at all you’ll have some very happy little tummies.

I hope you have fun baking and wish you and your families a very happy Halloween full of spooky, fun-filled goodness!

Snickerdoodle Cookies

Pumpkin Snickerdoodles

Cookie Dough

Makes 36

  • 3 1/4 cups All-purpose flour
  • 3 1/2 tsp cornstarch
  • 1 tsp cream of tartar
  • 1 tsp baking soda
  • 1/2 tsp baking powder
  • 1 tsp ground cinnamon
  • 1/2 tsp ground ginger
  • 1/2 tsp ground nutmeg
  • 1/4 tsp ground mixed spice
  • 1 cup granulated sugar
  • 3/4 cup packed light brown sugar
  • 1 cup salted butter, softened to room temperature
  • 1 large egg yolk
  • 3/4 cup canned pumpkin puree (make sure it’s 100%)
  • 1 tsp vanilla extract

Sugar Crust Coating

  • 1/4 cup fine (caster) sugar
  • 1 1/2 tsp ground cinnamon

Method

  • In a bowl combine the flour, cornstarch, cream of tartar, baking soda, baking powder, salt, cinnamon, ginger, nutmeg and mixed spice. Mix until well combined
  • In the bowl of a stand mixer (with paddle attachment), cream together butter, granulated sugar and brown sugar until combined. Periodically scrape down the sides of the bowl
  • Mix in egg yolk, followed by pumpkin puree and vanilla extract.
  • On a low speed,  add in dry ingredients (I usually do it a couple of heaped tablespoons at a time) then mix until combined.
  • Remove the dough from the bowl, wrap in cling warp and chill in the refrigerator for 30- 60 minutes
  • After the chilling time, preheat your oven to 350 degrees. Line two cookie baking sheets with baking parchment
  • In a small bowl, whisk together 1/4 cup granulated sugar with 1 1/2 tsp cinnamon.
  • Scoop dough out 2 tablespoons at a time and shape into a ball
  • Roll the dough ball in cinnamon sugar mixture to evenly coat then transfer to prepared cookie sheets, spacing cookies 2-inches apart.
  • Bake in preheated oven 14-16 minutes
  • Remove and leave cool on baking sheet about 5 minutes then transfer to a wire rack to cool completely

Pumpkin Oatmeal Cookies

Pumpkin Oatmeal Cookies

For the cookies:

  • 2 cups all-purpose flour
  • 1 1/2 cups rolled oats
  • 1/2 cup Quick Oats
  • 1 1/4 teaspoons baking powder
  • 1 1/2 teaspoons ground cinnamon
  • 1 teaspoon ground ginger
  • 1 teaspoon fine salt
  • 1/2 teaspoon ground nutmeg
  • 2 sticks  unsalted butter, softened to room temperature
  • 1 cup packed dark brown sugar
  • 1 cup granulated sugar
  • 1 large egg, at room temperature
  • 1 teaspoon vanilla extract
  • 1 3/4 cups pumpkin purée (make sure it’s 100%)

For the glaze:

  • 1 1/2 cups powdered sugar
  • 3 tablespoons milk
  • 2 tablespoons Ice-wine syrup (optional)

Method

  1. Preheat your oven to 350°F. Line 2 cookie baking sheets with baking parchment paper
  2. In a bowl combine the flour, oats, baking powder, cinnamon, ginger, salt, and nutmeg and mix until well combined
  3. Place the butter and sugars in the bowl of a stand mixer fitted with a paddle attachment and beat until lightened in color and fluffy, about 10 minutes. Periodically scrape down the sides of the bowl
  4. Add the egg and vanilla and beat on medium until incorporated
  5. With the mixer on low speed, add half of the flour/oats mixture and mix until incorporated. Add half of the pumpkin puree and mix until incorporated. Repeat with the remaining flour/oats mixture and pumpkin puree
  6. Using a 1/4 cup, drop scoops per baking sheet (approximately 6-8) spacing them 2 inches apart on the prepared sheets. Reserve the remaining dough until needed
  7. Place both sheets in the oven and bake for 12 minutes. Rotate the pans from top to bottom and front to back and continue baking until the cookies are golden brown on the bottom and around the edges, about 12 minutes more
  8. When baked remove from the oven and let the cookies cool on the baking sheets for 5 minutes. Using a flat spatula, transfer the cookies to the wire racks to cool completely.
  9. Repeat with the remaining dough (you can use the same parchment paper). Leave all the cookies to cool completely before glazing


For the glaze:

  1. Place all of the glaze ingredients in a medium bowl and whisk until smooth
  2. Place all of the cooled cookies on the baking parchment. Drizzle the glaze over the cookies in a pattern of your liking
  3. Let the cookies sit at room temperature until the glaze has set, about 20 minutes

#Recipe #ChocolateChip Day

A food lover’s calendar is choc-full (pardon the pun!) of days on which to celebrate, indulge and extol the virtues of food stuffs galore. In fact I’m pretty certain that if you research hard enough you’ll find that every single day is bequeath to some food or ingredient somewhere in the world. Not that I’m complaining! On that note, May 15th is National Chocolate Chip Day here in North American waters. And without further ado I present not one but TWO culinary efforts in homage to that humble morsel of cocoa goodness.

My “Triple Chocolate Peppermint Cookies” are chocolate, chocolate, chocolate lovers dream! Crumbly mint chocolate cookie studded with chocolate chips, enrobed in a smooth, dark chocolate case. Absolute perfection with a glass of ice-cold milk. Girl scouts eat your hearts out!

The second cookie that we have, “Choc Chip Short Oat Cookies” are a wonderful hybrid between buttery, crumbly shortbread and a classic oatmeal cookie. Easy to bake they’re also a handy one to have ready should you be looking for an afternoon activity with little hands.

Triple Chocolate Peppermint Cookies

Peppermint Cookies 1

Ingredients (makes apx 50)
Chocolate Cookies:

1 cup butter, room temperature

1 cup powdered sugar

1 teaspoon vanilla extract

1 teaspoon peppermint extract

1 cup cocoa powder, unsweetened

3/4 teaspoon salt

1 1/2 cups cake flour

1 cup chocolate chips, semi-sweet

Chocolate Peppermint Coating:

16oz chocolate, semi-sweet, broken into pieces

1 teaspoon peppermint extract

Method:
Making the cookies:
  • In the bowl of a stand mixer, cream the butter and powdered sugar until well combined (apx 10 mins) Add the vanilla extract, peppermint extract, salt, and cocoa powder. Mix until the cocoa powder is well combined and there are no pockets of cocoa dust
  • Add the flour and mix until you have crumbly dough
  • Gather the dough into a ball, and knead it together on a counter for about 3-5 mins It should become somewhat smoother. (Don’t worry if it’s still a little crumbly)
  • Divide the dough in 2, flatten into disks, and wrap in cling wrap. Chill in a refrigerator for 15-20 minutes
  • Preheat oven to 350°F.  Line two baking sheets with non-stick baking parchment
  • Roll dough out to a thickness of 6mm. I used a rolling-pin with guides to get a consistent thickness. A trick I found that works really well is to roll the dough out between two sheets of baking parchment. Not only are the cookies easier to lift, it also saves on counter top mess and cleaning up!
  • Cut out cookies (I use a 2 “ cutter) and place, spaced apart, on the pre-lined baking sheets
  • Bake for 10 minutes. Remove the cookies from the oven and allow them to cool on the trays for 3-5 mins. Then careful remove to wire racks and allow to cool completely
  • When your cookies have cooled completely prepare your chocolate coating

Peppermint Cookies

Making the coating:
  • In a bowl set over hot water in a pan, slowly melt the chocolate, stirring occasionally
  • Add in the peppermint extract and stir to combine. It may look like it’s caused the chocolate to separate and become grainy but fear not! Keep stirring and it’ll come right in the end.
Finishing the cookies:
  • With a fork in each hand, gently drop the cookies one at a time into the chocolate coating
  • Using the forks, flip to coat all sides. Lift the cookie out of the chocolate with one of the forks and allow any excess chocolate to drip off the cookie back into the bowl
  • Place the freshly coated cookie on a parchment lined counter, and repeat
  • Allow the cookies to cool at room temperature until ready. They’ll be ready in a couple of hours but I find it best to leave them overnight. They can be stored in an airtight tin for 3-5 days. (Use baking parchment to separate the layers and prevent sticking)

Peppermint Cookies 3

*When dipping the baked cookies you’ll get to a point where it becomes too awkward to flip and properly coat the cookies in the melted chocolate. I transfer the remaining chocolate to a piping bag and drizzle it over the remaining cookies.

Peppermint Cookies 4

Choc Chip Short Oat Cookies

Oatmeal Cookies

Ingredients (makes apx 48)

1 cup butter, softened

1 cup powdered sugar

1 1/2 cups cake flour

½ teaspoon baking soda

2 teaspoons vanilla extract

1 cup quick-cooking oats

12oz chocolate chips, semi-sweet

Method
  • Heat oven to 325°F. Line two baking sheets with baking parchment
  • In large bowl of a stand mixer, cream butter and powdered sugar until light, fluffy and well combined
  • Add in the flour, baking soda, vanilla and oats., and mix until well combined
  • Stir in chocolate chips
  • On pre-lined baking sheets, drop dough by teaspoonfuls. Space them apx 2 inches apart
  • Bake in the preheated oven for between 11 to 13 minutes
  • Remove from the oven and allow to cool on the trays for 5 mins
  • After 5 minutes carefully transfer the baked cookies to wire racks and allow to cool completely
  • Enjoy!

#Recipe Baking with kids…not literally!

Montage

We’ve now been resident here in Toronto for 5 months and things have pretty much settled. My husband has found his pace with his job, our kids have made a smooth transition to a new school, heck we even seemed to have navigated the whole “Daylight saving hours” thing without too much trouble. The only fly in the ointment is me trying to start Mr. Mom’s from scratch again. Whilst a brand new audience awaits from my take on baked goods, it also means a whole bunch of people who no NOTHING about you. And that’s an uphill climb! (If you do happen to work in the foodie sector and would like a food writer, or baker to work with  please do check out my Collaborations page here.)

Anyhoo I digress! As I mentioned above, our kids have (surprisingly) takenthe move to a new country in their stride with little or no tears and tantrums. This week had them on their “March Break” from school- seems to be the equivalent to a UK mid-term break. As well as taking them to the obligatory art galleries and museums (I don’t know who enjoyed it more!) I decided to introduce them to the world of baking. Now I’m not talking anything major- they’re not quiet ready for the cook’s torch or bain maire yet! However you’d be amazed how some simple stirring, cutting, and participation can ignite eagerness.

Here are some of the recipes that took place in Mr. Mom’s kitchen this week. Whilst they range from the sweet to the savory, they are all big on fun, flavour and involvement from little flour-caked hands. I’ve  also included some tips on getting kids involved in the kitchen. Don’t get me wrong- I’m not including this because I consider myself some kind of childcare expert and these are rules by which you should abide. They’re simply meant from the point of my being a dad who wanted to get his children involved in baking and these ways worked for me. I’ve left where to get your kids involved to your discretion as you know them best after all.

Some tips/tricks:

  • Put on some music. Not loud enough that you have to shout over it but loud enough for background. It helps to have something to pass lengthy tasks like kneading or blending. Also think sing-along or random exclamations of “Knead to the beat!”
  • Get the children to find and fetch the ingredients. Framed as a “Baking Treasure Hunt” I’ve seen it help reading skills and memory.
  • Weighing is a surprisingly enticing activity which always draws willing volunteers.  If they overshoot the mark when pouring, it’s no biggie (despite their possible panic!)

So now on to the fun stuff- the recipes! These are a selection of what ended up on the cooling rack…

No Bake Chocolate Cookies

Pumpkin Bread

Sugar Cookies

Simple White Loaf ( and how this can be used to make Pizza)


Mud Puddles (aka No Bake Chocolate Cookies)

pic 4


Ingredients

200g caster sugar

125ml semi-skimmed milk

115g salted butter

4 tablespoons cocoa, unsweetened

1 tablespoon good quality vanilla extract

1 pinch salt

120g gram crunchy peanut butter

225g Jumbo Oats

225g Quick Oats

Method
  • Line baking sheets with baking parchment
  • Bring the sugar, milk, butter and cocoa to a boil in a large saucepan over medium heat, stirring occasionally, then keep on a rolling boil for 1 minute
  • Remove from the heat. Add the oats, peanut butter, vanilla and salt, and stir to combine
  • Drop spaced tablespoonfuls of the mixture onto the prepared baking sheet
  • Leave to cool at room temperature for min 1 hour. After this they’ve set enough tp pick up and eat. I find they usually taste better and are easier to handle the next day
  • These can be kept in an airtight container in the fridge for up to 3 days


Pumpkin Bread

pic 3

Ingredients

250g all-purpose flour

1/2 teaspoon salt

1/2 teaspoon baking powder

1 teaspoon baking soda

1 teaspoon ground nutmeg

1 teaspoon ground cloves

1 teaspoon ground cinnamon

400g caster sugar

170g unsalted butter, softened

2 eggs

1 can (425g)  pumpkin (make sure it’s 100% pumpkin puree)

pic 2

Method
  • Preheat your oven to 160c or 325F.
  • Prepare two 1lb loaf tines with cake release or grease with butter
  • In a bowl sift together the flour, salt, baking powder, baking soda and spices
  • In a stand mixer combine the sugar, butter and eggs and mix for at least 10 mins
  • Add in the pumpkin puree and mix on slow until just combined
  • Reduce the mixer speed to low and add in the flour mixture by heaped tablespoon at a time. Keep  the mixer going until just combined – make sure there are no white flour pockets
  • Remove the bowl, pour the mixture equally between the prepared tins and level the top
  • Bake in the oven for 60-70mins until a skewer comes out clean
  • Remove from the oven, remove from tins and leave to cool on a wire rack. When cool wrap in clingfilm until needed.
  • These loaves get better over time. After a couple of days wrapped they develop a fudgy, sticky texture which goes really with the warming spicy flavor (similar to McVities Jamaican Ginger Cake for those of you who know it?)


Sugar Cookies

pic 5

Ingredients

350g unsalted butter, softened

400g caster sugar

4 eggs

1 teaspoon good quality vanilla extract

620g all-purpose flour

2 teaspoons baking powder

1 teaspoon salt

Icing sugar for dusting and rolling


Method
  • Preheat oven to 200C or 400F
  • Line cookie sheets with baking parchment
  • Sift the flour, baking powder and salt together in a bowl
  • In a stand mixer, cream together butter and sugar until smooth (mix for at least 10 mins)
  • Beat in eggs, one at a time,and vanilla
  • With the mixer on a slow speed, stir in the flour mixture one heaped tablespoon at a time until well combined and a dough formed
  • Tip the dough onto clingfilm and wrap tightly
  • Cover, and chill dough for at least one hour (or overnight)
  • Dust a surface with icing sugar, sprinkle the dough with icing sugar and roll out the dough to a thickness of apx 5mm (*use icing sugar to prevent sticking to surface and rolling-pin)
  • Cut out shapes using cookie cutters and transfer to prepared baking sheets
  • Bake in preheated oven for 8-10 mins
  • Remove and use a wide spatula or palette knife to transfer the soft cookies to wire rack to cool. They’ll firm up upon further cooling.

* I made 50/50 blend of vanilla and chocolate sugar cookie by removing half the dough when refrigerating it and leaving half in the bowl. To this I added 50g unsweetened cocoa powder and 100g unsweetened chocolate chips. Mix until well combined then refrigerate and make as per the rest of the recipe.


Simple White Loaf

pic 12

Ingredients

500g Bread flour

12g fast action yeast

10g salt

40ml light olive oil

320ml warm water

pic 10

Method
  • In a bowl combine the flour, yeast (to one side) and salt (to opposite side)
  • In bowl combine olive oil and water
  • Pour the water/oil mixture into the flour bowl in a steady stream
  • With your hand in a “Claw” shape mix from outside of the bowl towards to centre. Continue until all the mixture comes together into a dough ball and the bowl sides are clean
  • Lightly oil a surface with olive oil and tip out the dough onto it
  • Knead the dough for 10 mins until it becomes smooth and elastic
  • Transfer the kneaded dough to a lightly oiled bowl and cover with some lightly oiled cling film. Leave to rise until doubled in size
  • Line a baking sheet with baking parchment and dust with bread flour
  • Again lightly oil a surface and tip out the risen dough
  • Punch and knead the dough, for about 5 mins, until all the air has been expelled from it (called “Knocking Back”)
  • Shape with your hands into a long oval shape and transfer to the prepared baking sheet
  • Cover loosely with some damp kitchen paper or oiled cling film and leave for 40-60 mins until risen
  • Preheat your oven to 225c or 435F
  • Once the dough has risen, lightly spray with water, slash the top of the loaf, dust with all-purpose flour and place it in the preheated oven. After doing this place a dish filled with 1 pint of water in the bottom of the oven (this creates a crust)
  • Bake for 25mins, at which point reduce the temperature to 200c or 390F and continue to bake for a further 15-20mins
  • Remove the loaf from the oven (careful of the steam!) and leave to cool

Pizza adaptation

I’ve also used this recipe to make pizzas which the kids absolutely go crazy for. I’m not sure that it’s as much for the taste of it as it is for the whole “I’ve made this!” boost to their confidence. To use this for pizza making follow the steps until the “Knocking Back” stage.

pic 9

  • After knocking back the dough divide into equal pieces (I usually get 4-5 good size pizzas from this quantity of dough).
  • Preheat your oven to 250C or 475F (with baking sheets or pizza stones in)
  • Sprinkle a surface with a 50/50 combination of all-purpose flour and semolina
  • Dust the dough with some of the flour/semolina mixture. Flatten and stretch the dough until thin into which ever shape works best for you- circle, oval or rectangular. It just depends on what fits with your oven
  • Dress to your (and your kids!) taste with toppings. All of the following are good- tomato passata (as sauce); cheese shreds; bacon; tuna; pepperoni; chicken; fresh herbs; fresh mozzarella; thinly sliced figs…thre list can go on!
  • Carefully remove and dust your baking sheets or pizza stone with flour/ semolina mixture
  • Transfer your pizza(s) to baking sheets or pizza stone and bake for 10-12 mins until ready
  • Remove from oven, brush the exposed sides with extra virgin olive oil and servepic 8

So there’s a brief selection of some o the tasty goods from my kitchen. I hope you enjoy baking them, getting your kids to pitch in and tasting them as much as we have.