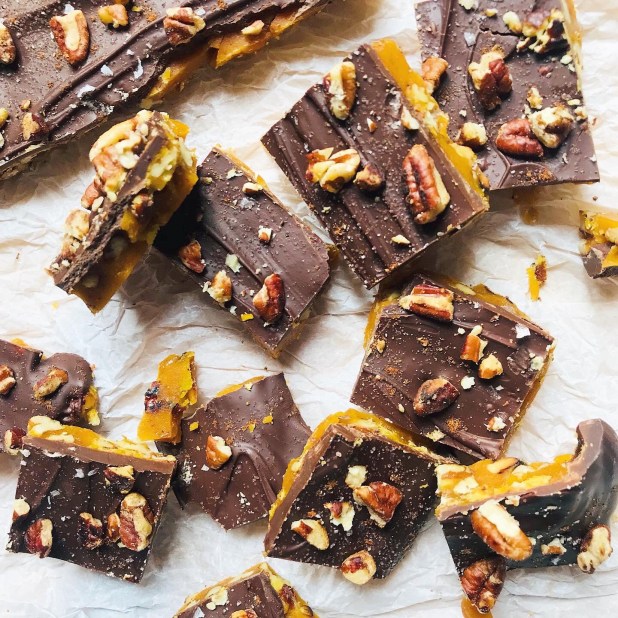
A li’l bit late to the game but here we are- Pumpkin Toffee. Enough said.
Ingredients
1 1/2 cups pecan pieces
1 cup salted butter, chopped
1/2 cup warm water
1 cup sugar
1 tspn salt
1 tspn light corn syrup
1/2 cup pumpkin puree
1 and 1/4 teaspoons pumpkin pie spice, divided
1 cup semi-sweet chocolate chips
Method
Line a large baking sheet with parchment paper or a silicone baking mat- the silicone baking mat being the better of the two. Set aside until needed later
In a pan lightly toast pecan pieces for 7-8 minutes or until fragrant and lightly browned. Set aside on a plate until needed
In a large heavy pan, melt the butter over medium heat. Once melted, add the water, 1 cup sugar, salt, corn syrup and pumpkin puree. Stir constantly until the sugar dissolves, then brush down the sides of the pan with a water-moistened pastry brush. Attach a candy thermometer to the pan
Now get comfortable- you’re going to be stirring a LOT. Constantly but gently stir the mixture until it reaches 290°F (143°C; soft crack stage). Be watchful– the temperature slowly rises in the beginning, but then moves quickly. I usually take mine off the heat when the toffee reaches 285°F (141°C), as it will continue to cook in the few seconds after
Immediately remove the pan from heat and stir in 1 teaspoon pumpkin pie spice and 1 cup toasted pecans. Pour the toffee out onto the prepared. lined baking mat. Your mixture should be thick and not spread all the way to the edges of the pan. Cool the toffee for 5-10 minutes
In a microwaveable bowl melt the chocolate chips until smooth. I melt it in the microwave in 20 second increments, stopping and stirring after each
Spread the melted chocolate on top of the toffee, then sprinkle with remaining pecan pieces and sprinkle over the remaining pumpkin pie spice
Refrigerate toffee for 20 minutes or until the chocolate has set. Peel off the silicone baking mat and break toffee into pieces- sized to personal preference of course!
Store toffee in an airtight container at room temperature in a cool dry place for up to 2 weeks
*If you notice the butter separating at any time during the cooking process, remove the pan from heat and beat vigorously (but carefully!) to bring the mixture back together
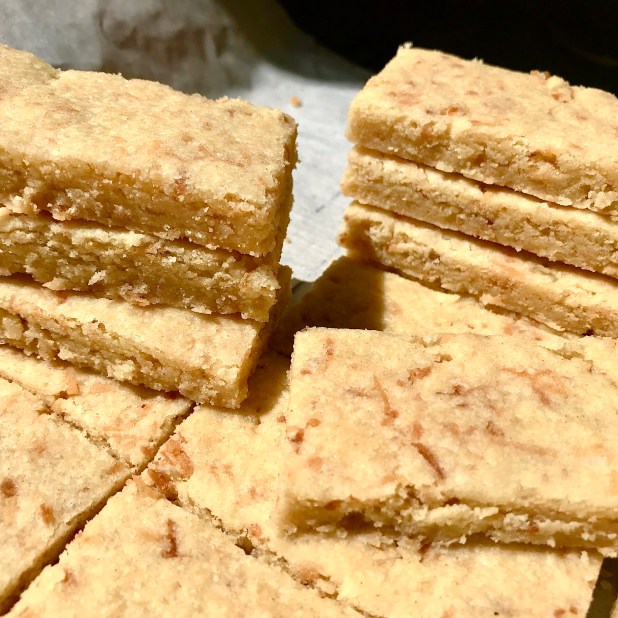
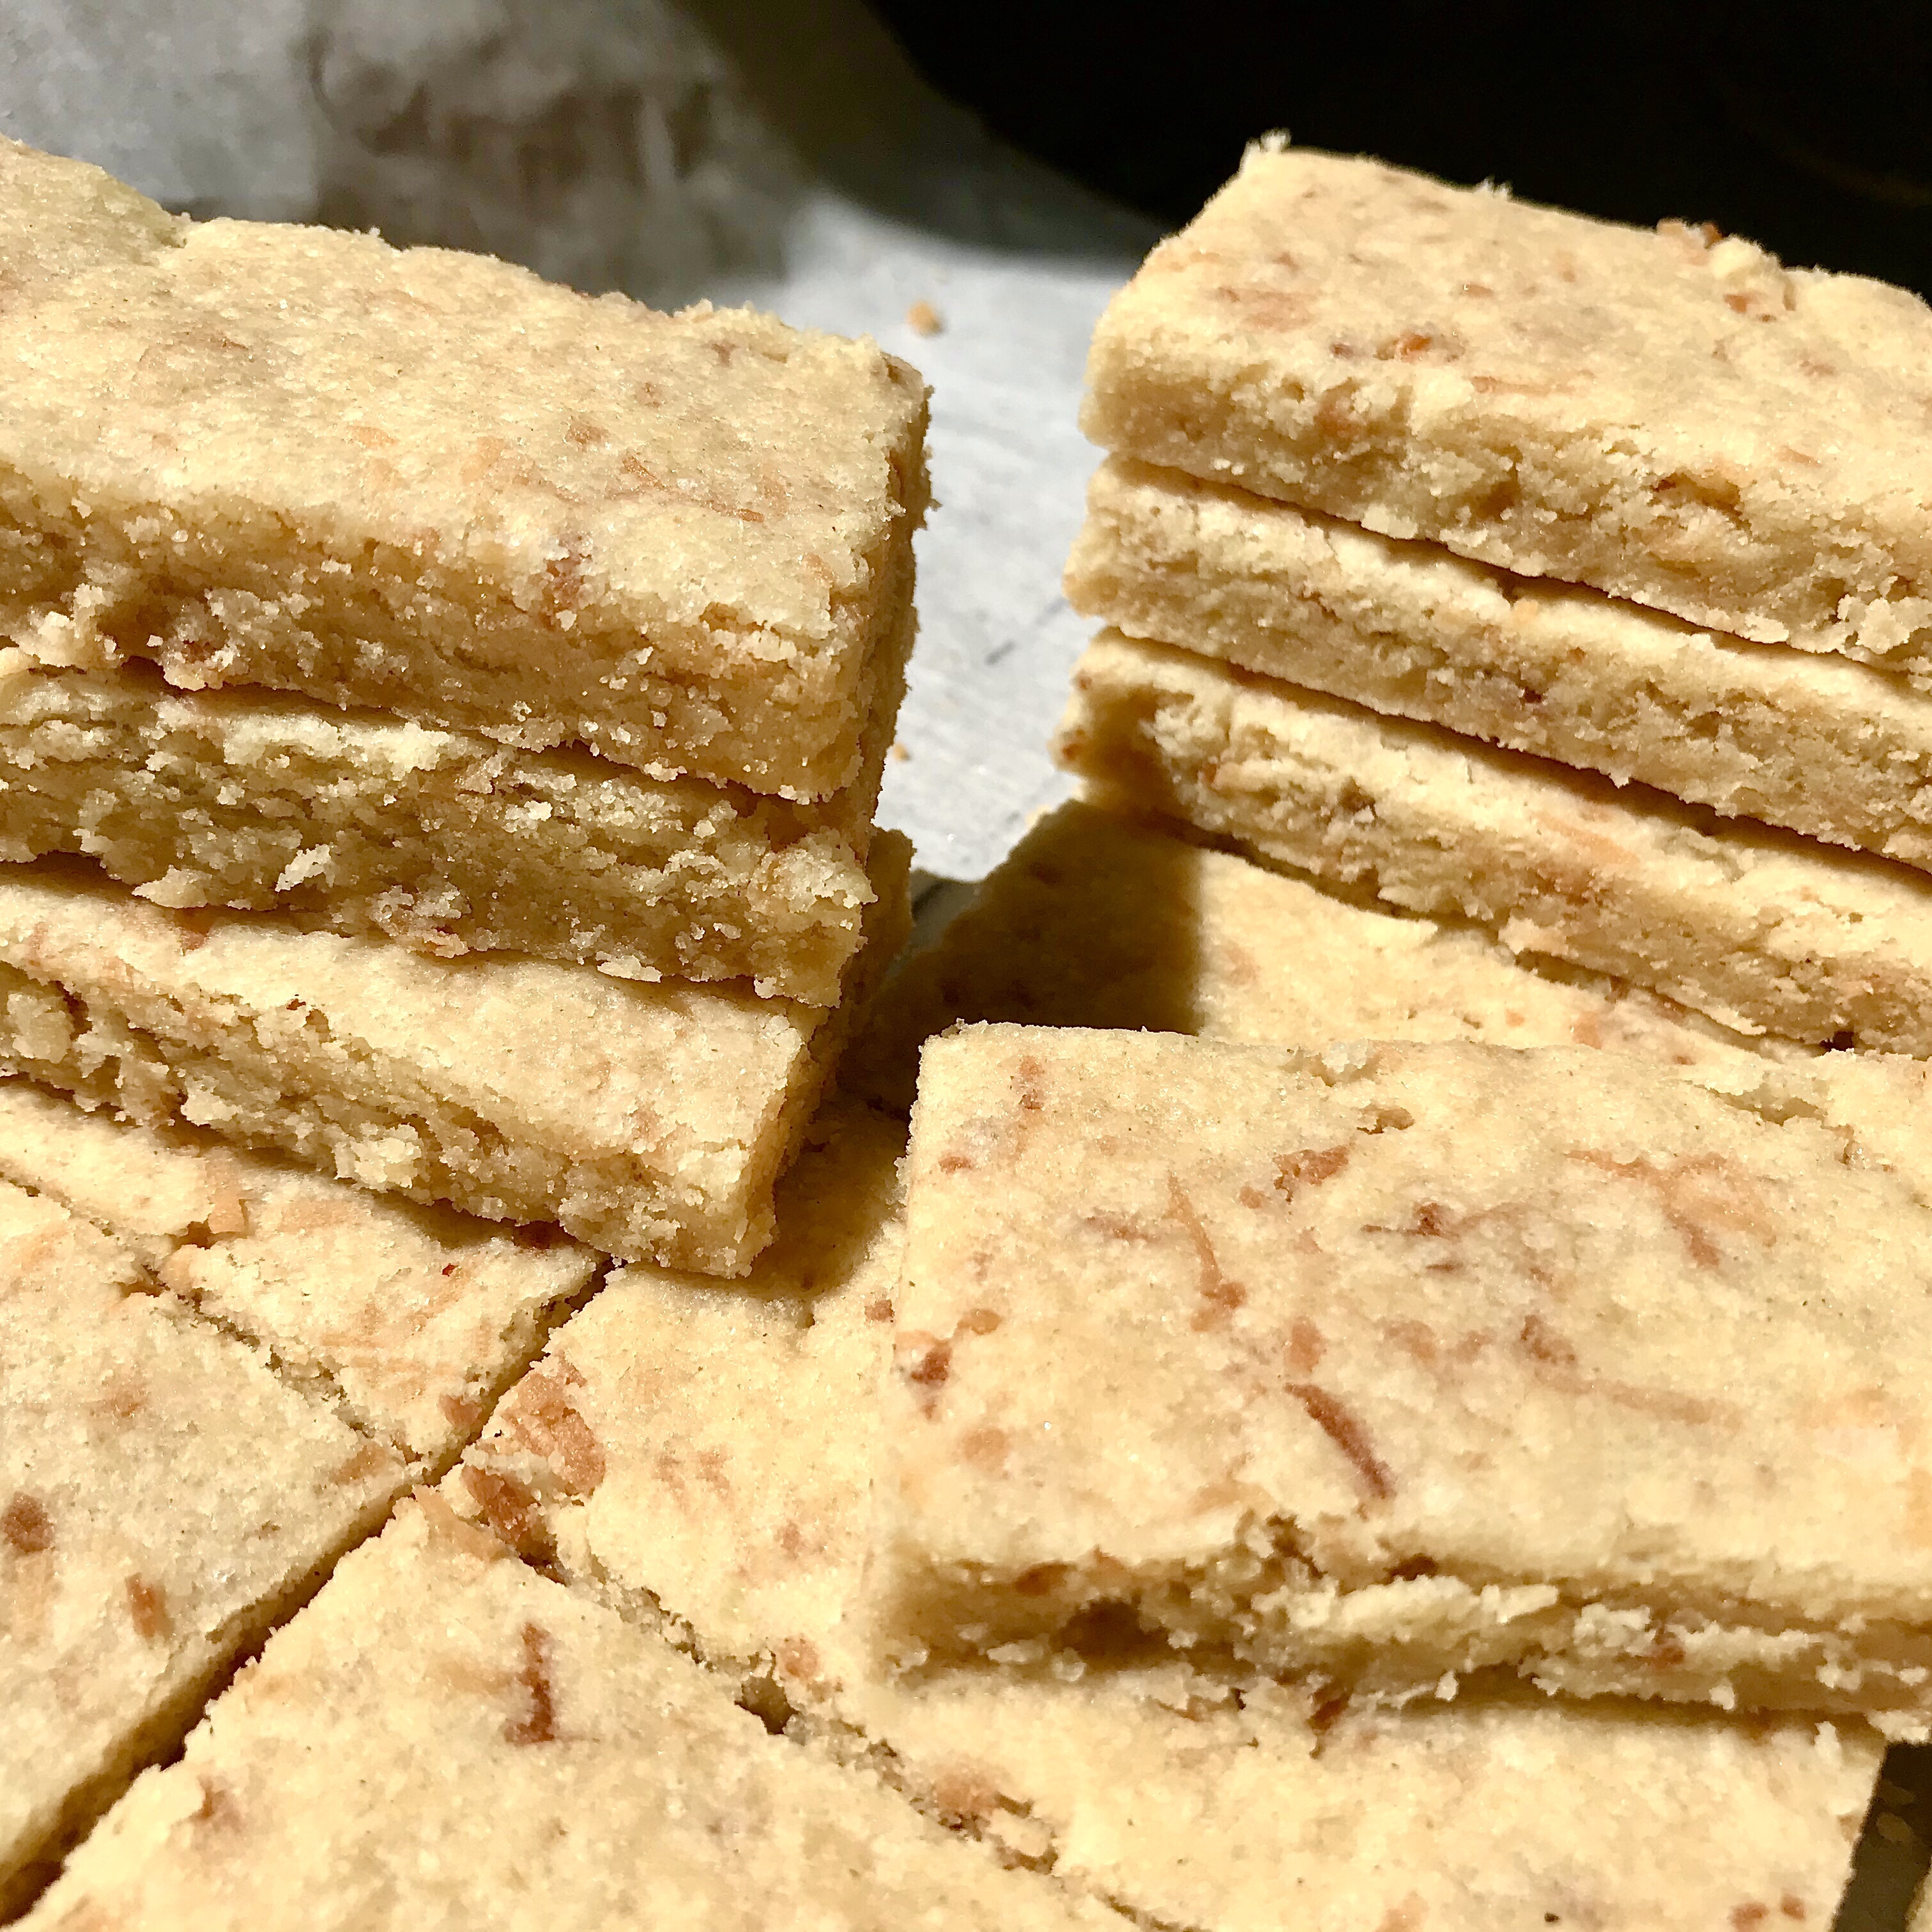
Shortbread is the stuff of legend in our house. Having a family that is Scottish means they’re well qualified to judge what falls in the parameters of acceptability. A fussy bunch they are and rightly so. Many a commercial highland cookie has fallen for being “too crumbly”, “not buttery enough” or “too damp” to name a few of criticisms. So I set about experimenting to find that correct combination of ingredients that would yield a shortbread that crumbly enough with falling to pieces; buttery enough would feeling too greasy or damp in your mouth and crisp enough to yield enough with a satisfying snap. In the words of everyone’s favourite flaxen haired domestic critic, “Just right”.
The historic recipe for shortbread hails from Scotland and in it’s basic form is one part sugar; two parts butter and 3 parts plain flour. Time and tide has, like many an ancestral recipe, meant that the original recipe has been tweaked and adjusted with many families input and alterations.
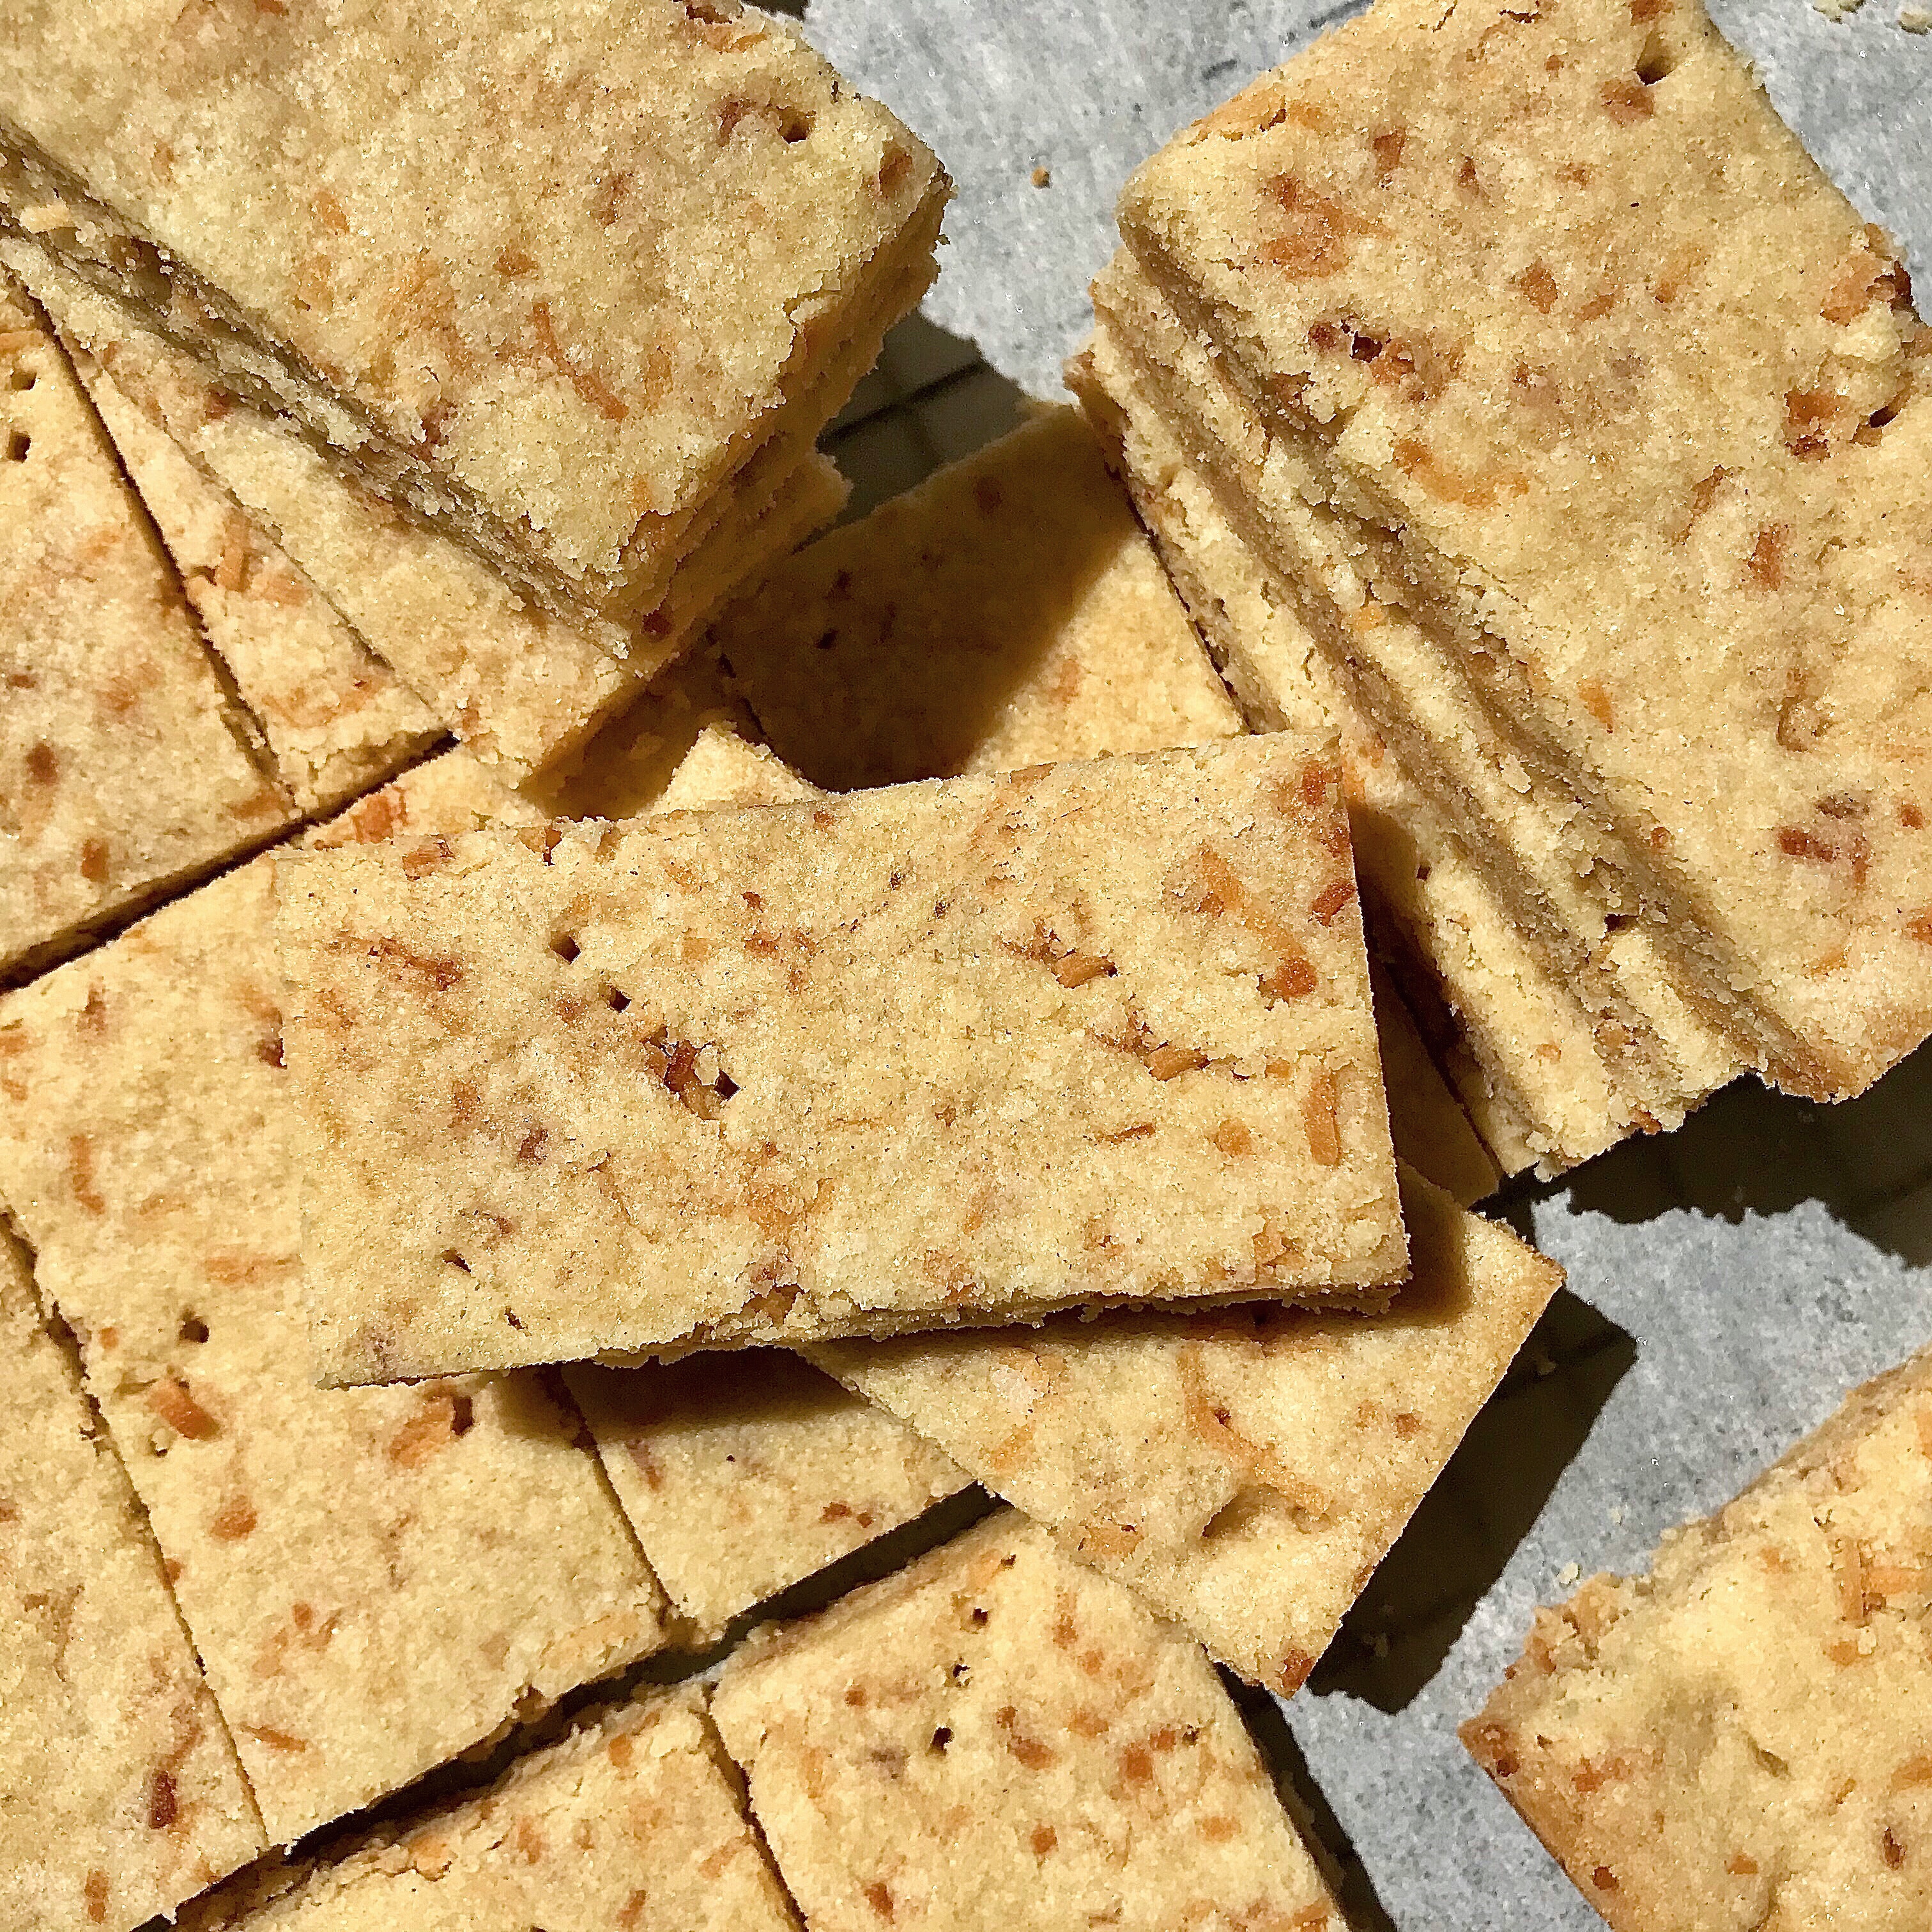
My recipe here has been tweaked from an original from my mom. I found the additions of the more unusual dry ingredient of semolina, rice flour and cornstarch increase the more desirable textures of crispness and crumbliness without marring the buttery taste. The inclusion of the ancient grain flour of Red Fife was purely a whimsical addition as I was exploring baking with differing flour types at the time. It adds a subtle nutty flavor to the finished shortbread cookie that works really well with the signature butteriness of the cookie. And the toasted coconut? Well who doesn’t like toasted coconut?
Ingredients
1 cup shredded coconut
1 cup AP Flour
2/3 cup Red Fife flour
1/3 Semolina
2 Tablespoons Rice Flour
1 1/2 Tablespoons Cornstarch
1/2 cup and 2 tablespoons fine sugar, divided
1/2 Teaspoon Kosher salt
1 cup/ 2 sticks salted butter, cold and cubed
Method
Lightly grease and line a 9″ x 12″ traybake tin
In a pan over a medium heat toast the shredded coconut until fragrant and lightly browned. Remove from heat and set aside until needed
In a large bowl combine the flour, semolina, rice flour, cornstarch, sugar and salt. Whisk together to further combine
Add in the cubed butter and rub together with your fingertips until the mixture is just beginning to bind together. Every so often do a quarter turn of the bowl to make sure you’re using all the dry mixture. You’ll want a texture somewhere between breadcrumbs and damp sand before you stop. Be wary of overworking the butter into the mixture – you want to avoid a dough that is feels slimey from the butter melting too much into the dry ingredients
Tip in the toasted coconut and lightly rub in with your fingers until combined
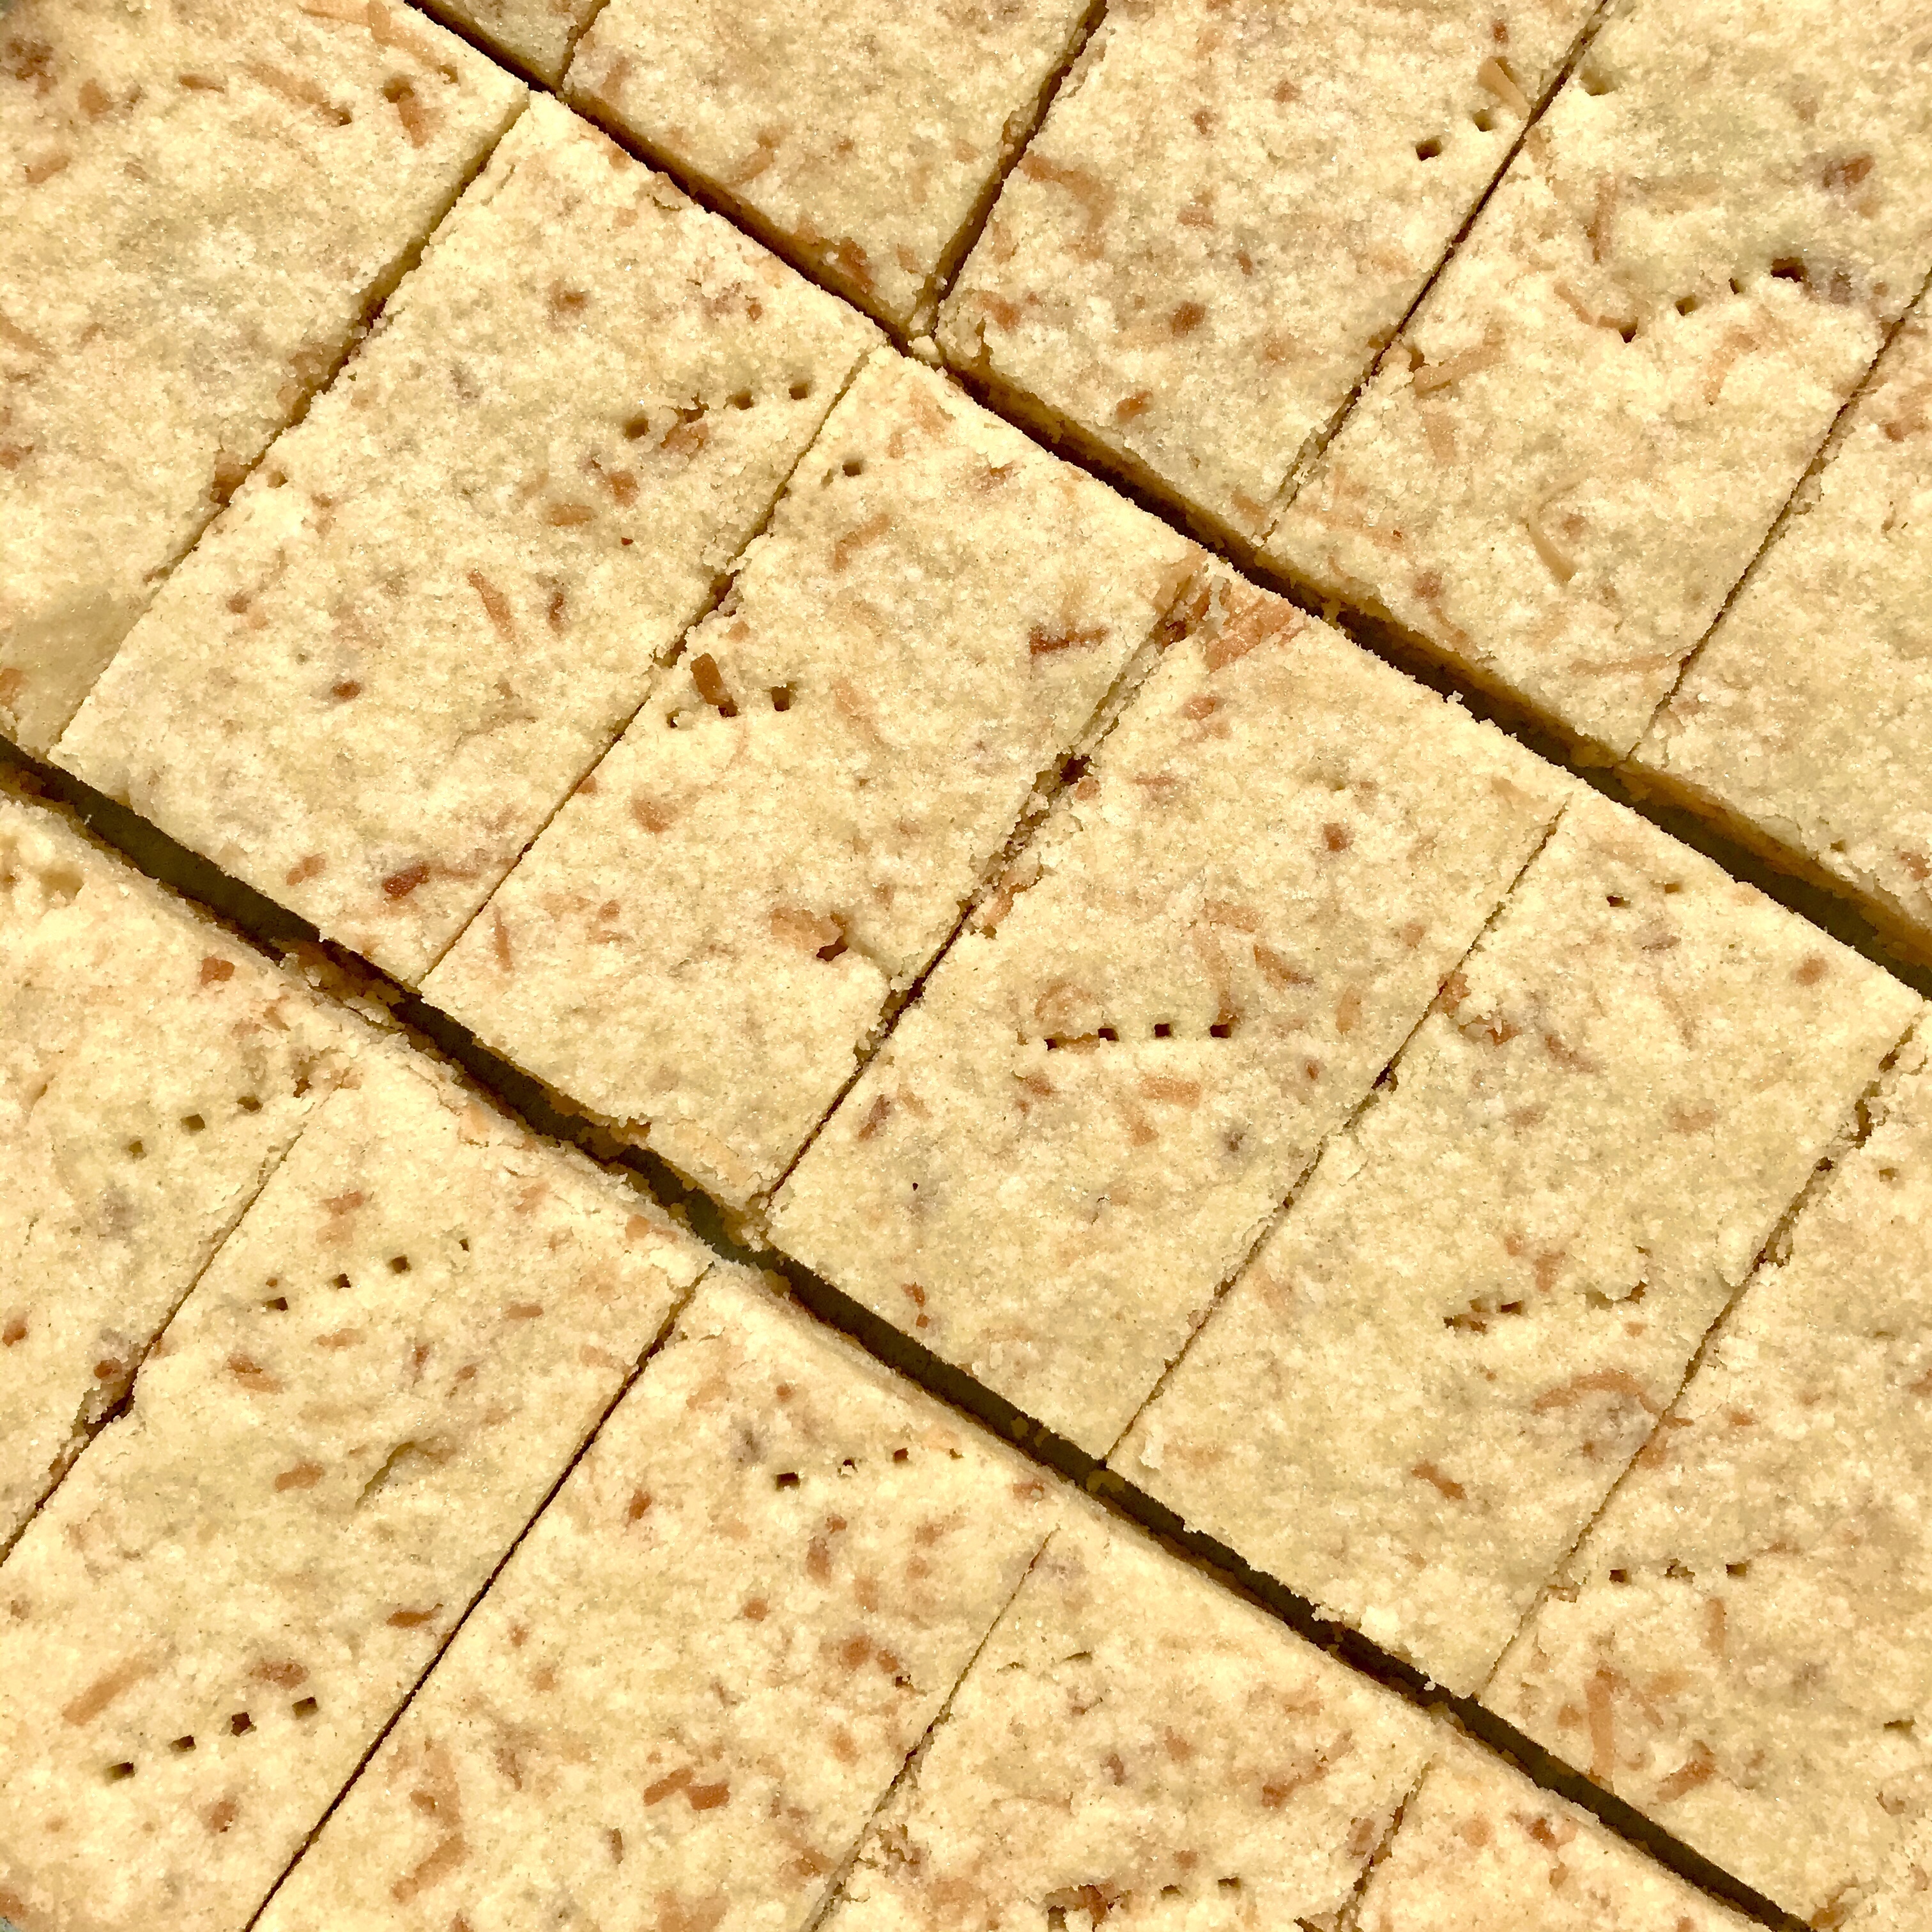
Tip the crumb mixture into your prepared tin and press the dough so that it forms a solid layer. Level the surface with the back of a spoon or measuring cup, making sure the mixture is evenly spread and uniform. Prick all over with a fork
With a knife or pizza cutter score the shortbread into 24 rectangular pieces (2 cuts by 7 cuts) taking care not to actually cut the full way through
Refrigerate for 30 mins minimum
Preheat your oven to 325°F
Remove the shortbread from the fridge and bake for about 35 minutes or until a very pale golden brown.
Remove from the oven and cut fully through the baked shortbread with a knife or pizza cutter at the score lines you previously made
Sprinkle with remaining 2 tablespoons of fine sugar and leave to cool in the tin for 15 minutes. Carefully lift the fingers out of the tin with a palette knife or the parchment paper overhang and finish cooling on a wire rack
First they came for the hand sanitizer, then they came for the TP. Finally they came for…the flour & yeast? Yeah- The Time of Covid has been a stressful, testing and, let’s face it, downright weird one. Panic induced mob-mentality has led to mass line-ups outside grocery stores and bulk buying of household items in order to weather self-isolation orders and solitude.
Whether it’s genuine creativity or social media induced compulsion it’s also led to an exponential increase in people home-baking. Despite the majority of grocery market shelves being repopulated with once scare items, a social distance complying stroll through any baking aisle will reveal barren, flour dusted shelves that once accommodated flour of all varieties and it’s habitual partner-in-crime…yeast.
Yeast shortage bedamned! Whilst I realized that I did NOT have the space to accommodate a domestic flour mill, what I could set about investigating was yeast and it’s production. I mean- I’d had already gotten a pretty solid hold on the process of Kombucha brewing -whatever else there is NO shortage of scobies at my house! That process involved yeast and it’s cultivation so how different could growing yeast for baking be? Turns out not so much. Use of a base fruit to cause a fermentation reaction (I use raisins here) and a few more steps. Said reaction then causes the production of yeast with which you can make use of in bread-making. Seems easy right? Well technically it is. BUT don’t expect it to be a speedy process. It takes almost a week to brew the initial yeast water- and that’s BEFORE you actually start on the bread production- which is slow. It seems that making bread by using naturally grown yeast, weather via a dough starter or yeast water, is a slower process than using your packet or jarred variety.
Please don’t think that I’m nay-saying the process. Quite the opposite in fact. Is the slow lengthy process of brewing and proofing so bad after all? In world now fraught with anxiety and frustration, is spending time on things so bad? Basking in the mindfulness of a task or hobby is hardly disadvantageous. I mean- time isn’t one of those things in shortage right now? Although a lengthy effort to make and bake with yeast water I can definitely say it’s one heck of a rush of elation and satisfaction when cutting in to the final baked loaf. And I will say it’s a delay well worth waiting for once you taste the final protracted fruits of your labour. Using natural yeast adds so much more character and dimension to your loaf that you’ll never get with the speedy but banal convenience of quick yeast again.
Another positive aspect (if more practical) is that once the initial yeast water is brewed there is minimal, if none at all, upkeep of it in comparison to it’s celebratory sourdough starter cousin. “Apparently” it’s just a process of just drain off the fruit, storing the yeast-rich water in the fridge, using it when needed. You only need to add more components when the source water runs low and you need to make more. (I say “apparently” as I’m in the middle of this process myself – so expect updates!)
I’m still testing out varying methods of dough proofing and crafting, and in doing so am trying a various hodge-podge of principles and methods “a little of this, a little of that”. Initially I used a sourdough method of using a starter and levain. As this method resulted in success (see the final video) it’s the one I detailed here.
*Later in the recipe I use a bench scraper to help with the procedure. Whilst not essential, you can use your hands, it does make the job easier. I also make reference to something called “50/50 mix”. This is a half and half mixture of bread flour and rice flour. The smaller, coarser grains of the rice flour helping to overcome dough sticking
Yeast water base
4 Tablespoons raisins
2 Tablespoons sugar
1 cup tepid water
Add all ingredients to a 1 litre bottle (in the photogrpahs below I started off in a Kilner jar but later transferred to a bottle). I’ve used a spare SodaStream bottle but the main thing you want is something that can be sealed and airtight. Mix to shake and leave to ferment in a warm (room temperature) place. I leave it in my pantry. Over the next 4 days shake the bottle at least once a day to ensure than the contents remain mixed and to avoid mould growth on the fruit. Over this time you will gradually see the fruit starting to float and a layer of bubbles form on the surface of the liquid
After the forth day release the cap carefully as the contents will be choc-full of carbonation and fizzing. You should also notice an odour reminiscent of beer/ over-ripe fruit. You’ll know it- it’s pretty distinctive. Once the contents have settled add an additional 4 cups of water and shake to mix the contents. leave overnight in your selected warm location
The following day, again carefully release the cap and wait for the carbonation to subside. Add in a further 1 tablespoon of raisins and 1/2 cup of water. Shake again and set aside for at least 4 hours before initial use
Starter dough
30g Bread Flour
30g Yeast Water (drained of any fruit)
Mix these two ingredients together in a jar and set aside overnight in the same location as your yeast water. If you water is successful (ie alive!) the mixture should have increased in volume and be quite bubbly. If not I’m afraid it’s pack to the drawing board for you. Perhaps try fresh fruit instead of dried? I’ve read of some recipes where figs, dates, and even apples have been used. Also see my note below*
Levain
Rested Starter dough, as above
60g Bread Flour
30g yeast water
Transfer you starter mix from the jar to a large bowl. Add in the bread flour and additional yeast water. Stir to combine well (the mixture should be like a thick slurry paste). Leave this to rest for minimum 6 hours in the same location as your yeast water. The next step is were you’re actually going to make the bread dough! (A word to the wise here – select a bowl large enough to contain you’re final amount of dough after proofing)
Bread dough
Rested levain, as above
400g bread flour
10g salt
350g tepid water
Combine all the ingredients in a large mixing bowl. Using your hand in a “claw” shape mix them until they are well combined. Cover with oiled cling wrap or a plastic bag and set aside for 30 minutes (this is called the autolyse)
After 30 mins remove the covering and again with your hand in a “claw” shape mix the dough. Continue for another few minutes until it gets to the stage where the dough is a roughly a single ball/ lump in the centre of the bowl and is “cleaning” the sides of the bowl of any residual mixture. It should still be quite sticky
Transfer the dough from the bowl onto a counter top. I find there is no need to flour or oil it as this way helps it stick- enabling stretching and gluten strand formation. This are is where you’ll develop your own technique for kneading the dough. As a heads up while you knead the dough it will become firmer and dryer, sticking less to the surface. My method of kneading is to grab the dough by either side and pull it up, away from the counter surface, causing the centre to stick to the surface. If the complete doughball comes away slap it to the counter surface whilst still holding either end. Then fold either end back on top of the main body of dough and repeat. I think this part of kneading is quite specific to the person doing it- almost like a signature. I continue this for 15 minutes by which time the dough has become firmer, dryer and holds it’s shape a lot better. At this point transfer back to the large bowl for First Proof. Cover loosely with oiled cling wrap and leave in a warm location (you guessed it- same as your yeast water!) The proofing of this will be rather slow so I’ve left mine overnight until it has more than doubled in size.
The following day
Your next step in dough production! Tip the risen dough out on to a clean counter top lightly dusted wit a 50/50 mix of bread flour and rice flour. You don’t actually want to knock it back too much here unlike when you ‘re making a standard bread loaf. Using a bench scraper gently scoop up and fold the dough in on itself. You’ll want to do this all around the dough ball. I usually end up doing it at between 6 to 8 times. What you’ll end up with is a dough ball with a very smooth, tight bottom (!) and it’s seams gathered at the top. Gently scoop the dough ball up and transfer it to a prepared banneton (heavily dusted with 50/50 mix) or bowl lined with a heavy-dusted cloth. Cover the banneton/ bowl with oiled cling-wrap, return it to your “yeast water” place and leave to proof/ rise for a second time. I’ve had to wait up to 6 hours for this to happen. When it has risen and doubled in size it’s now time for the next step
Preheat your oven to 425 degrees F at least 15 mins before wanting to bake. Line a baking tray with baking parchment. Dust the top of your dough (in the banneton) with 50/50 mix. Place your lined baking tray over the top of the banneton/ bowl and quickly invert. The dough should fall out onto the prepared tray. If not it may take some gentle coaxing with flour dusted fingers. Once your dough has turned out onto the tray, slash/ score the top of it (as fancy or as plain as you like) and you good to go!
Place the dough in your preheated oven and bake for 20 mins. After this time reduce the temperature to 390 degrees F and continue to bake for another 15-20 minutes. Your loaf should develop a hard, crisp out crust and sound hallow when tapped from below. Remove from the oven and leave to full cool before cutting
Lightly oil a large bowl and set aside for the dough later
In the bowl of a stand mixer combine the flour, salt (to one side), yeast (to opposite side) and brown sugar
Add in olive oil and 250ml warm water and mix on low setting to combine the ingredients. Add in remaining water, if needed, to achieve a soft, slightly sticky dough. Continue to knead in the machine for a total of 7 minutes. (if you’re mixing the traditional way, combine all the ingredients in a large bowl and stir using your hand (in a claw shape) until the all come together. Tip out onto a lightly oiled surface and continue to knead for 10 mins until the dough is soft and slightly sticky)
Tip the dough from the mixer bowl into the prepared oiled bowl, cover and set aside in a warm place to proof for at least 45 minutes, or until doubled in size
Before you start working on the dough pieces, bring the 3 litres of water to a rolling boil in a large pot and add in the bicarbonate of soda
Once the dough has finished proofing, tip out onto a lightly oiled surface. Divide the dough into 2 equal pieces and, in turn, divide each piece into 4 equal pieces. This will give you 8 equal pieces of dough to work with
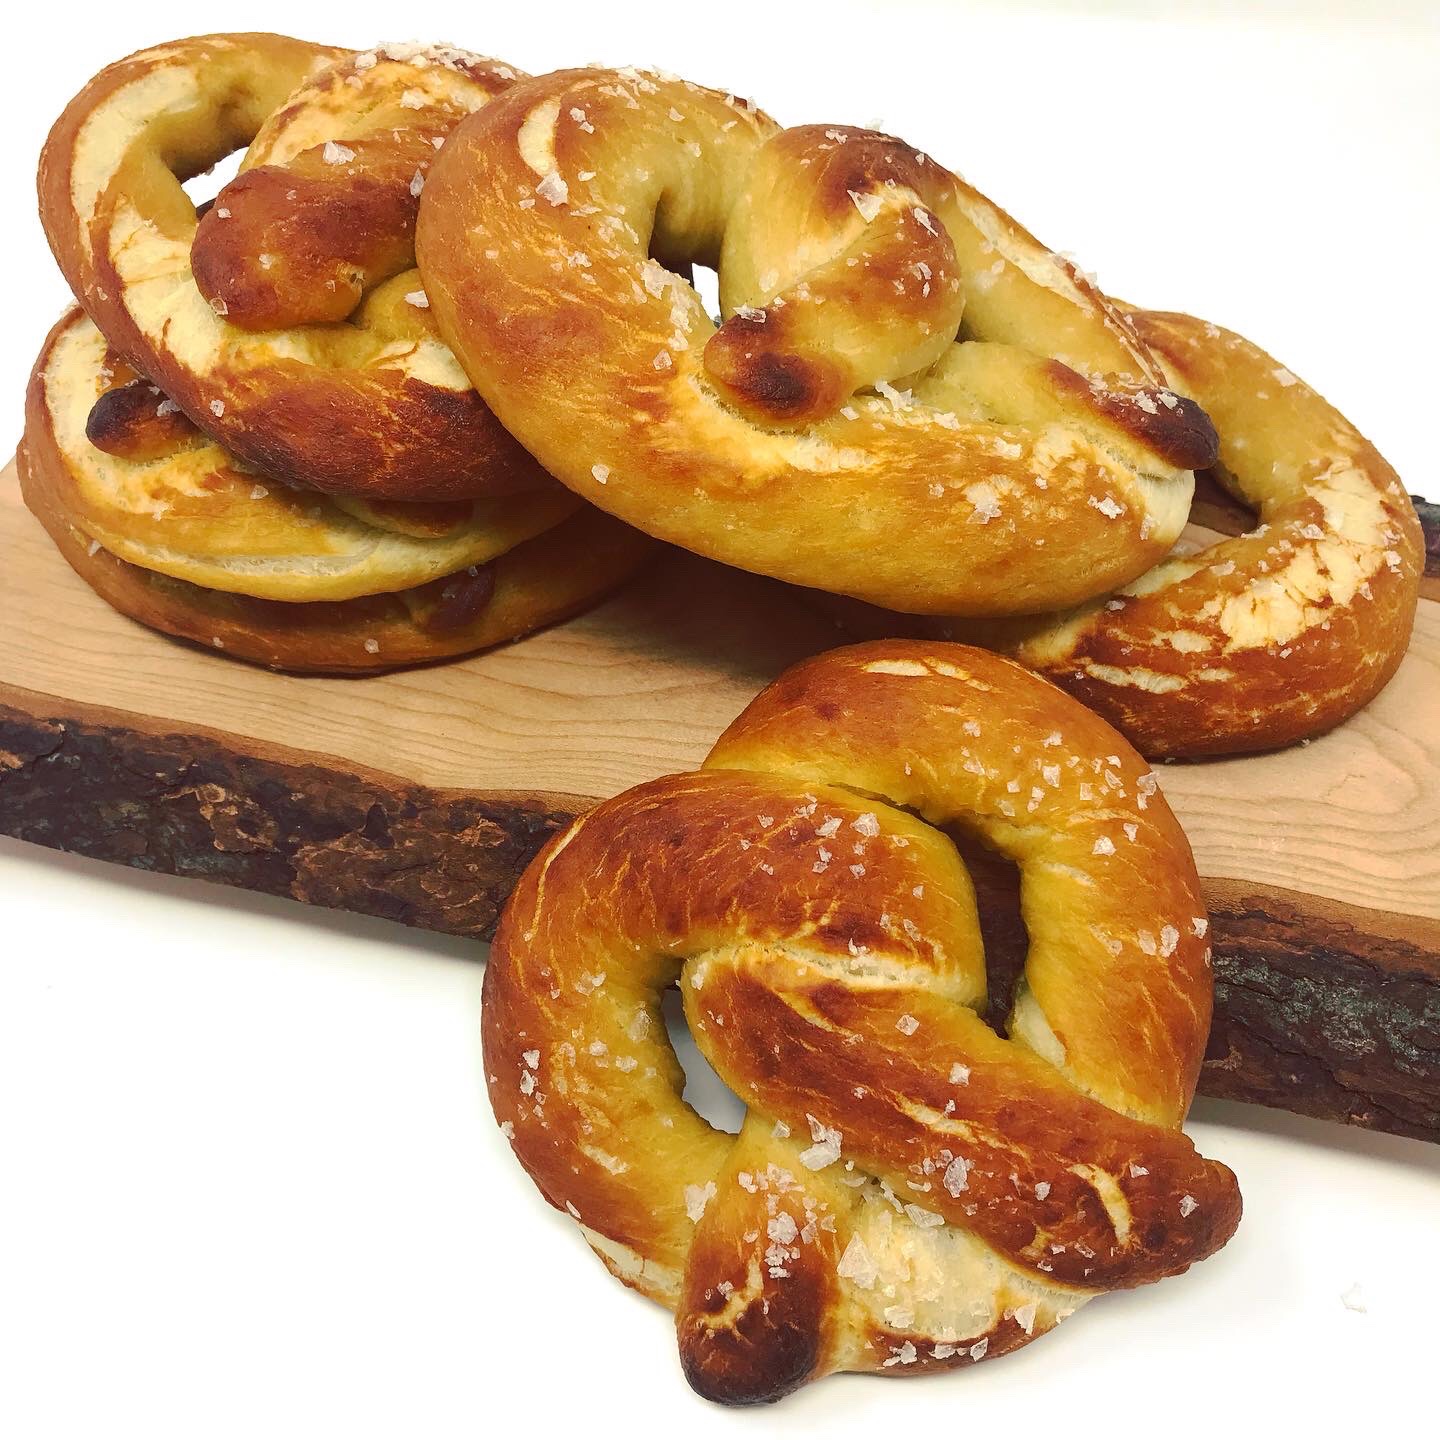
Roll each piece of dough into a long strand/rope approximately 30 inches in length. Take each end of the dough “rope” in the opposite hand and cross over simultaneously. Cross them over again to bring back the ends back to their original sides whilst bringing the tips down to the base of the loop. You should end up with a rough “heart” shape with the overlapping stands inside. Press the ends of the strands onto the loop so they stick
Preheat your oven to 400°F
This next bit is fiddly and a little patience & perseverance may be needed. Carefully pick up and drop the assembled pretzel to the pot of boiling soda solution (I use a slotted spatula) Take caution as there may be some splashing. Allow the pretzel to boil for 20 seconds (it should rise to the surface), the using a slotted spatula flip the pretzel on to it’s oppose side and continue to boil for another 20 seconds. Remove with the slotted spatula, drain and transfer to the prepared baking sheet. Repeat with remaining dough pretzels
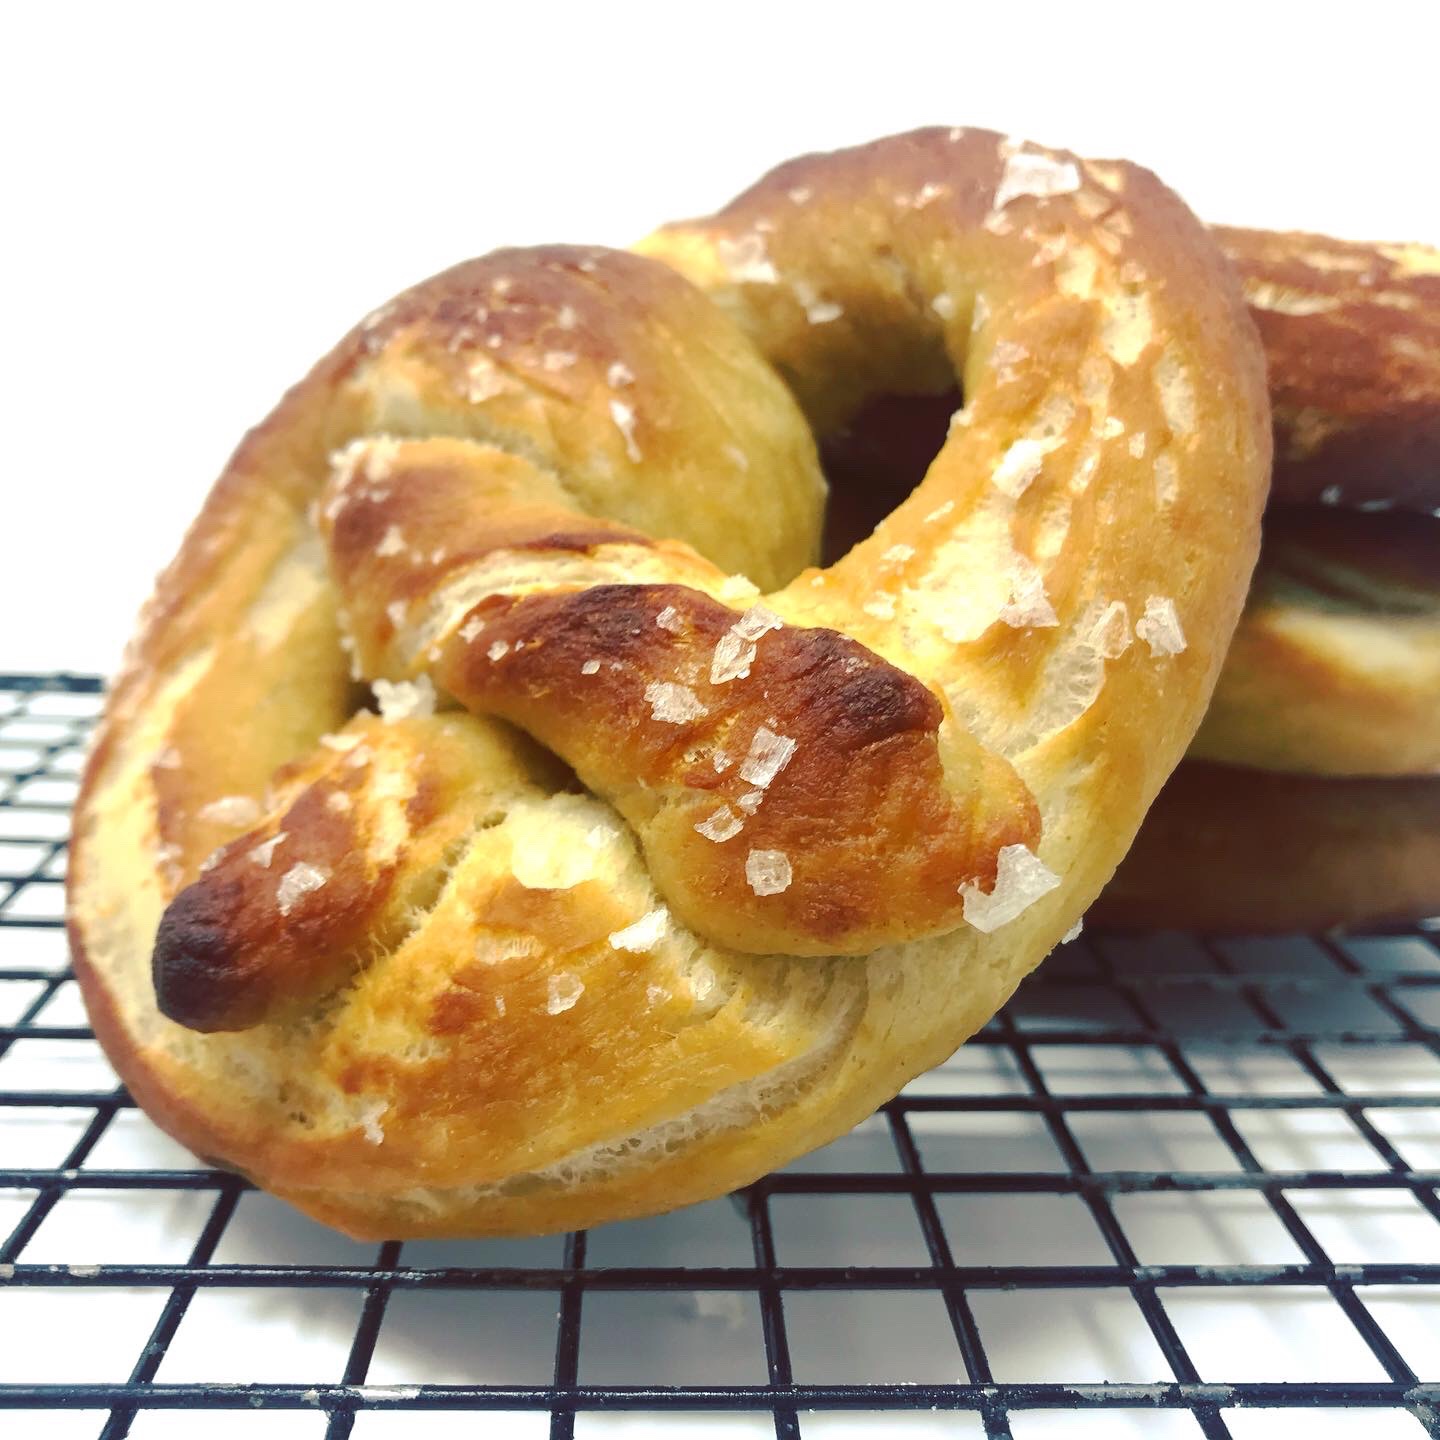
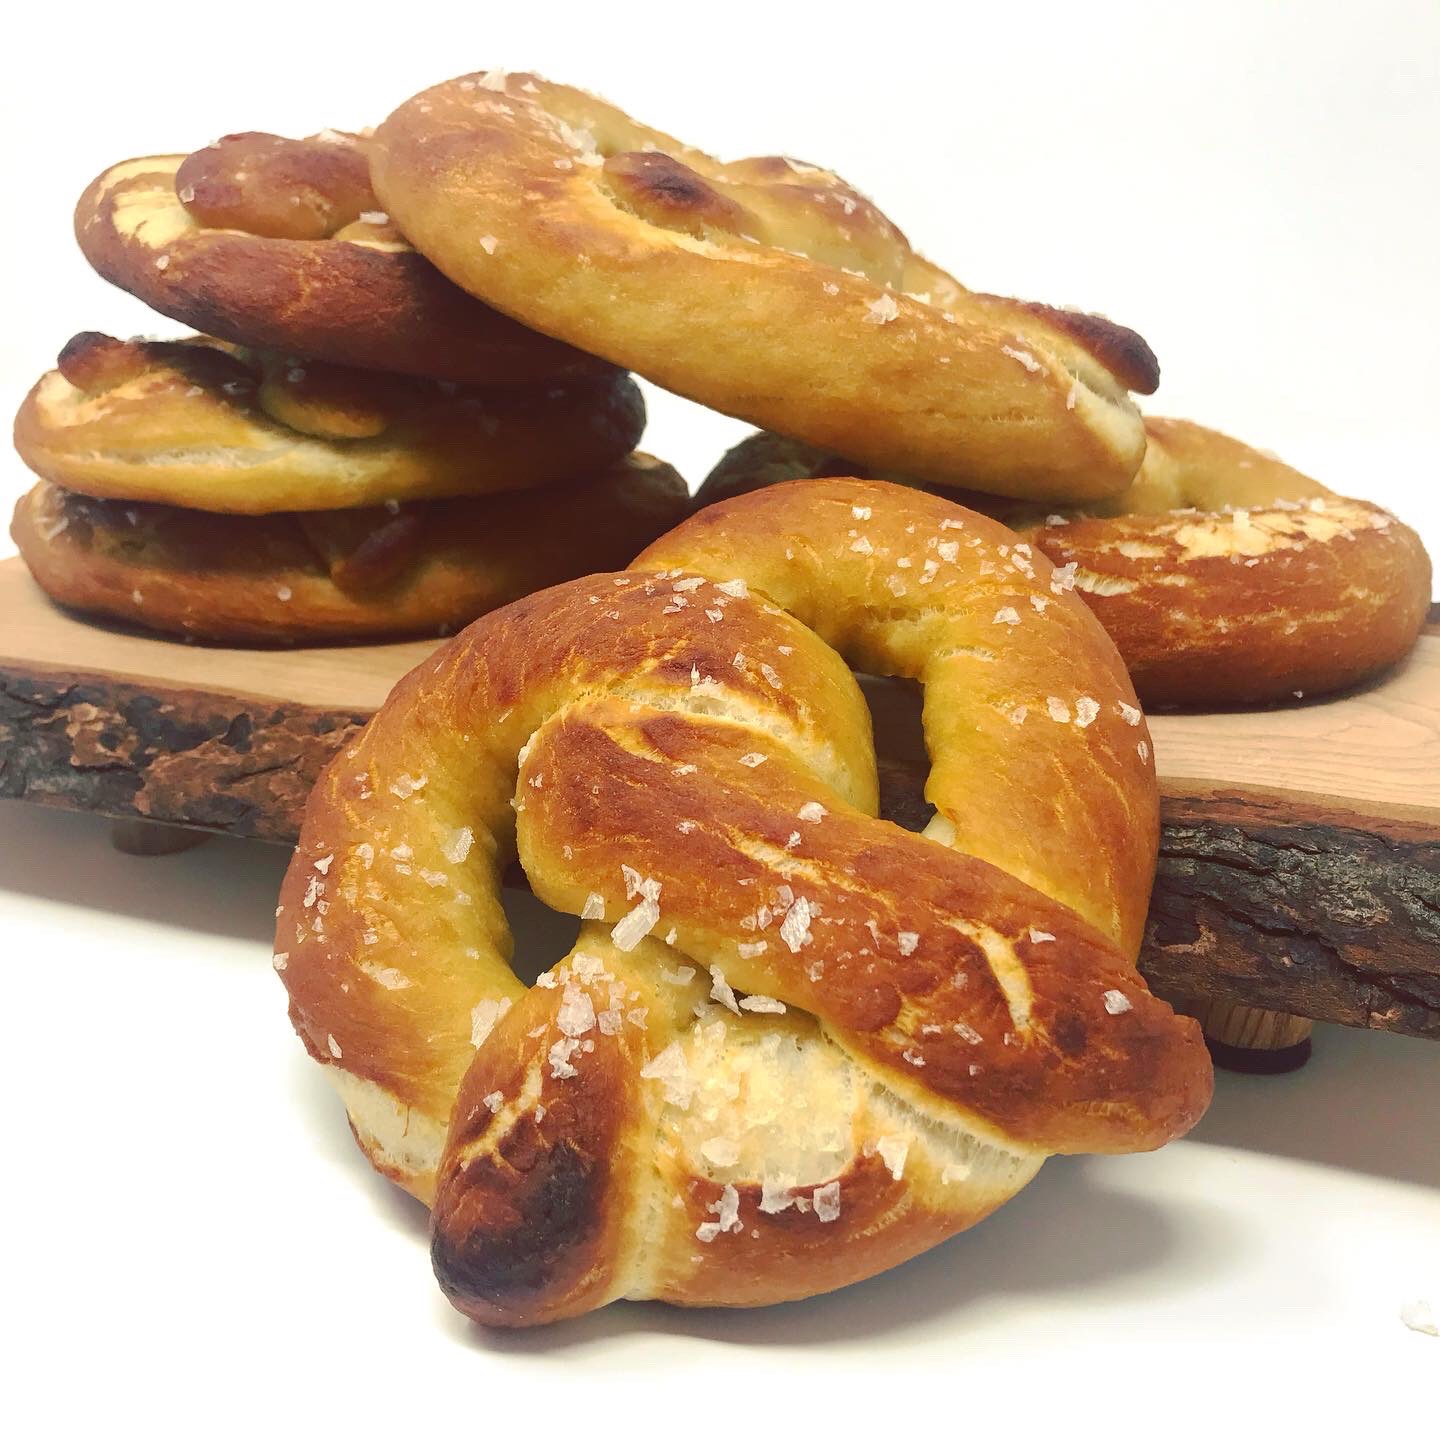
Brush each of the pretzels liberally with the melted butter and sprinkle with sea salt flakes to personal taste
Bake in the your preheated oven for 10-12 minutes, until golden brown. Remove and brush with any remaining butter if desired. Transfer to a rack to cool slightly
The pretzels are at their best enjoyed warm or fresh on the day of baking
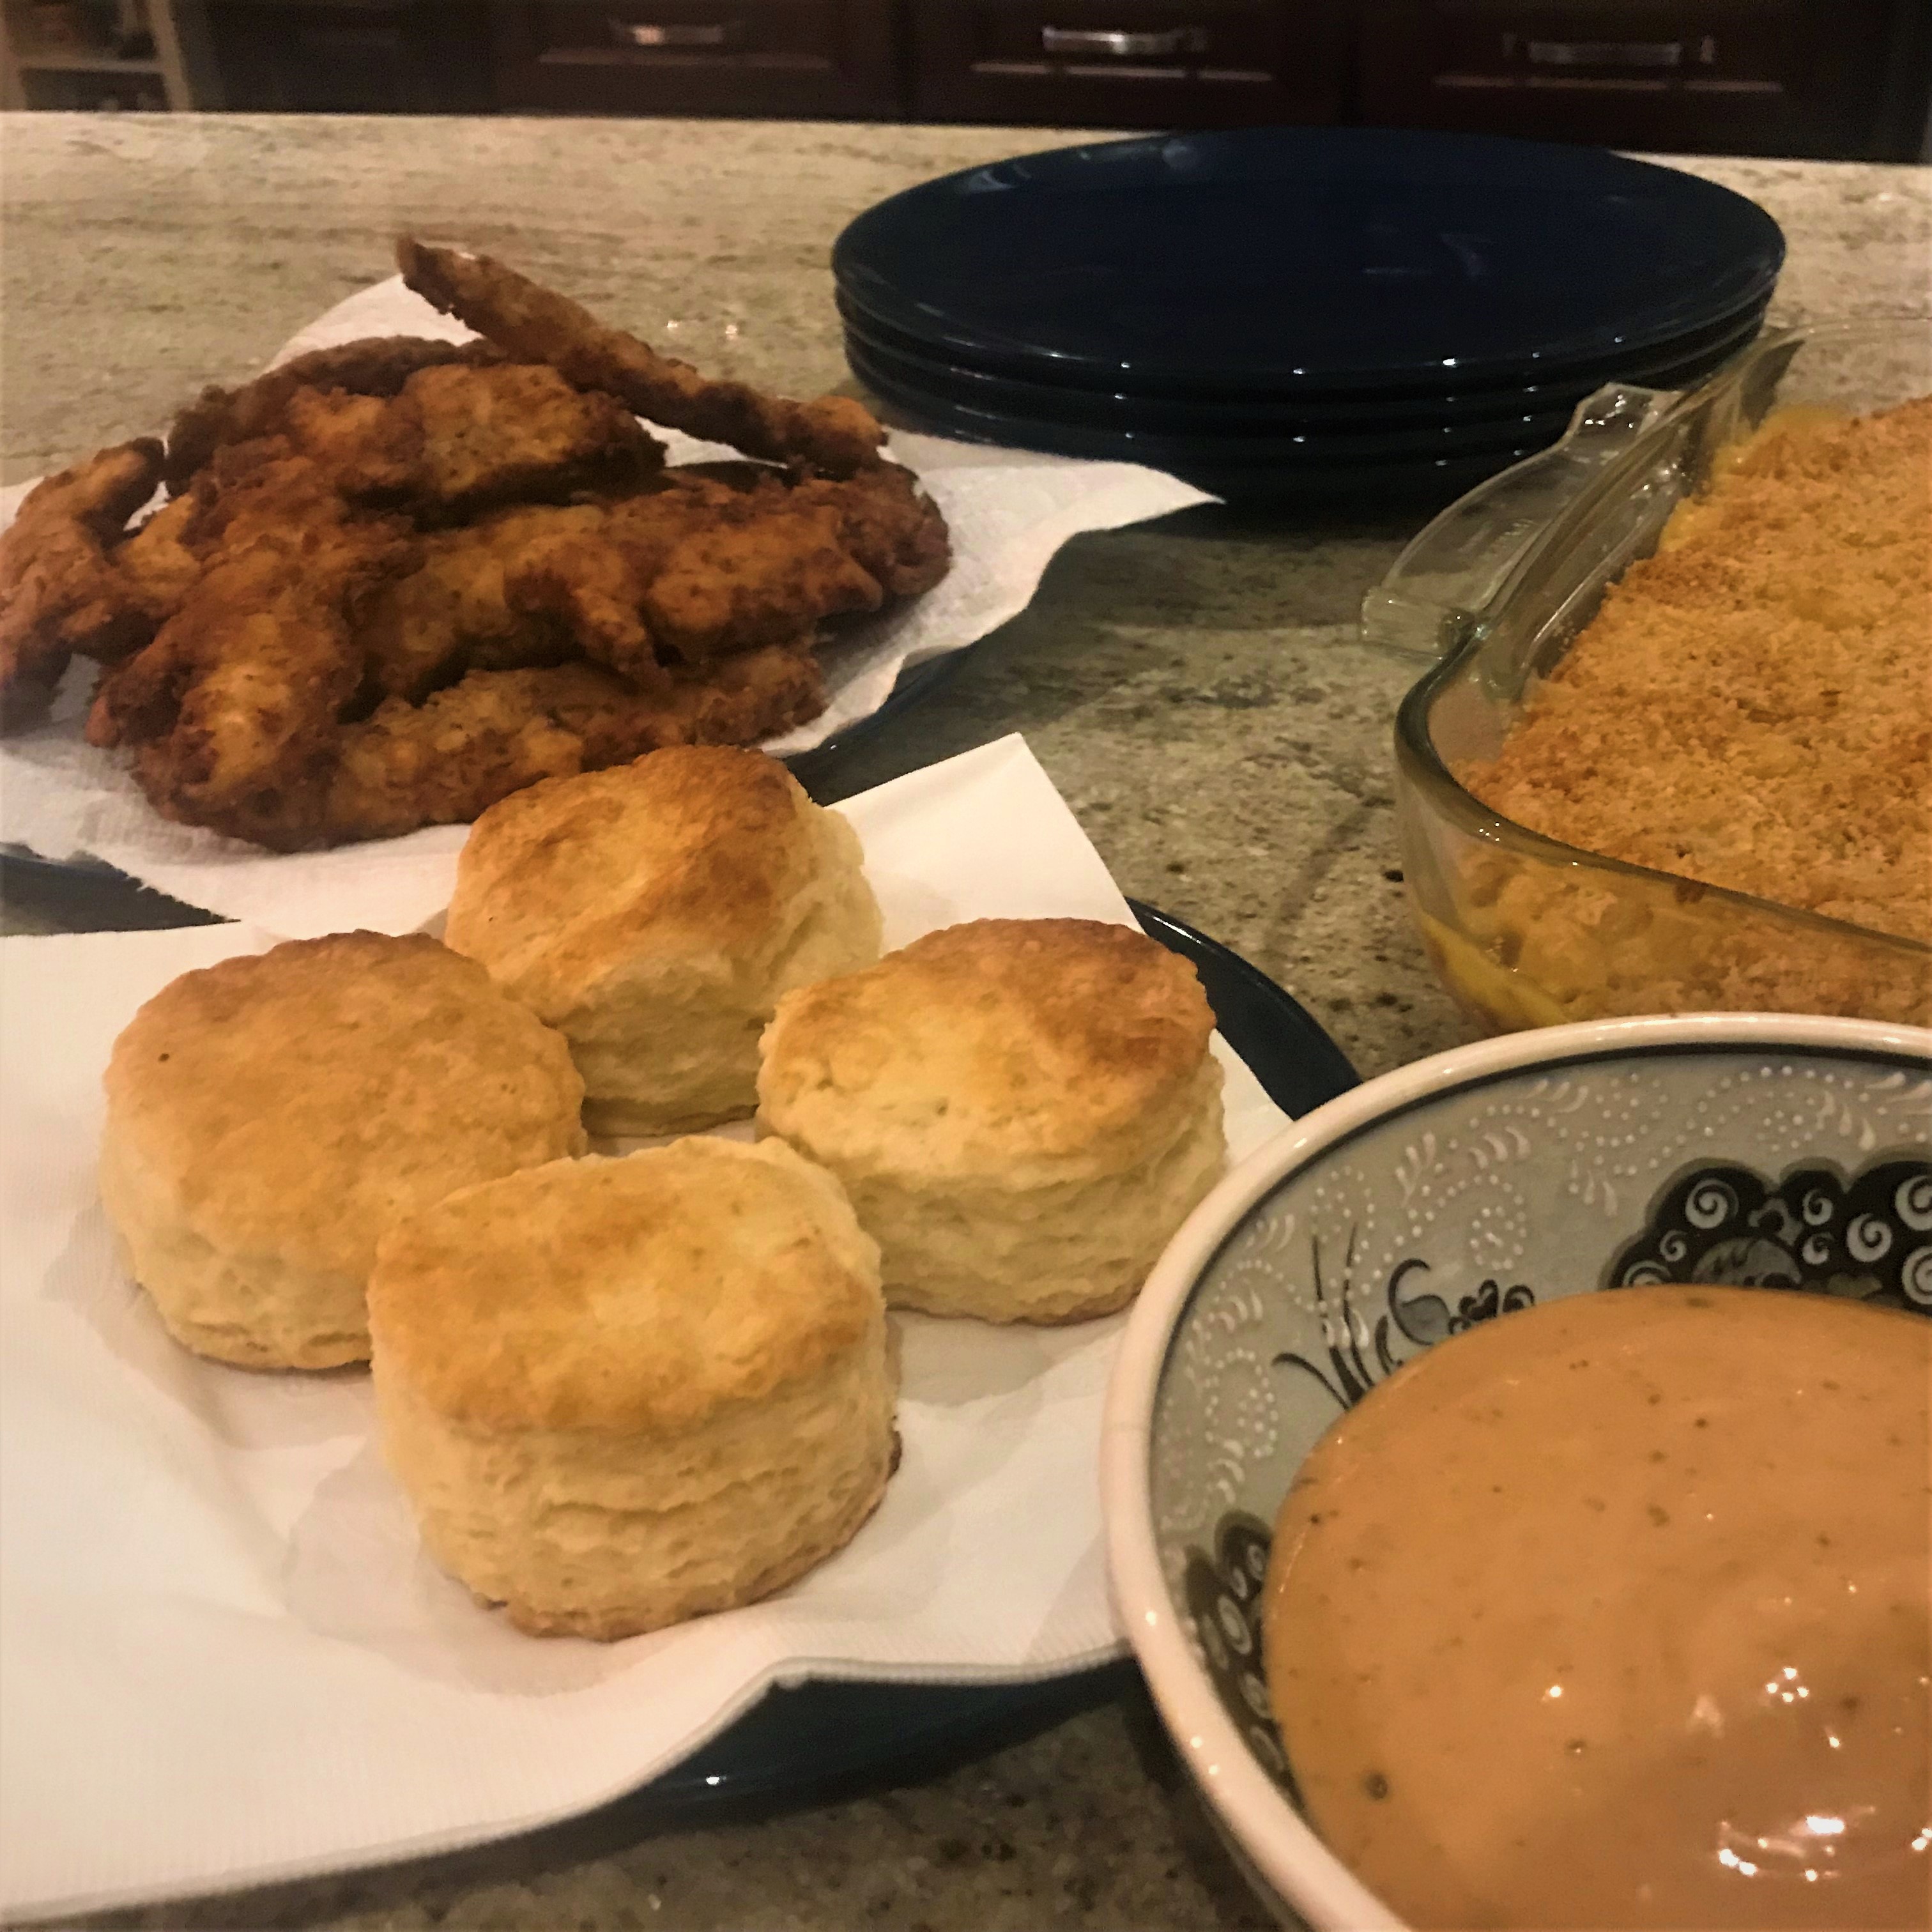
I’ll say it now- I’m not a big fan of cheese dishes. Now that’s out of the way I will admit to having cravings for them on occasion. Specifically one dish- Mac and Cheese. The stalwart comfort food that’s good enough to dissuade even a turophobe like me. One evening I took a fancy to make mac and cheese. Along with fried chicken. Along with Southern buttermilk biscuits! Pairing the cheesy pasta dish with fried chicken and how could I not be on board? Whilst doing my research on fried chicken I came across “Comeback Sauce”. Originating in Mississippi this dipping sauce is a spicy condiment guaranteed to have you licking your fingers and indeed “coming back” for more. When put together all of this dishes are for me the ultimate comfort food dinner and well worth the effort. After posting about it on my social media I was surprised by the interest in it and after much feedback from you- here it is! I hope you enjoy it as much as I did!
4
Cheese & Bacon Mac ‘n’ Cheese
Ingredients
2 cups diced bacon
1 1/2 tsp maple syrup
4 cups dried macaroni elbow pasta
3 tbsp butter
3 tbsp all purpose flour
1/2 tsp salt
1/2 ground white pepper
2 1/2 cups milk
1/2 cup Velveeta processed cheese product
2 cups freshly shredded Gouda (smoked can be used)
1 cup freshly shredded sharp red cheddar
1 cup fresh shredded Jarlesburg
1/2 cup grated Parmesean
1/2 cup panko breadcrumbs
1 Tbsp melted butter
Preheat your oven to 350F. Lightly grease/ butter a large casserole dish ( I used 11″x 11″x 2 1/2″)
In a frying pan or skillet fry the chopped bacon until lightly brown. Add the maple syrup and continue to fry until crispy. Remove from the heat, transfer to a plate and allow to cool. (When cool the bacon may stick together. Break up to smaller pieces if needed)
Cook the pasta according to package instructions, drain and return to pasta pot to keep warm. Lightly toss in olive oil to prevent clumping
Combine the shredded cheeses and set aside until needed
In a separate small bowl stir together the Parmesan cheese, panko breadcrumbs and melted butter. Set aside until needed
Prepare the cheese sauce base. In a large pot melt the butter. Add in the flour and stir to coat in butter. Cook over a medium heat until golden.
Gradually add in the milk, stirring constantly with a small whisk to prevent lumps
Once all the milk has been added cook the sauce over a medium heat until bubbling. Cook for 2 minutes, again stirring constantly, until thickened
Add in salt and pepper, and stir to mix
Reduce heat to low, add in the Velvetta and stir to melt
Once the Velveeta has melted, add in the shredded cheese mix in stages stirring between until each addition is melted. Once all the cheeses have been added continue to stir until smooth. Remove from the heat
Add the prepared macaroni pasta and crispy bacon pieces and stir well to combine ensuring all the pasta is covered in the cheese sauce. Transfer to your prepared casserole dish
Sprinkle the top of the pasta mix with the breadcrumb mix
Bake in the prepared oven for between 20-25mins or until the crumbs are golden.
Southern
Biscuits
Ingredients
2 1/2 cups all purpose flour
2 tablespoons baking powder
1/2 teaspoon salt
1/2 cup unsalted butter, very cold and cubed
1 cup cold buttermilk
Method
Preheat oven to 425°F (218°C). Place the flour, baking powder, and salt together in a large bowl and stir to well combined
Add the cubed butter and cut into the flour mixture using a pastry cutter until coarse crumbs form
Make a well in the centre of the mixture. Pour the buttermilk on top. Stir everything together until just about combined– don’t overwork the dough. The dough will look like very crumbly
Turn the dough out onto a lightly floured work surface and gently mould it into a rough looking rectangle using your hands. Next fold one side into the centre, then the other side. Turn the dough so it’s long horizontally. Gently flatten. Repeat the folding again. Turn the dough so it’s long horizontally once more. Gently flatten. Repeat the folding one more time
Gently roll the dough out with a rolling pin until it’s about 1/2 inch thick. Cut into 3-inch circles. Re-roll any scraps until you have 9-12 biscuits
Arrange close together on a parchment paper-lined baking sheet. Make sure they’re touching
Bake for 15 minutes or until biscuits are golden brown on top.
Remove from the oven and, if desired, brush with melted butter. Enjoy warm. When cool, cover tightly and store at room temperature or in the refrigerator for up to 5 days
Buttermilk
fried chicken
Ingredients
12-16 chicken breast fillets
Canola oil for frying
Marinade
4 cups Buttermilk
1 tablespoon smoked paprika
1/2 tablespoon dried oregano
1/2 tablespoon dried thyme
1/2 teaspoon salt
1/2 teaspoon black pepper
Flour seasoning
2 cups all purpose flour
1/2 salt
1/2 teaspoon smoked paprika
1/2 teaspoon cayenne pepper
1/2 teaspoon celery salt
1/2 teaspoon garlic powder
1/2 teaspoon onion salt
1/2 teaspoon white pepper
Method
Whisk together the buttermilk and dry ingredients and place in a shallow casserole dish
Place the chicken pieces into the marinade and gently stir to coat. The pieces should at least be semi-covered in the liquid
Cover and leave to marinate overnight in the fridge
In another shallow dish or plate mix together the seasoned flour ingredients
Remove the chicken pieces from the fridge, remove from buttermilk (do not remove any excess marinade) and dredge one at a time in the flour mixture. Press the mixture into the chicken whilst dredging. Again do not remove or shake off any excess. Leave the coated pieces to rest on a plate to one side whilst you heat your oil.
Pour canola oil into a large, heavy-bottomed pot or pan, so that oil only comes halfway up the pot. Heat oil over medium-high heat until it reaches 350 F (180 C). Add 4 pieces of chicken to the pot and reduce heat to medium-low. Fry chicken for 4 minutes per side, adjusting the heat so it hovers between 280 F (145 C) and 300 F (150 C)
Transfer chicken to a paper towel-lined baking sheet to drain (and check for doneness by opening chicken or using a probe thermometer to read 175 F). Cover with foil to keep warm and continue frying other chicken pieces *if oil temperature drops due to frying process, simple reheat to original temperature
Keep chicken pieces warm until ready to serve
Comeback
Sauce
Ingredients
2/3 Cup mayonnaise
2 tablespoons ketchup
2 tablespoons sweet chilli sauce
1 tablespoon hot sauce
1 1/2 teaspoons Worcestershire sauce
1/2 Garlic Powder
1/4 teaspoon black pepper
Method
Mix all ingredients together until smooth and well combined