Preheat the oven to 350 degrees F. Grease mini loaf pan* with baking spray
In a medium bowl, whisk together the flour, baking powder, baking soda and salt
In a separate medium bowl, combine the sugar, and orange zest. Rub together for a few minutes to release the orange natural oils. Add the orange juice and whisk together until the sugar is fully dissolved. Whisk in the sour cream, then the eggs and finally the olive oil
Gently whisk the dry ingredients into the wet ingredients
Pipe or spoon the batter into the prepared mini loaf pans, taking care to fill them no more than halfway full. Bake until the cakes are golden, spring back to the touch, and a toothpick inserted into the center comes out clean, 22-25 minutes
Let cool for 30 minutes, then remove the cakes from the pans to a cooling rack and let cool completely, about 20 minutes more
Glaze/ To Finish
Combine the powdered sugar, milk, rosewater in a bowl and mix until a smooth paste forms
Dip the tops of each loaf into the glaze, allowing any excess to run off. Place on a rack set over some parchment paper. Sprinkle tops with dried rose petals and allow to fully dry and set
Lightly grease the sides of and line a 9″ x 12″ traybake tin with parchment paper allowing a 2-3” overhang
In a large bowl, combine ½ cup sugar, the orange zest and rub together with your fingers to release the orange oils into the sugar. Add in the flour, semolina, rice flour, and salt. Whisk together to further combine
Add in the cubed butter and rub together with your fingertips, or a pastry cutter, until the mixture is just beginning to bind together. Every so often do a quarter turn of the bowl to make sure you’re using all the dry mixture. You’ll want a texture somewhere between breadcrumbs and damp sand before you stop. Be wary of overworking the butter into the mixture – you want to avoid a dough that is feels slimey from the butter melting too much into the dry ingredients
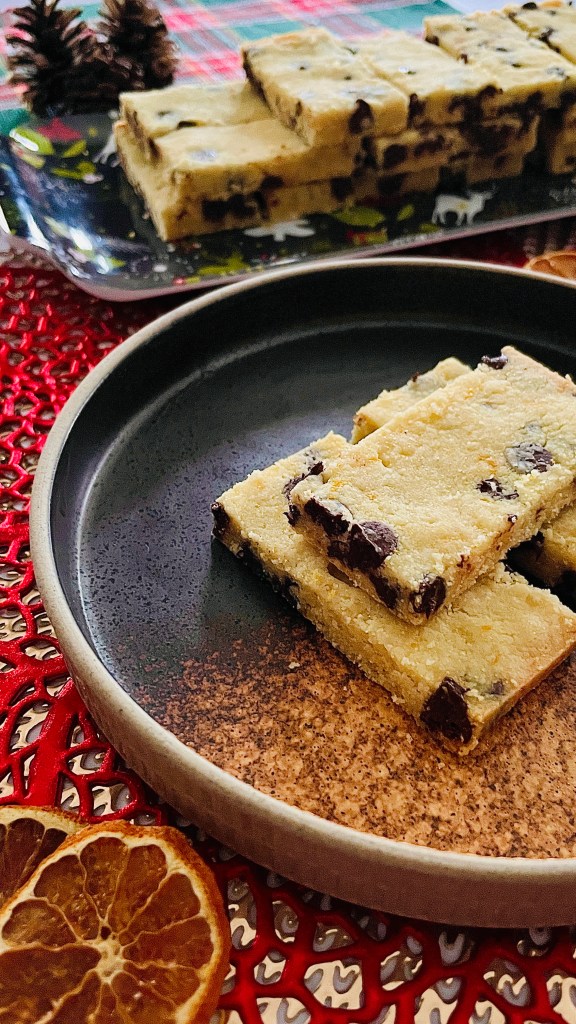
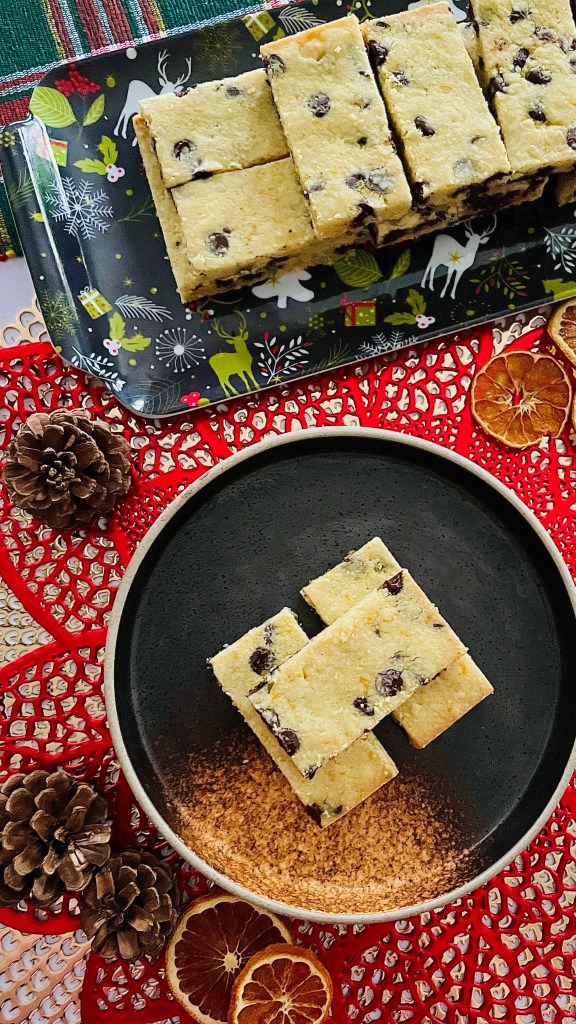
Add the chocolate chips and gently fold through the butter crumb mixture
Tip the crumb mixture into your prepared tin and press the dough so that it forms a solid, even layer. Level the surface with the back of a spoon or measuring cup, making sure the mixture is evenly spread and level
Refrigerate for 30 mins minimum
Preheat your oven to 325°F
Remove the chilled dough from your fridge and using a knife, or pizza cutter, score the shortbread into 24 rectangular pieces (2 cuts by 7 cuts) taking care not to actually cut the full way through the dough layer
Bake the dough for 30- 35 minutes or until a very pale golden brown, and deeper golden brown at the edges
Leave rest for 5 minutes, then cut with a knife, or pizza cutter, at the score lines you previously made, cut to the bottom of the pan to complete the cut the full way through
Dust with the remaining fine sugar and leave the full slab of shortbread to cool in the tin for 15 minutes. Carefully lift the fingers out of the tin with a palette knife or the parchment paper overhang and finish cooling on a wire rack
I can just bet your reaction upon reading the title of this recipe post. Furrowed brow, wrinkled nose…who knows…maybe even a snort of disbelief? “Garlic in a dessert? Well surely that CAN’T be right. He’s pushed fooling around with flavors too far this time!” Well for those of you who have been on this weirdly, wonderful flavor train of mine for while you might remember I have long been a advocate of black garlic and it’s uses in the sweeter side of things in the kitchen- check out my Living in the Black from a few years ago. Yes THAT long!
To give any newcomers a quick rundown-
Black garlic is fresh raw garlic that changes with time through the use of low heat and humidity of about 70% in a process called the Maillard reaction. During this process, the cloves turn a distinct black color. The garlic’s texture and flavor change as well. The flavor of black garlic has the slight tang of tamarind or balsamic vinegar and a mild sweetness that resembles rich molasses with the complexity and umami notes of soy sauce. Its cloves are much softer than fresh garlic, and stickier.
Thank you for coming to my TED talk.
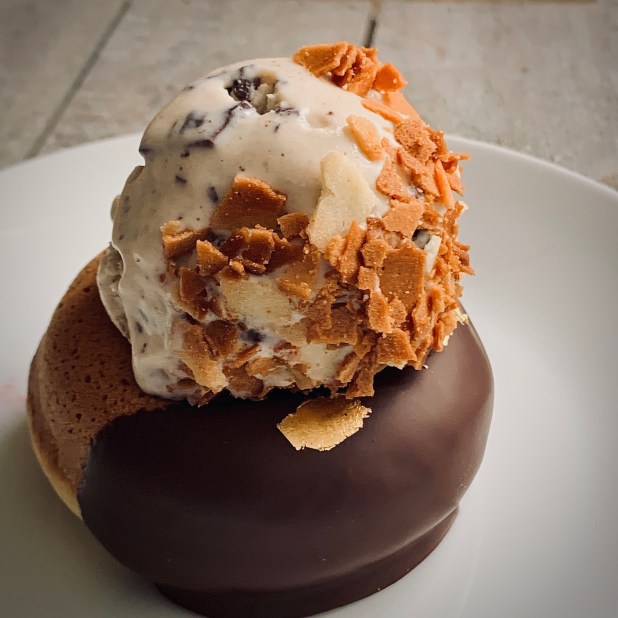
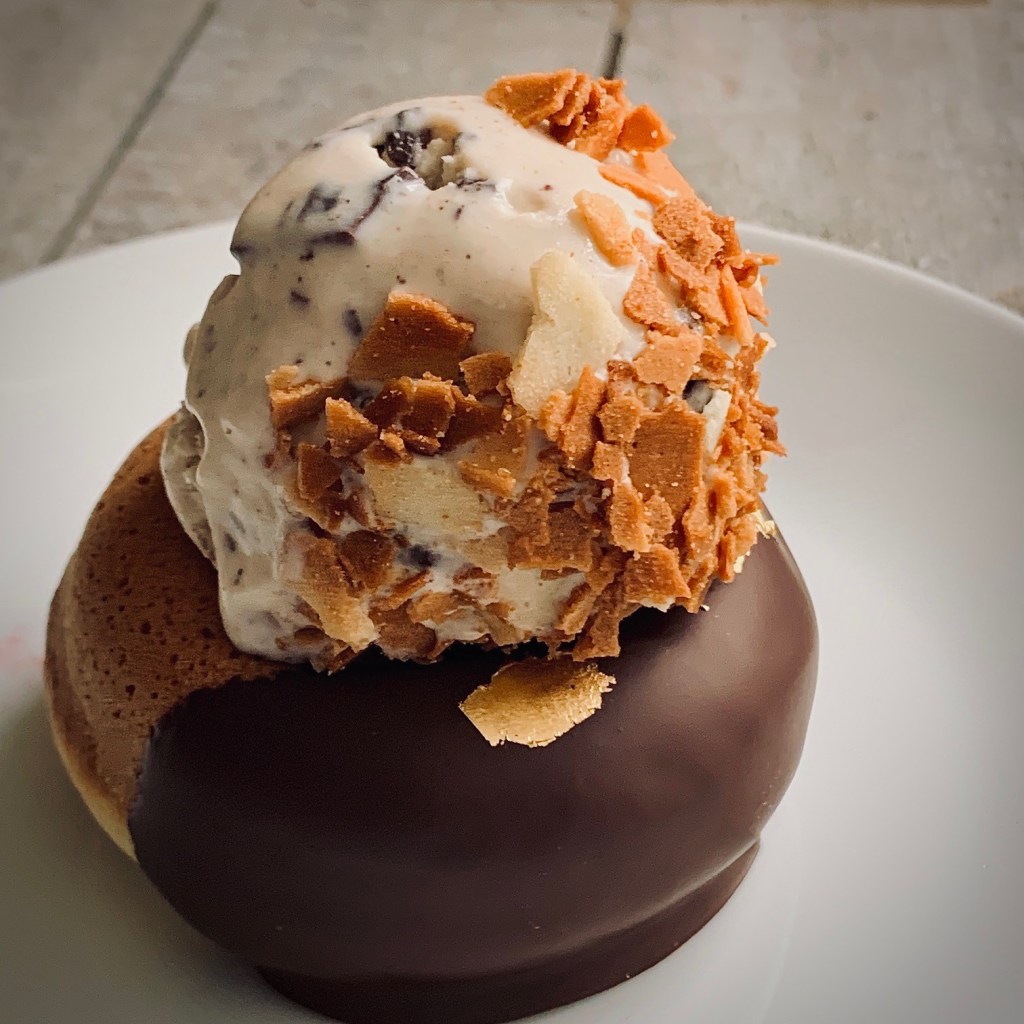
Here I’ve initially paired the black garlic itself with some dark chocolate in an ice cream. The ice cream itself is left wholly unflavored save for a touch of sweetness from a little honey. This allows the flavor of the black garlic to shine through, and work really well with the bitter sharpness of the dark chocolate. for me it’s a wonderfully decadent, almost avant-garde treatment of the humble stalwart dessert. I should point out that for me this recipe is all the more appealing as it’s a “no churn” recipe, you just need to tale a bit more time in the planning of it.
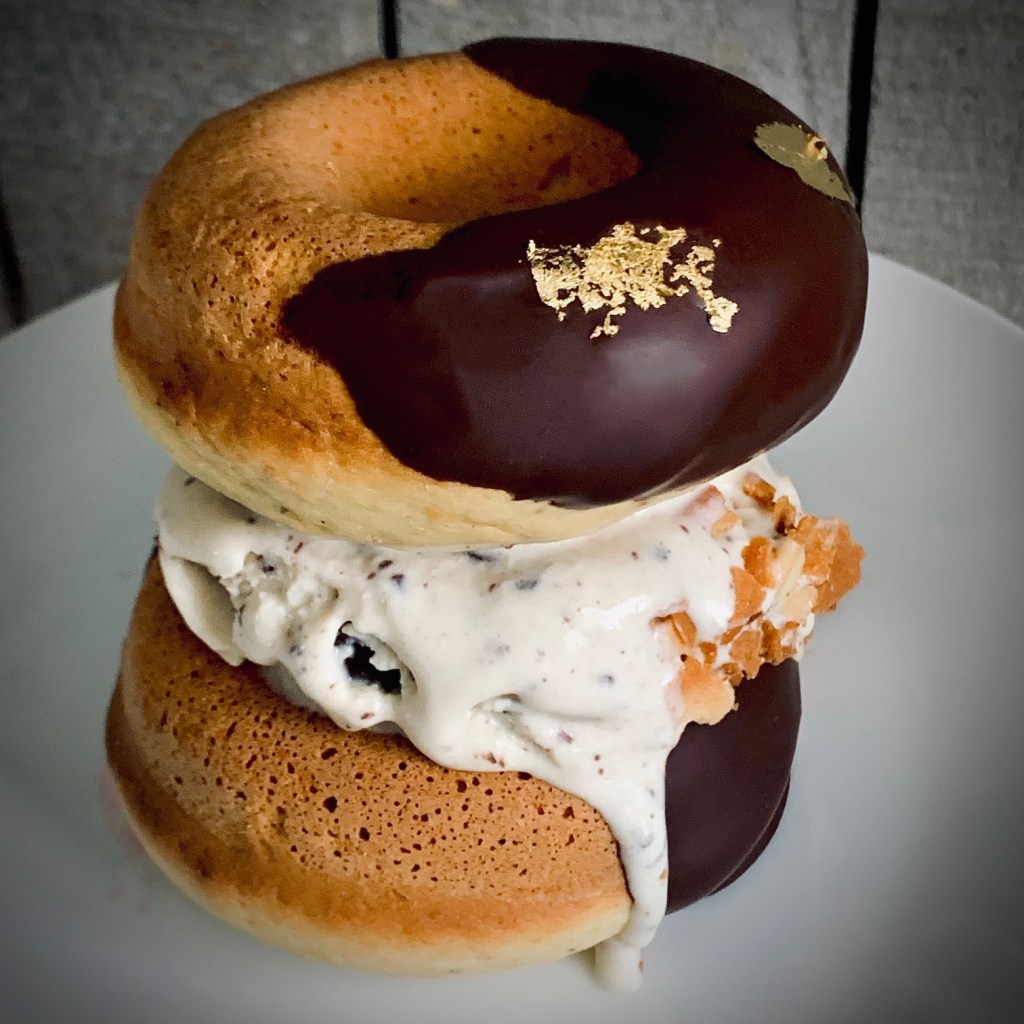
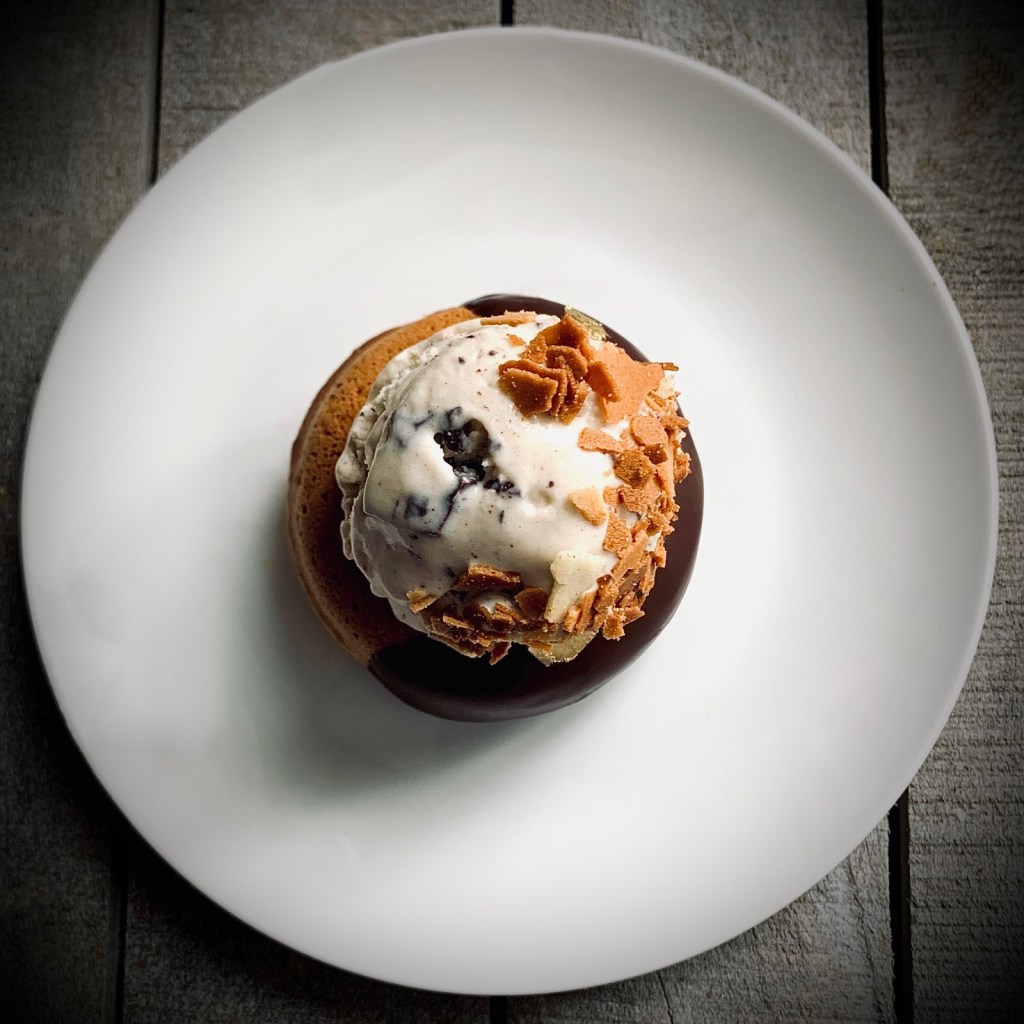
As for the donuts (which are baked, not fried) the whole idea for this came from a quest to create an ice cream sandwich that was just “a little bit” different. Black Garlic was my “gimmick” in the ice cream and well off course something left of center was needed as the sandwich vessel itself. That’s where the donuts come in. The flavors of orange and fennel aren’t just a random selection for intrigue value. The fennel anise, citrus of orange and that molasses-like tang of black garlic work together in a combination that takes on a herbaceous-like quality that does indeed elevate this beyond your usual ice cream sandwich.
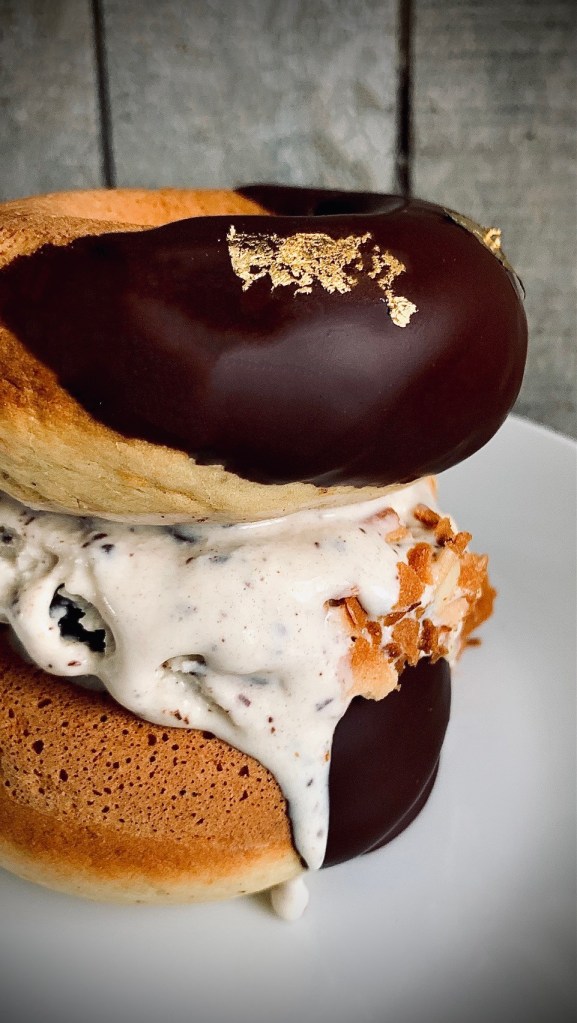
Be warned though- unique elevated flavors or not, this is still an ice cream sandwich- so be prepared to get messy!
Black Garlic Ice Cream Sandwich Recipe #recipe #greatchocolateshowdown
2 cups and 1/2 cup heavy whipping cream, separated
2 cloves black garlic, squashed to a paste
1 1/2 teaspoons honey
1 can (14oz) sweetened condensed milk
4oz dark chocolate, cut in to chunks
Orange & Fennel Donuts
½ cup (1 stick) butter, softened at room temp
½ cup sugar
¼ cup light brown sugar
Zest of 2 large oranges
2 ½ cups AP flour
1 ½ teaspoon baking powder
¼ teaspoon bicarb of soda
¾ teaspoon salt
2 teaspoons ground fennel
2 eggs, room temperature
1 Tablespoon orange juice
1 teaspoon vanilla extract
1 cup whole milk, room temperature
To Decorate
6oz Dark chocolate, melted
Gold leaf, optional
Dragees, optional
Feuilletine, optional
Method
Black Garlic Ice Cream
In a large saucepan combine 2 cups of heavy whipping cream and the black garlic paste
Heat over a medium heat, stirring occasionally until small bubbles start to form at the edge of the milk
Reduce heat to low for 5 mins
After 5 mins remove from heat and leave to infuse for 15 mins. After this time strain the cream/ garlic mixture in to a small bowl to remove the garlic pieces
Cover surface with plastic wrap to prevent skin and place in refrigerator to cool fully
Once the cream mixture has cooled fully, transfer to a large bowl, add in the 1/2 cup of whipping cream and whisk to soft peak stage
Fold in honey and condensed sweetened milk until fully incorporated
Pour the mixture into a freezer-proof container, cover the surface with plastic wrap and freeze for 2 hours
After 2 hours, remove ice cream from freezer and fold in chocolate chunks
Return to freezer and leave until fully frozen, minimum 6 hours
To serve ice-cream remove from freezer and leave at room temperature for 5 mins before scooping to serve
Orange & Fennel Donuts
Preheat oven to 425 degrees C. Prepare donut pans with butter, or baking spray
In stand mixer bowl with paddle attachment, cream the butter, sugars and orange zest until light and fluffy (apx 3 mins)
In a separate medium bowl combine the flour, baking powder, baking soda, salt, ground fennel and whisk together
Reduce mixer speed to medium, add eggs and vanilla extract and beat until combined, scraping the sides occasionally
Reduce speed to low and add in flour mixture in 2 batches, alternating with milk. Mix until just combined
Transfer batter to piping bag with an open nozzle (or just snip the end off) and pipe in donut pan. Bang to remove bubbles
Bake for 10- 12 minutes until springy, skewer test until clear
Leave to cool in pan for 5 minutes then remove to rack to cool fully
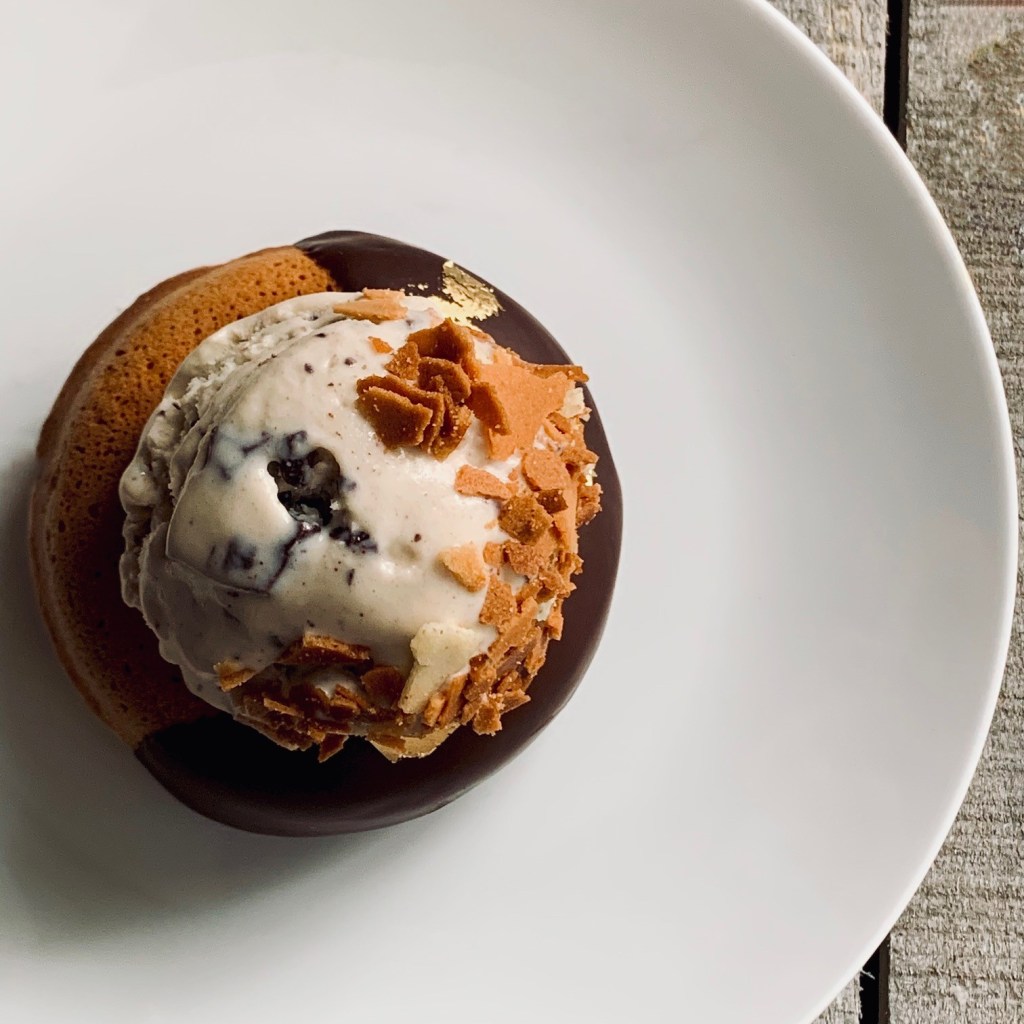
To finish the donuts dip in the melted chocolate and decorate to you liking
*Serve the ice cream and donuts however you like. Single scoop on a single donut and dusted with some feuilletine, adding some tasty textural crunch (I highly recommend this!); single scoop in an epic double donut sandwich or double scoop in a double donut extravaganza. The choice is yours- go WILD!
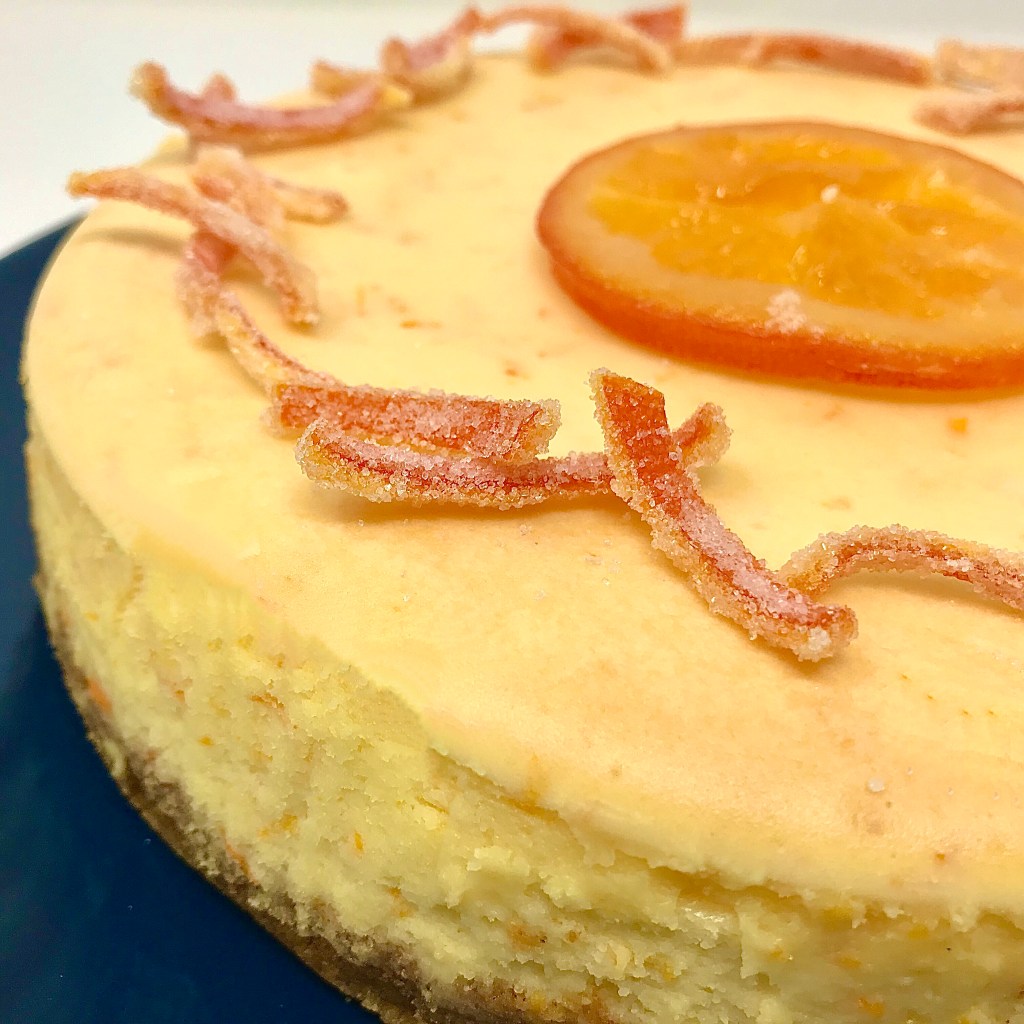
Okay I’m not gonna lie about this recipe- it came about completely by accident. Whilst looking for other ingredients for another recipe I stumbled up Minneolas Tangelos. Color me intrigued! These rather cute little citrus fruits are a hybrid between the grapefruit and the tangerine. The resulting fruit combines the sweetness of the mandarin with the tart flavors of the grapefruit, and has a wonderful juiciness, combination of sweet/sour flavors and is exceptionally easy-to-peel. The pear-shape of the fruit is also were it gets it’s other moniker from “Honeybell”.
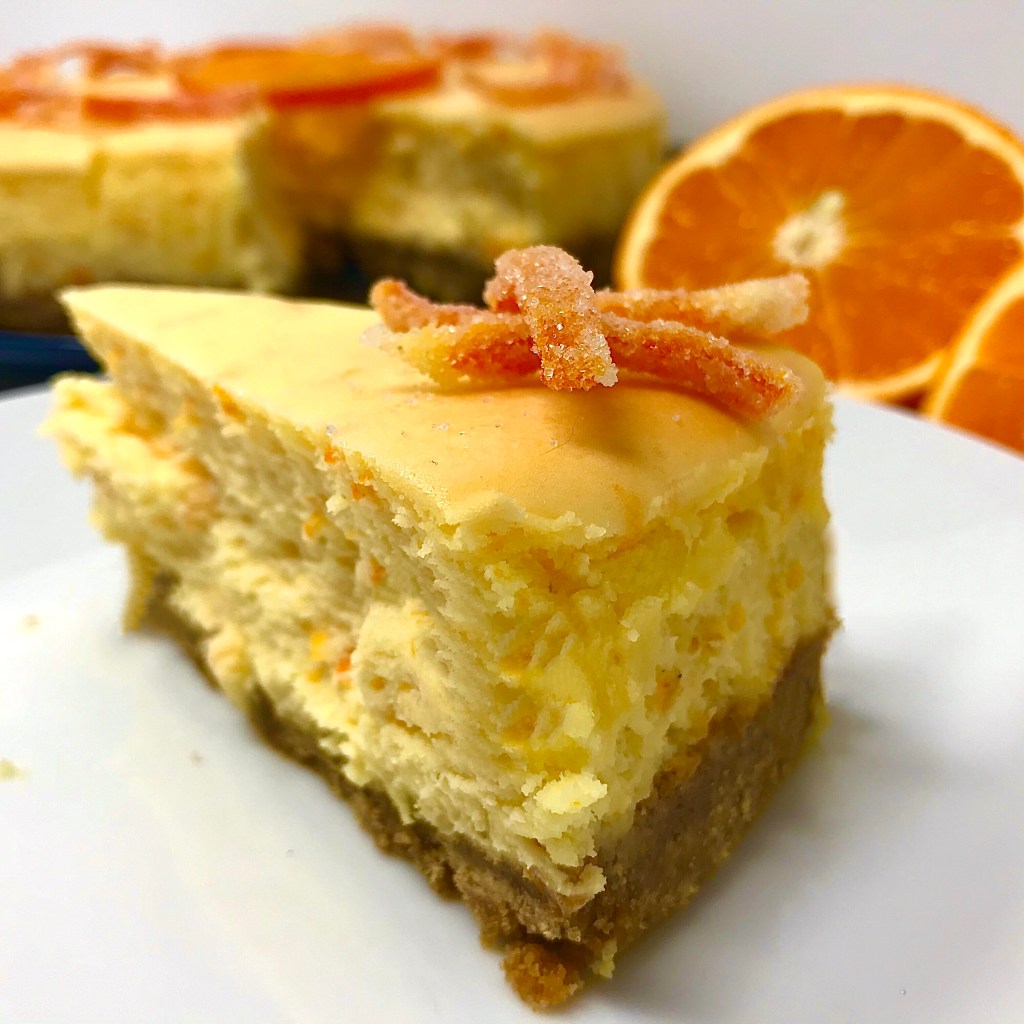
I was hankering after a baked cheesecake and coming across them seemed too coincidental to ignore. Plus it was an ideal excuse to try something new and adventurous in the kitchen. The resulting flavour of the fruit is light and summery without having an overwhelming tartness. Adding cardamom to the base gives some complimentary citrus notes to the tangelo filling while at the same time cutting through the rich, creamy texture.
*In this recipe I use the terms Minneolas Tangelo, Tangelo and Honeybell interchangeably.
Ingredients
Base
1 1/2cups graham cracker crumbs
5 tablespoons salted butter, melted
1/4 cup packed brown sugar
1 teaspoon ground cardamom
Filling
Three 8 oz packs cream cheese, at room temperature
1 1/3 cups sugar, divided
3 tablespoons cornstarch
2 large eggs
Juice of 1 Minneolas tangelo (Honeybell)
Zest of 2 Minneolas tangelos (Honeybell)
2/3 cup heavy whipping cream
Method
This cheesecake is best made the day before you plan to eat it. The extra time in the refrigerator will help firm it up and the flavours to intensify.
To make the crust/ base
Preheat the oven to 350°F
In a bowl combine all the base ingredients and stir to ensure they’re well and evenly mixed
Press the graham cracker crumbs into the bottom of an 8″ springform pan. Gently press down on the crumbs using a small (1/4) measuring cup, or your fingers, until the crumbs are an even layer at the bottom of the pan
Bake the crust, on the bottom 1/3 shelf, for 10 mins. After baking remove and set aside to cool until needed later
Keep the oven on at the current temperature. Move on the prepare the filling
To make the filling
Wrap the cooled tin with a triple layer of aluminium foil. Do this gently so as to ensure you don’t damage the baked crust. Once you have triple-wrapped the tin, set aside and prepare the filling
In a large bowl of a stand mixer, fitted with the paddle attachment, beat 1 package of the cream cheese, 1/3 cup of the sugar, and the cornstarch together on low until creamy, about 3 minutes, scraping down the bowl several times. Blend in the remaining cream cheese, one package at a time, beating well and scraping down the bowl after each. Here I find that beat for 3 minutes after each package on medium speed proves effective
Beat in the remaining sugar, then the vanilla. Blend in the eggs, one at a time, beating well after each to make sure they’re incorporated
Add in the tangelo zest, juice, and mix to incorporate. Beat in the cream until just completely blended. The filling will look light, airy, and smoot. Be careful not to overmix! Check the paddle attachment as sometimes the zest can stick and gather here. If it does simply scrap off into the mixture and fold in using a spoon or spatula
Gently pour the batter over the cooled crust
Place the cake pan in a large shallow pan containing hot water that comes halfway (about 1 inch) up the side of the springform. Bake until the edge is light golden brown, the top is light gold, and the center barely jiggles, about 1 1/4 hours. If the cake still feels soft around the edge, let it bake for 10 minutes more
When the baking time is up, turn off the heat but leave the cheesecake in the oven with the oven door open a crack (you can use a wooden spoon to help here) for the next 2 hours. After this take the cheesecake out of the oven and remove it from the water bath, transfering to a wire rack, and let cool for another 2 hours minimum. After this, leaving the cake in the pan, cover loosely with plastic wrap, and refrigerate until completely cold before serving, preferably overnight or for at least 6 hours
To serve
Release and remove the side of the springform, leaving the cake on the bottom of the pan. Refrigerate until ready to serve. Slice with a sharp straight-edge knife, not a serrated one, rinsing the knife with warm water between slices.
Refrigerate any leftover cake, tightly covered, and enjoy within 2 days, or wrap and freeze for up to 1 month.
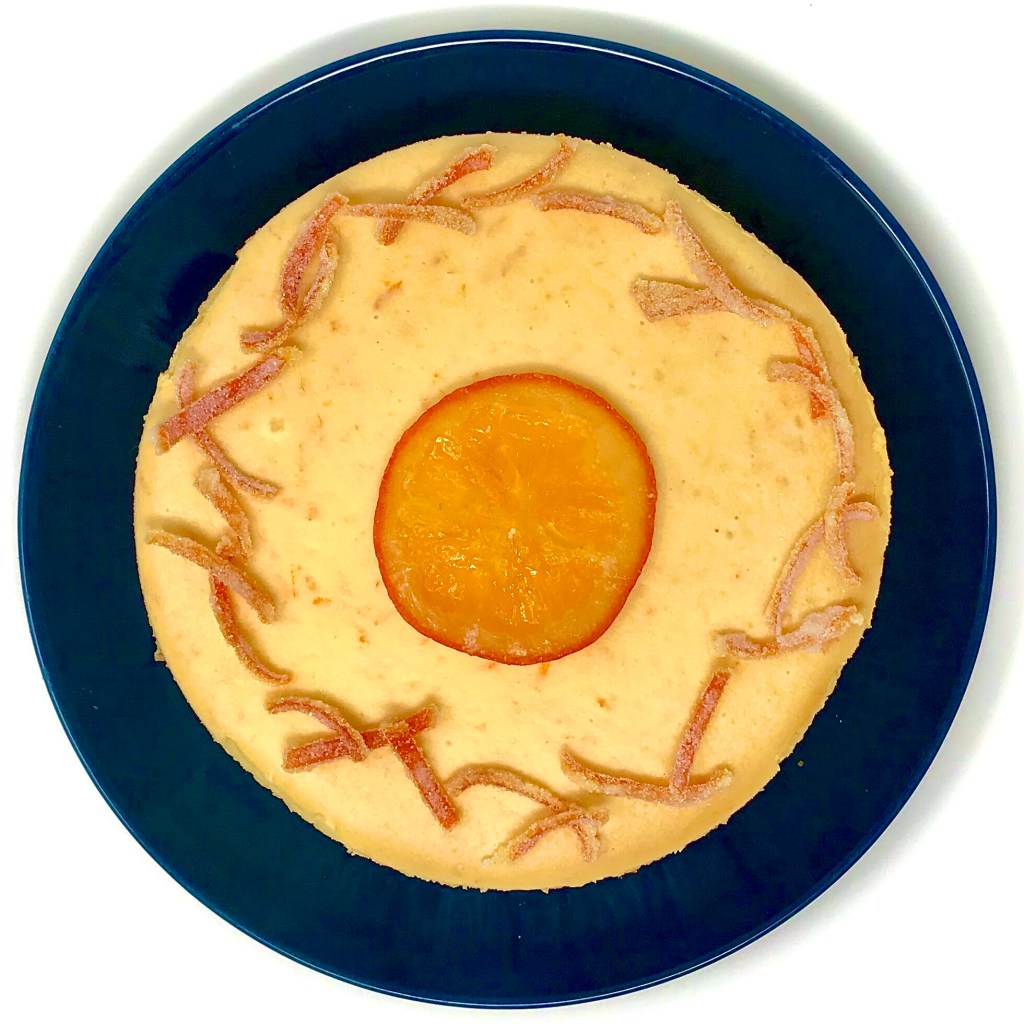
Here I finished mine with a slice of candied Honeybell and some candied Honeybell peel. My advice would be to skip trying to candy the slices of fruit. Part of the attraction of the Honeybell is that it is quite easy to pull away from its rind and de-segment. This however has the downside that when you trying to flip the slices in sugar syrup they easily break up. In fact the one centre slice that you see above was the sole survivor of 5 slices that I initially wanted to have candied. A much easier and straightforward garnish is to candy some sliced peel pieces (as I have on the perimeter of the finished cheesecake above).
These steps are entirely optional. You can finish the cheesecake whatever way you wish to your personal taste
Remove the rind from a Honeybell, trying to keep it as intact as possible. Using a teaspoon scrap away the bitter inner white rind. Slice the remaining outer orange rind into strips just less than 1/4″ thick
In a pan I combined 1 cup water with 1 cup of fine granulated sugar, bring to a boil and then reduce to a summer
Add in the Honeybell peel strips and stir to coat. Leave in the simmering liquid for 30 mins appx until the strips are translucent
While the strips are cooking line a baking sheet with baking parchment
After 30 mins carefully remove the strips from the sugar syrup with tongs and toss in some fine granulated fine sugar. When coated set on the baking parchment and leave overnight to dry out. Use as desired
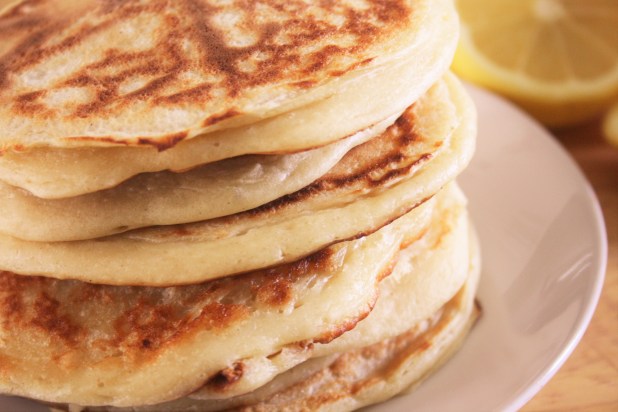
Pancake Tuesday to me is synonymous with one flavour conbination- Jif Lemon and sugar. Not caster sugar but granulated, and heaven forbid the juice be fresh. Nay! It had to come from a plastic lemon of the sqeezable variety. This cheek-puckering combination of crunchy sugar and citrus instantly bringing back childhood memories of playground squabbles about the quantities of pancakes consumed before school. Who cared of it was only 11am!?! Somehow you had persuaded your parents to let you scoff gargantuan amounts of fried batter for breakfast. Times have changed and I now realise there is more to life than lemon juice and sugar- just about! So here’s my recipe for ricotta pancakes with a variety of serving suggestions. Try one…or try them all! Either way I hope you enjoy.
Put the flour, baking powder and a pinch of salt in a large bowl.
Make a well in the middle, then pour in the egg and a splash of milk.
Gradually mix the flour into the liquid until starting to combine.
Mix in the rest of the milk in three stages until you have a smooth batter, then beat in the ricotta with a whisk.
Heat the rapeseed oil in a large non-stick frying pan until hot.
Spoon in a small laddle full of batter, spaced well apart, to make pancakes about 10cm across.
Cook on medium heat for 2-3 mins until bubbles appear on the surface. Flip over with a palette knife and cook for 2-3 more mins until golden. Set aside and keep warm; cook the rest of the batter.
Stack the pancakes, with baking parchment between, and keep warm in a low oven until ready to serve.
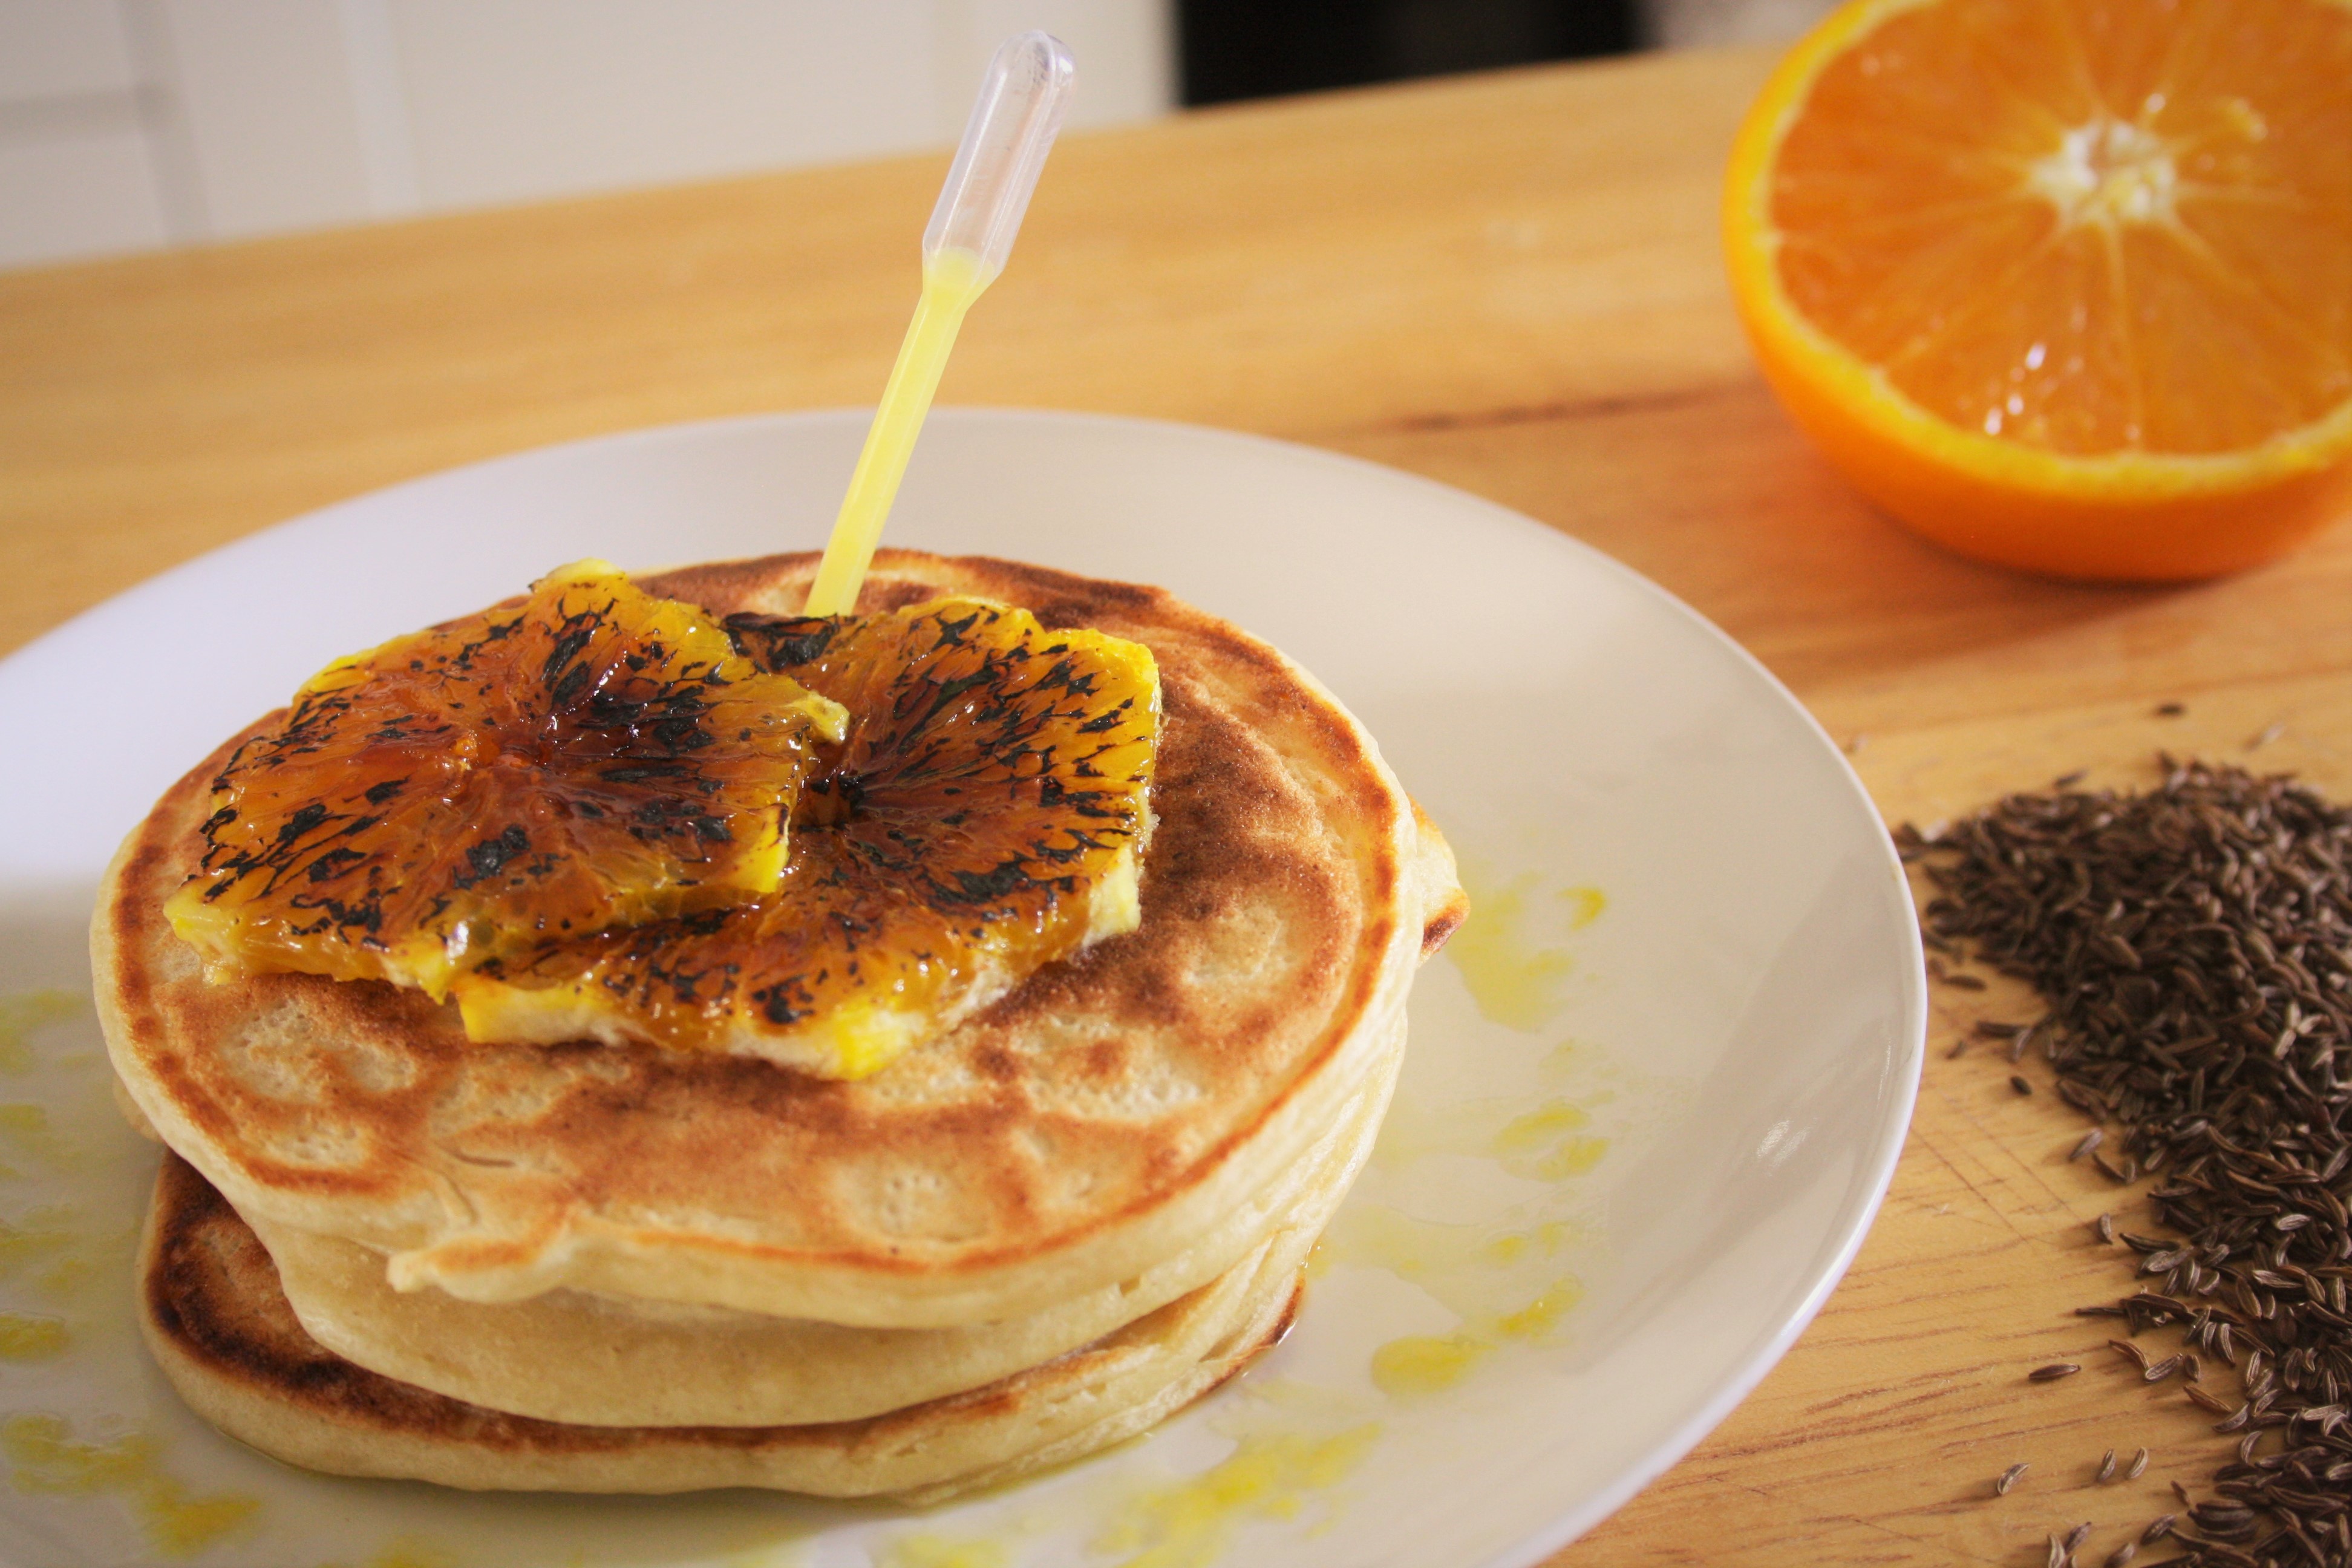
1 ways- Spiced Orange
150ml orange juice
1 tablespoon caster sugar
1/2 teaspoon fenugreek
1/2 teaspoon caraway seed
4 cardamom pods, crushed
1 large orange, sliced
Caster sugar
Gently warm the spices in a pan until the frangrance is released.
Add in the orange juice and caster sugar.
Continue to gently heat until the sugar is disolved. Set aside to cool and infuse before use.
While the sauce is cooling, sprinkle the orange slices with caster sugar. Using a cook’s torch, carmalise the sugar on the slices until the sugar is bubbling, burnished and a deep amber in color. Alternatley you can heat under a high grill until the sugar reaches the same stage as with the torch.
Arrange a copule of slices of orange on top of your pancakes and drizzle with the spiced orange sauce. (I’ve drizzle some around the palte and used a pipette to allow the sauce to be “injected” into the stack)
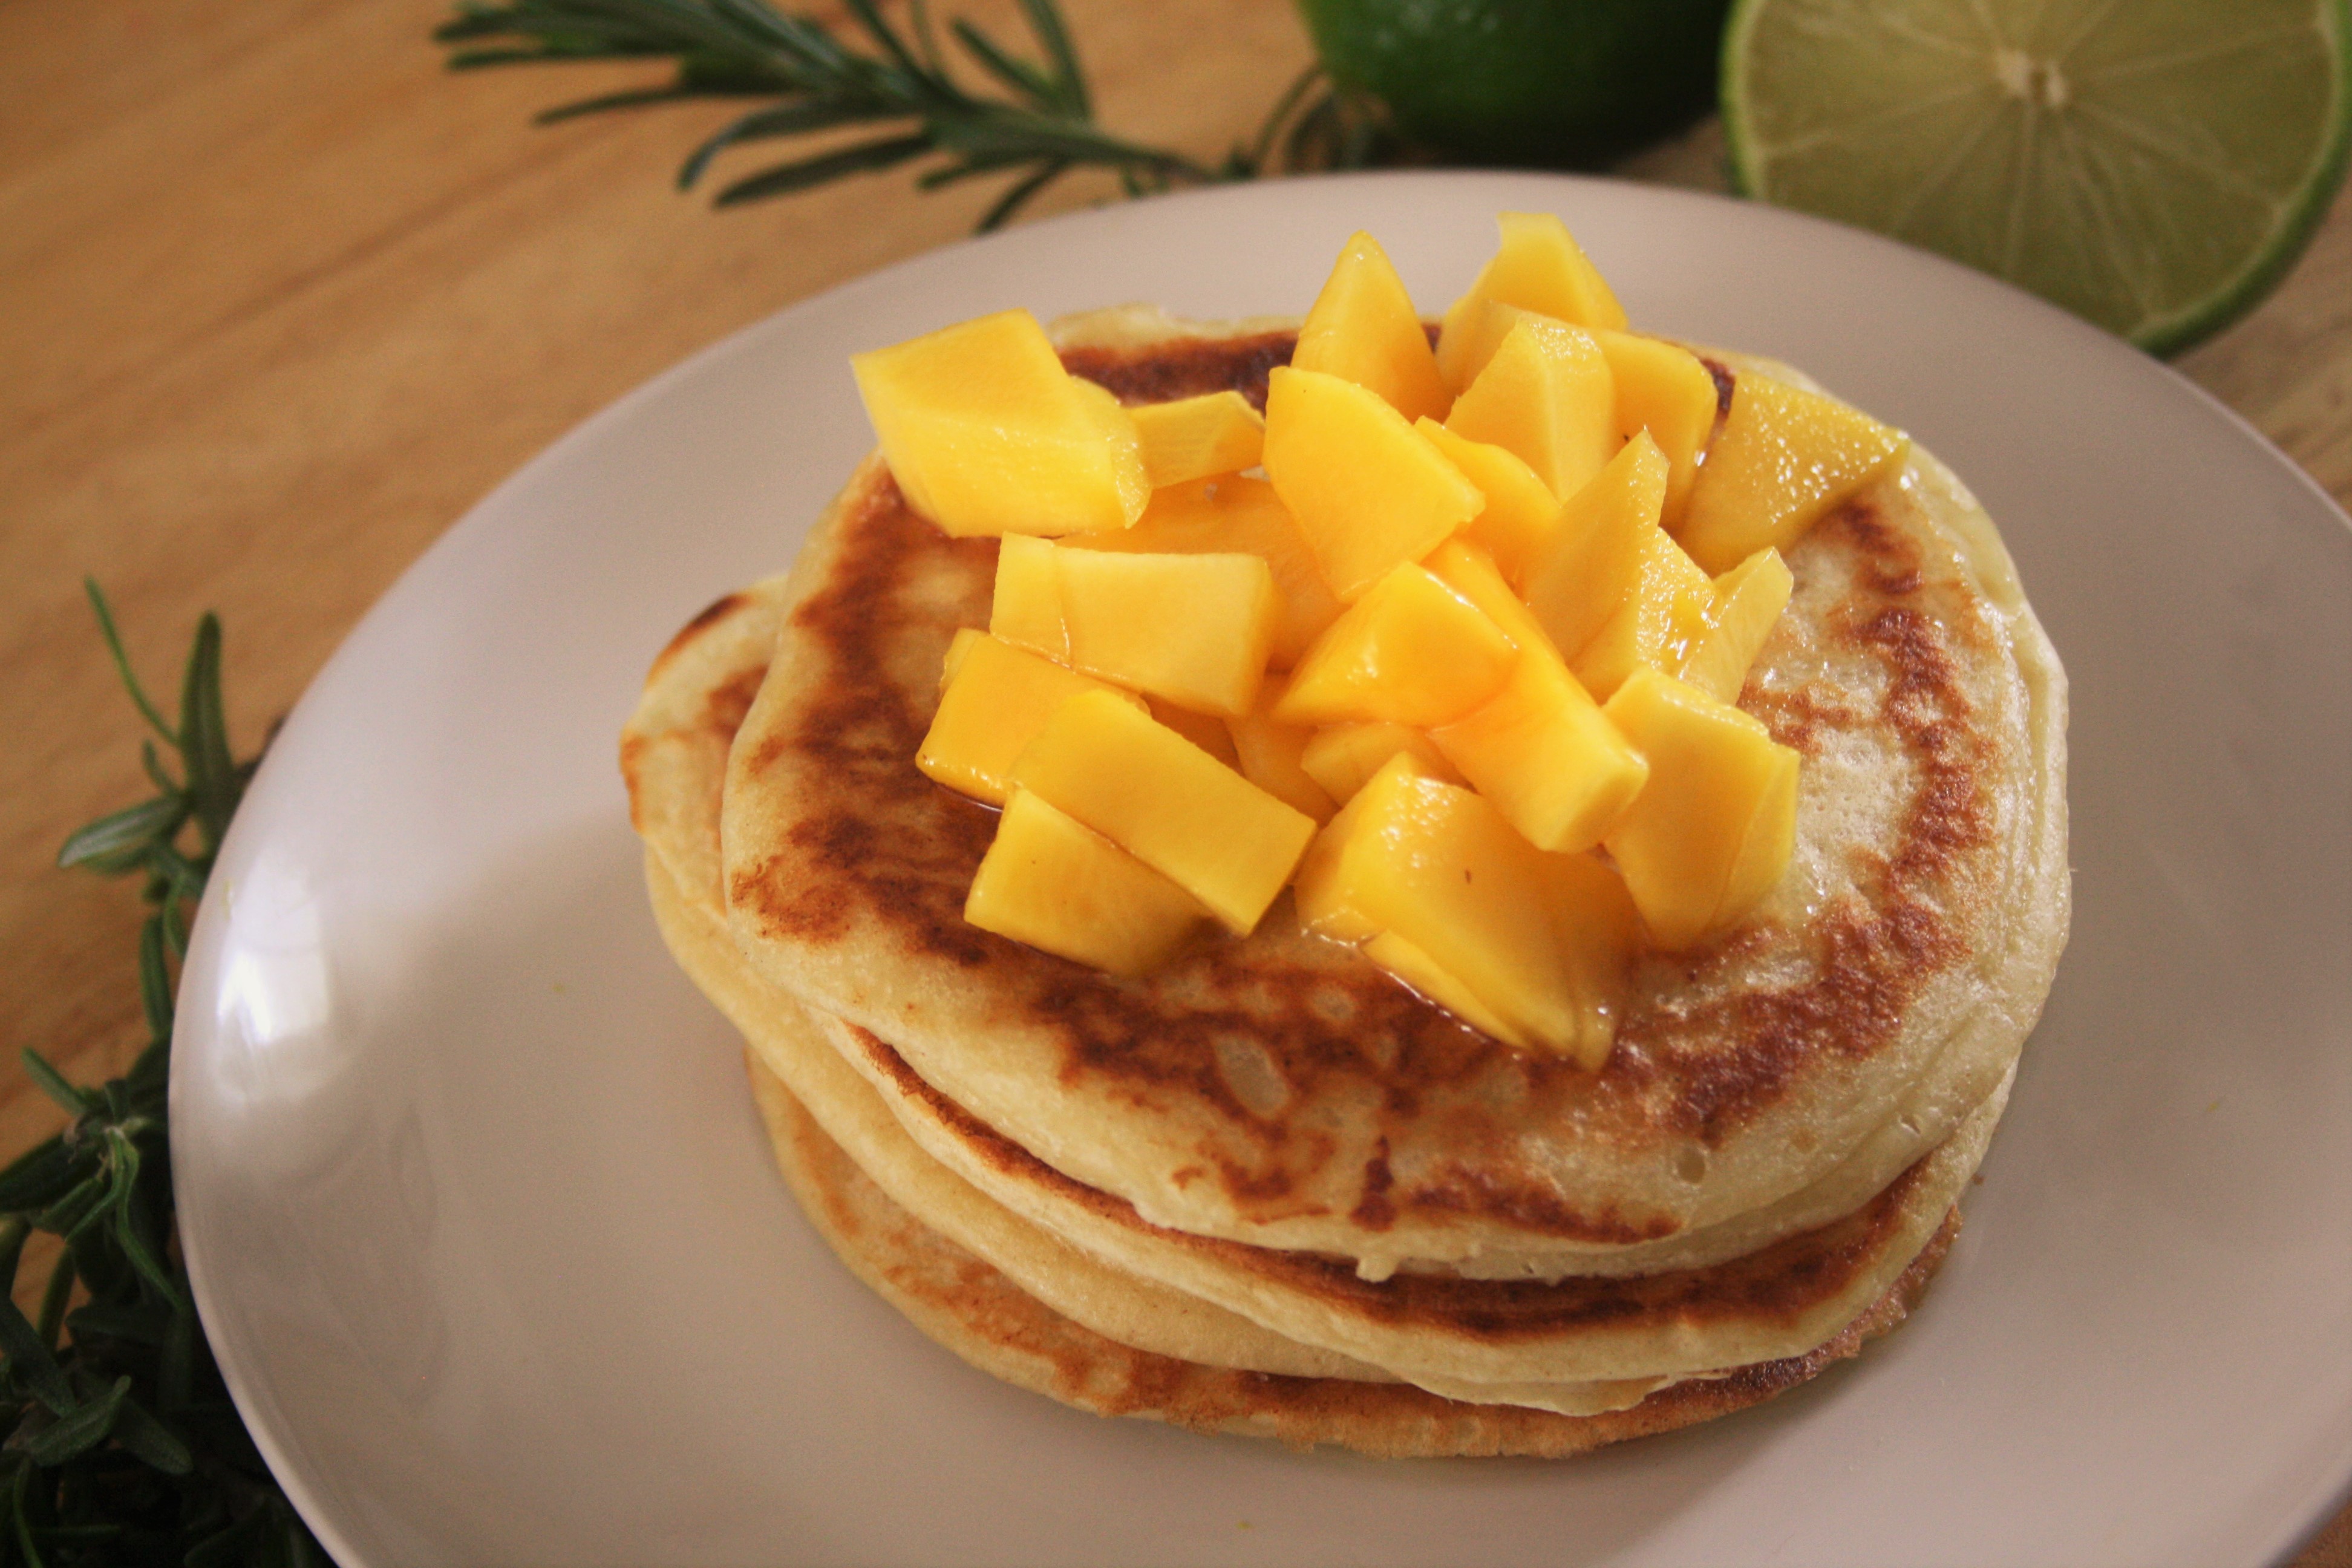
2 ways- Mango with Rosemary, Basil & Lime
75g fresh mango, chopped roughly
4 tablespoons waster
2 tablespoons caster sugar
1 tablesppon lime juice
1 small spirg fresh rosemary
3 large basil leaves
In a pan combine the liquids and caster sugar.
Add the rosemary spirg and chop in the basil leaves.
Heat until the sugar has disolved and the on point of boiling.
Remove from the heat and allow to cool fully and infuse for at least a couple of hours.
When fully cooled, strain into a bowl to remove the herbs. Toss in the mango pieces.
Top a stack of panckes with some of the mango, and serve with a dollop of creme fraiche.
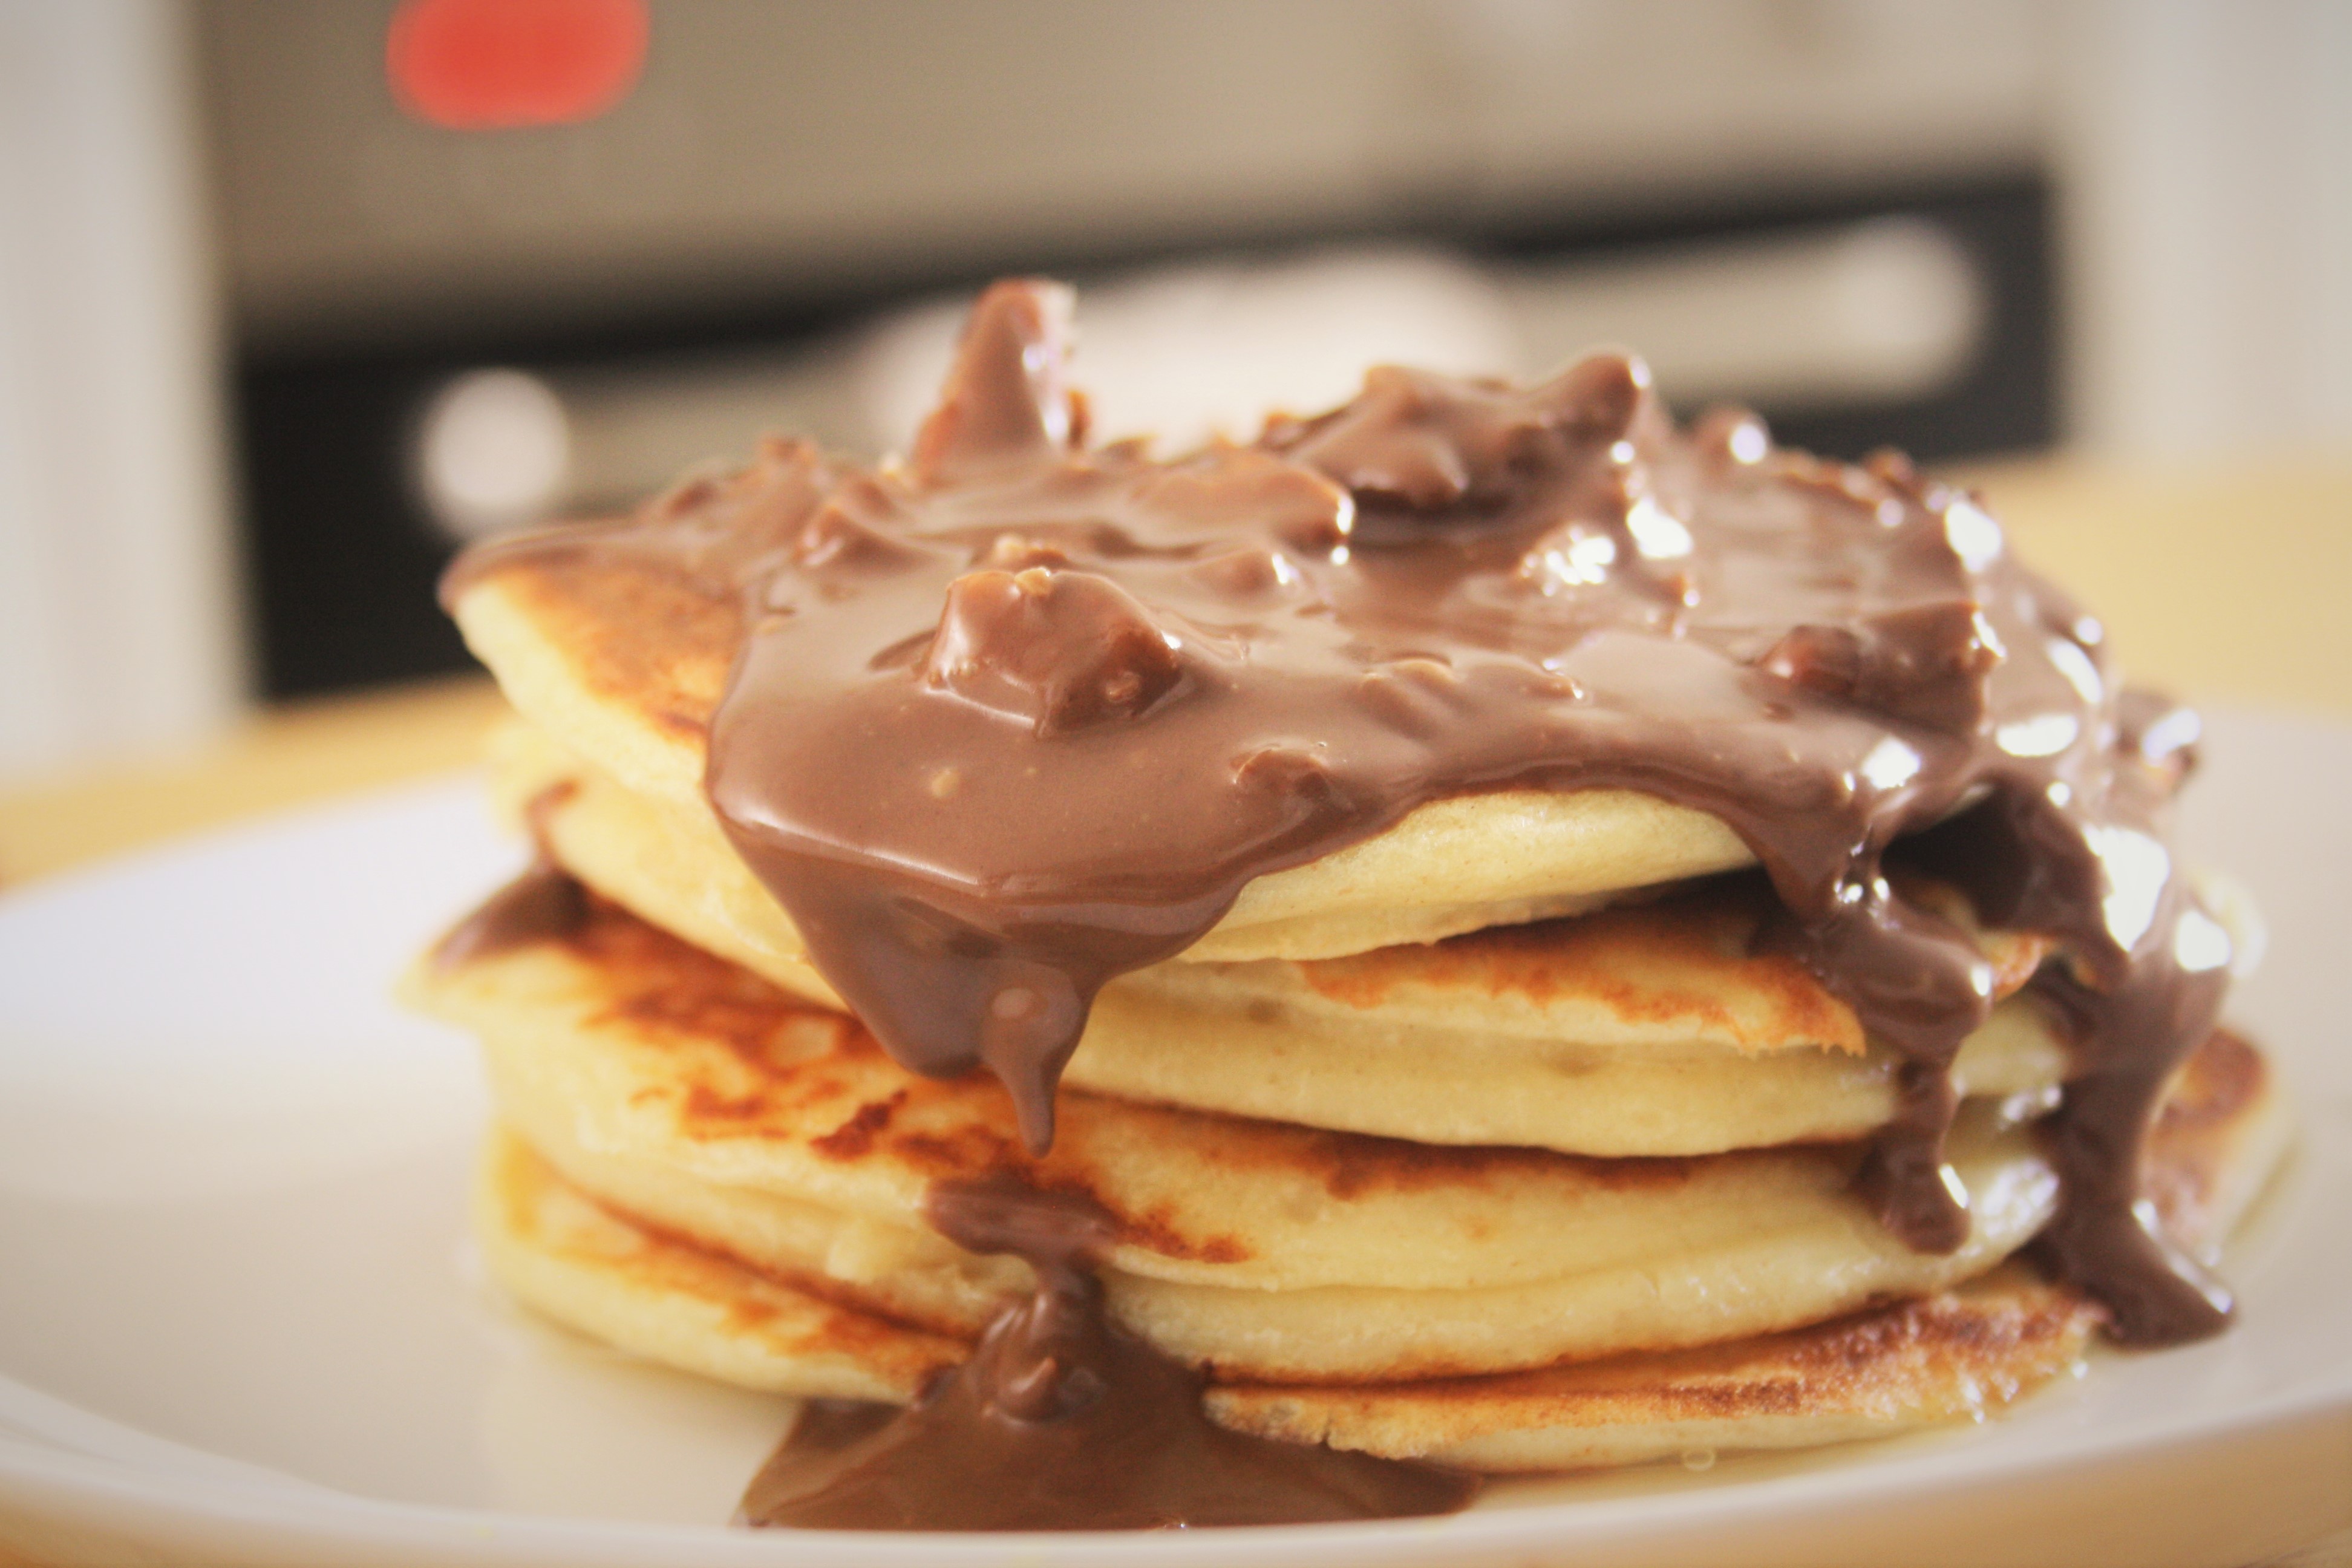
3 ways- Smoky Chocolate sauce with bourbon & pecan
50g dark chocolate, 70% cocoa content
25g butter
120ml double cream
1 tablespoon bourbon whiskey
1/4 teaspoon liquid smoke
25g chopped pecans, lightly toasted
Melt the chocolate in a bowl over a pan of simmering water (or in a microwave in short bursts) until smooth and fully melted. Remove from the heat.
Heat the butter, double cream, bourbon whiskey and liquid smoke in a small saucepan until evenly combined.
Remove from the heat and stir through the melted chocolate until fully combined. When fully mixed add in the pecan nuts.
Pour generously over your pancakes and sprinkle with some additional chopped pecans.